Sign In
Upload
Download
Table of Contents
Contents
Add to my manuals
Delete from my manuals
Share
URL of this page:
HTML Link:
Bookmark this page
Add
Manual will be automatically added to "My Manuals"
Print this page
×
Bookmark added
×
Added to my manuals
Manuals
Brands
NARDA Manuals
Measuring Instruments
EFA-200
Operating manual
NARDA EFA-200 Operating Manual
Em field analyzer, 2245/20, 30, series a
Hide thumbs
1
2
3
4
Table Of Contents
5
6
7
8
9
10
11
12
13
14
15
16
17
18
19
20
21
22
23
24
25
26
27
28
29
30
31
32
33
34
35
36
37
38
39
40
41
42
43
44
45
46
47
48
49
50
51
52
53
54
55
56
57
58
59
60
61
62
63
64
65
66
67
68
69
70
71
72
73
74
75
76
77
78
79
80
81
82
83
84
85
86
87
88
89
90
91
92
93
94
95
96
97
98
99
100
101
102
103
104
105
106
107
108
109
110
111
112
113
114
115
116
117
118
119
120
121
122
123
124
125
126
127
128
129
130
131
132
133
134
135
136
137
138
139
140
141
142
143
144
145
146
147
148
149
150
151
152
153
154
155
156
157
158
159
160
161
162
163
164
165
166
167
168
169
170
171
172
173
174
175
176
177
178
179
180
181
182
183
184
185
186
187
188
189
190
191
192
193
194
195
196
197
198
199
200
201
202
203
204
205
206
207
208
209
210
211
212
page
of
212
Go
/
212
Contents
Table of Contents
Bookmarks
Table of Contents
Table of Contents
1 Introduction
About These Instruments
Applications
Common Features
Differing Features
About this Operating Manual
2 Safety Instructions
Before Connecting up
Correct Use
AC Power Supply Unit
Faults and Excessive Stresses
3 Preparation for Use
Unpacking
Packaging
Checking the Package Contents
Checking for Transport Damage
Recovery after Transport and Storage
Power Supply
Operation from Rechargeable Batteries / Dry Cells
Charging the Rechargeable Batteries
Preparing for B-Field Measurements
Measurement Setup
Selecting the Probe Type
Connecting / Disconnecting the External B-Field Probe
Switching on the Basic Unit
Preparing for E-Field Measurements
Measurement Setup
Setup
E-Field Unit Function Test
4 Control and Display Elements
Basic Unit Keyboard
Basic Unit Display
Liquid Crystal Display
Backlight
Contrast
Basic Unit Indicators
E-Field Unit Controls
5 Selecting an Operating Mode
Operating Mode Applications
Operating Mode Features
Field Strength Mode
Exposure STD Mode (Shaped Time Domain)
Spectrum FFT Mode (Fast Fourier Transformation)
Harmonic Analysis Mode
Checking the EFA Operating Modes
6 Operating Modes
Field Strength Mode
Activating Field Strength Mode
Selecting the Measurement Range
Selecting the Detection Mode
Selecting the Display Mode
Selecting the Frequency Range
Evaluating the Results
Saving Data
Exposure STD Mode (Shaped Time Domain)
Selecting the Display Mode
Saving Data
Spectrum FFT Mode
Activating Spectrum FFT Mode
Selecting the Measurement Range
Selecting the Measurement Mode (Detection Mode)
Selecting the Display Mode
Selecting the Frequency Range
Starting and Stopping a Measurement
Evaluating Measurement Results
Zooming in on the Frequency Axis
Zooming in on the Measured Value Axis
Marker
Normalized Display
Saving Data
Possible Problems
Harmonic Analysis Mode
Activating Harmonic Analysis Mode
Selecting the Measurement Range
Selecting the Measurement Mode (Detection Mode)
Selecting the Display Mode
Selecting the Fundamental Frequency
Starting and Stopping a Measurement
Evaluating Measurement Results
Saving Data
Possible Problems
7 Measurement Data Memory
Saving Data
Saving Individual Values
Recording Timer-Controlled Measurement
Recording Spatially Assigned Measurement Sequences (MATRIX)
Displaying a Data Set
Exporting Data
Deleting Data
8 Optional Functions
Selecting an Alarm
Activating the "ALARM" Function
Entering the Alarm Threshold
Activating Alarm Signals
Recording Current Values
Activating the CURRENT Function
Entering Current Values
Activating Recording of Current Values
Choosing a Limit Curve
Selecting the Measurement Axis
Selecting the Measurement Units
Setting the Averaging Parameter NAVG
Editing the Frequency Selection List
Activating the "FREQ LISTS" Function
Changing the Frequency Values
Setting the Date and Time
Activating the "CLOCK" Function
Setting the Current Time
Setting the Date
9 Device Data Memory
Calling up a Device Setting (User Setup)
Scope and Content of the Default Settings (Factory Default Setup)
Saving Device Settings (User Setup)
10 Maintenance and Repairs
Dry Cells and Rechargeable Batteries
Replacing the Rechargeable Batteries / Dry Cells
Handling Rechargeable Batteries
Lithium Battery
Battery Disposal
Software Update
Installing the Software "EFA-200/-300 Tools
Setting up the EFA - PC Connection
Loading the Device Firmware
Transferring STANDARDS Parameters
Enabling Operating Modes
Entering the Access Code
Reading out the Device Characteristics
Cleaning
Power Supply Unit
Opening the Device
Repairs
Spare Parts
11 Remote Control
Abbreviations Used
Making the Connection from EFA to PC
Structure of Device-Specific Commands
Status Messages
Remote Control Commands
Measurement Settings
Reading out Current Measurement Values
Measurement Data Memory
Optional Functions
General Functions
Test / Service
12 Specifications
Principle of Operation
Field Strength Mode
Brief Description
Frequency Range
Measurement Range, Dynamic Range
Measured Value Detection
Averaging Time / Refresh Rate
Measurement Uncertainty
Result Display
Frequency Measurement (Broadband Setting Only)
Auxiliary Functions
Exposure STD (Shaped Time Domain) Mode
Brief Description
Frequency Range
Measurement Range, Dynamic Range
Limit Value Curves
Measurement Value Detection
Averaging Time / Refresh Rate
Measurement Uncertainty
Result Display
Additional Functions
Spectrum FFT
Brief Description
Frequency Range
Measurement Range
Recording of Measured Values
Averaging / Measured Value Rate
Result Display
Additional Functions
Harmonic Analysis Mode
Brief Description
Frequency Range
Result Display
Miscellaneous
Display Type and Warning Devices
Data Memory
Brief Description
Memory Capacity
Clock
Device Settings Memory
Self Test
Remote Control Interface (Serial)
Power Supply
Battery Operation
Charger Unit
General Specifications
Climatic Environment Conditions
Conformance Marks
Calibration Interval
Declaration of Origin
Maintenance
Dimensions and Weight
Ordering Information
Options
Advertisement
Quick Links
1
About These Instruments
Download this manual
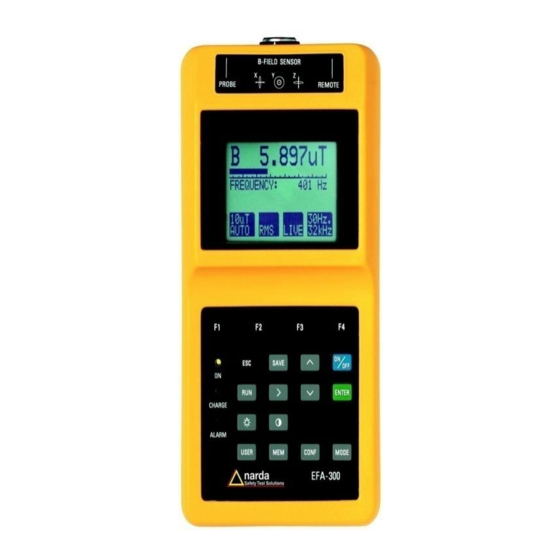
EFA-200/-300
EM Field Analyzer
Operating Manual
Table of
Contents
Previous
Page
Next
Page
1
2
3
4
5
Advertisement
Table of Contents
Need help?
Do you have a question about the EFA-200 and is the answer not in the manual?
Ask a question
Questions and answers
Related Manuals for NARDA EFA-200
Measuring Instruments NARDA ESM-10 RadMan Mobile Operating Manual
Radiation monitor (64 pages)
Measuring Instruments NARDA RadMan Operating Manual
Radiation monitor (60 pages)
Measuring Instruments NARDA EFA-300 Operating Manual
Em field analyzer, 2245/20, 30, series a (212 pages)
Measuring Instruments NARDA EHP-50F User Manual
Electric and magnetic field probe - analyzer from 1 hz up to 400 khz (74 pages)
Measuring Instruments NARDA EHP-50-G User Manual
Electric and magnetic field probe - analyzer (92 pages)
Measuring Instruments NARDA SRM-3006 Operating Manual
Selective radiation meter (240 pages)
Measuring Instruments NARDA SRM-3006 Command Reference Manual
Selective radiation meter (166 pages)
Measuring Instruments NARDA NBM-550 Operating Manual
Broadband field meter (156 pages)
Measuring Instruments NARDA IDA Operating Manual
Interference and direction analyzer (292 pages)
Measuring Instruments Narda SRM-3000 Operating Manual
Selective radiation meter (328 pages)
Measuring Instruments NARDA SRM-3006 Manual
Selective radiation meter for electromagnetic fields up to 6 ghz (25 pages)
Measuring Instruments NARDA FieldMan User Manual
Measurement device for electromagnetic fields (126 pages)
Measuring Instruments NARDA FieldMan Quick Start Manual
Measurement device for electromagnetic fields (112 pages)
Measuring Instruments NARDA AMB-8059 Quick Step Manual
(60 pages)
Measuring Instruments NARDA SMARTS AMC User Manual
Area monitor compact (166 pages)
This manual is also suitable for:
Efa-300
Table of Contents
Print
Rename the bookmark
Delete bookmark?
Delete from my manuals?
Login
Sign In
OR
Sign in with Facebook
Sign in with Google
Upload manual
Upload from disk
Upload from URL


Need help?
Do you have a question about the EFA-200 and is the answer not in the manual?
Questions and answers