Tylo H2 User And Installation Manual
For sauna
Hide thumbs
Also See for H2:
- User and installation manual (60 pages) ,
- Installation and operating instructions manual (46 pages) ,
- Operating instructions manual (21 pages)
Table of Contents
Advertisement
Advertisement
Table of Contents

Related Manuals for Tylo H2


Summary of Contents for Tylo H2
- Page 1 1205 ENGLISH USER AND INSTALLATION GUIDE H2 29005140-ENG...
-
Page 2: Table Of Contents
TABLE OF CONTENTS User Guide ..............1 The control panel in general ..........1 When starting for the first time ..........2 Start/stop ................2 Setting temperature ..............2 Setting humidity level .............2 Setting start time and calendar programming......3 The SETTINGS menu ............3 Locking the panel ..............4 Drying mode ................5 External ON/OFF switch (option) ........... -
Page 3: User Guide
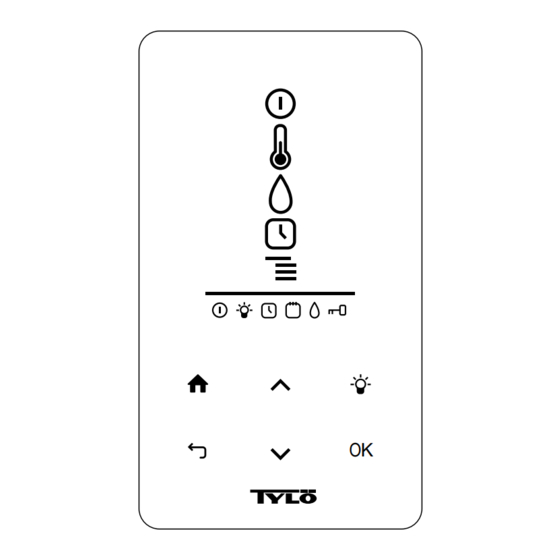
USER GUIDE The control panel in general The control panel is automatically activated when you pass your hand over it. Use UP (see Figure 1, Page 1 pos 6) and DOWN(pos 9) to scroll through the menus. Use UP and DOWN to increase/decrease a value when entering data. -
Page 4: When Starting For The First Time
When starting for the first time 3. Press OK. ON/OFF STATUS will light up in the STATUS BAR (see Figure 1, Page 1) to show that the sauna heater is Using the control panel for the first time: 1. Check the heater manual for getting started and safety pre- When the heater is on, the temperature and time will be shown if cautions. -
Page 5: Setting Start Time And Calendar Programming
Setting start time and calendar programming. When choosing a day, every day of the week will be shown. Use the UP/DOWN arrows to select which day the activity will You can set a time when the heater is to start up to 24 hours in apply to, and confirm with OK. -
Page 6: Locking The Panel
Sauna Service sub-menus: Sauna sub-menus: • Settings sub-menus: • Bath type priority: Select how heating up is to be prioritised. – Bathtime limit: The maximum time allowed for using the The basic priority is automatic (under 70°C steam production sauna. is prioritised. -
Page 7: Drying Mode
The panel can be set to automatically lock the buttons. Locking • To switch off the system, press the switch once more. can be performed with or without a code. Impulse switches: To program automatic keylock: • To run the system for a preprogrammed time in External 1. -
Page 8: Installation Guide
INSTALLATION GUIDE To install the control panel: 1. Slacken the lock screw and split the panel and back piece (see Figure 15, Page 6 pos 1). Figure 14: Schematic diagram of installation Heater Control panel Sensor External ON/OFF switch (option) Extra control panel (option) Control panel The control panel can be installed inside or outside the sauna. -
Page 9: External On/Off Switch (Option)
4. Screw the wires onto the terminals according to the wiring dia- gram (see Figure 15, Page 6 pos 4). To simplify connec- Extra control panels (h2) can be connected as an option. tion, the long terminal can be removed from the circuit board when screwing on the wires. -
Page 10: Troubleshooting The Control Panel
TROUBLESHOOTING THE CONTROL PAN- Table 4: Lost contact with temperature/humidity sensor Message “Lost contact with temperature/ humidity sensor.” Code 0x0007 Table 1: Sauna temperature sensor failure Comments The system has restarted be- Message “Sauna temperature sensor cause the control box could not failure.”... - Page 11 Table 8: There is more than one temperature sensor connected. Message “There is more than one tem- perature sensor connected.” Code 0x0012 Comments More than one temperature sensor is connected to the heater network. System status None. Remedy Disconnect all sensors except one.