Table of Contents
Advertisement
Advertisement
Table of Contents

Related Manuals for NewLine Trutouch X5


Summary of Contents for NewLine Trutouch X5
- Page 1 Unified Collaboration Touch Screen User Manual v 1.0...
- Page 2 Welcome to the world of TRUTOUCH: Thank you for choosing TRUTOUCH X Series Collaboration Touch Screen. Please use this document to maximize your user experience. This device complies with part 15 of the FCC Rules. Operation is subject to the following two conditions: (1) This device may not cause harmful interference, and (2) this device must accept any interference received, including interference that may cause undesired operation.
-
Page 3: Table Of Contents
Contents About This Document Safety Instruction Overview Introduction Parts Ports Remote Control Camera Temperature Control Reset Button Installation Guide Safety Precautions Installation Precautions Installation Installing the WiFi Antenna Installing the Internal PC (Optional) Getting Started Power On Power Off Positioning Operating the Touch Screen Home Page Meeting Assistant... -
Page 4: About This Document
About This Document This document describes multiple functions, instructions, and notes about the product. Symbols are used in this document to indicate operations that need particular attention. The symbols are defined as follows: Provides additional information to supplement operation in the main text. NOTE Provides tips for operation. -
Page 5: Safety Instruction
Safety Instruction For your safety, please read the following instructions before you use the product. Serious injury or property loss may be caused by improper operations. Do not try to repair the product by your own. WARNING Disconnect the product from power supply immediately if major failures occur. - Page 6 WARNING Do not open the cover or change the product on your own. High voltage components are installed in the product. When you open the cover, high voltage, electric shock, or other dangerous situations may occur. If inspection, adjustment, or maintenance is required, contact the local distributor for help.
- Page 7 WARNING Do not cover or block any vents on the product. Overheated components may cause fire, damage, and shorten the service life ● of the product. Do not put the venting surface of the product facedown. ● Do not install the product on a carpet or bed clothes. ●...
-
Page 8: Overview
Overview Introduction The Collaboration Touch Screen adopts the advanced capacitive touch technology and All in One design, and integrates video, audio, touch, writing, and multi-media presentation functions. This product does not require additional devices, installation and wiring, and commissioning and maintenance to function. Dedicated software is customized as a meeting assistant. - Page 9 Internal PC General Power Switch Ports in the Back Panel AC Power Temperature Control Reset Button NOTE The top and bottom cameras cannot be used at the same time. ● The indicators of the top and bottom cameras turn white when in use and off when ●...
-
Page 10: Ports
Ports Front Buttons ◆ Buttons Operations Functions Indicator Status Description Steady on red: standby state ● Short press Power on/off Steady on white: working state ● Short press Decrease volume Long press for more Decrease volume Steady on white: receiving an ●... - Page 11 Rear Ports ◆ LINE OUT USB 3.0 SD CARD IFI Antenna HDMI OUT RS-232 Touch Por HDMI Rear ouch Port VGA IN AUDIO IN...
-
Page 12: Remote Control
Remote Control Buttons Functions Buttons Functions Power On/Off Switch Source to Internal PC Start the Default UC Programs Toggle Display Mode Mute Audio Zoom Out (PC) Microphone Mute Zoom In (PC) Confirm/OK Up/Down/Left/Right Return to Previous/Exit Go to the Home Page Open the Menu Decrease Volume Increase Volume... -
Page 13: Camera
Camera You can fine-tune the angles of the cameras using the cameras adjustment handle on the back of the screen. Angle adjustment: Top camera: The initial position is 6° facing down and can be adjust up to 9° downwards. Bottom camera: The initial position is 0° and can be adjust up to 12° upwards. 12°... -
Page 14: Installation Guide
Installation Guide Safety Precautions Installation Environment ◆ Keep Temperature Below 120 Degrees Fahrenheit Keep Away From Do Not Use Combustible Vapors Outdoors (gas leaks, etc.) Installation Direction ◆ Hang the Unit Horizontally No Vertical Installation Do Not Lie Down... -
Page 15: Installation Precautions
Installation Height ◆ Recommended installation height is 36" (915 mm) from the floor to the bottom of the screen. Installation Precautions Weight Loading ◆ Weight of the unit: 79.4 lbs/36 kg The back of the panel is equipped with VESA standard holes. Please use a VESA ●... -
Page 16: Installation
Ventilation ◆ Ensure adequate ventilation and/or air conditioning environment. We recommend keeping certain distance from the side of the unit to the wall or panels. Proper space for ventilation is shown in following figure. Left ≥ 100 mm Right ≥ 100 mm Installation The dimensions of the 4 bracket mounting holes in the back panel are VESA MIS-F compliant (400 x 400 mm). -
Page 17: Installing The Wifi Antenna
Installing the WiFi Antenna Take out the WiFi antenna from the accessory box and securely fasten it to the rear WiFi antenna port clockwise. Installing the Internal PC (Optional) CAUTION The internal PC does not support hot plugging. Therefore, you must insert or remove the computer after the power supply of the screen is disconnected. -
Page 18: Getting Started
Getting Started Power On Step 1: Plug the power cord completely into the power outlet and the power supply plug. Plug the power connector into the side of the unit. Please ensure the power supply is in the range of 100 V - 240 V with frequency at 50 Hz/60 Hz ± 5%. The power cord must be plugged into a grounded source. - Page 19 Step 2: Press the power button on the front control panel or the power button on the remote control again. The Really end your meeting dialog box will be displayed as follows.
-
Page 20: Positioning
In the Really end your meeting dialog box, click Confirm. The meeting start Step 3: page is displayed as follows. Step 4: Press the power button on the front control panel or the power button the remote control again to power off the panel. The power indicator will turn off. - Page 21 If the positioning is still not correct, perform the following operations to calibrate again: Step 1: Ensure that the HDMI or VGA interface and external devices are connected properly. Step 2: Select the corresponding signal source on the signal source page. The Windows page will be displayed.
- Page 22 Step 5: Use finger or pencil to click and hold the center of the flickering cross . Do not release it until moves to the next positioning point. Complete the calibration process as instructed. To provide calibration samples, tap the crosshair each time that it appears on the screem.
-
Page 23: Operating The Touch Screen
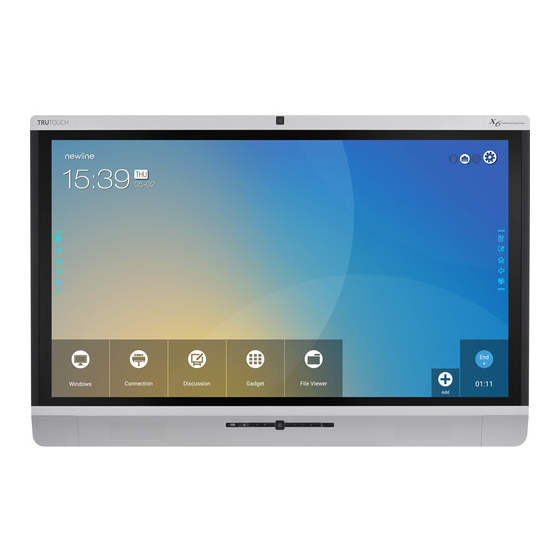
Operating the Touch Screen Home Page When the unit is turned on, it will show the Meeting Start page, as shown below: Touch the screen to start a meeting and the unit will go to the Home page, as shown in the following figure:... -
Page 24: Meeting Assistant
: Return to previous App/Exit. ● : Switch Apps. ● Meeting Assistant Newline Assistant Introduction ◆ Newline Assistant is a tool used to obtain applications required by users on Windows system. On Android system, you can start Windows applications by clicking one button. - Page 25 Installation ◆ Newline Assistant is a tool used to obtain applications required by users on Windows system. On Android system, you can start Windows applications by clicking one button. Step 1: Connect Internal PC correctly. Step 2: On the Home page, click Sources.
- Page 26 Note The Windows icon on the left navigation area is available only when the Collaboration Touch Screen has Internal PC. Add Applications on Android System ◆ Step 1: On the application customization page, click to view applications on the Android system. Step 2: In the application list displayed on the right area, click on the right to add the...
- Page 27 Add Applications on Windows System ◆ Step 1: Run the Newline Assistant application on the Windows system, and select applications to be added in the displayed Newline Assistant window. Step 2: Click to return to the Home page. Click the triangle at the upper right corner of Collaboration and select Add on the displayed menu.
- Page 28 On the customization page, click to view all Windows applications added Step 3: using Newline Assistant in Step 1. Step 4: Add applications on the page as described in Step 3. From the application list, click to the right of any application you would like to add.
-
Page 29: Whiteboard
Whiteboard Writing or Annotation ● On the whiteboard page, you can select pen type, width, and color to write or annotate on the screen. You can also erase selected content or clear all content. File management ● Preview, select, copy or delete a file. To access the whiteboard meeting, click Whiteboard. - Page 30 Whiteboard Functions New Slide and Settings ◆ Create a new slide ● In writing mode, click to create a new slide. A maximum of 20 slides can be created. See the following figure. Slide settings ● Click to set the background color of new slides, as show in the figure below: Whiteboard Mode ◆...
- Page 31 : Annotation mode ● The background is transparent and the real-time image of the current signal source will be displayed. You can comment on presentation content such as Office documents and pictures as showing in the following figure. : Writing mode ●...
- Page 32 Line Type and Color ◆ On the Whiteboard, click and hold . The line type and color selection page will be displayed. You can select the line type and color for writing, as shown in the following figure: Eraser ◆ Two methods are available to erase written errors or content as follows: Five-finger gesture: touch the screen with five fingers at the same time.
- Page 33 Screenshot ◆ In comment mode, click to save the current image as a picture, as shown in following figure: After the meeting is ended, save screenshots in the Save meeting discussion dialog box, as shown in following figure:...
- Page 34 Clear ◆ On the Whiteboard page, click to clear all contents on the current writing slide, as shown in the following figure: Cancel ◆ On the Whiteboard page, click to undo the latest operation, as shown in the following figure: Slide Operations You can preview, select, and delete a created writing slide.
- Page 35 Slide Preview ◆ Click at the lower right corner of the Whiteboard. All writing slides will be displayed. Click one slide to switch to that slide for more operations, as shown in the following figure. Note Only 8 slides are displayed in each column, and the remaining slides are displayed in the second column.
-
Page 36: Signal Source
Signal Source On the Home page, click Sources. The signal source selection page will be displayed. You can preview the image of the corresponding signal channel, as shown in the following figure. If the channel has no signal input, No Signal will appear. You can click the selected signal source to switch to the corresponding channel in full screen. - Page 37 File Preview By default, files saved to internal storage will be displayed. You can click at the upper left corner to view all external storage devices connected to Android USB and preview a specified external storage device, as shown in the following figure: File Filtering The system displays files by category, such as document, picture, audio and video.
- Page 38 File Search Click and enter the key word in the search box. Files matching the key word will be listed. The system supports additional filtering for searched files. Click the filtering tool bar below the search box to filter searched files based on PPT, PDF, DOC, XLS, Audio, and Video, as shown in the following figure:...
-
Page 39: End Meeting
File Operations File Management Click to perform operations on files in the storage, including select all files or one file, copy, delete and cancel, as shown in the following figure: Click the file to select the current file. ● All: Select all files. ●... -
Page 40: File Storage
File Storage ◆ When no external USB flash drives or SD cards are connected, icons in the Save to area will be gray. When an external USB flash drive or SD card is connected, icons in the Save to area will be blue. Click the USB or SD card icon in blue. The system will create a “uc”... - Page 41 File Sharing ◆ To send meeting minutes out, click on the Share icon to open the email application. Please confirm internet connection is working before sending email. Automatically End Meeting If the screen goes without operation longer than 90 minutes(Default), the system will automatically lock the screen to protect your privacy.
-
Page 42: Shortcut Settings And Applications
Shortcut Settings and Applications Using one finger to swipe down from the top of the screen and leave the finger from the screen about 2 inches from the top, do not swipe over 1/3 position of the whole screen, then the Shortcut Settings and Applications pages will show up. As the following figure. - Page 43 Shortcut Settings After a top-down slide, the Shortcut Settings page will be displayed by default, as shown in the following figure: Clock Settings ◆ to add the correct time zone, and click Time Formats to set the time display Click mode to analog clock or electronic clock.
-
Page 44: Volume Adjustment
Volume Adjustment ◆ Drag the slider beside the icon to adjust the volume. Microphone Mute Mode ◆ Click to enable or disable the microphone mute mode. - Page 45 Speaker Mute Mode ◆ Click to enable or disable the speaker mute mode. Camera Settings ◆ Click to switch to top or bottom camera.
- Page 46 System Settings ◆ Click to enter the system settings page. Setting items are shown in the following figure. Applications In the Meeting Assistant, click Applications to fast select and start applications in the Android system. Slide right and left on the screen to view all available applications, as shown in the following figure:...
-
Page 47: Serial Port Control
Serial Port Control Connect RS-232 port to the PC or controlling device. Enable RS-232 serial port connection and complete the following configuration. Port: COM1 (Set according to PC or controlling device’s port number) Baud rate 19200 Odd/even check None Data bits Stop bit The following table lists the button controlling code and return code. - Page 48 Function Controlling codes Return codes 7F 08 99 A2 B3 C4 02 FF 01 18 7F 09 99 A2 B3 C4 02 FF 01 18 VOL + 01 CF 7F 08 99 A2 B3 C4 02 FF 01 1B 7F 09 99 A2 B3 C4 02 FF 01 1B Menu 01 CF 7F 08 99 A2 B3 C4 02 FF 01 1C...
- Page 49 Function Controlling codes Return codes 7F 08 99 A2 B3 C4 02 FF 07 XX Set Display 7F 09 99 A2 B3 C4 02 FF 07 XX NOTE: Mode 01 CF XX indicates the mode. 00, 01, 02 and 03 indicate standard, bright, soft and custom modes respectively.
-
Page 50: Faq & Troubleshooting
FAQ & Troubleshooting Symptom Troubleshooting Methods Lync 2013 and Lync 2013 Basic failed to identify the microphone and a dialog box will appear, Upgrade Lync to the latest Skype for business indicating "We didn't find an version. audio device, which you need for calling."... - Page 51 Symptom Troubleshooting Methods Disable the automatic power-on/off function. For details, see section "Shortcut Settings". The system is automatically Check whether the screen entered sleep mode powered on/off when no operation due to no operation for an extended period of is performed. time.
- Page 52 Symptom Troubleshooting Methods Check whether the internal PC is properly inserted in the slot. Check whether the internal PC enters the sleep The internal PC has no signal. state. Press the power button on the internal PC (for details, see the instructions of the internal PC), and manually start up the internal PC.
-
Page 53: Specifications
Specifications Parameter Value Display Backlight Display Area 1209.6 x 680.4 mm Active Screen Size 55" Display Ratio 16 : 9 Resolution 1920 x 1080 Pixel Display Colors 8-bit, 16.7M colors Brightness 370 nit Contrast 4000 : 1 Response Time 8 ms Life Time 30,000 h Speaker... - Page 54 Touch Technology TruFlat HID support 10 Points in Windows/5 Points in Android (3 points Touch Points to write, 5 points to eraser) Writing Tools Newline Stylus or Finger Touch Resolution 19354x10866 Scan Speed 100 Hz Positioning Accuracy Communication Interface USB-A...
- Page 55 Parameter Value Ports Microphone (3.5mm) x 1, HDMI x 1, Front Interface Inputs USB (Touch) x 1, USB (OPS) x 1, USB (Android) x 1 AV Inputs HDMI x 1, VGA x 1, USB (Touch) x 2, Audio x 1 AV Outputs 3.5mm Line out x 1, HDMI x 1 (only video) USB2.0 x 2, RS232 x 1, RJ45 x 1, USB3.0 x 1,...
-
Page 56: More Information
More Information For More Information Please visit www.newline-interactive.com. Contact Us for Support Please email us at support@newline-interactive.com. Newline Interactive Inc. 101 East Park Blvd. Suite 807 Plano, TX 75074, USA Tel: +1 (972) 468-9728 Fax: +1 (972) 422-4288 Our company devotes to product innovation and technology enhancement. Therefore, we may change product spec and...
Need help?
Do you have a question about the Trutouch X5 and is the answer not in the manual?
Questions and answers