
Related Manuals for NewLine TRUTOUCH UB Series


Summary of Contents for NewLine TRUTOUCH UB Series
- Page 1 Interactive Touch Screen User Manual Please keep the manual for further reference. This is the general user manual for all interactive touch screens. Therefore, it may be different from the actual product.
- Page 2 Welcome: Thanks for purchasing this product. Please read the instructions carefully before using this product. This device complies with part 15 of the FCC Rules. Operation is subject to the following two conditions: (1) This device may not cause harmful interference, and (2) this device must accept any interference received, including interference that may cause undesired operation.
-
Page 3: Table Of Contents
Contents 1. Safety Instruction 2. Installation Requirement 3. Introduction 4. Basic Operation Power on Power off Software Installation Software Uninstall Software Positioning Positioning Method for Windows 7 System OPS Installation 5. Toolbar Introduction Task Manager Whiteboard Gallery File Manager System Settings Browser Audio Only Child Lock Setting... -
Page 4: Safety Instruction
Safety Instruction For your safety, please read the following instruction before you use the product. Serious injury or property loss may be caused by improper operations. Do not try to repair the product by your own. WARNING Disconnect the product from power supply immediately if major failures occur. - Page 5 WARNING Do not open the cover or change the product by your own. High voltage components are installed in the product. When you open the cover, high voltage, electric shock or other dangerous situations may occur. If inspection, adjustment or maintenance is required, contact the local distributor for help. Use the specified power supply.
- Page 6 CAUTION Do not install the product in high temperature environments. Do not install the product near heat source, such as the radiator, the heat ● reservoir, the stove or other heating devices. Do not expose the product under sunlight, which may cause high temperature ●...
-
Page 7: Installation Requirement
Installation Requirement Bearing You can choose the portable or a wall-mounting method according to your needs. The wall mounting can substantially save the space. If you choose portable mounting, use the mounting rack or support. If you want to use a self-made mounting rack, the bearing capacity of the rack should be at last four times of the screen weight. - Page 8 Right ≥ 100 mm Left ≥ 100 mm NOTE: When you install by wall mounting method, ensure insert the screws into the ● wall deeper than 10 mm. Do not block ventilation vents. ● Reference to the CAS 132-2006. ● The dimension of the 4 bracket mounting holes in the back panel is VESA ●...
-
Page 9: Introduction
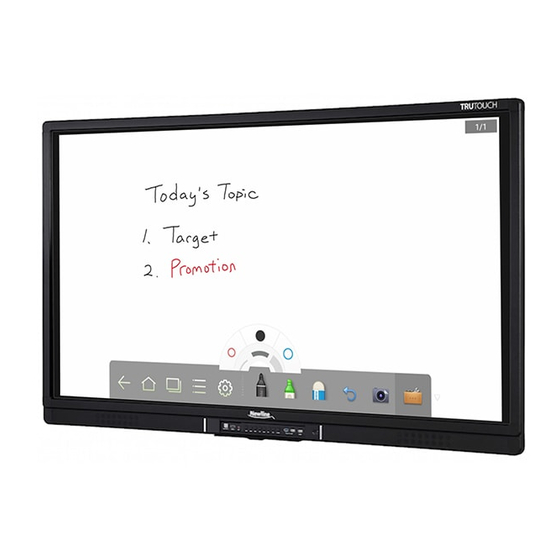
Introduction Thank you for choosing our interactive touch screen. As our latest independently developed and produced human-machine interactive product, the TRUTOUCH interactive touch screen is a multi-functional display for interactive teaching, digital demonstration, multi-media presentation, touch operations and handwriting. They are well designed and produced to meet the needs of education and corporate applications, and provide a user-friendly experience, digital intelligent control as an ideal equipment for schools and companies. - Page 10 Outer Appearance The front view and back view of the product are displayed as follows. Enclosure Infrared Frame Screen For 65"/ 70" Left Loudspeaker Connection Panel 1 Control Panel Front Cover Plate* Power on/off Right Loudspeaker OPS Port Connection Panel 2 Rocker Switch For 75"/ 80"/ 86"...
-
Page 11: Control Panel
Control Panel Name Function Description Home Enter/Exit Android home page. Return Return to previous menu. Menu Enter the function menu of screen. Switch among three modes: energy-saving, automatic, and standard. Source Enter the menu to select the signal source. Vol- Decrease volume. - Page 12 Connection Panel 1 Name Function Description Touch port 1 PC connecting port 1 for touch control. Display port HD digital display port. The input terminal 1 for high definition signal, which is used with the HDMI 1 Touch port 1 to operate PC in the way of touch control. The USB 2.0 (Rated output: 5V/0.5A) and USB 3.0 (Rated output: 5V/0.9A) ports for the OPS.
- Page 13 Connection Panel 2 Name Function Description Audio Audio input port. The VGA port for an external PC, which is used with the Touch Port 4 to operate PC in the way of touch control. The input terminal 4 for high definition signal, which is used with the HDMI4 Touch Port 4 to operate PC in the way of touch control.
- Page 14 Connection Panel 3 Name Function Description EARPHONE The port for earphone. SPDIF Audio digital output port. The input port for series signals, which is used by specific control device RS-232 of serial port to input serial port protocol in order to control the screen. LAN-IN The input port for local area network.
- Page 15 Functions of the Remote Controller Switch to the next page on On or standby whiteboard software and PPT Mute Open whiteboard software Select TV channel or enter Switch over to VGA signal number source Switch over to HDMI signal Open the Android home page source Go back or return to the parent Switch over to OPS signal...
- Page 16 Instructions of Remote Controller The effective area of the remote controller includes the vertical distance within five meters in front of the product, and the area within an angle of 30 degrees from the vertical point to the left and the right. The effective receiving The effective receiving area is about 3 meters...
-
Page 17: Basic Operation
Basic Operation Power on Step 1: Turn on the interactive touch screen with the 100V - 240V 50Hz/60Hz AC power supply. The power cord should be completely plugged into the power outlet, and insert the power connector into the appliance couplers at the bottom side. - Page 18 Step 2: Connect the screen to the power supply. Switch on the rocker switch (on the right bottom of the rear of the screen, next to the power port) to enter the standby status. The power indicator turns red. For 65"/ 70" Rocker switch (next to the power port) For 75"/ 80"/ 86"...
-
Page 19: Power Off
Power off Step 1: Press PC Power to turn off the OPS (for all-in-one models only). Step 2: Press Power on the control panel or Power on the remote controller to enter the standby mode. The power indicator turns red. Step 3: In the standby mode, switch off the rocker switch to turn off the interactive touch screen. -
Page 20: Software Uninstall
Step 1: Insert the official USB cable into the USB ports of the computer and interactive touch screen. Step 2: Insert the official software installation disk into the computer. Step 3: Double click the , follow the instructions and complete the installation of the interactive touch screen software. - Page 21 Step 3: Select nine Points, click Calibrate and the following figure is displayed. Step 4: Use the pen to click and hold the center of the flickering cross. Do not release it until the flickering cross moves to the next point. Repeat and complete the positioning process according to the instructions on the interface.
-
Page 22: Positioning Method For Windows 7 System
② ③ ④ ⑤ ⑨ ① Press Esc to quit IR-HID-OLOOVOOO ⑧ ⑦ ⑥ Positioning Method for Windows 7 System Step 1: Connect the interactive touch screen to PC using the USB cable via the USB interface on the panel. Choose Control Panel >... - Page 23 Click Calibrate in Tablet PC Settings window. Step 3: Step 4: Use the pen to click and hold the center of the flickering cross. Do not release it until the flickering cross moves to the next point. Repeat and complete the positioning process according to instructions on the interface.
-
Page 24: Ops Installation
To ensure the handwriting accuracy, use the pen provided together with the ● interactive touch screen rather than a finger to perform calibration. Positioning errors may cause touch function failure on the interactive ● touch screen. In this case, you need to perform positioning one more time. During the positioning process, you can press ESC on the keyboard to exit ●... -
Page 25: Toolbar Introduction
Toolbar Introduction The toolbar has three modes: Home Page, Task Manager, and Whiteboard. Under any of the three modes, you can click on the toolbar to go back to the previous page and click to exit from other programs or go back to the home page from other signal sources. -
Page 26: Task Manager
Task Manager In the task manager, you can view current running programs, switch and end programs. Click to enter the task manager as shown in the following figure: View Running Programs In the task manager, scroll up and down to view the current running programs. Switch Programs In the task manger, click an application program icon to switch programs. -
Page 27: Whiteboard
Whiteboard The whiteboard provides the writing function. In the whiteboard program, you can select a pen, line weight and color to write and use an eraser to erase content on the whiteboard. You can also print and clear the content on the whiteboard. Click on the toolbar or press Whiteboard on the remote controller to enter the whiteboard interface. - Page 28 Pen, Line Weight and Color If the marker is selected, click and hold for two seconds to set its line weight and color. If the highlighter is selected, click and hold for two seconds to set its line weight and color.
- Page 29 Screen Capture The following two methods are used to capture screen: Click to capture current content on the whiteboard and save it as an image file in ● Screenshots directory. (The toolbar is not captured in the image.) Press CAPTURE on the remote controller to save current content on the whiteboard ●...
-
Page 30: Gallery
Gallery You can enter the gallery to view images one by one or play them as slides. Click in the application programs to enter the gallery. All folders containing images are displayed. Full preview ● One full screen can maximum display eight images, you can preview other group image by your finger slipping left or right. -
Page 31: File Manager
File Manager Click on the toolbar to enter the file manager interface. Current system files are displayed. External device files are also displayed, such as the files in the SD card and USB drive. The file manager provides various functions, such as preview, filter, search, select, copy and delete files. -
Page 32: Browser
Browser Click on the toolbar to open the web browser. Enter a website in the address bar and enter keywords in the search box by using the soft keyboard or remote controller. Audio Only Press AUDIO ONLY on the remote controller to turn off the screen but keep audio on. To turn on screen again, touch any place on screen or click AUDIO ONLY again to return to normal operation mode. -
Page 33: Child Lock Setting
Child Lock Setting You can turn on/off Child Lock Setting function by three methods below: Click on the toolbar to enter the system settings interface. You can click the ● Authorization setting item to turn on the Child Lock function. Press ECO button on the front panel for more than 5 seconds to enter Child Lock ●... -
Page 34: Application Programs
Application Programs Click on the toolbar to enter the application program page. All application programs in the system are displayed. Scroll right and left to turn the page, as shown in the following figure: Calculator Click to enter the calculator application. Click digits and operators on the keyboard to perform calculation. -
Page 35: Temperature Reminder And Thermal Shutdown
Temperature Reminder and Thermal Shutdown Temperature Reminder The real-time temperature of the interactive touch screen is displayed on upper left corner of the home page. Click the temperature display area on the top-left corner of screen to switch between Celsius and Fahrenheit. Thermal Shutdown In the running status, the overall temperature of the screen increases due to unfavorable ventilation environment and long working hours. -
Page 36: Signal Source Selection
Signal Source Selection The following three ways are used to select a signal source: Press SOURCE on the remote controller. ● Press Source on the control panel of the interactive touch screen. ● At Main page or Whiteboard mode, click for input Source selection page. -
Page 37: Menu
Menu After switching to selected signal source, press MENU on the remote controller. A menu is displayed, including Sound Mode, Screen Setting, and Display setting. Scroll left and right on the screen or press ◄ or ► to switch between entries. Sound Mode The Sound Mode page displays options including STANDARD, MEETING, THEATER and CLASSROOM. - Page 38 Under different input sources, the screen settings could be different. Under OPS, HDMI 1-HDMI 4 and DP signal source. ● Under AV signal source, the P2P mode cannot use. ● Under VGA signal source, Auto mode cannot use. ●...
-
Page 39: Display Setting
Display Setting The Display setting page displays options including STANDARD, LIGHTNESS, VIVID and EYE PROTECTION. Two ways are used to set the options: Click an icon and set the option. ● Press ◄ or ► and press OK to modify the option. Press RETURN to exit the menu. ●... -
Page 40: Eco Mode
ECO Mode CAUTION ● Please switch off the screen when it is not used, and enable the function of Audio Only when you do not need to watch the display, helping to reduce power consumption and save energy. ● On the premise of ensuring viewing effect, the energy consumption can be reduced by lowering display brightness. -
Page 41: Serial Port Control
Serial Port Control The RS-232 port of the interactive touch screen is defined as follows: Connect RS-232 port to the PC or controlling device. Enable RS-232 serial port connection and complete the following configuration. Port Number: COM 1 (Set the value according to the port number of the PC or controlling device.) baud rate 19200... - Page 42 Function Controlling Code Function Controlling Code 7F 08 99 A2 B3 C4 02 FF 7F 08 99 A2 B3 C4 02 FF HDMI 3 01 0C CF 01 2A CF Internal 7F 08 99 A2 B3 C4 02 FF 7F 08 99 A2 B3 C4 02 FF PC(OPS) 01 38 CF 01 2B CF...
-
Page 43: Vga Signal Input
VGA Signal Input VGA (Video Graphics Array) is the computer display standard for analog signal. VGA port is the special port on the computer which uses the VGA standard for data input. The following table lists the specifications of various VGA signal input. NOTE: The VGA signal input is available only when the screen is in PC mode. -
Page 44: Multimedia Format Support
Multimedia Format Support Media Type File Format File Extension Image JPEG, BMP, PNG .jpg, .bmp, .png MPEG1, MPEG2, MPEG4, H.264, H.265, RM, RMVB, .avi, mpg, .dat, .vob, .div, .mov, Movie MOV, MJPEG, VC1, DivX, .mkv,.rm, .rmvb, .mp4, .ts, .trp, FLV (Support 1080P, 4K HD .asf, .flv Decoding) Music... -
Page 45: Common Faults And Solutions
Common Faults and Solutions Symptom Possible Cause Solution The drive program is not Install the drive program correctly. correctly installed. The service The USB port (lead) Change the USB lead or check if the program fails to be is not connected or is USB port is faulty. - Page 46 Symptom Possible Cause Solution The color of the pen is the same as or similar to Change the color of the pen. the background color. You are advised to use the pen rather than a finger to write. Hold Your hand or other the pen as far to the nib as possible.
- Page 47 Symptom Possible Cause Solution Change the batteries. ● The remote Clean the signal emitter at the top of the remote controller. ● controller fails. (Check whether it is blocked.) Check contacts of the batteries. ● The PC cannot be started. (This Check whether the PC adapter is correctly connected and ●...
-
Page 48: Care And Maintenance
Care and Maintenance Maintenance Tips Do not put or install the product near a heat source or under direct sunlight, or in dusty ● or humid places, or somewhere the product may be hit or damaged by mechanical vibration. To maximize the performance, it needs to be put away from equipment such as grid, large metal objects and radar stations as far as possible. -
Page 49: Technical Parameters
Technical Parameters Specification Parameter Backlight Type Aspect Ratio 16 : 9 3840 x 2160 Pixel (4K_UHD Model) / 1920 x Physical Resolution 1080 (2K_FHD Model) Viewing Angle 178° Display Colors 10bit LCD Brightness 370cd/m² Response Time (Typical) Viewing Angle 178° Life Time (working hours) 30,000 hours 65, 70 inch: Maximum <... - Page 50 Specification Parameter HDMI (MHL*1) x 3, HDMI out x 1, USB3.0 x 1, Rear Side Ports USB (Touch) x 3, Microphone (3.5mm) x 1, VGA x 1, VGA Audio x 1, Mini SD Reader x 1 AV in x 1, LAN in x 1, LAN out x 1, RS232 x 1, Bottom Ports SPDIF, Earphone x 1 Image: JPEG, BMP, PNG...
Need help?
Do you have a question about the TRUTOUCH UB Series and is the answer not in the manual?
Questions and answers