Table of Contents
Advertisement
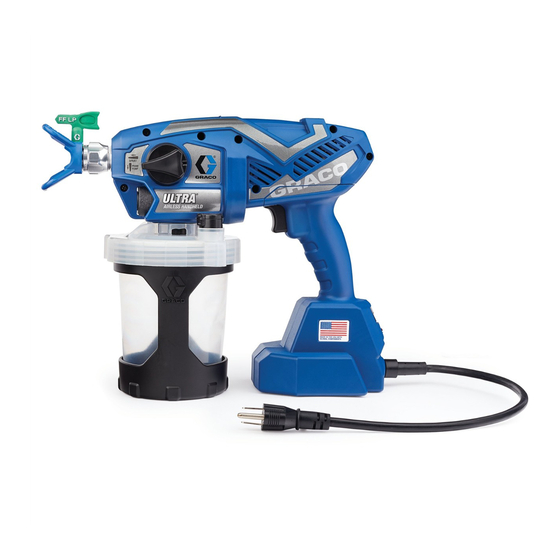
Operation, Parts
Corded Airless
HandHeld Sprayers
Important Safety Instructions
Read all warnings and instructions in this manual and on the unit. Be familiar with the
controls and the proper usage of the equipment. Save these instructions.
FIRE AND EXPLOSION HAZARD
Use only non-flammable or water-based
materials, or non-flammable paint thinners. Do
not use materials having flash points below
100°F (38°C). This includes, but is not limited to,
acetone, xylene, toluene, and naphtha. For
more information about your material, request
Safety Data Sheet (SDS) from the supplier.
Use oil-based materials outdoors or in a
well-ventilated indoor area with a flow of fresh air.
For portable spray applications of water-based and oil-based
Not approved for use in explosive atmospheres or hazardous locations.
non-flammable architectural paints and coatings only.
3A4433B
Operational video.
http://graco.com/hhsupport
ti29707a
844-241-9499
EN
Advertisement
Table of Contents

Related Manuals for Graco 17M359


Summary of Contents for Graco 17M359
-
Page 1: Important Safety Instructions
Read all warnings and instructions in this manual and on the unit. Be familiar with the controls and the proper usage of the equipment. Save these instructions. Operational video. http://graco.com/hhsupport ti29707a FIRE AND EXPLOSION HAZARD Use only non-flammable or water-based materials, or non-flammable paint thinners. -
Page 2: Table Of Contents
Graco Limited Warranty ........ -
Page 3: Models - Corded Airless Handhelds
Models – Corded Airless HandHelds Models – Corded Airless HandHelds Model Sprayer Name Voltage Tip Family Tip Size 17M359 Ultra 120V FFLPxxx 17N162 Ultimate 120V FFLPxxx 0.008 – 0.016 in. (0.20 – 0.41 mm) 17N163 TC Pro 120V TCPxxx Operating pressure range: 500-2000 psi (35 –... -
Page 4: Important User Information
Before using your sprayer read this Owners Manual for complete instructions on proper use and safety warnings. Congratulations! You have purchased a high-quality paint sprayer made by Graco Inc. This sprayer is designed to provide superior spray performance with water-based and oil-based (mineral spirit-type) architectural paints and coatings. -
Page 5: Warnings
Warnings Warnings The following warnings are for the setup, use, maintenance, and repair of this equipment. The exclamation point symbol alerts you to a general warning and the hazard symbols refer to procedure-specific risks. When these symbols appear in the body of this manual or on warning labels, refer back to these Warnings. -
Page 6: Fire And Explosion Hazard
Warnings FIRE AND EXPLOSION HAZARD Flammable fumes, such as solvent and paint fumes, in work area can ignite or explode. To help prevent fire and explosion: • Sprayer generates sparks. Do not spray or flush with flammable liquids. • Do not spray or clean with materials having a flash point lower than 100° F (38° C). •... - Page 7 Disconnect power when not spraying. • Always use the spray tip guard. Do not spray without spray tip guard in place. Use only Graco spray tips. • Use caution when cleaning and changing spray tips. In the case where the spray tip clogs while spraying, follow the Pressure Relief Procedure, page 10 for relieving the pressure before removing the spray tip to clean.
- Page 8 Warnings TOXIC FLUID OR FUMES HAZARD Toxic fluids or fumes can cause serious injury or death if splashed in the eyes or on skin, inhaled, or swallowed. • Read Safety Data Sheets (SDSs) to know the specific hazards of the fluids you are using. •...
-
Page 9: Know Your Sprayer
Know Your Sprayer Know Your Sprayer SPRAY PRIME Prime Pump/Spray Knob Cup Cover Power Cord FlexLiner Sprayer Trigger Cup Support Speed Control, ProControl II VacuValve Cap Spray Tip. Reverse-A-Clean (RAC) VacuValve Air Hole Spray Tip Guard VacuValve Reservoir Diagnostic Light Pump Filter 3A4433B... -
Page 10: Start Up
Start Up Start Up Turn Prime Pump/Spray Knob down to PRIME PUMP position to relieve pressure. Use only oil-based (non-flammable) or water-based materials, or non-flammable paint thinners. Do not use materials having flash points below 100°F (38°C). Do not use materials which state “FLAMMABLE”... - Page 11 Start Up Install FlexLiner in the cup support. The VacuValve is an important part of your new sprayer. It is used to evacuate the air out of the FlexLiner. Open VacuValve cap. ti29721a Tilt the sprayer so the VacuValve is the ti23361a highest point, causing any air in the FlexLiner to rise to the VacuValve.
- Page 12 Start Up Plug sprayer into power source. If sprayer does not spray, try one of the steps below: Turn Prime Pump/Spray knob down to Prime Pump position. To fill sprayer with • Make certain there is only one FlexLiner fluid, point sprayer into a waste area and in cup support.
-
Page 13: Refilling Flexliner
Start Up Refilling FlexLiner If sprayer runs out of paint simply separate the cup support from the cup cover/sprayer and refill the FlexLiner. Unplug sprayer from power source. Separate the cup support from the cup cover/sprayer. Set the sprayer upside down on a flat surface. -
Page 14: How To Spray
How to Spray How to Spray Speed Control Take a few moments prior to spraying and review these simple tips to ensure your spraying project is a success. NOTE: For proper sprayer operation use only a tip from the same tip family that came with your sprayer. -
Page 15: Triggering Sprayer
How to Spray Triggering Sprayer 12 in. Pull trigger after starting stroke. Release (30 cm) trigger before end of stroke. Sprayer must be moving when trigger is pulled and released. EVEN FINISH ti30015a Aiming Sprayer THICK Aim sprayer at bottom edge of previous stroke, overlapping each stroke by half. -
Page 16: Spray Pattern Quality
How to Spray Clear Tip Clog When spraying vertical corners turn spray tip guard to the horizontal orientation and move sprayer up and down. In the event that particles or debris clog the spray tip, this sprayer is designed with a reversible spray tip that quickly and easily clears the particles without disassembling the sprayer. - Page 17 How to Spray Aim sprayer at waste area, turn Prime Turn Prime Pump/Spray knob down to Pump/Spray knob forward to spray Prime position. Rotate spray tip back to position. Pull trigger to clear clog. SPRAY position. Turn Prime Pump/Spray knob forward to SPRAY position, and resume spraying.
-
Page 18: Cleanup
Cleanup Cleanup Use only oil-based (non-flammable) or water-based materials, or non-flammable paint thinners. Do not use materials having flash points below 100°F (38°C). Do not use materials which state “FLAMMABLE” on the packaging. For more information about your material, request SDS from distributor or retailer. Clean in a well-ventilated area. - Page 19 Cleanup You can either dispose of the used FlexLiner and install a new FlexLiner or clean a used FlexLiner. To clean the sprayer, fill FlexLiner approximately half-full with appropriate cleaning fluid (warm water or mineral spirits). Securely tighten cup support with FlexLiner to cup cover/prayer.
- Page 20 Cleanup 10. Turn Prime Pump/Spray knob forward to SPRAY position. 11. While holding the sprayer upside down point the sprayer into a waste pail. With the spray tip in the SPRAY position, pull the trigger for five seconds. Release the trigger. ti29768a 13.
-
Page 21: Cleaning Vacuvalve
Cleanup 16. Use a soft cloth to clean the cup support Cleaning VacuValve and cup cover. The VacuValve is an important part of your sprayer and it should be cleaned after every use. Remove VacuValve cap from cup cover and clean it. Clean VacuValve reservoir in lid. -
Page 22: Storage
Storage Storage With the sprayer upside-down pour approximately 2 oz. (60 ml) PUMP ARMOR into pump opening. With proper storage, the sprayer will be ready to use the next time it is needed. NOTICE Failure to store sprayer with Pump Armor can result in operational problems the next time you spray. -
Page 23: Common Procedures
Common Procedures Common Procedures Spray Tip Installation Screw spray tip and tip guard assembly onto the gun and hand tighten. • Spray tips wear with use and abrasive paint and need periodic replacement. • If the spray pattern is poor, you may have a worn spray tip. - Page 24 Common Procedures Unscrew cup cover from the cup Fill FlexLiner with cleaning fluid. See support. Cleaning Fluid Compatibility, page 27. ti23676a Make certain FlexLiner is in the cup support. ti23383a Securely tighten cup cover onto cup support. ti29719a Align VacuValve on cup cover with Prime ti23361a Pump/Spray knob.
- Page 25 Common Procedures Plug sprayer into power source. 11. While holding the sprayer upside down point the sprayer into a waste pail. Pull Make certain the Prime Pump/Spray the trigger for three seconds. knob is in the Prime Pump position (pointed down). Set speed control to 10. Turn the sprayer upside down and point the sprayer into a waste pail.
-
Page 26: Reference
Reference Reference Fan Width Fan width is the size of the spray pattern, which determines the area covered with each Spray Tip Selection stroke. Spray tips come in a variety of hole sizes for Hints: spraying a range of fluids. Your sprayer includes a tip for use in most paint spraying •... -
Page 27: Cleaning Fluid Compatibility
Reference Cleaning Fluid Static Grounding Compatibility Instructions (Oil-Based materials) The equipment must be grounded to reduce the risk of static sparking and electric shock. An electric or static spark Oil- or Water-Based Materials can cause fumes to ignite or explode. An •... -
Page 28: Maintenance
Maintenance Maintenance Routine maintenance is important to ensure proper operation of your sprayer. Activity Interval Inspect pump filter. Daily or each time you spray Inspect enclosure vents for blockage. Daily or each time you spray Inspect pump inlet holes located under pump filter for blockage. Each time the sprayer is cleaned Cleaning Outlet Valves 3/16"... -
Page 29: Notes
Notes Notes 3A4433B... -
Page 30: Replacement Parts
Replacement Parts Replacement Parts ti29777a Ref. Torque Ref. Torque 8-10 in-lb (0.9 - 1.1 N•m) 55-65 in-lb (6.2 - 7.3 N•m) 10-15 in-lb (1.1 - 1.7 N•m) 5-7 in-lb (0.6 - 0.8 N•m) 3A4433B... -
Page 31: Parts List
Replacement Parts Parts List Ref. Sprayer Name Part # Description 17P185 Kit, pump assembly includes 4, 9, 11, 25 17P554 Filter. pump, 60 mesh, 3 pack 17P555 Filter. pump, 100 mesh, 3 pack 17P183 Kit, outlet valve repair includes 3 of 4a, 2 of 4b, 2 of 50, 1 of 51 Outlet valve assembly Outlet valve plug 17P098... -
Page 32: Troubleshooting
Troubleshooting Troubleshooting 844-241-9499 Check everything in this Troubleshooting Table before you bring the sprayer to an authorized service center. Sprayer Diagnostics Problem Cause Solution Sprayer makes no sound Diagnostic light does not blink when Verify power to the sprayer. when trigger is pulled the spray is first plugged in. - Page 33 Troubleshooting Problem Cause Solution Sprayer makes sound but Sprayer is not primed. Prime the pump. See Starting a no material is sprayed New Job, page 10. when trigger is pulled Make certain there is only one FlexLiner in the cup support. Make certain the cup cover is properly threaded to the cup support.
- Page 34 Troubleshooting Problem Cause Solution Sprayer sprays with poor Spray tip is partially clogged. See Clear Tip Clog, page 16. results Spray tip is not in correct position Rotate spray tip to SPRAY position. Incorrect spray tip for application of Install different size spray tip. material.
- Page 35 Troubleshooting Spray Pattern Diagnostics Problem Cause Solution Spray pattern is uneven: Operator is moving too Slow speed of movement. fast while spraying. Spray tip is clogged. Unclog spray tip or clean spray tip see Clear Tip Clog, page 16. Material difficult to Increase speed control until atomize.
- Page 36 Troubleshooting Problem Cause Solution Spray pattern is too wide: Sprayer is too far away Move sprayer closer to surface. from target surface. Incorrect spray tip for Install different size spray tip. application of material. See Tip and Pressure Selection, page 14. Spray pattern “spits”...
-
Page 37: Technical Specifications
Technical Specifications Technical Specifications HandHeld Sprayer U.S. Metric Max Working Pressure 2000 psi 14 MPa, 138bar Maximum Amperage 3.6 Amps 3.6 Amps Weight 4.6 lb 2.1 kg Dimensions: Length 14.0 in. 36.1 cm Width 5 in. 12.7 cm Height 10.5 in. 26.7 cm Storage Temperature Range ... -
Page 38: Graco Limited Warranty
Graco’s written recommendations. This warranty does not cover, and Graco shall not be liable for general wear and tear, or any malfunction, damage or wear caused by faulty installation, misapplication, abrasion, corrosion, inadequate or improper maintenance, negligence, accident, tampering, or substitution of non-Graco component parts. -
Page 39: Graco Information
Graco Limited Warranty Graco Information For the latest information about Graco products, visit www.graco.com. For patent information, see www.graco.com/patents. TO PLACE AN ORDER, contact your Graco distributor or call 1-888-541-9788 to identify the nearest distributor. 3A4433B... - Page 40 Original instructions. This manual contains English. MM 3A4433 Graco Headquarters: Minneapolis International Offices: Belgium, China, Japan, Korea GRACO INC. AND SUBSIDIARIES • P.O. BOX 1441 • MINNEAPOLIS MN 55440-1441 • USA Copyright 2016, Graco Inc. All Graco manufacturing locations are registered to ISO 9001. www.graco.com...
Need help?
Do you have a question about the 17M359 and is the answer not in the manual?
Questions and answers