Sign In
Upload
Download
Table of Contents
Contents
Add to my manuals
Delete from my manuals
Share
URL of this page:
HTML Link:
Bookmark this page
Add
Manual will be automatically added to "My Manuals"
Print this page
×
Bookmark added
×
Added to my manuals
Manuals
Brands
FLIR Manuals
Thermal cameras
T1020
User manual
FLIR T1020 User Manual
T10 series
Hide thumbs
Also See for T1020
:
Quick start
(2 pages)
,
User manual
(146 pages)
1
2
3
4
5
6
Table Of Contents
7
8
9
10
11
12
13
14
15
16
17
18
19
20
21
22
23
24
25
26
27
28
29
30
31
32
33
34
35
36
37
38
39
40
41
42
43
44
45
46
47
48
49
50
51
52
53
54
55
56
57
58
59
60
61
62
63
64
65
66
67
68
69
70
71
72
73
74
75
76
77
78
79
80
81
82
83
84
85
86
87
88
89
90
91
92
93
94
95
96
97
98
99
100
101
102
103
104
105
106
107
108
109
110
111
112
113
114
115
116
117
118
119
120
121
122
123
124
125
126
127
128
129
130
131
132
133
134
135
136
137
138
139
140
141
142
143
144
145
146
147
148
149
150
151
152
153
154
155
156
157
158
159
160
161
162
163
164
165
166
167
168
169
170
171
172
173
174
175
176
177
178
179
180
181
182
183
184
185
186
187
188
189
190
191
192
193
194
195
196
197
198
199
200
201
202
203
204
205
206
207
208
209
210
211
212
213
214
215
216
217
218
219
220
221
222
223
224
225
226
227
228
229
230
231
232
233
234
235
236
237
238
239
240
241
242
243
244
245
246
247
248
249
250
251
252
253
254
255
256
257
258
259
260
page
of
260
Go
/
260
Contents
Table of Contents
Bookmarks
Table of Contents
Table of Contents
1 Disclaimers
U.S. Government Regulations
Fonts (Dejavu)
2 Safety Information
3 Notice to User
Note about Authoritative Versions
4 Customer Help
Downloads
Introduction
5 Introduction
6 Quick Start Guide
7 About FLIR Tools/Flir Tools
Workflow
8 Using the High-Speed Interface (HSI)
Quick Start Guide
9 A Note about Ergonomics
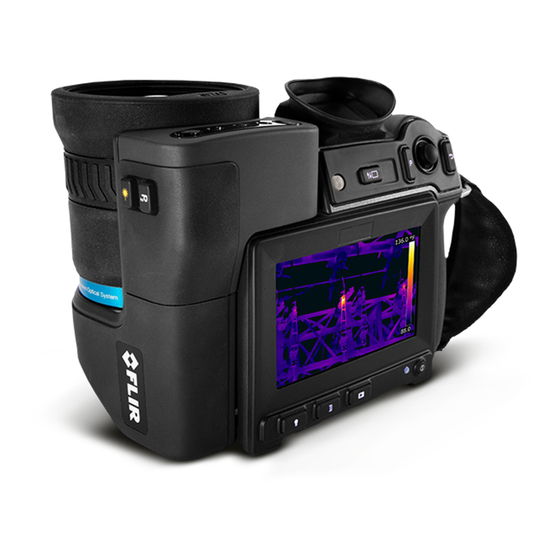
10 Camera Parts
View from the Bottom
View from the Rear
Neck Strap Attachment Points
Power LED Indicator
Laser Warning Label
Figure
Image Overlay Information
General
13 Handling the Camera
Charging the Battery
Adjusting the Viewfinder's Dioptric Correction (Sharpness)
Adjusting the Angle of the Lens
Autofocusing the Infrared Camera
Procedure
Using the Digital Zoom Function
Procedure
Procedure
Using the Close-Up Lens
Attaching the Close-Up Lens
Removing the Close-Up Lens
Calibrating the Compass
Procedure
14 Saving and Working with Images
Previewing an Image
Editing a Saved Image
Deleting an Image
Deleting All Images
15 Achieving a Good Image
Example 1
Manual Adjustment in Level, Span Mode
Changing the Color Palette
Procedure
Manual Calibration
General
16 Working with Image Modes
Selecting the Image Mode
General
Resizing or Moving a Measurement Tool
Changing Object Parameters
Procedure
Related Topics
Creating and Setting up a Difference Calculation
Setting a Measurement Alarm
18 Working with Color Alarms and Isotherms
Color Alarms
Setting up Above, Below, and Interval Alarms
Building Isotherms
19 Annotating Images
Procedure
Procedure
20 Programming the Camera (Time Lapse)
21 Recording Video Clips
22 Screening Alarm
23 Pairing Bluetooth Devices
24 Configuring Wi-Fi
25 Changing Settings
Programmable Buttons
Device Settings
Procedure
26 Technical Data
Flir T1020 12
Flir T1020 28
Flir T1020 45
FLIR T1020 28° and 12
FLIR T1020 28° and 45
FLIR T1020 28°, 12°, and 45
FLIR T1030Sc 12
FLIR T1030Sc 28
FLIR T1030Sc 45
Flir T1040 12
Flir T1040 28
Flir T1040 45
FLIR T1050Sc 12
FLIR T1050Sc 28
FLIR T1050Sc 45
IR Lens, F=36 MM (28°) with Case
Close-Up Lens 3× (51 ΜM) with Case
IR Lens F=21.2 MM (45°) with Case
IR Lens F=83.4 MM (12°) with Case
FLIR T10Xx SC Kit
27 Mechanical Drawings
28 Digital I/O Pin Configuration
29 Digital I/O Connection Diagram
30 CE Declaration of Conformity
31 Cleaning the Camera
Infrared Detector
32 Application Examples
Oxidized Socket
Insulation Deficiencies
33 About FLIR Systems
More than Just an Infrared Camera
Supporting Our Customers
34 Terms, Laws, and Definitions
35 Thermographic Measurement Techniques
Reflected Apparent Temperature
36 About Calibration
The Differences between a Calibration Performed by a User and that Performed Directly at FLIR Systems
Non-Uniformity Correction
37 History of Infrared Technology
38 Theory of Thermography
Planck's Law
Wien's Displacement Law
Stefan-Boltzmann's Law
Non-Blackbody Emitters
Infrared Semi-Transparent Materials
39 The Measurement Formula
40 Emissivity Tables
Advertisement
Quick Links
1
Quick Start Guide
Download this manual
User's manual
FLIR T10xx series
Table of
Contents
Previous
Page
Next
Page
1
2
3
4
5
Advertisement
Table of Contents
Need help?
Do you have a question about the T1020 and is the answer not in the manual?
Ask a question
Questions and answers
Related Manuals for FLIR T1020
Thermal cameras FLIR T10 Series User Manual
(146 pages)
Thermal cameras FLIR T1K Quick Start
(2 pages)
Thermal cameras FLIR T1030sc User Manual
T10 series (260 pages)
Thermal cameras FLIR T1040 User Manual
T10 series (260 pages)
Thermal cameras FLIR T1050sc User Manual
T10 series (260 pages)
Thermal cameras FLIR T10 series Getting Started
Hd thermal camera with viewfinder (148 pages)
Thermal cameras FLIR T4xx series User Manual
(168 pages)
Thermal cameras FLIR PathFindIR User Manual
Thermal imaging system (38 pages)
Thermal cameras FLIR T420 User Manual
Thermal imaging cameras t4xx series (220 pages)
Thermal cameras FLIR FLIR TG167 User Manual
(68 pages)
Thermal cameras FLIR TG267 User Manual
Automotive diagnostic thermal camera (35 pages)
Thermal cameras FLIR TG267 User Manual
Diagnostic thermal camera (42 pages)
Thermal cameras FLIR TG267 Quick Start Manual
Diagnostic thermal camera (74 pages)
Thermal cameras FLIR TG275 User Manual
Automotive diagnostic thermal camera (38 pages)
Thermal cameras FLIR TG275 Quick Start Manual
Automotive diagnostic thermal camera (68 pages)
Thermal cameras FLIR TG130 User Manual
(44 pages)
This manual is also suitable for:
72501-0101
72501-0105
72501-0102
72501-0106
72501-0201
T1030sc
...
Show all
72501-0202
T1040
72501-0203
72501-0301
72501-0103
72501-0302
72501-0303
T1050sc
72501-0104
72501-0401
72501-0402
72501-0403
T199064
T199065
T199066
T199077
Table of Contents
Save PDF
Print
Rename the bookmark
Delete bookmark?
Delete from my manuals?
Login
Sign In
OR
Sign in with Facebook
Sign in with Google
Upload manual
Upload from disk
Upload from URL


Need help?
Do you have a question about the T1020 and is the answer not in the manual?
Questions and answers