Table of Contents
Advertisement
Quick Links
Download this manual
See also:
Instruction Manual
Advertisement
Table of Contents

Related Manuals for Toa AM-1B


Summary of Contents for Toa AM-1B
- Page 1 SOFTWARE INSTRUCTIONS REAL-TIME STEERING ARRAY MICROPHONES AM-1B AM-1W Thank you for purchasing TOA’s Real-Time Steering Array Microphone. Please carefully follow the instructions in this manual to ensure long, trouble-free use of your equipment.
-
Page 2: Table Of Contents
TABLE OF CONTENTS 1. GENERAL DESCRIPTION ................3 1.1. Software Summary ....................3 1.2. System Settings Summary ..................3 1.3. System Requirements ................... 3 1.3.1. PC ........................ 3 1.3.2. iPad ......................3 ® 1.4. System Application Examples ................4 2. SOFTWARE INSTALLATION AND START-UP ...... -
Page 3: General Description
1. GENERAL DESCRIPTION 1.1. Software Summary The AM-1 iOS app is intended exclusively for use with the iPad. It connects to the AM-1 Control Unit via a wireless network and allows setting, control and monitoring of the array microphone. This app can be downloaded from Apple App Store free of cost. 1.2. -
Page 4: System Application Examples
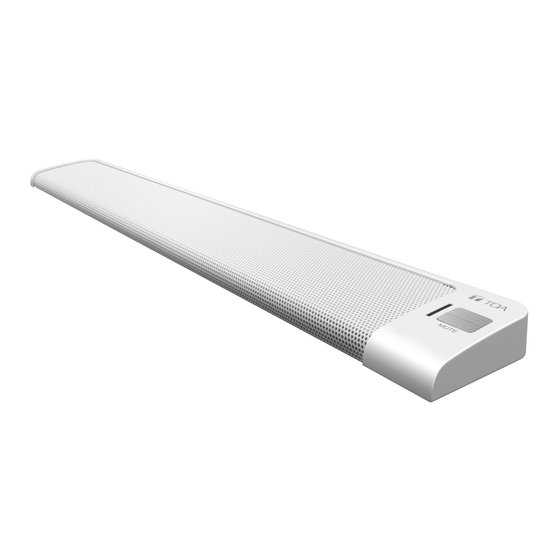
1.4. System Application Examples Array Microphone MUTE Control Unit [Rear panel] SIGNAL DC INPUT 410mA -10dBV -50dBu +4dBu OFF ON MIC INPUT OUTPUT OUTPUT LEVEL LOW-CUT AC adapter AD-246 (option) or the equivalent Wi-Fi router Switching hub To mixer or amplifier iPad... -
Page 5: Software Installation And Start-Up
2. SOFTWARE INSTALLATION AND START-UP 2.1. Installation Using the iPad, download the AM-1 iOS app from App Store. Note: iPhones are not compatible with the AM-1 iOS app. Step 1. Access the App Store on the iPad. Step 2. Search for the “AM-1” and tap the “GET” button. Download and installation will begin automatically. - Page 6 After installation is completed, the “TOA AM-1” icon will appear on the iPad’s home screen. [Starting preparations] Perform Wi-Fi setup using the iPad’s settings controls. Confirm that the iPad’s IP address and the control unit’s IP address are set to the same network.
-
Page 7: Starting The App
2.2. Starting the App Either of the following two startup modes can be used: Basic Mode (Basic): Allows the array microphone’s tracking status to be monitored. Advanced Mode (Advanced): Allows the array microphone’s tracking status to be monitored and tracking conditions to be changed. - Page 8 Step 2. Tap the “Select Startup Mode” button to select “Advanced.” “Select Startup Mode” button The password input screen is displayed. Step 3. Tap the “OK” button without entering the password. Note When the password has been set, it needs to be entered. For password settings, see p.
- Page 9 The initial Advanced mode screen is displayed.
-
Page 10: Basic System Settings And Setting Changes
3. BASIC SYSTEM SETTINGS AND SETTING CHANGES 3.1. Basic Settings Step 1. Tap the “Setting” button at the upper right of the initial screen. “Setting” button The Settings screen is displayed. Step 2. Set each item. Display units: Changes display units from meters (m) to feet (ft). Password*: Used to change the password. -
Page 11: Setting Changes (Advanced Mode Only)
3.2. Setting Changes (Advanced Mode Only) Step 1. Tap the “Edit” button at the upper right of the initial Advanced mode screen. The Edit screen is displayed, allowing the AM-1 system icons to be selected. Step 2. Tap the icon of the AM-1 system for which setting changes are to be made. - Page 12 The input screen is displayed. Step 3. Change the IP address (IP Address) and array microphone name (ArrayMic Name). The IP address change is made to match the control unit’s IP address. For control unit IP address settings, please refer to the instruction manual enclosed with the unit. Also, AM-1 system icons that have already been set can be deleted using the “Delete Microphone Settings”...
-
Page 13: Adding Additional Am-1 Systems (Advanced Mode Only)
3.3. Adding Additional AM-1 Systems (Advanced Mode Only) • Up to 12 systems can be displayed. • Only 1 system can be connected at a time per iPad. • Take care that the same IP address is not duplicated. Step: Tap the “+” button on the initial Advanced mode screen. The AM-1 system icon is added. -
Page 14: Software Functions And Operation
4. SOFTWARE FUNCTIONS AND OPERATION 4.1. Main Screen If a connectable AM-1 system icon is selected and tapped on the initial screen, the selected AM-1 system’s setting information is loaded and the main screen is displayed. The following explanation assumes Advanced mode is being used. A portion of the functions are restricted in Basic mode. - Page 15 8. Input level meter Displays the input levels for 8 microphone elements. 9. Output level meter Displays the output level. 10. Output level change Tapping the [dB] button displays a fader. (See p. 20, “Output level change.”) 11. Mute control Allows the array microphone’s audio to be muted.
-
Page 16: Main Screen Operation
4.2. Main Screen Operation 4.2.1. Operation settings Tapping the “Operation settings and preset” button at the upper right of the screen allows array microphone settings. 1. Power Turns the array microphone power ON/OFF. This button is not normally used. 2. Output mode Selects either Array mode (Array) or Cardioid mode (Cardioid). - Page 17 [Loading preset data] The Load screen is displayed if “Load” is selected on the operation setting screen. Preset data can be selected from among [Default], [Preset 1] and [Preset 2]. Tapping one of these buttons causes the corresponding data to be loaded. Notes •...
- Page 18 [Saving preset data (Advanced mode only)] Selecting “Save” on the operation setting screen displays the Save screen. Select the save destination from among [Default], [Preset 1] and [Preset 2]. Tapping one of these buttons causes the data to be saved to the corresponding internal memory of the control unit.
-
Page 19: Horizontal Inversion Display
4.2.2. Horizontal inversion display Use this function in such applications as when mounting the array microphone to a ceiling. Tap the “Horizontal inversion display” button to use. The “Horizontal inversion display” button is displayed in pink during use. -
Page 20: Output Level Change
4.2.3. Output level change Audio output level can be adjusted. A fader is displayed when the “dB” button is tapped. Adjust the output level by moving the fader up and down. -
Page 21: Mute Control
4.2.4. Mute control Audio from the array microphone can be muted. Tapping the “Mute” button mutes the audio. The “Mute” button is displayed in red while enabled. -
Page 22: Moving The Screen
4.2.5. Moving the screen The screen can be moved by dragging it. 4.2.6. Centering It is possible to return the screen to its default position after it has been moved. To revert to the center of the screen (default position), tap the “Centering” button. -
Page 23: Tracking Settings (Advanced Mode Only)
4.2.7. Tracking settings (Advanced mode only) In such cases as when the sound source (speaker) is moving around, set the tracking control to ON. If the position of the sound source (speaker) is fixed at a certain degree, set the tracking control to OFF. 1. - Page 24 6. Tracking sensitivity* This is the threshold for sound source detection. The sound source is detected whenever the input audio level is larger than the threshold value. Set the value according to surrounding sound volume conditions. Setting range: −24 dB to 0 dB Note It is recommended that the threshold value be set a little higher than the ambient noise level.
-
Page 25: Quitting The Software
If any setting is changed, an asterisk (*) is shown before the array microphone name displayed on the menu bar. Note: Settings cannot be changed or saved in Basic mode. Traceability Information for Europe Manufacturer: Authorized representative: TOA Corporation TOA Electronics Europe GmbH 7-2-1, Minatojima-Nakamachi, Chuo-ku, Kobe, Hyogo, Suederstrasse 282, 20537 Hamburg, Japan Germany URL: http://www.toa.jp/...
Need help?
Do you have a question about the AM-1B and is the answer not in the manual?
Questions and answers