Table of Contents
Advertisement
Advertisement
Table of Contents

Related Manuals for Suunto TRAVERSE series


Summary of Contents for Suunto TRAVERSE series
-
Page 1: Suunto Traverse
SUUNTO TRAVERSE USER GUIDE... -
Page 2: Table Of Contents
Contents SUUNTO TRAVERSE ..............1 1 SAFETY ................... 6 2 GETTING STARTED ............. 10 2.1 Buttons and menus ............10 2.2 Set up ................11 2.3 Adjusting settings ............13 3 FEATURES ................14 3.1 Activity monitoring ............14 3.2 Alti-Baro ................. 14 3.3 Autopause.............. - Page 3 Notifications ............59 3.25 HR sensors ............60 3.27 Routes ............... 67 3.28 Service menu ............73 3.30 Sport modes............76 Custom sport modes ............76 3.31 Stopwatch .............. 77 3.32 Suunto Apps ............79 3.35 Track back ............... 106...
- Page 4 5.3 NOM-121-SCT1-2009 ..........117 5.4 Trademark ..............117 5.5 Patent notice ..............117 5.6 Warranty ..............118 Warranty Period ............118 Exclusions and Limitations ..........118 Access to Suunto warranty service ....... 119 Limitation of Liability ............119 5.7 Copyright ..............120...
-
Page 6: Safety
1 SAFETY Types of safety precautions WARNING: - is used in connection with a procedure or situation that may result in serious injury or death. AVERTISSEMENT: - s'utilise en lien avec une procédure ou une situation pouvant entraîner des accidents graves voire mortels. CAUTION: - is used in connection with a procedure or situation that will result in damage to the product. - Page 7 Safety precautions Précautions d'utilisation WARNING: ALLERGIC REACTIONS OR SKIN IRRITATIONS MAY OCCUR WHEN PRODUCT IS IN CONTACT WITH SKIN, EVEN THOUGH OUR PRODUCTS COMPLY WITH INDUSTRY STANDARDS. IN SUCH EVENT, STOP USE IMMEDIATELY AND CONSULT A DOCTOR. AVERTISSEMENT: DES RÉACTIONS ALLERGIQUES OU DES IRRITATIONS CUTANÉES PEUVENT SURVENIR LORSQUE LE PRODUIT EST EN CONTACT AVEC LA PEAU, MALGRÉ...
- Page 8 WARNING: ONLY FOR RECREATIONAL USE. AVERTISSEMENT: RÉSERVÉ À UNE UTILISATION DE LOISIR. WARNING: DO NOT ENTIRELY RELY ON THE GPS OR BATTERY LIFETIME, ALWAYS USE MAPS AND OTHER BACKUP MATERIAL TO ENSURE YOUR SAFETY. AVERTISSEMENT: NE VOUS FIEZ PAS TOTALEMENT AU GPS OU À...
- Page 9 ENDOMMAGER LA SURFACE. CAUTION: DO NOT THROW THE PRODUCT AWAY, BUT TREAT IT AS ELECTRONIC WASTE TO PRESERVE THE ENVIRONMENT. ATTENTION: NE JETEZ PAS LE PRODUIT AUX ORDURES MÉNAGÈRES. TRAITEZ-LE COMME UN DÉCHET ÉLECTRONIQUE AFIN DE PROTÉGER L'ENVIRONNEMENT. CAUTION: DO NOT KNOCK OR DROP THE DEVICE, AS IT MAY BE DAMAGED.
-
Page 10: Getting Started
2 GETTING STARTED 2.1 Buttons and menus Suunto Traverse has five buttons which allow you to access all the features. Upper right [Start]: press to access the start menu • press to pause or resume a recording or timer •... -
Page 11: Set Up
Center right [Next]: press to change displays • press to accept a setting • keep pressed to access/exit the options menu • keep pressed to access/exit the options menu in sport modes • Bottom right [Light]: press to activate the backlight •... - Page 12 To make the most of your Suunto Traverse you may want to download Suunto Movescount Mobile App from App store, and create own user account with Suunto Movescount service before setting up the product. To start using your sports watch 1.
-
Page 13: Adjusting Settings
Pairing with mobile device (this can also be done later if you don’t • have the app installed) 2.3 Adjusting settings You can change the settings of your Suunto Traverse directly in the watch, through Movescount, or on the go with Suunto Movescount 3.21 Movescount mobile app App (see To change the settings in the watch: 1. -
Page 14: Features
3 FEATURES 3.1 Activity monitoring Suunto Traverse measures your daily steps and estimates calories burned during the day, based on your personal data. Daily step count is available as a default view in TIME. You can see the step number by pressing the [VIEW] button. - Page 15 If you are not recording an outdoor activity, and your activity requires accurate sea level air pressure or altitude, you need to calibrate your Suunto Traverse by entering either your current altitude or the current sea level air pressure. When recording an activity, Suunto Traverse uses Suunto FusedAlti by default.
- Page 16 The altitude of your location can be found from most topographic maps or Google Earth. A sea level air pressure reference for your location can be found using the websites of national weather services. TIP: Absolute air pressure and known altitude reference = sea level air pressure.
- Page 17 Changes in local weather conditions will affect altitude readings. If local weather changes often, it is advisable to reset the current altitude reference value frequently, preferably before starting your journey when the reference values are available. As long as the local weather stays stable, you do not need to set reference values.
- Page 18 Automatic profile, the graph visible in Alti/BAro display will always represent altitude. You can either let Suunto Traverse decide a suitable profile for the activity, or choose yourself a profile that matches your activity. The Altimeter profile should be selected when your outdoor activity...
- Page 19 (e.g. soccer, sailing, canoeing). NOTE: You can define the profile as part of the sport mode settings in Movescount, or in your Suunto Traverse. To set the ALTI & BARO profile: 1. Keep [Next] pressed to enter the options menu.
- Page 20 Barometer profile to the Altimeter profile when you started moving in the morning. You know that the current altitude readings given by your Suunto Traverse are wrong. So, you hike to the nearest location shown on your topographic map for which an altitude reference value is provided.
-
Page 21: Using Barometer Profile
[View] to show temperature, baro trend • NOTE: If you are wearing your Suunto Traverse on your wrist, you will need to take it off in order to get an accurate temperature reading because your body temperature will affect the initial reading. - Page 22 When the Barometer profile is activated, the barometer icon is shown on the display. When the Barometer profile is activated, Suunto Traverse shows you the following barometric information: current pressure or a graph displaying sea level pressure • changes over the past 26 hours (15 min. recording interval) bottom row: change with [View] to show temperature, baro •...
- Page 23 NOTE: If you are wearing your Suunto Traverse on your wrist, you will need to take it off in order to get an accurate temperature reading because your body temperature will affect the initial reading. 3.2.5 Using Automatic profile The Automatic profile switches between the Altimeter and Barometer profiles according to your movements.
-
Page 24: Autopause
If you are moving in altitude (more than 5 meters of vertical movement within 3 minutes), Suunto Traverse interprets all pressure changes as movements in altitude. In the Automatic Profile, Suunto Traverse will display following information: top row, name of currently active profile, Altitude, altitude graph. In addition, baro trend and temperature are accessible with the [View] button. -
Page 25: Button Lock
By default, the backlight turns on for a few seconds and turns off automatically. This is the Normal mode. There are three different backlight modes: Mode: Normal: The backlight turns on for a few seconds when you • press [Light] and when the alarm clock sounds. Off: The backlight is not switched on by pressing a button or •... -
Page 26: Compass
[Start ] buttons are locked, you can still change displays by pressing [Next] and views by pressing [View]. 3.6 Compass Suunto Traverse has a digital compass that allows you to orient yourself in relation to magnetic north. The tilt-compensated compass gives you accurate readings even if the compass is not horizontally level. - Page 27 3.7.1 Calibrating compass If you have not used the compass before, you must first calibrate it. Turn and tilt the watch in multiple directions until the watch beeps, indicating calibration is complete. If you have already calibrated the compass and want to re-calibrate it, you can access the calibration option in the options menu.
- Page 28 4. Scroll to Compass with [Light] and select with [Next]. 5. Press [Next] to select Calibration. 3.7.2 Setting declination To ensure correct compass readings, set an accurate declination value. Paper maps point to true north. Compasses, however, point to magnetic north – a region above the Earth where the Earth’s magnetic fields pull.
- Page 29 (east). 7. Set the declination value with [Start] or [Light]. 8. Press [Next] to accept the setting. TIP: You can also access the Navigation menu and Compass settings by pressing [Start] in Navigation mode. 3.7.3 Setting bearing lock You can mark the direction to your target in relation to North with the bearing lock feature.
- Page 30 2. Press [Back Lap] to lock the current degree displayed on the watch as your bearing. 3. An empty triangle indicates the locked bearing in relation to the North indicator (solid triangle). 4. Press [Back Lap] to clear the bearing lock.
- Page 31 NOTE: While using the compass in an exercise mode, the [Back Lap] button only locks and clears the bearing. Exit the compass view to make a lap with [Back Lap].
-
Page 32: Countdown Timer
3.8 Countdown timer You can use the countdown timer to count down from a preset time to zero. The timer makes a short sound every second during the last 10 seconds and sounds an alarm when zero is reached. You can show/hide the countdown timer from the start menu under DISPLAYS »... -
Page 33: Displays
3.9.1 Adjusting display contrast Increase or decrease the display contrast of your Suunto Traverse in the watch settings. To adjust the display contrast: 1. Keep [Next] pressed to enter the options menu. -
Page 34: Exercising With Sport Modes
3.10.1 Using Suunto Smart Sensor A Bluetooth® Smart compatible heart rate sensor, such as the Suunto Smart Sensor, can be used with your Suunto Traverse to give you more detailed information about your exercise intensity. While exercising, the heart rate sensor enables: heart rate in real time •... - Page 35 • peak heart rate • If you use the Suunto Smart Sensor, you also have the added advantage of heart rate memory. The Suunto Smart Sensor memory function buffers data whenever the transmission to your Suunto Traverse is interrupted.
- Page 36 2. Adjust the strap length as needed. 3. Moisten the strap electrode areas with water or electrode gel. 4. Put the strap on so that it fits snugly and the Suunto logo is facing up. The Smart Sensor turns on automatically when it detects a heartbeat.
- Page 37 NOTE: Dry skin under the belt electrodes, a loose belt, and synthetic shirt materials can cause abnormally high heart rate readings. Moisten the belt electrodes well and tighten the belt to avoid heart rate peaks. If you are otherwise concerned about your heart rate, please consult a doctor.
-
Page 38: Recording Tracks
3.10.5 Recording tracks Suunto Traverse allows you to record various information. If your sport mode has GPS enabled, Suunto Traverse also records your track during your exercise. You can view the track in Movescount as part of the recorded Move and export it as a route to use for later... - Page 39 During your exercise, you can make laps either manually or automatically by setting the autolap distance interval in Movescount. When you are making laps automatically, Suunto Traverse records the laps based on the distance you have specified in Movescount. To make laps manually, press [Back Lap] during the exercise.
- Page 40 3. Scroll to POIs (Points of interest) or Routes with [Light] and select with [Next]. The navigation view will be updated with navigation guidance To deactivate navigation, go back to NAVIGATION in the navigation menu and select End navigation. NOTE: If the GPS accuracy setting (see 3.23.3 GPS accuracy and power saving) of your sport mode is Good or lower, while navigating GPS accuracy switches to Best.
-
Page 41: Setting Altitude During Exercise
2. Scroll to ACTIVATE with [Light] and select with [Next]. 3. Scroll to Compass with [Light] and select with [Next]. 4. The compass is shown as the last display on the custom sport mode. To deactivate the compass, go back to ACTIVATE in the options menu and select End compass. -
Page 42: Find Back
3.11 Find back Suunto Traverse automatically saves the starting point of your exercise, if you are using GPS. With Find back, Suunto Traverse can guide you directly back to your starting point (or to the location where the GPS fix was established). -
Page 43: Fusedalti
3.13 FusedAlti FusedAlti provides an altitude reading that is a combination of GPS and barometric altitude. It minimizes the effect of temporary and offset errors in the final altitude reading. NOTE: By default, altitude is measured with FusedAlti during exercises that use GPS and during navigation. When GPS is switched off, altitude is measured with the barometric sensor. - Page 44 FusedAlti. NOTE: In good conditions it takes 4 – 12 minutes for FusedAlti to activate. During that time, Suunto Traverse shows barometric altitude and ~ is shown with the altitude reading to indicate that the altitude may not be correct.
-
Page 45: Icons
3.14 Icons The following icons are displayed in Suunto Traverse3 Peak: alarm altimeter barometer battery Bluetooth activity button lock... - Page 46 button press indicators chronograph current display down/decrease GPS signal strength heart rate incoming call interval timer message/notification missed call next/confirm pairing settings sport mode storm sunrise sunset up/increase...
-
Page 47: Poi Icons
POI icons The following POI icons are available in Suunto Traverse begin building/home camp/camping car/parking cave crossroad food/restaurant/cafe forest geocache lodging/hostel/hotel meadow mountain/hill/valley/cliff road/trail rock... -
Page 48: Logbook
sight water/river/lake/coast waypoint 3.15 Logbook The logbook stores the logs of your recorded activities. The maximum number of logs and the maximum duration of a single log depend on how much information is recorded in each activity. GPS accuracy (see 3.23.3 GPS accuracy and power saving ) and using the interval timer 3.16 Interval timer... - Page 49 duration • laps • TIP: You can see many more details of your recorded activities in Movescount.com. To view log summary after stopping a recording: 1. Keep [Start] pressed to stop and save the exercise. Alternatively, you press [Start] to pause the recording. After pausing, stop by pressing [Back Lap], or continue recording by pressing [Start] .
- Page 50 If the log includes multiple laps, you can view lap-specific information by pressing [View].
-
Page 51: Memory Left Indicator
Movescount allows you to transfer your recorded exercise logs from your Suunto Traverse to Movescount and customize the watch to best meet your needs. -
Page 52: Movescount Mobile App
Movescount and in the watch are automatically synchronized. 3.18 Movescount mobile app With the Suunto Movescount App, you can further enrich your Suunto Traverse experience. Pair with the mobile app to get notifications on your Suunto Traverse, change settings and customize sport modes on... - Page 53 1. Download and install Suunto Movescount App on your compatible Apple device from the iTunes App Store. The app description includes the latest compatibility information. 2. Start Suunto Movescount App and turn on Bluetooth if it is not on already. Leave the app running in the foreground.
- Page 54 3. If you have not yet set up your Suunto Traverse, do so now (see Getting started ) and press [Start] when asked to pair MobileApp. If you are already using your Suunto Traverse, keep [Next] pressed to enter the options menu and scroll to PAIR with [Light]. Select MobileApp with [Next].
-
Page 55: Navigating With Gps And Glonass
To manually sync with mobile app: 1. Ensure Suunto Movescount App is running and Bluetooth is on. 2. Press [Start] to enter the start menu. 3. Scroll to MOBILEAPP with [Light] and select with [Next]. 4. Press Next to Sync now. - Page 56 3.23.1 Getting GPS signal Suunto Traverse activates GPS automatically when you select a sport mode with the GPS functionality, determine your location, or start navigating. NOTE: When you activate GPS for the first time, or have not used it for a long time, it might take longer than usual to get a GPS fix.
- Page 57 Troubleshooting: No GPS signal For an optimal signal, point the GPS part of the watch upwards. The • best signal can be received in an open area with a clear view of the sky. The GPS receiver usually works well inside tents and other thin •...
-
Page 58: Gps Accuracy And Power Saving
MGRS (Military Grid Reference System) is an extension of UTM • and consists of a grid zone designator, 100,000-meter square identifier and a numerical location. Suunto Traverse also supports the following local grids: British (BNG) • Finnish (ETRS-TM35FIN) • Finnish (KKJ) •... -
Page 59: Notifications
OK: ~ 60 sec fix interval, lowest power consumption • Off: no GPS fix • 3.24 Notifications If you have paired your Suunto Traverse with Suunto Movescount App 3.21 Movescount mobile app (see ), you can get call, message and push notifications on the watch. -
Page 60: Hr Sensors
Please refer to the user guide for the device you are pairing with your Suunto Traverse before continuing. To pair a heart rate sensor: 1. Activate the heart rate sensor. 3.10.2 Putting on If you are pairing a Suunto Smart Sensor, see Suunto Smart Sensor... -
Page 61: Points Of Interest
4. Scroll the options with [Start] and [Light] and press [Next] to select heart rate sensor. 5. Hold your Suunto Traverse close to the sensor you are pairing and wait for Suunto Traverse to notify that pairing was successful. If the pairing fails, press [Start] to retry, or [Light] to return to the pairing setting. - Page 62 5. Press [Next] to select Navigate. If you are using the compass for the first time, you need to calibrate 3.7.1 Calibrating compass it (see ). After activating the compass, the watch starts searching for a GPS signal and displays GPS found after acquiring the signal.
- Page 64 When stationary or moving slowly (<4 km/h), the watch shows you the direction to the POI (or waypoint if navigating a route) based on the compass bearing. While moving (>4 km/h), the watch shows you the direction to the POI (or waypoint if navigating a route) based on GPS.
- Page 65 [Next] pressed to access the options menu. 3.26.2 Adding your location as a POI Suunto Traverse allows you to save your current location or define a location as a POI. You can navigate to a saved POI anytime, for example, during your exercise.
- Page 66 Press [Start] to save the POI. TIP: You can create POIs in Movescount by selecting a location on a map or inserting the coordinates. POIs in your Suunto Traverse and in Movescount are always synchronized when you connect the watch to Movescount.
-
Page 67: Routes
2. Under PLAN & CREATE, browse to ROUTES to search and add existing routes or browse to ROUTE PLANNER to create your own route. Make sure to tick the use route in my Suunto Traverse box if you want to use the route in the device. - Page 68 Movescount App (manually start sync, see mobile app ) or by using Moveslink and the supplied USB cable. 3.27.1 Navigating a route You can navigate a route you have downloaded to your Suunto 3.27 Routes Traversefrom Movescount (see ) or recorded from an 3.10.5 Recording tracks...
- Page 69 [Light]. Accept with [Next]. 6. Press [Next] to select Navigate. 7. If you selected a waypoint in the middle of the route, Suunto Traverse prompts you to select the direction of the navigation. Press [Start] to select Forwards or [Light] to select Backwards.
-
Page 70: During Navigation
To skip a waypoint on a route: 1. While you are navigating a route, keep [Next] pressed to access the options menu. 2. Press [Next] to select NAVIGATION. 3. Scroll to Skip waypoint with [Start] and select with [Next]. The watch skips the waypoint and starts navigating directly to the next waypoint on the route. - Page 71 WP01 Full track view The full track view shows you the following information: (1) arrow indicating your location and pointing to the direction of • your heading. (2) the next waypoint on the route • (3) the first and last waypoint on the route •...
- Page 72 Waypoint navigation view The waypoint navigation view shows you the following information: (1) arrow pointing to the direction of the next waypoint • (2) your distance to the next waypoint • (3) the next waypoint you are headed towards • WP01 WP01...
-
Page 73: Service Menu
3.28 Service menu To access the service menu, keep [Back Lap] and [Start] pressed simultaneously until the watch enters the service menu. The service menu includes the following items: INFO: • Air pressure: shows the current absolute air pressure and temperature. - Page 74 NOTE: Service menu content is subject to change without notice during updates. Resetting GPS In case the GPS unit cannot find a signal, you can reset GPS data in the service menu. To reset GPS:...
- Page 75 1. In the service menu, scroll to ACTION with [Light] and enter with [Next]. 2. Press [Light] to scroll to GPS reset and enter with [Next]. 3. Press [Start] to confirm GPS reset, or press [Light] to cancel. NOTE: Resetting GPS resets GPS data, compass calibration values and recovery time.
-
Page 76: Sport Modes
3.30 Sport modes Sport modes are your way to record exercises and other activities with your Suunto Traverse3 Peak. For any activity, you can select a sport mode from the set of predefined sport modes that came with your watch. If you cannot find a suitable sport mode, create your own custom sport modes through Movescount and Suunto Movescount App. -
Page 77: Stopwatch
You can transfer up to 10 different sport modes created in Movescount to your Suunto Traverse3 Peak. 3.31 Stopwatch The stopwatch is a display that can be turned on or off from the start menu. To activate the stopwatch: 1. Press [Start] to enter the start menu. - Page 78 Lap 1 Lap 0 Lap 1 00’10.0 00’00.0 00’10.0 00’00.0 00’10.0 00’10.0 Lap 2 Lap 0 00’20.0 00’00. 00’10.0 While the stopwatch is running, you can: press [View] to switch between the time and lap time shown on the • bottom row of the display.
-
Page 79: Suunto Apps
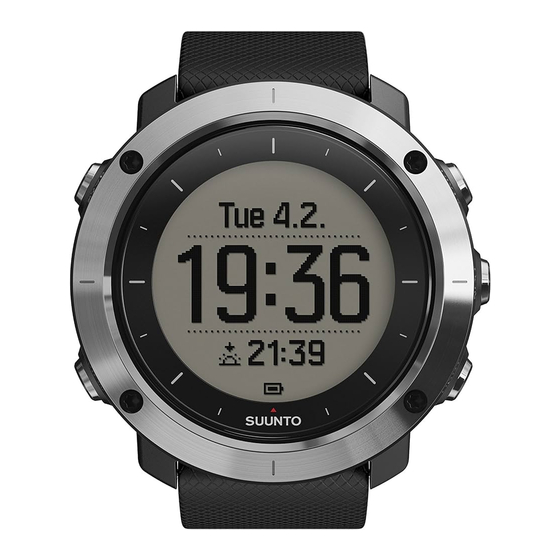
The added Suunto App will show the result of its calculation while you exercise. NOTE: You can add up to four Suunto Apps to each sport mode. 3.33 Swimming You can use your Suunto Traverse for recording swimming exercises in a pool or openwater. - Page 80 Suunto Traverse once you get out of the water. 3.34 Time The time display on your Suunto Traverse shows the following information: top row: date • middle row: time • bottom row: change with [View] to show additional information such •...
- Page 81 If GPS is not active, sunrise and sunset times are based on the last recorded GPS data. 3.34.1 Alarm clock You can use your Suunto Traverseas an alarm clock. To access the alarm clock and set the alarm: 1. In the options menu, go to GENERAL, then to Time/date and Alarm.
- Page 82 When the alarm is switched on, the alarm symbol is shown on most of the displays. When the alarm sounds, you can: Select Snooze by pressing [Light]. The alarm stops and restarts • every five minutes until you stop it. You can snooze up to 12 times for a total of one hour.
- Page 83 3.34.2 Time syncing Your Suunto Traverse time can be updated through your mobile phone, computer (Moveslink) or GPS time. If you have paired your watch with the Suunto Movescount App, time and time zone are automatically synced with your mobile phone.
-
Page 84: Track Back
3.35 Track back With Track back, you can retrace your route at any point during an exercise. Suunto Traverse creates temporary waypoints to guide you back to your starting point. To track back during exercise: 1. While you are in a sport mode that uses GPS, keep [Next] pressed to access the options menu. -
Page 85: Weather Indicators
3.36 Weather indicators 3.2.4 Using Barometer profile In addition to the barometer graph (see Suunto Traverse has two weather indicators: weather trend and storm alarm. The weather trend indicator is displayed as a view the time display, providing you a quick way to check weather changes. - Page 86 A significant drop in barometric pressure typically means a storm is coming and you should take cover. When the storm alarm is active, Suunto Traversesounds an alarm and flashes a storm symbol when the pressure drops 4 hPa (0.12 inHg) or more during a 3-hour period.
- Page 87 A special lap (called 'storm alarm') is generated when a storm alarm occurs while recording an exercise. TIP: You can also activate or deactivate the storm alarm through the options menu in a sport mode.
-
Page 88: Care And Support
Suunto Traverseis water resistant to 100 meters/330 feet/10 bars. The meter value relates to an actual diving depth and is tested in the water pressure used in the course of the Suunto water resistance test. This means you can use the watch for swimming and snorkeling, but it should not be used for any form of diving. -
Page 89: Charging The Battery
• 4.3 Charging the battery The duration on a single charge depends on how Suunto Traverse is used and in what conditions. Low temperatures, for example, reduce the duration of a single charge. In general, the capacity of rechargeable batteries decreases over time. -
Page 90: Getting Support
Suunto Traverse to My Products. 2. Visit Suunto.com (www.suunto.com/support) to see if you question has been asked/answered already. 3. Go to CONTACT SUUNTO to submit a question or call us at any of the listed support numbers. - Page 91 Alternatively, send us an email to support@suunto.com. Please include the product name, serial number and a detailed description of the issue. Suunto’s qualified customer support staff will help you and, if needed, troubleshoot your product during the call.
-
Page 92: Reference
-30° C to +60° C/-22° F to +140° F • weight: TBD • water resistance (Suunto Traverse): 100 m/328 ft/10 bar • water resistance (Suunto Smart Sensor): 20 m/66 ft (ISO 2281) • lens: mineral crystal glass (sapphire crystal in Sapphire models) • power: rechargeable lithium-ion battery •... -
Page 93: Thermometer
1 m/3 ft • 5.2 Compliance 5.2.1 CE Suunto Oy hereby declares that this product is in compliance with the essential requirements and other relevant provisions of Directive 1999/5/EC. Suunto Oy déclare par la présente que ce produit est conforme aux exigences essentielles et aux autres dispositions pertinentes de la directive 1999/5/CE. - Page 94 FCC a été testée et ce produit est destiné à être utilisé à la maison ou au bureau. Les changements ou modifications non expressément approuvés par Suunto peuvent annuler votre droit d'utiliser cet appareil dans le cadre de la réglementation de la FCC. 5.2.3 IC This device complies with Industry Canada licence-exempt RSS standard(s).
-
Page 95: Nom-121-Sct1-2009
Suunto Oy. All rights are reserved. Suunto Traverse, ses logos et les autres marques et noms de commerce de la marque Suunto sont des marques de commerce déposées ou non déposées de Suunto Oy. Tous droits réservés. -
Page 96: Warranty
5.6 Warranty Suunto warrants that during the Warranty Period Suunto or a Suunto Authorized Service Center (hereinafter Service Center) will, at its sole discretion, remedy defects in materials or workmanship free of charge either by a) repairing, or b) replacing, or c) refunding, subject to the terms and conditions of this Limited Warranty. -
Page 97: Access To Suunto Warranty Service
Suunto; 4. non-rechargeable batteries. Suunto does not warrant that the operation of the Product or accessory will be uninterrupted or error free, or that the Product or accessory will work with any hardware or software provided by a third party. -
Page 98: Copyright
Suunto Oy. While we have taken great care to ensure that information contained in this documentation is both comprehensive and accurate, no warranty of accuracy is expressed or implied. - Page 99 SPAIN +34 91 11 43 175 SWEDEN +46 8 5250 0730 SWITZERLAND +41 44 580 9988 +44 20 3608 0534 +1 855 258 0900 © Suunto Oy 9/2014, 3/2015 Suunto is a registered trademark of Suunto Oy. All Rights reserved.
Need help?
Do you have a question about the TRAVERSE series and is the answer not in the manual?
Questions and answers