Table of Contents
Advertisement
Hygenic
®
Fully Cleanable Recovery Tank
Tennant True
®
Parts
®
IRIS
a Tennant Technology
Smart-Fill™ Automatic Battery Watering
Insta-Click™ Magnetic Disk
For the latest Parts Manuals and other
language Operator Manuals, visit:
www.nobles.com/manuals
SPEED SCRUB
STAND-ON RIDER SCRUBBER
R
®
OPERATOR MANUAL
Rev. 00 (09-2017)
*9016424*
ENGLISH
350
9016424
Advertisement
Table of Contents

Subscribe to Our Youtube Channel
Related Manuals for Nobles SPEED SCRUB 350


Summary of Contents for Nobles SPEED SCRUB 350
- Page 1 OPERATOR MANUAL Hygenic ® Fully Cleanable Recovery Tank Tennant True ® Parts ® IRIS a Tennant Technology Smart-Fill™ Automatic Battery Watering Insta-Click™ Magnetic Disk 9016424 For the latest Parts Manuals and other Rev. 00 (09-2017) language Operator Manuals, visit: *9016424* www.nobles.com/manuals...
-
Page 2: Introduction
INTRODUCTION INTENDED USE This manual is available for each new model. It provides The Speed Scrub 350 stand-on rider fl oor scrubber is necessary operation and maintenance instructions. intended for commercial use, for example in hotels, schools, hospitals, factories, shops, offi ces and rental businesses. -
Page 3: Table Of Contents
Pushing, Towing, And Transporting The Double Scrubbing .........28 Machine ..........57 Emergency Shut-Off Button ......29 Pushing And Towing The Machine ...57 While Operating Machine ......29 Transporting The Machine .......57 Circuit Breaker PaneL ........30 Hour Meter ............30 Speed Scrub 350 9016424 (09-2017) - Page 4 CONTENTS Storing Machine ..........58 Freeze Protection ........58 Machine Troubleshooting ......60 General Machine Dimensions/Capacties/ Performance ............62 Supervisor Controls ..........65 Entering The Supervisor Control Modes ..65 Speed Scrub 350 9016424 (09-2017)
- Page 5 CONTENTS Speed Scrub 350 9016424 (09-2017)
-
Page 6: Important Safety Instructions - Save These Instructions
9% grade. harm. - Do not turn on inclines or ramps - Reduce speed when turning. - Keep all parts of body inside operator station while machine is moving. Speed Scrub 350 9016424 (09-2017) - Page 7 - Tie machine down to truck or trailer. - Inspect charger cord regularly for damage. - Do not plug in charger if prongs are wet. - Open recovery tank to vent batteries if temperature is above 80ºF/27ºC when charging batteries. Speed Scrub 350 9016424 (09-2017)
- Page 8 Keep hands away. Located on top of scrub head. WARNING LABEL - Magnetic Field Hazard. Magnetic pad driver/brush can be harmful to those with pacemakers or medical implants. Located on Insta-Click magnetic pad driver/brush. Speed Scrub 350 9016424 (09-2017)
- Page 9 SAFETY Speed Scrub 350 9016424 (09-2017)
-
Page 10: Operation
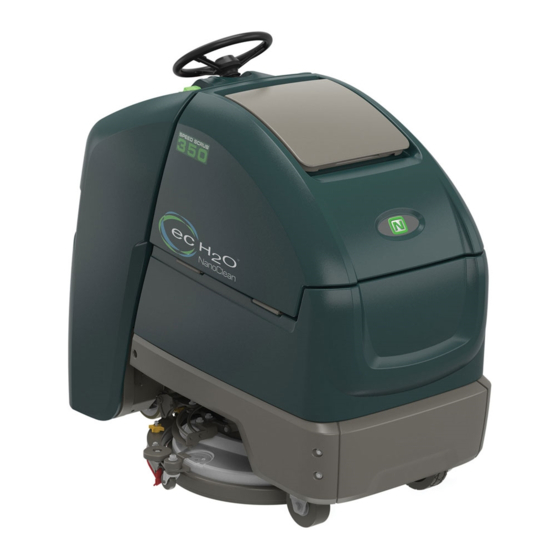
OPERATION MACHINE COMPONENTS Speed Scrub 350 9016424 (09-2017) -
Page 11: Machine Components
24. Circuit breaker panel 25. Squeegee assembly 26. Scrub head 27. Scrub head skirt 28. On-board battery charger power cable 29. Access panel 30. Double scrub caster knob 24 in. / 600 mm Dual Disk Speed Scrub 350 9016424 (09-2017) -
Page 12: Control Panel Components
7. Vacuum fan button 8. Brush pressure indicator 9. Service indicator 10. ec-H2O Button (option) 11. Automatic battery watering indicator (option) 12. Severe Environment button (option) 13. Quiet-mode button (option) 14. Battery discharge / fault code indicator Speed Scrub 350 9016424 (09-2017) -
Page 13: Machine Symbols
Automatic battery watering Direction (forward / reverse) (option) Key Off Circuit breaker Key On Brush pressure Vacuum fan Battery charge Change brush Severe Environment (option) Quiet mode (option) 1-Step Service indicator Jack point Filter location Speed Scrub 350 9016424 (09-2017) -
Page 14: Installing Batteries
Availability of IRIS battery metric reporting is not guaranteed with third party supplied batteries. NOTE: If there is liquid in battery compartment, drain battery compartment before installing batteries. See BATTERY COMPARTMENT DRAIN VALVE. Speed Scrub 350 9016424 (09-2017) -
Page 15: How The Machine Works
fl oors. Buffi ng pad (Red) - For light duty scrubbing without removing fl oor fi nish. Scrubbing pad (Blue) − For medium to heavy duty scrubbing. Removes dirt, spills, and scuffs. Speed Scrub 350 9016424 (09-2017) -
Page 16: Machine Setup
3. Align the squeegee carriage pins into the squeegee assembly bracket. 7. Rotate and center the squeegee assembly underneath the machine. 4. Slide the squeegee assembly onto the squeegee carriage until both squeegee carriage pins are secured in the bracket. Speed Scrub 350 9016424 (09-2017) -
Page 17: Installing Brushes / Pads
3. Machines with magnetic brushes or pad drivers: Position the brush under the scrub head and lift the brush up onto the scrub head until the magnet in the scrub head secures the brush. Speed Scrub 350 9016424 (09-2017) -
Page 18: Filling Solution Tank
H2O system. Conventional cleaning detergents will cause an ec-H2O system fault. 4. Turn off the water supply and remove the fi ll hose from the yellow strainer. 5. Replace the cap on the solution tank. Speed Scrub 350 9016424 (09-2017) -
Page 19: Filling Ec-H2O Model Option)
5. Adjust the detergent mixing ratio knob according to the cleaning detergent’s mixing instructions. NOTE: Remove the Severe Environment tank from the machine before fi lling the tank with detergent to prevent damaging electronic components. Speed Scrub 350 9016424 (09-2017) -
Page 20: Ec-H2O Water Conditioning Cartridge (Ec-H2O Model)
The shelf-life of an un-installed cartridge is one selected solution fl ow rate for up to 75 minutes. year from manufacture date. For new cartridge replacement, the ec-H2O module timer must be reset. See ec-H2O WATER CONDITIONING CARTRIDGE REPLACEMENT. Speed Scrub 350 9016424 (09-2017) -
Page 21: Filling Automatic Battery Watering Tank (Option)
fi lled. 6. Replace blue cap on automatic battery watering tank and return the automatic battery watering tank to the upright stowed position. 3. Remove the blue cap from the automatic battery watering tank. Speed Scrub 350 9016424 (09-2017) -
Page 22: Control Panel Operation
BRUSH PRESSURE BUTTON Press the brush pressure button to increase or decrease the brush pressure. The brush pressure indicator will display the pressure setting. One LED = Low pressure and two LED’s = High pressure. Speed Scrub 350 9016424 (09-2017) -
Page 23: Severe Environment Button (Ec-H2O Model Option)
- Quiet-Mode on or off - ec-H2O system on or off (option) - Severe Environment mode on or off (option) - Maximum scrub speed (see Supervisor Controls) NOTE: The Severe Environment mode and ec-H2O system cannot be preset together. Speed Scrub 350 9016424 (09-2017) -
Page 24: Ec-H2O Button / Indicator (Option)
When the machine or on-board battery charger detects a fault, the service indicator will light up and begin fl ashing. The battery discharge indicator lights will also fl ash a fault code. See SERVICE INDICATOR CODES to diagnose machine fault. Speed Scrub 350 9016424 (09-2017) -
Page 25: Brush Change Button
VACUUM FAN BUTTON Press the vacuum fan button to turn on the vacuum fan. Press button again to turn off the vacuum fan. The vacuum fan automatically turns on when the 1-Step button is pressed. Speed Scrub 350 9016424 (09-2017) -
Page 26: Machine Operation
fi lled with clear cool water only. Machines with SE (Severe Environment) option: Check detergent tank level. Fill detergent tank as necessary. Check steering for proper operation. Check the horn. Check maintenance records to determine maintenance requirements. Speed Scrub 350 9016424 (09-2017) - Page 27 The squeegee will briefl y remain lowered to the fl oor to pick up remaining water, and then raise. 9. Remove foot from the green go pedal to stop machine and turn the key off. Speed Scrub 350 9016424 (09-2017)
-
Page 28: Double Scrubbing
Scrub the heavily soiled area. Let the cleaning solution soak on the fl oor for 3-5 minutes. FOR SAFETY: When using machine, go slowly on inclines and slippery surfaces. Speed Scrub 350 9016424 (09-2017) -
Page 29: Emergency Shut-Off Button
10. When leaving the machine unattended, park on level surface, turn machine off, and remove key. 11. Do not operate machine in areas where the ambient temperature is above 110ºF/43ºC or below freezing 36ºF/2ºC. Speed Scrub 350 9016424 (09-2017) -
Page 30: Circuit Breaker Panel
Open the access door to access the circuit breaker panel. Circuit Rating Circuit Protected Breaker Key switch 10 A ec-H2O, automatic battery watering 70 A Propel controller FOR SAFETY: When servicing machine, all repairs must be performed by trained personnel. Speed Scrub 350 9016424 (09-2017) -
Page 31: Draining Tanks
Use damp cloth. NOTE: When using a bucket to drain the machine, do not use the same bucket to fi ll the solution tank. 3. Remove and clean the fl oat shut-off screen. Speed Scrub 350 9016424 (09-2017) -
Page 32: Draining Solution Tank
/ draining tank. 4. Remove the solution tank fi lter and clean screen after every 50 hours of use. Drain solution tank before removing fi lter. Speed Scrub 350 9016424 (09-2017) -
Page 33: Service Indicator Codes
☼ ● ● ☼ ● Propel Motor Short Low Fault Contact service. Propel Motor Short High Fault ☼ ● ● ☼ ☼ Scrub Motor Over Current Contact service. Scrub Motor Over Current 1 Scrub Motor Over Current 2 Speed Scrub 350 9016424 (09-2017) -
Page 34: On-Board Battery Charger Service Indicator Codes
● ☼ ● ● ● Charger overheated. Let charger cool. Move to well ventilated area. If fault persists, contact service. ● ☼ ☼ ☼ ● Charger communication fault. Power cycle machine. If fault code persists, contact service Speed Scrub 350 9016424 (09-2017) -
Page 35: Ec-H2O System Service Indicator Codes (Option)
*Verify if cleaning detergent was added to solution tank. If ec-H2O system was operated with cleaning detergent, drain solution tank, add clear water and operate the ec-H2O system until the fault code clears. Speed Scrub 350 9016424 (09-2017) -
Page 36: Maintenance
MAINTENANCE MAINTENANCE MAINTENANCE CHART Speed Scrub 350 9016424 (09-2017) - Page 37 Check tension. Check for damage and wear 750 Hours Vacuum motor Replace carbon brushes 1250 Hours Propel motor Replace carbon brushes Brush motor(s) Replace carbon brushes LUBRICANT/FLUID Distilled water Commercial approved detergent SAE 90 weight gear lubricant Speed Scrub 350 9016424 (09-2017)
-
Page 38: Machine Maintenance
5. Drain, rinse out, and clean the recovery tank. See DRAINING TANKS AFTER DAILY USE 1. Turn pad over or replace when worn. See BRUSH AND PAD REPLACEMENT. 2. Replace brushes when they no longer clean effective. See BRUSH AND PAD REPLACEMENT. Speed Scrub 350 9016424 (09-2017) - Page 39 10. Automatic battery watering option - Refi ll tank with distilled water. Replace cap. NOTE: Check for liquid in the battery compartment whenever replenishing the automatic battery watering tank. Drain all liquid from the battery compartment. See BATTERY COMPARTMENT DRAIN VALVE. Speed Scrub 350 9016424 (09-2017)
-
Page 40: After Weekly Use
2. Check for liquid in the battery compartment. See BATTERY COMPARTMENT DRAIN VALVE. 3. Machines with 24 in. (600 mm) scrub heads only: Remove the drip trap cover from the squeegee assembly and clean reservoir. Speed Scrub 350 9016424 (09-2017) -
Page 41: After Every 50 Hours Of Use
Avoid contact with battery acid. ELECTRIC MOTORS Replace motor carbon brushes as indicated. Contact trained personnel for carbon brush replacement. Carbon Brush Replacement Hours Vacuum motor Propel motor 1250 Brush motor(s) 1250 Speed Scrub 350 9016424 (09-2017) -
Page 42: Batteries
The fl ooded (wet) lead-acid batteries require routine watering as described below. Check the battery electrolyte level weekly. NOTE: If machine is equipped with the automatic or manual battery watering system, proceed to the BATTERY WATERING SYSTEM instructions. Speed Scrub 350 9016424 (09-2017) -
Page 43: Charging Batteries
ATTENTION: Do not disconnect battery cables while charger is plugged in, circuit board damage may result. Speed Scrub 350 9016424 (09-2017) -
Page 44: Battery Charger Settings
Tennant Service Department. OFF-BOARD BATTERY CHARGER: 1. To change the off-board battery charger settings, refer to the off-board charger’s owner manual. 2. To reprogram the machine’s battery discharge indicator (BDI): Service application software required, contact service. Speed Scrub 350 9016424 (09-2017) - Page 45 5. Re-apply the display label. 6. To set the BDI for the new battery type, plug the on-board battery charger cord into an electrical outlet. The machine’s software will automatically reprogram the BDI to the new battery type. Speed Scrub 350 9016424 (09-2017)
-
Page 46: Hydrolink® Battery Watering System (Trojan® Battery Option)
6. After adding water, replace the dust cap on the battery fi ll hose and store the hand pump hose inside the machine’s battery compartment for future use. Speed Scrub 350 9016424 (09-2017) -
Page 47: Smart-Fill Automatic Battery Watering (Option)
3. Close the battery compartment drain valve after all liquid has drained from the battery compartment. The automatic battery watering indicator will also alert user to add distilled water when tank is empty. See CONTROL PANEL OPERATION for further details. Speed Scrub 350 9016424 (09-2017) -
Page 48: Brush And Pad Replacement
Turn key switch to OFF position to abort process. Machines equipped with 3-lug brush hubs: Position the three lugs into the motor hub slots and give the pad driver / brush a quick counter- clockwise turn to engage hub. Speed Scrub 350 9016424 (09-2017) - Page 49 7. Repeat procedure for the other brush or pad driver, if machine is equipped with dual brush scrub head. 8. Step back onto the operator presence pedal to allow the machine to complete the brush change cycle. Speed Scrub 350 9016424 (09-2017)
-
Page 50: Squeegee Blade Replacement
2. Rotate the squeegee assembly to the right assembly. This will separate the spring loaded side of the machine. blade retainer from squeegee frame. 3. Disconnect the vacuum hose from the 6. Remove worn blade(s) from the blade retainer. squeegee assembly. Speed Scrub 350 9016424 (09-2017) - Page 51 9. Position the squeegee assembly bracket near 12. Connect the vacuum hose to the squeegee the squeegee carriage and align the squeegee assembly. carriage pins into the squeegee assembly 13. Rotate and center the squeegee assembly bracket. underneath the machine. Speed Scrub 350 9016424 (09-2017)
-
Page 52: Replacing Squeegees On Machines With 24 In. (600 Mm) Scrub Heads
7. Rotate the rear blades to a new wiping edge and reinstall blades. Make sure to align the slots in the blades with retainer tabs. 4. Squeeze the squeegee retainer lever and remove the squeegee assembly from the machine. Speed Scrub 350 9016424 (09-2017) - Page 53 9. Position the squeegee assembly bracket near the squeegee carriage and align the squeegee carriage pins into the squeegee assembly bracket. 10. Slide the squeegee assembly onto the squeegee carriage until both squeegee carriage pins are secured in the bracket. Speed Scrub 350 9016424 (09-2017)
-
Page 54: Ec-H2O Water Conditioning Cartridge Replacement
1. Park the machine on a level surface and remove the key. 2. Open the access door to access the ec-H2O water conditioning cartridge. 4. Fill in the installation date on the new cartridge label. Speed Scrub 350 9016424 (09-2017) -
Page 55: Machine Jacking
Rear jack point. The three indicator lights will then blink three times to indicate timer has been reset. Repeat process if the three indicator lights do not blink three times. Front jack points. Speed Scrub 350 9016424 (09-2017) -
Page 56: Jacking Up The Front Of The Machine
5. Use a fl oor jack to raise machine from the fl oor. 6. When fi nished with maintenance, use fl oor jack to raise machine from jack stand, remove the jack stand from under the machine, and lower the machine to the fl oor. Speed Scrub 350 9016424 (09-2017) -
Page 57: Pushing, Towing, And Transporting The Machine
fl oor of your trailer or truck. NOTE: When transporting machine in an open truck or trailer, secure recovery tank lid. ATTENTION: Do not use control console area or accessory storage rails for tie-down locations, damage may occur. Speed Scrub 350 9016424 (09-2017) -
Page 58: Storing Machine
Environment detergent tank - Lift tank from machine and empty the detergent from tank. Return tank. Pour a 1/4 gallon / 1 liter of propylene glycol based recreational vehicle (RV) antifreeze into the detergent tank. Speed Scrub 350 9016424 (09-2017) - Page 59 Environment detergent tank. Add clean water to solution tank and to optional detergent tank and operate the machine to fl ush system. 7. Refi ll the automatic battery watering tank with distilled water, if equipped. Speed Scrub 350 9016424 (09-2017)
-
Page 60: Machine Troubleshooting
Remove debris performance Worn brush/pad Replace brush/pad Incorrect brush pressure Adjust brush pressure Wrong brush/pad type Use correct brush/pad for application Low battery charge Recharge batteries Uneven brush pressure Scrub head/brushes not level. Contact service Speed Scrub 350 9016424 (09-2017) - Page 61 Batteries need maintenance See BATTERIES Defective battery or end of battery life Replace batteries Battery discharge indicator (BDI) See CHARGING BATTERIES programmed incorrectly Faulty charger Replace battery charger Brush pressure set too high Lower brush pressure Speed Scrub 350 9016424 (09-2017)
-
Page 62: General Machine Dimensions/Capacties/Performance
Sound power level uncertainty L - uncertainty K 82.5 dBA 84.0 dBA Machine vibration at hand-arm* <2.5 m/s Ambient operating temperature ° ° ° ° Min: 36 F / 2 C Max: 110 F / 43 Speed Scrub 350 9016424 (09-2017) - Page 63 SPECIFICATIONS MACHINE DIMENSIONS 500 mm / 20 in. Single Disk Model: 727 mm 673 mm (28.6 in) (26.5 in) 1,245 mm (49 in) 1397 mm (55 in) Speed Scrub 350 9016424 (09-2017)
- Page 64 SPECIFICATIONS 600 mm / 24 in. Dual Disk Model: 780 mm 673 mm (30.7 in) (26.5 in) 1,245 mm (49 in) 1397 mm (55 in) Speed Scrub 350 9016424 (09-2017)
-
Page 65: Supervisor Controls
LED turns on. After releasing button, the - Severe Environment button on or off active supervisor control mode will display as (Hold button for 3 seconds until LED turns on) described in step 3. - Maximum scrubbing speed setting Speed Scrub 350 9016424 (09-2017) - Page 66 LED represents the highest speed. Lowest Highest NOTE: The maximum scrub speed setting can only be adjusted in supervisor control lockout modes 2 and 3. 6. To exit the supervisor control mode, turn key off. Speed Scrub 350 9016424 (09-2017)
Need help?
Do you have a question about the SPEED SCRUB 350 and is the answer not in the manual?
Questions and answers