Table of Contents
Advertisement
Available languages
Available languages
Quick Links
Model No.:
608336
608337 – Pac
609245 – Can. Pac
TENNANT COMPANY
701 NORTH LILAC DRIVE
MINNEAPOLIS, MN 55422
MAILING ADDRESS:
TENNANT COMPANY
P.O. BOX 1452
MINNEAPOLIS, MN 55440–1452
NOBLES CUSTOMER SERVICE:
1–800–365–6625
FAX: 1–800–678–4240
TECHNICAL SUPPORT:
1–800–522–7839 EXT. 5356
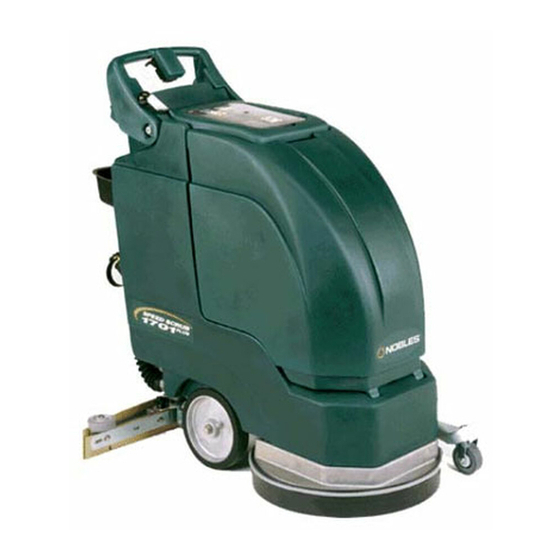
Speed Scrub
1701 Plus
Battery Automatic Scrubber
Fregadora Automática Batería
Manual de Operación y de Piezas
ENGLISH - ESPAÑOL
Operator and Parts Manual
Rev. 03 (02-04)
t
608362
Advertisement
Chapters
Table of Contents

Related Manuals for Nobles Speed Scrub1701 Plus


Summary of Contents for Nobles Speed Scrub1701 Plus
- Page 1 608337 – Pac 609245 – Can. Pac TENNANT COMPANY 701 NORTH LILAC DRIVE MINNEAPOLIS, MN 55422 MAILING ADDRESS: TENNANT COMPANY P.O. BOX 1452 MINNEAPOLIS, MN 55440–1452 NOBLES CUSTOMER SERVICE: 1–800–365–6625 FAX: 1–800–678–4240 608362 TECHNICAL SUPPORT: Rev. 03 (02-04) 1–800–522–7839 EXT. 5356...
- Page 2 E1999, 2000, 2004 Tennant Company Printed in U.S.A subsidiaries. Nobles is a registered United States trademark of Tennant Company. This machine will provide excellent service. However, Speed Scrub is a United States trademark of Tennant Company. the best results will be obtained at minimum costs if: The machine is operated with reasonable care.
-
Page 3: Table Of Contents
OPERATION TABLE OF CONTENTS (ESPAñOL ÍNDICE....22) SAFETY PRECAUTIONS ....TRANSPORTING MACHINE ....SAFETY LABELS . -
Page 4: Safety Precautions
OPERATION The following information signals potentially dangerous conditions to the operator or SAFETY PRECAUTIONS equipment: FOR SAFETY: This machine is intended for commercial use. It is 1. Do not operate machine: designed exclusively to scrub hard floors in an – With flammable liquids or near flammable indoor environment and is not constructed for any vapors as an explosion or flash fire may... -
Page 5: Safety Labels
OPERATION 6. When transporting machine: – Use a recommended ramp when loading/unloading into/off truck or trailer. – Turn machine off. – Use tie–down straps to secure machine to – Get assistance when lifting machine. truck or trailer. – Do not lift machine when batteries are installed. -
Page 6: Machine Components
OPERATION MACHINE COMPONENTS 1. Key Switch 14. Wand Kit ON/OFF Switch (Opt.) 28. Brush Trigger 2. Power ON/OFF Indicator Light 15. ES ON/OFF Switch (ESt Model) 29. Recovery Tank Lid 3. Hour Meter (Opt.) 16. Pump On Light (ESt Model) 30. -
Page 7: Machine Installation
OPERATION Squeegee assembly is packaged with machine. MACHINE INSTALLATION Batteries, battery charger, brush, pad driver and pads must be purchased separately. Consult an authorized distributor for specific pads and brushes. ATTENTION: The use of supplies other than those UNCRATING MACHINE recommended by manufacturer may cause damage. -
Page 8: Machine Setup
OPERATION 5. After connecting cables to bottom battery, carefully 8. After batteries are properly installed, turn on key hang metal battery tray on studs located above and vacuum switch and check battery meter bottom battery. Place top battery into tray with charge level. -
Page 9: Installing Pad Driver Or Brush
OPERATION 3. Turn key switch on (Figure 11). FIG. 11 FIG. 8 4. Place the pad driver/brush on the floor in front of 4. Tighten thumb knobs securely. the scrub head (Figure 12). 5. Connect vacuum hose from machine to squeegee assembly (Figure 9). -
Page 10: Removing Pad Driver Or Brush
OPERATION NOTE: To prevent scrub head skirt damage, always keep machine in transport position when pad driver or brush is not installed. FILLING SOLUTION TANK 1. Transport machine to filling station. Raise squeegee and scrub head when transporting. 2. Turn off key switch. 3. -
Page 11: Adjusting Control Handle Height
OPERATION Check condition of squeegee blades. OPERATING MACHINE 1. Release brush lift pedal from transport position by stepping down on scrub head release pedal (Figure 20). FIG. 18 c. The ESt light will glow when the ESt pump is recycling. ADJUSTING CONTROL HANDLE HEIGHT The control handle has three height settings to accommodate a comfortable operating height. -
Page 12: Operating Est (Option)
OPERATION 2. Turn on ESt switch. During operation the ESt pump will automatically start recycling when ESt pump on light turns on (Figure 25). FIG. 23 NOTE: On rough surfaces it may be necessary to reduce brush pressure. FIG. 25 5. -
Page 13: Operating Accessory Tools (Optional)
OPERATION ATTENTION: Do not operate machine with battery CIRCUIT BREAKERS meter in red zone, battery damage will result. The machine is equipped with two circuit breakers to WARNING: Do Not Pick Up Flammable protect machine from damage. The Main (20amp) and Materials Or Reactive Metals. -
Page 14: Adjusting Pad Pressure
OPERATION ADJUSTING PAD PRESSURE DRAINING TANKS NOTE: On rough surfaces it may be necessary to reduce brush pressure. When to drain recovery tank: To adjust pad pressure, turn adjustment knob – After each use. clockwise to decrease or counterclockwise to increase –... -
Page 15: Draining Solution Tank
OPERATION 1. Transport machine to a flat, dry surface in a well– DRAINING SOLUTION TANK ventilated area for charging. 2. Turn off all switches and key. To drain unused cleaning solution or recycled solution from solution tank, follow steps below: FOR SAFETY: Before leaving or servicing machine, stop on level surface and turn off 1. -
Page 16: Machine Maintenance
OPERATION FOR SAFETY: Do not operate charger unless cord is properly grounded. WARNING: Keep Sparks And Open Flame Away. Keep Battery Hood Open When Charging. 7. The charger will automatically begin charging and shut off when fully charged. 8. After charger has turned off, unplug charger from machine then disconnect charger from wall outlet. -
Page 17: Monthly Maintenance
OPERATION NOTE: Do not take reading immediately after adding distilled water. The water and acid must be thoroughly MONTHLY MAINTENANCE mixed in order for accurate reading. (Every 80 Hours of Operation) 1. Lubricate wheel grease fittings with a water resistant grease. 2. -
Page 18: Transporting Machine
OPERATION TRANSPORTING MACHINE STORING MACHINE When transporting machine by use of trailer or truck, 1. Before storing machine, be certain to rinse tanks and drain machine of all water. be certain to follow tie–down procedures below: 2. Store machine in a dry area with squeegee FOR SAFETY: When using machine, go slow on removed and scrub head in the raised position. - Page 19 OPERATION TROUBLE SHOOTING – continued Vacuum motor does not run. Faulty vacuum switch. Contact Service Center. Main circuit breaker has tripped. Remove obstruction and reset circuit breaker button. Faulty vacuum motor or wiring. Contact Service Center. Worn carbon brushes. Contact Service Center. Little or no solution flow.
-
Page 20: Specifications
OPERATION SPECIFICATIONS MODEL Speed Scrubt 1701 Plus LENGTH 990 mm (39 in) WIDTH 495 mm (19.5 in) HEIGHT 914 mm (36 in) WEIGHT 71Kg (158 lbs), 131Kg (290 lbs) with batteries RECOVERY TANK CAPACITY 28.5L (7.5 gal) SOLUTION TANK CAPACITY 28.5L (7.5 gal) ES OPTION SOLUTION FILL CAPACITY 42.5L (11.25 gal) - Page 21 E1999, 2000, 2004 Tennant Company Printed in U.S.A centro autorizado de piezas y servicio, distribuidor o Nobles is a registered United States trademark of Tennant Company. de cualquiera de las subsidiarias del fabricante. Esta máquina proporcionará un servicio excelente. Sin embargo, los mejores resultados se obtienen a un costo mínimo si:...
- Page 22 OPERACIÓN INDICE MEDIDAS DE SEGURIDAD ....TRANSPORTE DE LA MÁQUINA ... . . ROTULOS DE SEGURIDAD .
-
Page 23: Medidas De Seguridad
OPERACIÓN La información siguiente señala condiciones potencialmente peligrosas para el operador o el MEDIDAS DE SEGURIDAD equipo: PARA SEGURIDAD: Esta máquina está diseñada para el uso 1. No opere la máquina: comercial. Se ha diseñado exclusivamente para – Con líquidos inflamables o cerca de los limpiar pisos duros en un ambiente interior y no vapores inflamables ya que puede ocurrir se fabrica para ningún otro uso. -
Page 24: Rotulos De Seguridad
OPERACIÓN 6. Al transportar máquina: – Use una rampa recomendada al cargar/descargar al/fuera del camión o – Apague la máquina. remolque . – Obtenga ayuda al alzar la máquina. – Use correas de amarre para asegurar la – No alce la máquina al instalar las baterías. máquina al camión o remolque. -
Page 25: Componentes De La Máquina
OPERACIÓN COMPONENTES DE LA MÁQUINA 1. Contacto para la llave 14. Interruptor de ENCENDIDO/ 24. Manguera de aspiración de la 2. Indicador luminoso de APAGADO del tubo de escobilla de goma ENCENDIDO/APAGADO aspiración (Opc.) 25. Conjunto de la escobilla de 3. -
Page 26: Instalación De La Máquina
OPERACIÓN ATENCIÓN: No retire la máquina del pallet haciéndola rodar porque podría averiarla. INSTALACIÓN DE LA MÁQUINA ATENCIÓN: La instalación de la batería debe realizarse DESPUÉS de retirar la máquina del pallet. DESEMBALADO DE LA MÁQUINA El conjunto de la escobilla de goma está embalado con la máquina. - Page 27 OPERACIÓN (–) Puente Negro (–) Rojo Puente FIG. 2 ATENCIÓN: No deje caer la batería en el FIG. 4 compartimento, tanto la batería como su soporte 7. Conecte de nuevo la manguera de aspiración a la podrían deteriorarse. La garantía no cubre estos boquilla del depósito de recuperación como se daños.
-
Page 28: Preparación De La Máquina
OPERACIÓN PREPARACIÓN DE LA MÁQUINA FIJACIÓN DEL CONJUNTO DE LA ESCOBILLA DE GOMA 1. Gire la llave hasta la posición de apagado. PARA SEGURIDAD: Antes de dejar o prestar servicio a la máquina, detenga la máquina sobre una superficie nivelada y apague la máquina. 2. -
Page 29: Extracción Del Impulsor De La Almohadilla O Del Cepillo
OPERACIÓN 4. Coloque el accionador/cepillo de la plancha sobre el piso, delante del cabezal de fregado (Figura 12). FIG. 14 NOTA: Antes de instalar el impulsor de la almohadilla o el cepillo asegúrese de que la superficie de montaje FIG. 12 está... -
Page 30: Llenado Del Depósito De La Disolución
OPERACIÓN 6. Coloque de nuevo la tapa del orificio de llenado del depósito. PARA SEGURIDAD: Al usar la máquina, observe las instrucciones de mezcla y manejo de los recipientes de substancias químicas. ATENCIÓN: Utilice únicamente productos de limpieza recomendados, NO utilice sustitutos. Consulte a un distribuidor autorizado acerca de los productos recomendados. -
Page 31: Operación De La Máquina
OPERACIÓN 2. Baje el conjunto de la escobilla de goma desplazando el botón de elevación de la escobilla de goma a la derecha (Figura 21). FIG. 19 OPERACIÓN DE LA MÁQUINA FIG. 21 3. Encienda la máquina y los interruptores de la aspiración y de la disolución (Figura 22). -
Page 32: Operación De La Opción De Fregado Prolongado
OPERACIÓN 5. Controle el indicador de la presión del cepillo mientras friega. Utilice la máquina sólo cuando el indicador esté en la zona verde. Nunca utilice la máquina con el indicador en la zona roja (Figura 24). NOTA: Si necesita ajustar la presión del cepillo, consulte el apartado de AJUSTES DE LA MÁQUINA. -
Page 33: Operacion De Las Herramientas De
OPERACIÓN 7. Manténgase alejado de obstáculos del suelo como placas eléctricas o rejillas, romperían las CORTACIRCUITOS almohadillas. La máquina está equipada con dos cortacircuitos de 8. No es necesario apagar ningún interruptor durante protección. Los cortacircuitos Principal (20A) y del las paradas cortas, los cepillos y el flujo de la Cepillo (35A). -
Page 34: Ajuste De La Presión De La Almohadilla
OPERACIÓN FIG. 30 FIG. 28 VACIADO DE LOS DEPÓSITOS AJUSTE DE LA PRESIÓN DE LA ALMOHADILLA NOTA: Es posible que sea necesario reducir la presión de la almohadilla en superficies rugosas. Cuándo debe purgarse el tanque de recuperación: Para ajustar la presión de la almohadilla, gire el botón –... -
Page 35: Vaciado Del Depósito De La Disolución
OPERACIÓN CARGA DE LA BATERÍA NOTA: Recargue las baterías SOLO después de un total de 30 minutos de uso o más. Esto prolonga la duración de la batería. Las siguientes instrucciones de carga son válidas exclusivamente para los cargadores de 24V suministrados con la máquina. -
Page 36: Mantenimiento De La Máquina
OPERACIÓN 8. Desconecte el cargador de la máquina cuando éste se haya apagado y a continuación desconecte el cargador del enchufe de la pared. 9. Después de cargar, vuelva a inspeccionar el nivel de flúido de la batería (A) en cada celda de la batería. -
Page 37: Mantenimiento Semanal
OPERACIÓN 3. Abra la tapa transparente y extraiga y limpie el 3. Controle el nivel del electrolito en los elementos filtro del flotador de cierre. Vuelva a colocar bien el de la batería (Consulte el apartado de filtro (Figura 37). MANTENIMIENTO DE LA BATERÍA). -
Page 38: Mantenimiento De La Batería
OPERACIÓN GRAVEDAD ESPECIFICA CARGA DE LA BATERÍA MANTENIMIENTO DE LA BATERÍA a 27 C (80 1.265 100% CARGADA ADVERTENCIA: Mantenga alejada de chispas 1.223 75% CARGADA y llamas expuestas. Al cargar mantenga abierta la cubierta de la batería. 1.185 50% CARGADA 1.148 25% CARGADA PARA SEGURIDAD: Al prestar servicio a la... -
Page 39: Transporte De La Máquina
OPERACIÓN TRANSPORTE DE LA MÁQUINA ALMACENAMIENTO DE LA MÁQUINA Cuando transporte la máquina en un camión o 1. Antes de guardar la máquina, asegúrese de aclarar y vaciar todo el agua de los depósitos de remolque, asegúrese de seguir los pasos siguientes la máquina. -
Page 40: Localización De Averías
OPERACIÓN LOCALIZACIÓN DE AVERÍAS PROBLEMA CAUSA SOLUCIÓN No hay alimentación, no funciona Contacto para la llave defectuoso Contactar con el Servicio Técnico. nada. nada. Las baterías necesitan ser cargadas. Consultar el apartado de CARGA DE LAS BATERÍA. Batería(s) defectuosa(s). Sustituir la(s) batería(s). Cable de la batería suelto. - Page 41 OPERACIÓN LOCALIZACIÓN DE AVERÍAS – continuación PROBLEMA CAUSA SOLUCIÓN Recogida de agua insuficiente. Depósito de recuperación lleno y Vaciar el depósito de recuperación. flotador de cierre activado. Filtro del flotador de cierre del Extraer el filtro y limpiar. interior del depósito de recuperación bloqueado.
-
Page 42: Especificaciones
OPERACIÓN ESPECIFICACIONES MODELO Speed Scrubt 1701 Plus LONGITUD 990 mm (39 pulg) ANCHURA 495 mm (19.5 pulg) ALTURA 914 mm (36 pulg) PESO 71Kg (158 lbs), 131Kg (290 lbs) con baterías CAPACIDAD DEL DEPÓSITO DE RECUPERACIÓN 28.5L (7.5 gal) CAPACIDAD DEL DEPÓSITO DE 28.5L (7.5 gal) LA DISOLUCIÓN CAPACIDAD DE LLENADO DE LA DISOLUCIÓN–ES... -
Page 43: Dimensiones De La Máquina
OPERACIÓN DIMENSIONES DE LA MÁQUINA 990 mm (39 pulg) 914 mm (36 pulg) 495 mm (19.5 pulg) Speed Scrubt 1701 Plus (02–04) -
Page 44: Electrical Diagrams
ELECTRICAL DIAGRAMS DIAGRAMAS ELECTRICAS WIRING DIAGRAM DIAGRAMA DE CABLEADO VOLTAGE INTERRUPT OPTION -58- GRN SWITCH -34- GRN -38- GRN BRUSH SWITCH -50- GRN BATTERY -31- BLK -54- GRN -54- GRN METER PRESSURE INDICATOR GAUGE LIGHT -60- -27- -14- -10- -13- VACUUM SWITCH -20- GRN... - Page 45 ELECTRICAL DIAGRAMS DIAGRAMAS ELECTRICAS LADDER DIAGRAM DIAGRAMA ESCALONADO -60- -GRN- -58- -RED- -33- -BLK- -54- -GRN- -56- -14- -31- -BLK- -RED- -RED- -RED- -RED- -50- -GRN- -ORG- -30- -BRN- -11- -BLK- -YEL- -28- -RED- -17- -BLK- OPTIONAL VOLTAGE -26- -15- -BLK- -RED- -24- -BLU- -7- -BLK-...
-
Page 46: Parts List
PARTS LIST LISTA DE PIEZAS REPLACEMENT BRUSHES AND PAD DRIVER GROUP SUSTITUCIÓN DEL CONJUNTO DEL IMPULSOR DE LA ALMOHADILLA Y CEPILLOS Speed Scrubt 1701 Plus (02–04) - Page 47 PARTS LIST LISTA DE PIEZAS REPLACEMENT BRUSHES AND PAD DRIVER GROUP SUSTITUCIÓN DEL CONJUNTO DEL IMPULSOR DE LA ALMOHADILLA Y CEPILLOS PART # DESCRIPTION QTY. PART # DESCRIPTION QTY. ∇ DASM., BRUSH 17” NYLON SCRUB ∇ DASM., PAD DRIVER 17” 370000 606227 DASM., BRUSH 17”...
-
Page 48: Solution Tank Group
PARTS LIST LISTA DE PIEZAS SOLUTION TANK GROUP GRUPE DEL DEPÓSITO DE DISOLUCIÓN Speed Scrubt 1701 Plus (02–04) - Page 49 DESCRIPTION QTY. PART # DESCRIPTION QTY. 608358 COVER, BATTERY, GREEN 601359 PLATE, SWITCH BACKING 608188 DECAL, NOBLES 7.06” OVAL 578403000 SCREW, M3X.5X20 PAN PHL 230513 CHAIN ASSEMBLY 603331 SPACER, CHARGER PLUG 140825 SCREW, #6X1/2 PANPHL SHTMTL 140019 WASHER, LOCK EXT #6...
-
Page 50: Recovery Tank Group
PARTS LIST LISTA DE PIEZAS RECOVERY TANK GROUP CONJUNTO DESPOSITO RECUPERAR Speed Scrubt 1701 Plus (02–04) - Page 51 PARTS LIST LISTA DE PIEZAS RECOVERY TANK GROUP CONJUNTO DESPOSITO RECUPERAR PART # DESCRIPTION QTY. PART # DESCRIPTION QTY. ∇ DASM., LID & LABEL 613716 601462 CLAMP, 1–1/4 CONDUIT 613287 LABEL, WARNING SCRUB 6X2.25 140016 WASHER, LOCK 0.25 DGASKET, REC. TANK 630367 363503 SCREW, PAN M6X1.0X12...
-
Page 52: Wheel Group
PARTS LIST LISTA DE PIEZAS WHEEL GROUP CONJUNTO DE LA RUEDA Speed Scrubt 1701 Plus (02–04) - Page 53 PARTS LIST LISTA DE PIEZAS WHEEL GROUP CONJUNTO DE LA RUEDA PART # DESCRIPTION QTY. PART # DESCRIPTION QTY. 02994 SCREW, HEX .38–16X0.75 601471 PIN, CLEVIS 0.50D X 2.50L 140017 WASHER, LOCK SPLIT 0.38 578140000 SPRING, COMPR 16.8D 1.2W 25.4L 140028 WASHER, FLAT 0.42B 1.00D .05 603145...
-
Page 54: Scrub Head Group
PARTS LIST LISTA DE PIEZAS SCRUB HEAD GROUP GRUPO DEL CABEZAL DE FREGADO DE DISCO Speed Scrubt 1701 Plus (02–04) - Page 55 PARTS LIST LISTA DE PIEZAS SCRUB HEAD GROUP GRUPO DEL CABEZAL DE FREGADO DE DISCO PART # DESCRIPTION QTY. PART # DESCRIPTION QTY. ∇ DMOTOR, ELE .75HP 165RPM 24V ∇ 13 601499 614113 KIT, REPLACEMENT BAND 56” DBRUSH, CARBON 1PC 603638 602044000 FASTENER, ADJUSTING, SKIRT...
-
Page 56: Plumbing Group
PARTS LIST LISTA DE PIEZAS PLUMBING GROUP GRUPO DE TUBERÍAS Speed Scrubt 1701 Plus (02–04) - Page 57 PARTS LIST LISTA DE PIEZAS PLUMBING GROUP GRUPO DE TUBERÍAS PART # DESCRIPTION QTY. PART # DESCRIPTION QTY. 601489 FITTING, BRS STR PM06X2.0 NIP 069762095 SCREW, 10–24X1/4 SKSET 150420 FITTING, 3/8M X 3/8F ELB 90° 601472 COUPLING ∇ DFILTER, INLINE 80 MESH 1005302 601473 ROD, WATER VALVE...
-
Page 58: Vacuum Motor Group
PARTS LIST LISTA DE PIEZAS VACUUM MOTOR GROUP CONJUNTO DEL MOTOR DE ASPIRACIÓN Speed Scrubt 1701 Plus (02–04) - Page 59 PARTS LIST LISTA DE PIEZAS VACUUM MOTOR GROUP CONJUNTO DEL MOTOR DE ASPIRACIÓN PART # DESCRIPTION QTY. PART # DESCRIPTION QTY. DSOLENOID, 24VDC (BRUSH) 630432 SCREW, HEX M06 X 1.0 X 50 610742 140000 WASHER, FLAT 1/4 08712 NUT, HEX LOCK M6 X 1.0 NL DHOSE, VAC 1–1/2X15”...
-
Page 60: Squeegee Group
PARTS LIST LISTA DE PIEZAS SQUEEGEE GROUP CONJUNTO PALETA Speed Scrubt 1701 Plus (02–04) - Page 61 PARTS LIST LISTA DE PIEZAS SQUEEGEE GROUP CONJUNTO PALETA PART # DESCRIPTION QTY. PART # DESCRIPTION QTY. DHOSE, VAC 1–1/2”X24” W/CUFFS 160617 140000 WASHER, FLAT 1/4 140237 SCREW, HEX .50–13X1.00 140536 NUT, WING .25–20 140024 WASHER, LOCK 0.50 601457 STRIP, REAR RETAINER DBLADE, SQ.
-
Page 62: Control Handle Group
PARTS LIST LISTA DE PIEZAS CONTROL HANDLE GROUP MANIJA GRUPO PART # DESCRIPTION QTY. PART # DESCRIPTION QTY. 613358 HANDLE, GREEN 578186000 WASHER, FLAT 601422 PIN, HANDLE LATCH 578082000 SPACER 601470 SPRING, CMPR 12.2D 1.0W 25.4L 578002000 ARM, TRIGGER 601421 TUBE, HANDLE LATCH 601429 CONSOLE, TRIGGER... -
Page 63: Control Console Group
PARTS LIST LISTA DE PIEZAS CONTROL CONSOLE GROUP CONJUNTO CONSOLA DE CONTROLES PART # DESCRIPTION QTY. PART # DESCRIPTION QTY. DMETER, BATTERY VOLTAGE 130015 610723 PANEL, CONSOLE BLACK DSWITCH, ROCKER 250VAC 10A DBREAKER, CIRCUIT 20AMP 608605 130752 DSWITCH, ROCKER 28VDC SPST DBREAKER, CIRCUIT 35AMP 630419 602951... -
Page 64: Battery And Charger Group
PARTS LIST LISTA DE PIEZAS BATTERY AND CHARGER GROUP CONJUNTO DE BATERÍA Y CARGADOR Speed Scrubt 1701 Plus (02–04) - Page 65 PARTS LIST LISTA DE PIEZAS BATTERY AND CHARGER GROUP CONJUNTO DE BATERÍA Y CARGADOR PART # DESCRIPTION QTY. PART # DESCRIPTION QTY. DCABLE, BATTERY 6 BLK X 24” DWIRE ASM., #6 X 24” BLK 602871 603208 DWIRE ASM., #6 X 12” RED 130869 BATTERY, 12VDC 130AH (WET) 603207...
-
Page 66: Options
OPTIONS OPCIONES ESt (EXTENDED SCRUB) KIT CONJUNTO DEL SISTEMA ESt 12 13 Speed Scrubt 1701 Plus (02–04) - Page 67 OPTIONS OPCIONES ESt (EXTENDED SCRUB) KIT CONJUNTO DEL SISTEMA ESt PART # DESCRIPTION QTY. PART # DESCRIPTION QTY. DKIT, ESt & WAND PUMP 603171 140016 WASHER, LOCK 0.25 ∇ DKIT, EXTENDED SCRUB (ESt) 603172 608322 SCREW, TRS M6X1.0X16 PHL DSENSOR, LIQUID LEVEL 28VDC 603166 578008000 SCREW, PAN M5X0.8X30 PHL...
-
Page 68: Wand Pump Kit
OPTIONS OPCIONES WAND PUMP KIT CONJUNTO DE LA BOMBA DEL TUBO Speed Scrubt 1701 Plus (02–04) - Page 69 OPTIONS OPCIONES WAND PUMP KIT CONJUNTO DE LA BOMBA DEL TUBO PART # DESCRIPTION QTY. PART # DESCRIPTION QTY. DKIT, ESt & WAND PUMP 603171 630252 FITTING, BRS PM12/PF06 BUSHING ∇ DKIT, WAND PUMP 603173 150538 FITTING, PLSTC STR PM06/BM06 DPUMP, SOL 24VDC 630136 606325...
-
Page 70: Hour Meter And Low Voltage Interrupter Kits
OPTIONS OPCIONES HOUR METER AND LOW VOLTAGE INTERRUPTER KITS CONTADOR DE HORAS Y CONJUNTO DEL INTERRUPTOR DE BAJO VOLTAJE PART # DESCRIPTION QTY. PART # DESCRIPTION QTY. DKIT, HOUR METER ∇ DKIT, LOW VOLTAGE INTERRUPTER 603174 610724 (FOR MACHINES MANUFACTURED ∇... -
Page 71: Wet Pick-Up Tool Kit
OPTIONS OPCIONES WET PICK–UP TOOL KIT KIT DE HERRAMIENTA MOJADO PART # DESCRIPTION QTY. PART # DESCRIPTION QTY. ∇ DKIT, WET PICK–UP TOOL DCONNECTOR, 1–1/2 VAC HOSE 190928 160451 ∇ 1 DWAND, TWO BEND ALUMINUM DHOSE, VAC 1–1/2X10’ (3M) 6108.1 160481 DRING, LOCK BRASS 605257... -
Page 72: Deluxe Power Wand Group
OPTIONS OPCIONES DELUXE POWER WAND GROUP GRUPO DEL TUBO ELÉCTRICO DELUXE Speed Scrubt 1701 Plus (02–04) - Page 73 OPTIONS OPCIONES DELUXE POWER WAND GROUP GRUPO DEL TUBO ELÉCTRICO DELUXE PART # DESCRIPTION QTY. PART # DESCRIPTION QTY. ∇ DASM., DELUXE POWER WAND 578905000 578154000 BRACKET, HANDLE DFITTING, 1/4M QD CPLR PLUG BR 578060000 WAND, DOUBLE BEND 578091000 578077000 BRACKET, VALVE MOUNTING 578164000 GROMMET, 0.38ID, 0.62GD, .06GW...
-
Page 74: Power Wand Group
OPTIONS OPCIONES POWER WAND GROUP GRUPO DEL TUBO ELÉCTRICO Speed Scrubt 1701 Plus (02–04) - Page 75 OPTIONS OPCIONES POWER WAND GROUP GRUPO DEL TUBO ELÉCTRICO PART # DESCRIPTION QTY. PART # DESCRIPTION QTY. ∇ DWAND ASM., POWER 579908 579135 SCREW, SELF TD UNITED DFITTING, BRS, QDC, PM04 PLUG 578091000 579103 RETAINER, WAND BLADE DBLADE, SQUEEGEE, FRONT 578160000 CLAMP, HOSE, 11–13MM EAR 579239...
-
Page 76: Power Wand Hose Group
OPTIONS OPCIONES POWER WAND HOSE GROUP CONJUNTO DE LA MANGUERA DEL TUBO ELÉCTRICO PART # DESCRIPTION QTY. PART # DESCRIPTION QTY. ∇ DHOSE ASM., POWER WAND 578903000 578276000 HOSE, VAC 1-1/2 X 10’ GRAY DFITTING, 3/8M X 1/4H QC DCONNECTOR, QUICK FEMALE 578318000 578071000 140325... -
Page 77: Quick Change Battery Kit
OPTIONS OPCIONES QUICK CHANGE BATTERY KIT KIT DE CAMBIO INMEDIATO DE BATERÍA PART # DESCRIPTION QTY. PART # DESCRIPTION QTY. ∇ DKIT, QUICK CHANGE BATTERY DBOOT, BATTERY CABLE BLACK 604341 611221 DASM., CABLE W/RED CONNECT DBOOT, BATTERY CABLE RED 603210 611222 QUICK CHANGE DCAP, BATTERY PLSTC... -
Page 78: Battery Connector Mount Kit
OPTIONS OPCIONES BATTERY CONNECTOR MOUNT KIT KIT DE MONTAJE DE LOS CONECTORES DE LA BATERÍA PART # DESCRIPTION QTY. PART # DESCRIPTION QTY. ∇ DKIT, BATTERY CONNECTOR 606689 140019 WASHER, LOCK EXT #06 MOUNT 2728.12 SCREW, 6–32 X .75 PAN PHL 140887 SCREW, 10–24X .38 PAN PHL 140519...
Need help?
Do you have a question about the Speed Scrub1701 Plus and is the answer not in the manual?
Questions and answers