Table of Contents
Advertisement
Quick Links
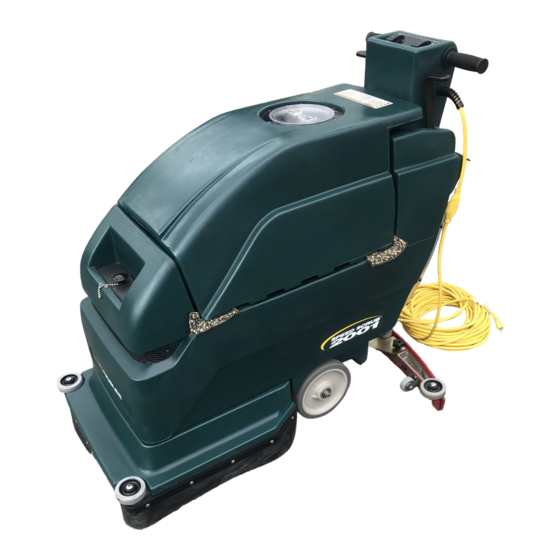
Speed Scrub
Model No.:
612943
612944 – Pac
612945 – Can. Pac
NOBLES
12875 RANSOM STREET
HOLLAND MI 49424 U.S.A.
CUSTOMER SERVICE: 1-800-365-6625
FAX: 1–800–678–4240
Home Find... Go To..
ENGLISH - ESPAÑOL
t
2001
Battery Automatic Scrubber
Fregadora Automática Batería
Operator and Parts Manual
Manual de Operación y de Piezas
612993
Rev. 00 (01-02)
Advertisement
Table of Contents

Related Manuals for Nobles 612943


Summary of Contents for Nobles 612943
- Page 1 Speed Scrub 2001 Battery Automatic Scrubber Fregadora Automática Batería Operator and Parts Manual Model No.: Manual de Operación y de Piezas 612943 612944 – Pac 612945 – Can. Pac NOBLES 12875 RANSOM STREET HOLLAND MI 49424 U.S.A. 612993 CUSTOMER SERVICE: 1-800-365-6625 FAX: 1–800–678–4240...
-
Page 2: Table Of Contents
E2002 Tennant Company Printed in U.S.A This machine will provide excellent service. However, Nobles and Speed Scrub are registered United States trademarks of the best results will be obtained at minimum costs if: Tennant Company. Specifications and parts are subject to change without notice. -
Page 3: Safety Precautions
OPERATION 5. When servicing machine: SAFETY PRECAUTIONS – Avoid moving parts. Do not wear loose jackets, shirts, or sleeves. – Block machine tires before jacking This machine is intended for commercial use. It is machine up. suited to scrub floors in an indoor environment and is –... -
Page 4: Machine Components
OPERATION MACHINE COMPONENTS 1. Control Grips 14. Squeegee Assembly 2. Vacuum ON/OFF Switch 15. Control Console 3. Brush ON/OFF Switch 16. Recovery Tank 4. Battery Meter 17. Recovery Tank Lid 5. Brush Motor Circuit Breaker 18. Solution Tank Fill Door 6. -
Page 5: Machine Installation
OPERATION MACHINE INSTALLATION UNCRATING MACHINE Carefully check carton for signs of damage. Report damages at once to carrier. Check carton contents to ensure all accessories are included. To uncrate your machine, remove straps and raise brush head. To raise brush head, step down firmly on FIG. -
Page 6: Machine Setup
OPERATION MACHINE SETUP PRE–OPERATION CHECKS 1. Sweep and dust mop floor. 2. Check battery meter charge level to ensure batteries are fully charged (See BATTERY CHARGING). 3. Check that a pad/brush is installed. FIG. 4 4. Check that squeegee is installed. 3. -
Page 7: Filling Solution Tank
OPERATION 3. Open solution fill door at front of machine and fill solution tank with 38L (10 gal) of clean water, 60°C (140°F) maximum temperature. Or use the rear fill port to fill solution tank. The clear tube below the fill port has 19L (5 gal) increment markers to indicate amount of water in tank (Figure 9). -
Page 8: Machine Operation
OPERATION 4. Turn vacuum switch to the on position. MACHINE OPERATION 5. Push solution flow lever forward to desired flow rate. Solution will immediately begin to flow once lever is activated (Figure 13). FOR SAFETY: Do not operate machine unless operator manual is read and understood. -
Page 9: Brush Motor Circuit Breaker
OPERATION 2. If more scrubbing pressure is needed for small heavily soiled areas, simply pull brush lift lever BRUSH MOTOR CIRCUIT BREAKER upward while operating (Figure 15). Machine is equipped with a circuit breaker to protect brush motor from damage. If the brush motor circuit breaker should trip, it can not be reset immediately. -
Page 10: Draining Solution Tank
OPERATION BATTERY CHARGING NOTE: Recharge batteries ONLY after a total of 30 minutes of use or more. This will prolong battery life. The following charging instructions are intended for chargers supplied with machine. Only use a charger with the following specifications to prevent battery damage. -
Page 11: Machine Maintenance
OPERATION MACHINE MAINTENANCE To keep machine in good working condition, simply follow machines daily, weekly and monthly maintenance procedures. FOR SAFETY: Before leaving or servicing machine, stop on level surface and turn off FIG. 21 machine. 5. Plug charger DC output connector to battery FOR SAFETY: When servicing machine, connector located near battery compartment. -
Page 12: Weekly Maintenance
OPERATION WEEKLY MAINTENANCE (Every 20 Hours of Use) 1. Check fluid level in battery cells. 2. Clean battery tops from corrosion. 3. Check for loose or corroded battery cables. MONTHLY MAINTENANCE (Every 80 Hours of Use) FIG. 25 1. Flush solution system. Pour 11.3 liters (3 gal) of 3. -
Page 13: Storing Machine
OPERATION STORING MACHINE RECOMMENDED STOCK ITEMS Store machine in a dry area in the upright position. Refer to Parts List section for recommended stock Before storing machine be certain to flush tanks and items. Stock Items are clearly identified with a bullet drain machine of all water. -
Page 14: Specifications
OPERATION TROUBLE SHOOTING – CONTINUED PROBLEM CAUSE SOLUTION Poor water pick up. Recovery tank is full. Empty recovery tank. Ball float shutoff screen inside Remove screen and clean. recovery tank is clogged. Squeegee is clogged with debris. Clean squeegee. Squeegee blades are worn. Replace squeegee blades. - Page 15 OPERACIÓN Este manual acompaña a todos los modelos estándar nuevos. En él se indican las instrucciones necesarias DATOS DE LA MÁQUINA para la utilización y el mantenimiento de la máquina. Lea el manual entero para comprender el Sírvase llenar los datos en el momento de la preparación funcionamiento de la máquina antes de utilizarla o para referencia en el futuro.
- Page 16 OPERACIÓN 4. Antes de estacionar o revisar la máquina: MEDIDAS DE SEGURIDAD – Deténgase en una superficie plana. – Apague la máquina. 5. Al revisar la máquina: Esta máquina está destinada al uso comercial. Está – Evite las partes en movimiento. No lleve diseñada para fregar suelos en recintos cerrados y no chaquetas, camisas o mangas sueltas.
- Page 17 OPERACIÓN COMPONENTES DE LA MÁQUINA 1. Mandos de control 14. Conjunto de la escobilla de goma 2. Interruptor de Encendido/Apagado (ON/OFF) de 15. Consola de control la aspiración 16. Depósito de recuperación 3. Interruptor de Encendido/Apagado (ON/OFF) del 17. Tapa del depósito de recuperación cepillo 18.
- Page 18 OPERACIÓN INSTALACIÓN DE LA MÁQUINA DESEMBALADO DE LA MÁQUINA Compruebe cuidadosamente si la caja de cartón muestra daños. En caso de que así sea informe inmediatamente de los daños al transportista. Controle el contenido de la caja para asegurarse que incluye todos los accesorios.
- Page 19 OPERACIÓN PREPARACIÓN DE LA MÁQUINA COMPROBACIONES PREVIAS A LA PUESTA EN FUNCIONAMIENTO 1. Barra el suelo para eliminar partículas y otros restos. 2. Controle el nivel de carga de la batería para asegurarse que de las baterías estén completamente cargadas en caso necesario FIG.
- Page 20 OPERACIÓN 6. Conecte el impulsor del cepillo o de la almohadilla al cubo del motor. Alinee los tres pernos de montaje con las ranuras del cubo del motor. Gire rápidamente el impulsor hacia el sujetador de resorte del cubo del motor. Asegúrese de que el impulsor de la almohadilla está...
Need help?
Do you have a question about the 612943 and is the answer not in the manual?
Questions and answers