Advertisement
Quick Links
ARF Helicopter
ARF Helicopter
ARF Helicopter
ARF Helicopter
ARF Helicopter
- HIGH QUALITY FIBERGLASS
- MAIN ROTOR DIAMETER
- TAIL ROTOR DIAMETER
- HEIGHT
- BLADES
- ENGINE
Century Helicopter Products
Twinstar
Twinstar
Twinstar
Twinstar
Twinstar
Detail Manual
Specifications
Designed and Developed in USA
2nd Edition March 2002, All rights reserved.
49.5 in
9.7 in
15.2 in
550mm
32 ~ 38
Advertisement

Summary of Contents for Century Helicopter Products Twinstar CN1075
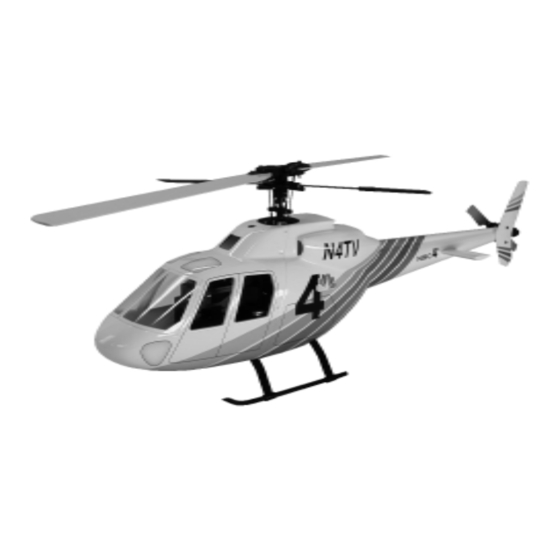
- Page 1 - HIGH QUALITY FIBERGLASS - MAIN ROTOR DIAMETER 49.5 in - TAIL ROTOR DIAMETER 9.7 in - HEIGHT 15.2 in - BLADES 550mm - ENGINE 32 ~ 38 Century Helicopter Products Designed and Developed in USA 2nd Edition March 2002, All rights reserved.
-
Page 2: Pre-Assembly Information
Care has been taken in the filling and packaging of each bag. However, mistakes do happen. If there is a shortage or missing hardware, please contact us at: Century Helicopter Products 523 Sinclair Frontage Road Milpitas, CA 95035 Fax:408-942-9524 www.centuryheli.com... - Page 3 Twinstar Detail Construction Manual Detail Instructions: Detail Instructions: Detail Instructions: Detail Instructions: Detail Instructions: This manual has been written to cover the assembly of the Twinstar scale helicopter kit and the ARF Painted version. This is the detail construction of the Twinstar fuselage components that work in cooperation with the scale mechanics instruction manual.
-
Page 4: Section One: Completing The Helicopter Mechanics
Section One: Completing the helicopter mechanics. Section One: Completing the helicopter mechanics. Section One: Completing the helicopter mechanics. Section One: Completing the helicopter mechanics. Section One: Completing the helicopter mechanics. Twinstar Detail Manual Twinstar Detail Manual Twinstar Detail Manual Twinstar Detail Manual Twinstar Detail Manual The mechanics (completely built helicopter without body) should be flight ready. - Page 5 STEP 2 Fuselage Side Supports STEP 2 Fuselage Side Supports Twinstar Detail Manual Twinstar Detail Manual Twinstar Detail Manual STEP 2 Fuselage Side Supports STEP 2 Fuselage Side Supports STEP 2 Fuselage Side Supports Twinstar Detail Manual Twinstar Detail Manual During flight the fuselage will vibrate and depending on the rotor speed, this vibration can be strong enough to have the some part of the fiberglass contact the mechanics.
- Page 6 STEP 3 Attaching the Tail Boom & Tail Pushrod STEP 3 Attaching the Tail Boom & Tail Pushrod STEP 3 Attaching the Tail Boom & Tail Pushrod STEP 3 Attaching the Tail Boom & Tail Pushrod STEP 3 Attaching the Tail Boom & Tail Pushrod Twinstar Detail Manual Twinstar Detail Manual Twinstar Detail Manual...
- Page 7 STEP 5 Vertical Tail Fin STEP 5 Vertical Tail Fin STEP 5 Vertical Tail Fin STEP 5 Vertical Tail Fin STEP 5 Vertical Tail Fin Twinstar Detail Manual Twinstar Detail Manual Twinstar Detail Manual Twinstar Detail Manual Twinstar Detail Manual The vertical tail fin is attached with the short portion on the bottom.
- Page 8 STEP 7 Horizontal Stabilizers STEP 7 Horizontal Stabilizers STEP 7 Horizontal Stabilizers Twinstar Detail Manual Twinstar Detail Manual STEP 7 Horizontal Stabilizers STEP 7 Horizontal Stabilizers Twinstar Detail Manual Twinstar Detail Manual Twinstar Detail Manual The horizontal stabilizers are attached to the tail boom by bonding the edge of the fin to the matching molded protrusion on the tail boom.
- Page 9 Twinstar Detail Manual Twinstar Detail Manual Twinstar Detail Manual STEP 9 Attach the Main Rotor Head STEP 9 Attach the Main Rotor Head STEP 9 Attach the Main Rotor Head Twinstar Detail Manual Twinstar Detail Manual STEP 9 Attach the Main Rotor Head STEP 9 Attach the Main Rotor Head Now the rotor head assembly must be re-attached, insert the main shaft through the top bearing, the mast stopper and insert the...
- Page 10 Twinstar Detail Manual Twinstar Detail Manual Twinstar Detail Manual STEP 11 Bottom Hatch STEP 11 Bottom Hatch STEP 11 Bottom Hatch STEP 11 Bottom Hatch STEP 11 Bottom Hatch Twinstar Detail Manual Twinstar Detail Manual If an exhaust diverter is to be used, install before the bottom hatch is attached.
- Page 11 STEP 14 Final Balancing STEP 14 Final Balancing Twinstar Detail Manual Twinstar Detail Manual STEP 14 Final Balancing STEP 14 Final Balancing STEP 14 Final Balancing Twinstar Detail Manual Twinstar Detail Manual Twinstar Detail Manual Congratulations, you have a fine looking scale Twinstar helicopter kit. The final work is in the balancing of the helicopter before flying.
-
Page 12: Section Three: Preparing And Painting The Kit Version
Section Three: Preparing and painting the kit version. Section Three: Preparing and painting the kit version. Section Three: Preparing and painting the kit version. Section Three: Preparing and painting the kit version. Section Three: Preparing and painting the kit version. This section is written to cover painting and detailing of fiberglass components using in Century’s scale helicopter kits. - Page 13 The prepared finish will have very fine score marks usually seen when the part is held to the light at a slight angle. 2. This is the time to rough sand any accessories or small parts, using the 320 grit sandpaper, that will be as- sembled and attached at different positions on the fuselage.
- Page 14 Exhaust Diverter 40-60 size, 45° Degree..............1 CN3058 32-38 Scale Muffler (optional)................. 1 CN3059 46-50 Scale Muffler (optional)................. 1 CNT4444 Branch Valve w/Filter & Filling Nozzle Set............. 1 Century Helicopter Products 523 Sinclair Frontage Rd., Milpitas, CA 95035 USA Fax:1-408-942-9524 www.centuryheli.com email: info@centuryheli.com...


Need help?
Do you have a question about the Twinstar CN1075 and is the answer not in the manual?
Questions and answers