
Related Manuals for ERNITEC Orion/3-DN Outdoor


Summary of Contents for ERNITEC Orion/3-DN Outdoor
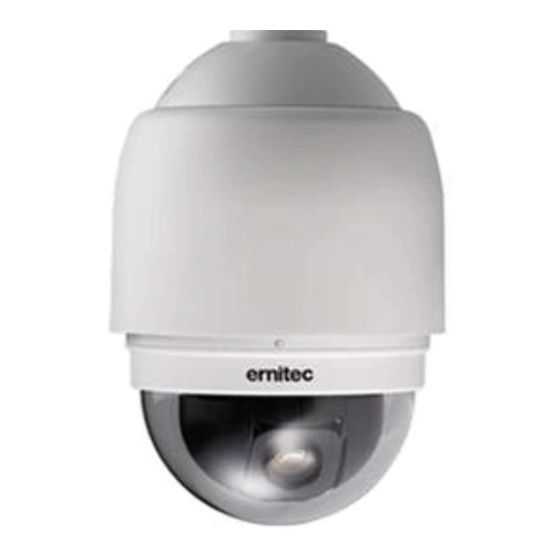
- Page 1 Orion/3-DN High Speed Dome Camera Outdoor Dome Installation & User Instructions 00P3H8110ZXSEC6...
- Page 2 Orion/3-DN Outdoor Preface The information given in this manual was current when published. The company reserves the right to revise and improve its products. All specifications are subject to change without notice. Notice To work with the Integrated High Speed Dome Cameras, any installer or...
- Page 3 Orion/3-DN Outdoor This symbol on the product or on its packaging indicates that this product shall not be treated as household waste in accordance with Directive 2002/96/EC. Instead it shall be handed over to the applicable collection point for the recycling of electrical and electronic equipment.
- Page 4 Orion/3-DN Outdoor Cautions Handle the camera carefully Do not abuse the camera. Avoid striking, shaking, etc. The camera could be damaged by improper handing or storage. Installing electricity wiring carefully Ask qualified personnel of electrical wiring for the installation. Please note that input electricity to the unit is at tolerance of DC 12V/AC 24V ±...
- Page 5 Orion/3-DN Outdoor Do not use strong or abrasive detergents when cleaning the camera body Use a dry cloth to clean the camera when dirty. In case the dirt is hard to remove, use a mild detergent and wipe gently.
-
Page 6: Table Of Contents
Orion/3-DN Outdoor Table of Contents Overview ..........................7 Product Features ......................8 Product Application ...................... 9 Connecting the Dome Camera ................... 10 Package Contents ..................... 10 Switch/Connector Definition ..................11 Communication Switch Setting .................. 12 ID Setting ........................13 Camera Control Protocol Setting ................14 22-Pin Connector Definition .................. - Page 7 Orion/3-DN Outdoor PT POSITION (S Series Model) ..............45 SPEED BY ZOOM ..................46 AUTO CALI. (Auto Calibration) ............... 46 PASSWORD (S Series Model) ............... 46 OSD AUTO CLOSE (S Series Model) ............48 SYSTEM RESET ................... 48 EXIT ....................... 48 3.3.9 ID DISPLAY ....................
-
Page 8: Overview
Orion/3-DN Outdoor Overview The Dome Camera delivers up to 432x zoom ratio (T model) to capture clear image in the distance. Continuous Auto Focus, Back Light Compensation, Auto Exposure and Digital Slow Shutter functions are provided for clear and high quality image. Removable IR cut filter ensures 24 hours operation, while Privacy Masks are specially designed to avoid any intrusive monitoring at specific region;... -
Page 9: Product Features
Orion/3-DN Outdoor Product Features Precise and Accurate Performance Auto Calibration Preset accuracy of 0.225° Preset speed up to 400°/sec. Proportional Pan & Tilt Speed Preset Position/Sequence /Auto-Pan /Cruise Dynamic Applications Multi-language OSD Schedule function ... -
Page 10: Product Application
Orion/3-DN Outdoor Product Application Connect the Dome Camera to other devices as shown in the diagram to complete a video surveillance solution. NOTE: To extend the network distance up to 1.2 km (4000 feet) and to protect the connected devices, it is highly recommended to place a repeater at the mid-point. -
Page 11: Connecting The Dome Camera
Orion/3-DN Outdoor Connecting the Dome Camera Please refer to the following sections to connect, set and operate the Dome Camera. In order to control the Integrated High Speed Dome Camera, basically a control keyboard or other control device is required. -
Page 12: Switch/Connector Definition
Orion/3-DN Outdoor Switch/Connector Definition Configuring the Dome Camera’s ID and communication protocol are required before connecting the Dome Camera to other devices. The switches used for configuring these settings are located on the camera’s back plate. Additionally, the 22-Pin Connector for Data Cable connection and ISP Connector for firmware upgrade kit connection are also set on the back plate. -
Page 13: Communication Switch Setting
Orion/3-DN Outdoor Communication Switch Setting The Dome Camera’s communication switches are specified in the table below. Communication Switch SW 1 RS-485 Setting SW 2 SW 3 Termination SW 4 Line Lock SW 5 Factory Default Reset SW 6 Reserved RS-485 is the interface that communicates the Dome Camera and its control device;... -
Page 14: Id Setting
Orion/3-DN Outdoor ID Setting Please change the Dome Camera’s ID if there is more than one Dome Camera on the same installation site. Use the switch to change your Speed Dome Camera’s ID by turning the arrow to the desired number respectively. -
Page 15: Camera Control Protocol Setting
9600 Kalatel-485 9600 Kalatel-422 4800 *Only function of Ernitec protocol is fully verified. Select protocol: Pelco D, with switch no. 01 and baud rate 2400, for instance, the protocol switch should be set as below. Decimal Digit Single Digit NOTE: The number “0” should locate upwards as shown in above... -
Page 16: 22-Pin Connector Definition
Orion/3-DN Outdoor 22-Pin Connector Definition An AC 24V Data Cable is shipped with the Integrated High Speed Dome Camera for a quick installation for demo or testing usage; see the diagram below. The Dome Camera’s 22-pin connector definition will also be specified in the latter part. - Page 17 Orion/3-DN Outdoor The Dome Camera’s 22-pin connector definition is listed as shown below. Definition Definition AC 24-1/DC (+) ALM-1 ALM NC ALM-3 AC 24-2/DC (-) ALM-2 ALM NO ALM-4 ALM-5 ALM COM ALM-6 ALM-7 ALM-8 ALM GND VGND ISOG Video...
-
Page 18: Rs-485 Connector Definition
Orion/3-DN Outdoor RS-485 Connector Definition RS-485 is the interface that communicates the Dome Camera and its control device. Please connect the control keyboard to the speed dome through the terminal block. The recommended cables for RS-485 communication are CAT 5 cables; maximum cable length for over 24-gauge wire is 4000 feet (1219 meters). -
Page 19: Operation And Configuration
Orion/3-DN Outdoor Operation and Configuration Display Format The information shown on the screen is described in terms of OSD display, position and function description in the table below. Position Function OSD Display Description Motion MOTION Alarm Detect Message Alarm ALARM 1... -
Page 20: Osd Menu Tree
Orion/3-DN Outdoor OSD Menu Tree The OSD setup menu structure of each model is listed separately in the following section. The star symbol indicates the factory default. For detailed function description, please refer to 3.3 Configuration Menu. 3.2.1 G/V/T Model... - Page 21 Orion/3-DN Outdoor Item Layer 1 Layer 2 Layer 3 Default AUTO CALI. <ON>, <OFF> SYSTEM RESET EXIT ID DISPLAY <ON>, <OFF> TITLE DISPLAY <ON>, <OFF> TITLE SETTING <01> ~ <16> PRESET SET <001>~<256> ENTER PRESET PRESET RUN <001>~<256> ENTER EXIT...
- Page 22 Orion/3-DN Outdoor Item Layer 1 Layer 2 Layer 3 Default TRANSPARENCY <ON>, <OFF> <BLACK>, <HI GRAY>, <LO GRAY>, <WHITE>, COLOR <RED>, <GREEN>, <BLUE>, <CYAN>, <YELLOW>, BLACK <MAGENTA> H CENTER: L/R V CENTER: D/U SET MASK <01> ~ <24> H SIZE <000> ~ <080>...
-
Page 23: P/M Model
Orion/3-DN Outdoor 3.2.2 P/M Model Item Layer 1 Layer 2 Layer 3 Default <ENGLISH>, <JAPANESE>, <PORTUGUESE>, <SPANISH>, <FRENCH>, LANGUAGE <GERMAN>, <ITALIAN>, <POLISH>, <RUSSIAN>, <TRADITIONAL ENGLISH CHINESE>, <SIMPLIFIED CHINESE>, <TURKISH> DEFAULT <ON>, <OFF> CAMERA BLC LEVEL <00> ~ <30> <ON> EXIT + SAVE: YES BACKLIGHT <OFF>... - Page 24 Orion/3-DN Outdoor Item Layer 1 Layer 2 Layer 3 Default SEQUENCE POINT <01> ~ <64> PRESET POS. <001> ~ <255>, <END> SPEED <01> ~ <15> DWELL TIME <000> ~ <127> SEC. RUN SEQUENCE ENTER EXIT AUTOPAN LINE <1> ~ <4>...
- Page 25 Orion/3-DN Outdoor Item Layer 1 Layer 2 Layer 3 Default SET HOUR <00> ~ <23> SET MINUTE <00> ~ <59> EXIT+SAVE SWITCH <ON>, <OFF> POINT <01> ~ <32> HOUR <00> ~ <23> MINUTE <00> ~ <59> ☆ NONE NO FUNCTION PRESET PRESET POINT <001>...
-
Page 26: S6 Model
Orion/3-DN Outdoor 3.2.3 S6 Model Item Layer 1 Layer 2 Layer 3 Default <ENGLISH>, <JAPANESE>, <PORTUGUESE>, <SPANISH>, <FRENCH>, LANGUAGE <GERMAN>, <ITALIAN>, <POLISH>, <RUSSIAN>, <TRADITIONAL ENGLISH CHINESE>,<SIMPLIFIED CHINESE>, <TURKISH> DEFAULT <ON>, <OFF> CAMERA <ON> BACKLIGHT <OFF> AF MODE <NORMAL>, <Z. TRIG.>, <PTZ TRIG.>... - Page 27 Orion/3-DN Outdoor Item Layer 1 Layer 2 Layer 3 Default SYSTEM RESET <YES> SYSTEM RESET DEFAULT SYSTEM <YES> EXIT <YES> EXIT ID DISPLAY <ON>, <OFF> TITLE DISPLAY <ON>, <OFF> TITLE SETTING <01> ~ <16> PRESET SET <001>~<256> ENTER PRESET PRESET RUN <001>~<256>...
- Page 28 Orion/3-DN Outdoor Item Layer 1 Layer 2 Layer 3 Default FRAME DISABLE NONE; MOTION: <01> ~ <04> THRESHOLD NONE; MOTION: <001> ~ <255> EXIT WDR FUNCTION <ON>, <OFF> PRIVACY SWITCH <ON>, <OFF> TRANSPARENCY <ON>, <OFF> <BLACK>, <WHITE>, <RED>, <GREEN>, <BLUE>,...
-
Page 29: Configuration Menu
Orion/3-DN Outdoor Configuration Menu The detailed functions and parameter settings of your high speed dome can be set through the OSD (On Screen Display) menu with a control device, such as a control keyboard. The items in each model’s OSD menu are described in the following sections. -
Page 30: Language
Orion/3-DN Outdoor 3.3.1 LANGUAGE The camera supports multi-language OSD operation; the available languages include English, Japanese, Portuguese, Spanish, French, German, Italian, Polish, Russian, Traditional Chinese, Simplified Chinese and Turkish. You can straight set a wanted language on the MAIN PAGE 1, as shown below. -
Page 31: Focus
Orion/3-DN Outdoor MAIN PAGE 1 LANGUAGE ENGLISH DEFAULT CAMERA BACKLIGHT FOCUS AUTO AE MODE ENTER WBC MODE AUTO SETUP MENU 1 ENTER SETUP MENU 2 ENTER P/M Model: The Backlight Compensation Level ranges from 00 to 30. BLC LEVEL EXIT+SAVE NOTE: If this function is enabled, the WDR function (for P and M models) will be disabled automatically. - Page 32 Orion/3-DN Outdoor Normal AF (Auto Focus) Mode The Dome Camera will automatically adjust the focus of the picture. Zoom Trigger Mode When users press the TELE or the WIDE keys on a control keyboard or other control devices to change the zoom, the Dome Camera will...
- Page 33 Orion/3-DN Outdoor P/M Model: AUTO The optimum focus is achieved by the internal digital circuit. Users can adjust the minimum auto focus range for some special conditions; the options include <1.5 m> (P model only), <1 m>, <30 cm>, <10 cm> and <1 cm>.
-
Page 34: Ae Mode
Orion/3-DN Outdoor Normal Mode In this mode, the camera will keep in focus automatically and continuously in any condition. Zoom Trigger Mode In this mode, AF is activated at the time when zoom is changed. PTZ Trigger Mode ... - Page 35 Orion/3-DN Outdoor G/V/T Model: EXPOSURE COMPENSATION The exposure value ranges from -10.5dB to 10.5dB. Select <OFF> to disable the function. NOTE: For G/V/T model, this function can be adjusted through <Brightness>/<Iris> key on the control keyboard. AE MODE AUTO ...
- Page 36 Orion/3-DN Outdoor MANUAL In this mode, users can adjust shutter speed (1/10000 ~ 1), iris value (F1.6 ~ F28) and gain value (-3dB ~ 28dB). EXIT Exit the AE MODE menu and go back to the Main Page 1 to continue to set the WBC mode.
- Page 37 Orion/3-DN Outdoor With this option, the priority of AGC is higher than SHUTTER and IRIS; SHUTTER and IRIS circuit will function automatically in cooperating with AGC to get consistent exposure. The range of AGC level is between 00 and 05.
-
Page 38: Wbc Mode
Orion/3-DN Outdoor speed ranges from 1/10000 to 1/50. IRIS In this mode, the IRIS function adjusts exposure in higher property. SHUTTER speed and AGC circuit will function automatically in cooperating with IRIS to get consistent exposure output. The IRIS value is fixed at f1.6. - Page 39 Orion/3-DN Outdoor G/V/T/S Series Model: AUTO In this mode, white balance works within its color temperature range. This mode computes the white balance value output using color information from the entire screen. It outputs the proper value using the color temperature radiating from a black subject based on a range of values from 3000K to 7500K.
-
Page 40: Setup Menu 1
Orion/3-DN Outdoor P/M Model: AUTO In this mode, white balance works within its color temperature range and calculates the best-fit white balance. MANUAL In this mode, users can change the White Balance value manually; adjustable R gain and B gain range from 00 to 99. -
Page 41: Zoom Speed
Orion/3-DN Outdoor G/V/T Model: P/S7/S8/SY Model: SETUP MENU 1 SETUP MENU 1 ZOOM SPEED FAST ZOOM SPEED DIGITAL ZOOM DIGITAL ZOOM SLOW SHUTTER SLOW SHUTTER D.N.R. IMAGE INVERSE IMAGE INVERSE FREEZE FREEZE APERTURE APERTURE AUTO EXIT STABILIZER EXIT M Model:... -
Page 42: Slow Shutter
Orion/3-DN Outdoor image and expands the partial image to the full size of the original image; therefore, the image quality will be reduced. G/V/T Model: For these models, maximum 12× digital zoom function is allowed to be enabled. The default setting is <ON>. -
Page 43: Image Inverse
Orion/3-DN Outdoor D.N.R generates better denoising effects. As for P model, the D.N.R. is adjustable from <1> to <4>; level 4 achieves best denoising results. IMAGE INVERSE Users can select <ON> to make the displayed image inversed vertically and horizontally (see the figures shown below). Occasions to employ the function include conferences, demonstration, testing, etc. -
Page 44: Stabilizer (P/Sy/S7/S8 Model)
Orion/3-DN Outdoor G/V/T/S Series Model: There are 16 levels of adjustment; the options are from <01> to <16>; <01> represents “no enhancement”. When shooting text, this function could make it sharp. P/M Model: Users can select either the <AUTO> mode or <MANUAL> mode. Under the <MANUAL>... -
Page 45: Setup Menu 2
Orion/3-DN Outdoor G/V/T/S Series Model: P/M Model: MAIN PAGE 1 MAIN PAGE 1 LANGUAGE ENGLISH LANGUAGE ENGLISH DEFAULT CAMERA DEFAULT CAMERA BACKLIGHT BACKLIGHT FOCUS AUTO FOCUS AUTO AE MODE ENTER AE MODE AUTO WBC MODE AUTO WBC MODE AUTO SETUP MENU 1... -
Page 46: Off
Orion/3-DN Outdoor M.E. (Mechanical Flip) M.E. is a standard mechanical operation. As the Dome Camera tilts to the maximum angle, it will pan 180°, and then continue tilting to keep tracking objects. NOTE: Flip setting is manual-controlled only. If a Preset or a point for other function (ex. -
Page 47: Speed By Zoom
Orion/3-DN Outdoor PT DISPLAY Turn the item to <ON> to display the pan/tilt position on the screen. The display format will be “XX YYY/ YY”. SET PAN ZERO By using <SET PAN ZERO> function, user can set north direction as coordinate zero. - Page 48 Orion/3-DN Outdoor NEW PASSWORD:: _ _ _ _ CONFIRM PASSWORD:: _ _ _ _ 0123456789 DELETE SAVE EXIT B GAIN The password setting procedure is like the following: STEP 1: Choose a number with direction keys and then press the <CAMERA MENU>...
-
Page 49: Osd Auto Close (S Series Model)
Orion/3-DN Outdoor OSD AUTO CLOSE (S Series Model) Users can specify the duration for OSD menu to stay on the screen. Time selection ranges from 5 to 30 seconds. To keep the OSD menu stay on the screen, please set this option to “OFF”. -
Page 50: Title Display
Orion/3-DN Outdoor Display the ID address of the selected dome on the right bottom of the screen. Hide the ID address of the selected dome. 3.3.10 TITLE DISPLAY Users are allowed to name a view area, where the title will be displayed on screen for easy recognition. - Page 51 Orion/3-DN Outdoor STEP 4: Press the <CAMERA MENU> key (ENTER) on the keyboard to go into the editing page. TITLE SETTING: 01 EXIT SAVE LEFT RIGHT DELETE TITLE: STEP 5: Choose a character with direction keys and then press the <CAMERA MENU>...
-
Page 52: Preset
Orion/3-DN Outdoor 3.3.12 PRESET PRESET SET Totally 256 preset points can be set. Follow the steps below when in the preset setting menu. STEP 1: Press the right/left key on the keyboard to select a number (001 represents preset point 1, 002 represents preset point 2, etc.) STEP 2: Press the <CAMERA MENU>... -
Page 53: Sequence
Orion/3-DN Outdoor 3.3.13 SEQUENCE The function executes pre-positioning of the pan, tilt, zoom and focus features in a certain sequence for a camera. Before setting this function, users must pre-define at least two preset points. SEQUENCE SEQUENCE LINE SEQUENCE POINT... - Page 54 Orion/3-DN Outdoor SPEED Users can set the pan/tilt speed of the Dome Camera from one Sequence Point to the next one, and the range of setup speed is from 1 to 15. Within the range, PAN speed varies from 10 to 400 (degree/sec.), and TILT speed varies from 8 to 400(degree/sec.).
-
Page 55: Autopan
Orion/3-DN Outdoor 3.3.14 AUTOPAN Auto-Pan means motion of scanning an area horizontally so that the Dome Camera can catch horizontal view. The parameters are listed as follows. AUTOPAN AUTOPAN LINE START POINT TO FIND END POINT TO FIND DIRECTION RIGHT... - Page 56 Orion/3-DN Outdoor DIRECTION The item is for setting the AUTOPAN direction of the Dome Camera. The dome will start to pan clockwise from the start point to the end point if your selection is <RIGHT>, and then return to the start point. The dome will start to pan anti-clockwise from the start point to the end point if your selection is <LEFT>.
-
Page 57: Cruise
Orion/3-DN Outdoor 3.3.15 CRUISE CRUISE is a route formed with manual operation, through adjusting pan, tilt position and zoom parameters, which can be stored and recalled to execute repeatedly. CRUISE CRUISE LINE RECORD START ENTER RECORD END ENTER RUN CRUISE... -
Page 58: Home Setting
Orion/3-DN Outdoor EXIT Exit the CRUISE setup menu; go back to the MAIN PAGE 2 to carry on setup of Home Setting. MAIN PAGE 2 ID DISPLAY TITLE DISPLAY TITLE SETTING PRESET ENTER SEQUENCE ENTER AUTOPAN ENTER CRUISE ENTER... - Page 59 Orion/3-DN Outdoor PRESET POINT Select a preset point where the dome should go after the Return Time function, which will be mentioned later, is activated. The preset point(s) should be set prior either in the PRESET setup menu or through the keyboard.
-
Page 60: Ir Function (Removable Ir Cut Filter)
Orion/3-DN Outdoor G/V/T/P/M Model: S Series Model: MAIN PAGE 3 MAIN PAGE 3 IR FUNCTION AUTO IR FUNCTION AUTO ALARM SETTING ENTER ALARM SETTING ENTER ALARM DETECT ALARM DETECT NONE WDR FUNCTION WDR FUNCTION PRIVACY MASK ENTER PRIVACY MASK ENTER... - Page 61 Orion/3-DN Outdoor AUTO The Internal circuit will automatically decide the occasion to remove the IR cut filter according to the image brightness level. NOTE: When IR function is in AUTO mode, AE will automatically become AUTO mode. Additionally, if AE is set as Shutter, Iris and AGC priority mode, the IR AUTO function will be invalid.
- Page 62 Orion/3-DN Outdoor IR COLOR When the IR cut filter is removed, the video output can be programmed as color or B/W (black and white). The color here refers to simulated color, not real color. This function is only applicable in IR ON mode.
-
Page 63: Alarm Setting
Orion/3-DN Outdoor 3.3.18 ALARM SETTING The integrated high speed dome provides eight alarm inputs and one alarm output (N.O. or N.C) to connect alarm devices. With this function, the Dome Camera can cooperate with alarm system to catch events’ images. For wiring, please refer to the installation guide and/or qualified service personnel. - Page 64 Orion/3-DN Outdoor ALARM TYPE There are two kinds of alarm types: Normal Open and Normal Close, which are illustrated as below. Select an alarm type that corresponds with the alarm application. Alarm Normal Open Alarm Normal Close ALARM ACTION The alarm actions include PRESET, SEQUENCE, AUTOPAN and CRUISE functions.
- Page 65 Orion/3-DN Outdoor CRUISE LINE Select a cruise line that the Dome Camera should execute when an alarm pin is triggered. The cruise line(s) should be defined prior either in the CRUISE setup menu or through the keyboard. DWELL TIME The DWELL TIME is duration of executing an alarm action.
-
Page 66: Alarm Detect
Orion/3-DN Outdoor If using S Series model, after exiting the ALARM SETTING menu, go back to the MAIN PAGE 3 to carry on setup of Privacy Mask function. Thus please skip the next section and go to 3.3.21 PRIVACY MASK to continue setup of Privacy Mask function. - Page 67 Orion/3-DN Outdoor FIX FOCUS If focus movement is detected, the alarm will be triggered, and the alarm stops when focus returns to the original position. If the detected focus movement keeps changing for more than four seconds, the new focus position will be memorized as the reference, and the alarm will stop.
- Page 68 Orion/3-DN Outdoor FRAME SET In a monitored field, users can define specific areas as motion detection target zones. Please refer to the instructions as follows to configure parameters for each motion detection zone so-called “Frame.” When motion is detected within a defined frame, a flash warning notice: MOTION, will display in the upper left corner of the screen.
- Page 69 Orion/3-DN Outdoor released or users rotate the joystick to change the status of the Dome Camera. If select other modes (SEQUENCE/AUTOPAN /CRUISE), the Dome Camera will keep executing the selected mode (DWELL TIME: ALWAYS) until alarm condition is released or users rotate the joystick to change the status of the Dome Camera.
-
Page 70: Wdr Function
Orion/3-DN Outdoor Digital Zoom is turned OFF; 5) No Auto Focus; 6) Digital Slow Shutter won’t work. Additionally, when Alarm Detect function is on, if the Dome Camera is controlled to execute motions (ex. Tilt and Pan) or functions (Preset, Sequence and Auto-pan), Alarm Detect will be disabled temporarily during that time. -
Page 71: Privacy Mask
Orion/3-DN Outdoor WDR MODE RATIO LEVEL SHUTTER SPEED IRIS OFFSET EXIT NOTE: The parameter effects set here will be limited if Image Inverse is turned on. Select this option to disable the WDR function. Exit the WDR FUNCTION menu and go back to the MAIN PAGE 3 to carry on setup of Privacy Mask. - Page 72 Orion/3-DN Outdoor NOTE: The Image Flip function and the Image Inverse function will be disabled automatically while the Privacy Mask function is enabled. G/V/T/S Series Model: For these models, the available area for setting a privacy mask is restricted within tilt angle 70 degrees. Maximum 8 masks can be displayed in one scene.
- Page 73 Orion/3-DN Outdoor H CENTER The original horizontal center of a mask zone is the center of a screen; it is able to move a mask zone to the other position by adjusting the horizontal value with the LEFT/RIGHT keys on the keyboard.
- Page 74 Orion/3-DN Outdoor G/V/T Model: S Series Model: MAIN PAGE 3 MAIN PAGE 3 IR FUNCTION AUTO IR FUNCTION AUTO ALARM SETTING ENTER ALARM SETTING ENTER ALARM DETECT ALARM DETECT NONE WDR FUNCTION WDR FUNCTION PRIVACY MASK ENTER PRIVACY MASK ENTER...
- Page 75 Orion/3-DN Outdoor MASK01 MENU H CENTER V CENTER H SIZE V SIZE EXIT+SAVE H CENTER (000~255) The original center of a mask zone is the center of a screen. Users can move the center of a mask zone to another position by pressing the LEFT/RIGHT keys on the keyboard to adjust the value.
-
Page 76: Time Setting
Orion/3-DN Outdoor MASK DISPLAY This item is used to set the time to display a privacy mask. FIRST If this mode is selected, the camera will detect the mask zone at the next preset position and display the mask in advance, and then pan the dome to the preset point. -
Page 77: Schedule
Orion/3-DN Outdoor YEAR / MONTH / DAY The items are for setting up the system date. HOUR / MINUTE The items are for setting up the system time. EXIT+SAVE Exit the TIME SETTING menu and go back to the MAIN PAGE 3 to carry on setup of schedule. -
Page 78: Exit Osd
Orion/3-DN Outdoor HOUR / MINUTE The items are for setting up the time to execute each schedule point. MODE This is for setting the schedule function of the selected schedule point; the options are listed as follows. NONE ... -
Page 79: Appendix A: Technical Specification
Orion/3-DN Outdoor Appendix A: Technical Specification Items G Model M Model V Model P Model T Model CAMERA CCD Sensor 1/4" EXview 1/4" CCD 1/4" EXview 1/4" CCD 1/4" EXview Progressive Scan Optical Zoom 18× 26× Digital Zoom 1× ~ 12× variable... - Page 80 Orion/3-DN Outdoor Items G Model M Model V Model P Model T Model Cruise Privacy Mask Proportional Pan & Tilt On / Off (Pan and tilt speed proportional to zoom ratio) Resume after Power loss Zone Title Home Function Preset, Sequence, Auto pan, Cruise...
- Page 81 Orion/3-DN Outdoor Items SB/SY S3 Model S5/S7 Model S4 Model S6/S8 Model CAMERA CCD Sensor Sony CCD Optical Zoom 30× 36× Digital Zoom 1~12x variable NTSC 380k 480k 380k 480k 380k 480k Effective Pixels 440k 570k 440k 570k 440k 570k...
- Page 82 Orion/3-DN Outdoor Items SB/SY S3 Model S5/S7 Model S4 Model S6/S8 Model Auto Flip Mechanical / Digital / Off Digital Slow Shutter On / Off Motion Detection On / Off Wide Dynamic Range On / Off Day/Night: IR Cut Filter...
-
Page 83: Osd Menu Notes
Orion/3-DN Outdoor OSD Menu Notes The following OSD menu tables are provided for users to record various camera settings. <G/V/T Model> Item Layer 1 Layer 2 Layer 3 Notes <ENGLISH>, <JAPANESE>, <PORTUGUESE>, <SPANISH>, <FRENCH>, LANGUAGE <GERMAN>, <ITALIAN>, <POLISH>, <RUSSIAN>, <TRADITIONAL CHINESE>, <SIMPLIFIED CHINESE>, <TURKISH>... - Page 84 Orion/3-DN Outdoor Item Layer 1 Layer 2 Layer 3 Notes TITLE DISPLAY <ON>, <OFF> TITLE SETTING <01> ~ <16> PRESET SET <001>~<256> PRESET PRESET RUN <001>~<256> EXIT SEQUENCE LINE <1> ~ <8> SEQUENCE POINT <01> ~ <64> PRESET POS. <001> ~ <255>, <END>...
- Page 85 Orion/3-DN Outdoor Item Layer 1 Layer 2 Layer 3 Notes H SIZE <000> ~ <080> V SIZE <000> ~ <060> EXIT + SAVE CLEAR MASK <01> ~ <24> EXIT TIME DISPLAY <ON>, <OFF> SET YEAR <00> ~ <99> SET MONTH <01>...
-
Page 86: P/M Model
Orion/3-DN Outdoor <P/M Model> Item Layer 1 Layer 2 Layer 3 Notes <ENGLISH>, <JAPANESE>, <PORTUGUESE>, <SPANISH>, <FRENCH>, LANGUAGE <GERMAN>, <ITALIAN>, <POLISH>, <RUSSIAN>, <TRADITIONAL CHINESE>, <SIMPLIFIED CHINESE>, <TURKISH> DEFAULT <ON>, <OFF> CAMERA BLC LEVEL <00> ~ <30> <ON> EXIT + SAVE: YES BACKLIGHT <OFF>... - Page 87 Orion/3-DN Outdoor Item Layer 1 Layer 2 Layer 3 Notes PRESET POS. <001> ~ <255>, <END> SPEED <01> ~ <15> DWELL TIME <000> ~ <127> SEC. RUN SEQUENCE ENTER EXIT AUTOPAN LINE <1> ~ <4> START POINT <TO FIND>, <TO SAVE>...
- Page 88 Orion/3-DN Outdoor Item Layer 1 Layer 2 Layer 3 Notes SET MINUTE <00> ~ <59> EXIT+SAVE SWITCH <ON>, <OFF> POINT <01> ~ <32> HOUR <00> ~ <23> MINUTE <00> ~ <59> NONE NO FUNCTION PRESET PRESET POINT <001> ~ <256>...
-
Page 89: S Series (S3/S4/S5/S6/S7/S8/Sy/Sa/Sb) Model
Orion/3-DN Outdoor <S Series (S3/S4/S5/S6/S7/S8/SY/SA/SB) Model> Item Layer 1 Layer 2 Layer 3 Notes <ENGLISH>, <JAPANESE>, <PORTUGUESE>, <SPANISH>, <FRENCH>, LANGUAGE <GERMAN>, <ITALIAN>, <POLISH>, <RUSSIAN>, <TRADITIONAL CHINESE>,<SIMPLIFIED CHINESE>, <TURKISH> DEFAULT <ON>, <OFF> CAMERA BLC LEVEL <00> ~ <30> <ON>, <OFF> EXIT + SAVE: YES BACKLIGHT <OFF>... - Page 90 Orion/3-DN Outdoor Item Layer 1 Layer 2 Layer 3 Notes PASSWORD <ON>, <OFF> OSD AUTO CLOSE <OFF>, <5> ~ <30> SEC. SYSTEM RESET <YES> SYSTEM RESET DEFAULT SYSTEM <YES> EXIT <YES> EXIT ID DISPLAY <ON>, <OFF> TITLE DISPLAY <ON>, <OFF>...
- Page 91 Orion/3-DN Outdoor Item Layer 1 Layer 2 Layer 3 Notes BLOCK MODE NONE; MOTION: <ON>, <OFF> FRAME SET NONE; MOTION: <01> ~ <04> FRAME DISABLE NONE; MOTION: <01> ~ <04> THRESHOLD NONE; MOTION: <001> ~ <255> EXIT WDR FUNCTION <ON>, <OFF>...
Need help?
Do you have a question about the Orion/3-DN Outdoor and is the answer not in the manual?
Questions and answers