
Subscribe to Our Youtube Channel
Related Manuals for MAXTEK 77429


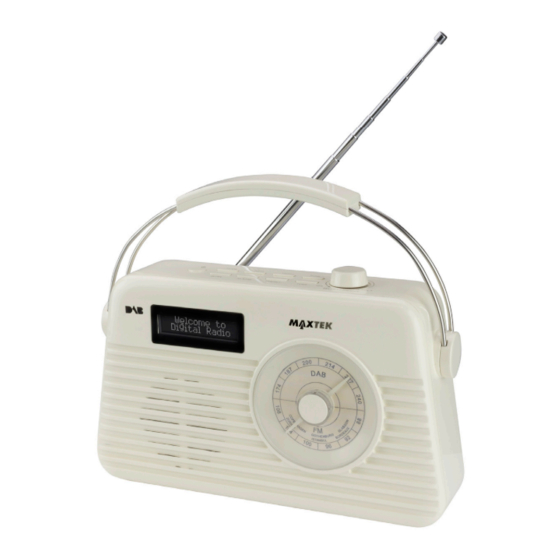
Summary of Contents for MAXTEK 77429
- Page 1 Vintage DAB Radio MODEL NUMBER: 77429 USER GUIDE After Sales Support UK/N.IRELAND HELPLINE N 01270 508538 REP.IRELAND HELPLINE N 1800 995 036 WEBSITE: www.quesh.co.uk EMAIL: enquiries@quesh.co.uk...
-
Page 2: Table Of Contents
Contents Welcome Section 13-15. FM Mode • FM Mode 2-3. Information & Safety Instructions • Auto Scan • Manual Tune Contents & Features • Preset Store • Preset Recall Controls & Layout • Scan Settings • Audio Settings Setup • System •... -
Page 3: Welcome Section
Welcome Section Congratulations! You have made an excellent choice with the purchase of this quality MAXTEK product. ® By doing so you now have the assurance and peace of mind which comes from purchasing a product that has been manufactured to the highest standards of performance and safety, supported by the high quality standards of Quesh Ltd. -
Page 4: Information & Safety Instructions
Information & Safety Instructions This radio is powered by 4 x ‘C’ size alkaline batteries (not included). Do not leave batteries in this radio while it is in storage. Do not dispose of batteries in your household waste. Please contact your local authority for details on safe disposal. •... -
Page 5: General Information
General Information & Safety Instructions Please read the following safety information before use. C A U T I O N RISK OF ELECTRIC SHOCK DO NOT OPEN • To avoid risk of electric shock do not attempt to open this appliance. •... -
Page 6: Contents & Features
Contents & Features Contents 1 x DAB & FM Radio 1 x 5V Mains Adaptor Features • DAB receiver (174MHz - 240MHz) • FM receiver (87.5MHz - 108.00MHz) • Stores 10 FM presets • Stores 10 DAB presets • Powered by 4 x C alkaline batteries (not included) •... -
Page 7: Controls & Layout
Controls & Layout Mode Info Menu Tune + Button Button Button Button Vol +/- On/Off/Standby Select/Snooze Button Dial Tune - Scan Alarm Preset Button Button Button Button Battery Telescopic Cover Aerial Headphone DC/5V Port Port Please remove the screen protector on the LCD screen before use. After Sales Support UK/N.IRELAND HELPLINE N 01270 508538... -
Page 8: Setup
Setup Out Of The Box Once you have removed the radio from the packaging, connect the 5V/1A mains adaptor (supplied) to a suitable mains outlet. To use the radio with batteries, install 4 x ‘C’ batteries into the battery bay at the back of the radio. Fully extend the telescopic aerial and press the button to turn the radio on. -
Page 9: Control Method
Control Method Using The Button All the button actions are just a quick press unless otherwise stated in the required action. This includes the button function of the dial. Using The Dial The dial on this radio is dual action. This means you can use it to scroll through available options and press it for required button actions. -
Page 10: Dab Mode
DAB Mode The radio, when turned on, is usually in DAB mode. If is not, repeatedly press the ‘Mode’ button until DAB shows on the display. Tuning In A Station All the available stations are saved by the radio in alphabetical order. To select a station press the ‘Tune+’... - Page 11 Preset Store To save a preset, connect the radio to the required station so it is playing (Tune In A Station - Page 8). Press and hold the ‘Preset’ button for 2 seconds. You will see ‘Preset Store’, press the tune +/- to cycle through the available preset slots.
-
Page 12: Dab Menu
DAB Menu Press the ‘Menu’ button to enter the DAB menu. The first option on the screen will be ‘Full Scan’. Using the tune +/- button, you can cycle through the DAB menu options and press the dial to select your option. Options: Full Scan >... - Page 13 Manual Tune Press the ‘Menu’ button to enter the DAB menu. The first option will be ‘Full Scan’, press the tune +/- button to cycle through the menu to ‘Manual Tune’, then press the dial to access the manual tune options.
- Page 14 Prune You can remove any station from the station list that is marked with a ‘?’ in front of the name listing. To delete a station, connect the radio to the required ‘?’ listed station so it is active (Tune In A Station - Page 8). Press the ‘Menu’...
-
Page 15: Fm Mode
FM Mode The radio, when turned on, is usually in DAB mode. To enter the FM mode, press the ‘Mode’ button. FM will show on the display. Auto Scan Press the tune +/- button for 2 seconds to start the FM auto scan in either direction along the frequency range. -
Page 16: Preset Store
Preset Store To save a preset, connect the radio to the required station so it is playing. Press and hold the ‘Preset’ button for 2 seconds. You will see ‘Preset Store’, press the tune +/- to cycle through the available preset slots. -
Page 17: Scan Settings
Scan Settings Scan settings will allow you to change how the radio auto scans. As default the scan setting is set to strong stations. Press the ‘Menu’ button to enter the FM menu. The first option will be ‘Scan Setting’, press the dial to access this feature. Use the tune +/- button to cycle through the two options and then press the dial to confirm. -
Page 18: System Menu
System System Menu It is possible to access the system menu through both modes. Press ‘menu’ button, then press the ‘Tune-’ to cycle the menu to ‘System’ and press the dial to access it. Using the tune +/- button, you can cycle through the system menu options available. -
Page 19: Setting The Alarm
System Setting The Alarm There are 2 alarms that can be set on this radio. Once in the system menu list, press the tune +/- button repeatedly until you get to ‘Alarm’ and then press the dial to set this feature. When you are in the alarm feature, press the tune +/- button repeatedly to change between alarm 1 and 2, then press the dial to select the alarm to set. - Page 20 System Turning The Alarm On/Off The alarm can be set or disabled with the last option when setting the alarm (See page 17, Setting The Alarm). To check which alarm(s) have been set press the button to put the radio into standby mode and check the display. The bell icon and number indicate alarm 1 or 2 is active and the double bell icon indicates that both alarms are active.
- Page 21 System Time From here you can set the date and time manually, update it from different sources, change the time format and the date format. Once in the system menu list, press the tune +/- button repeatedly until you get to ‘Time’ and then press the dial to select this feature. In this sub menu you can choose from the following: •...
- Page 22 System Time - Auto Update With this option you can auto update the time and date information from a DAB or FM signal. Once in the Time sub menu list, press the ‘Tune+’ button repeatedly until you get to ‘Auto Update’ and then press the ‘Select/Snooze’ to set this feature.
- Page 23 System Time - Set Date Format With this option you can change the displayed format of the date. Once in the Time sub menu list, press the tune +/- button repeatedly until you get to ‘Set Date Format’ and then press the dial to set this feature.
- Page 24 System Backlight - Timeout This option will allow you to set the length of time in seconds before the screen dims. Once in the Backlight sub menu list, press the tune +/- button repeatedly until you get to ‘Timeout’ and then press the dial to select this feature.
-
Page 25: Inactive Standby
System Backlight - Dim Level Dim level is the brightness of the display when the radio has timed out i.e. no buttons pressed (unless ‘On’ has been selected in the timeout options). Once in the Backlight sub menu list, press the tune +/- button repeatedly until you get to ‘Dim Level’... -
Page 26: Factory Reset
System Language It is possible to change the menu language for the menu systems. Once in the system menu list, press the tune +/- button repeatedly until you get to ‘Language’ and then press the dial to select this feature. Select the update source by using the tune +/- to cycle through the available options and press the dial to confirm. - Page 27 System SW Version This option displays the radio’s firmware version installed on the chipset. Once in the system menu list, press the tune +/- button repeatedly until you get to ‘SW Version’ and then press the dial to display this information.
- Page 28 Specification Vintage DAB & FM Radio General Chipset/Solution: Frontier Approx Weight: 900g Approx Dimentions: 250mm x 145mm x 65mm Mains Adaptor: 5V/1A Battery Battery Type: 4 x ‘C’ 1.5V (not supplied) Talk/Play Time: 8 Hours (at 50% volume) Standby Time: Up to 100 Hours Speaker Speaker Size:...
- Page 29 INTENTIONALLY LEFT BLANK After Sales Support UK/N.IRELAND HELPLINE N 01270 508538 REP.IRELAND HELPLINE N 1800 995 036 WEBSITE: www.quesh.co.uk EMAIL: enquiries@quesh.co.uk...
- Page 30 Warranty Certificate Warranty This product is warranted to be free from defects in workmanship and parts for a period of 36 months from the date of purchase. Defects that occur within this warranty period, under normal use and care, will be repaired, replaced or refunded at our discretion, solely at our option with no charge for parts and labour.
- Page 31 Warranty Card Vintage DAB Radio Model Number: 77429 Please keep your purchase receipt together with your warranty card Name: Address: Date of purchase: Location of purchase: Fault Description: We recommend that you attach a photocopy of your receipt, showing the date of purchase, to this warranty card and keep it for your reference.
Need help?
Do you have a question about the 77429 and is the answer not in the manual?
Questions and answers