Table of Contents
Advertisement
Advertisement
Table of Contents

Related Manuals for Whirlpool WWDE 7512


Summary of Contents for Whirlpool WWDE 7512
- Page 1 Instructions for use www.whirlpool.eu/register...
- Page 2 ENGLISH . . . . . . . . . . . . . . . . . . . . . . . . . . . . . . . . . . . 3...
-
Page 3: Table Of Contents
ENGLISH SAFETY AND INSTALLATION INSTRUCTIONS THANK YOU FOR BUYING AN WHIRLPOOL PRODUCT . For even more complete user support, register your appliance at www .whirlpool .eu/register Index Health and Safety guide SAFETY INSTRUCTIONS . . . . . . . . . . . . . . . . . . . . . . . . . . . . . . . . . . . . . . . . . . . . . . . . . . . . . . . . . . . . . . . . . . . . . . 5 IMPORTANT: TO BE READ AND RESPECTED . - Page 4 CLEANING AND MAINTENANCE . . . . . . . . . . . . . . . . . . . . . . . . . . . . . . . . . . . . . . . . . . . . . . . . . . . . . . . . . . . . . . 22 CLEANING THE WASHER DRYER EXTERNALLY .
-
Page 5: Safety Instructions
Health and Safety guide SAFETY INSTRUCTIONS IMPORTANT: TO BE READ AND RESPECTED This symbol is used to remind you to read this manual . Before using the appliance damage and electric shock Never open the door forcibly carefully read Health and resulting from improper use of or use it as a step . - Page 6 the manufacturer’s instructions When installing the appliance Do not stop the appliance until and local safety regulations . Do make sure that the four feet are the drying cycle has been not repair or replace any part stable and resting on the floor, completed;if this should be of the appliance unless adjusting them as required,...
- Page 7 ELECTRICAL CONNECTIONS Socket outlet / plug (valid for corresponds to that of your FOR GREAT BRITAIN AND both countries) home . IRELAND ONLY For installation to comply with If the fitted plug is not suitable current safety regulations, an for your socket outlet, contact Fuse replacement omnipolar switch with Customer Support for further...
-
Page 8: Safeguarding The Environment
SAFEGUARDING THE ENVIRONMENT DISPOSAL OF PACKAGING This appliance is marked in Always select the correct MATERIALS compliance with European programme/drying time for the Directive 2012/19/EU, Waste load in order to obtain the The packaging material is 100% Electrical and Electronic desired drying results . -
Page 9: Declaration Of Conformity
DECLARATION OF CONFORMITY “This appliance has been designed, constructed and distributed in compliance with the safety requirements of European Directives : -2006/95/EC Low Voltage Directive -2004/108/EC Electromagnetic Compatibility Directive” . -
Page 10: Use And Maintenance
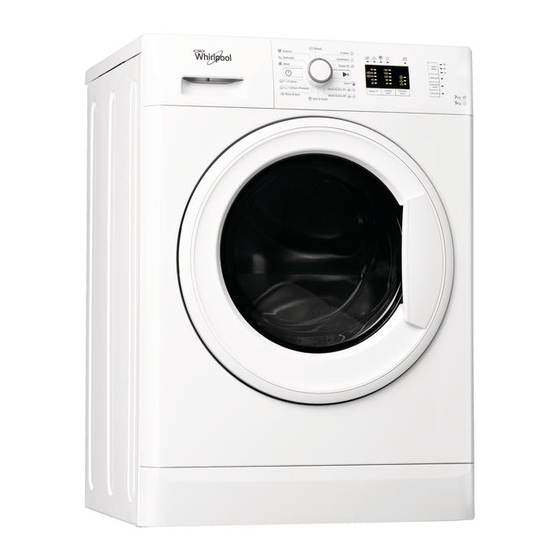
Use and Maintenance PRODUCT DESCRIPTION APPLIANCE 1 . Top 2 . Detergent dispenser 3 . Control Panel 4 . Lid handle 5 . Door 6 . Water filter - behind kick panel 7 . Removable kick panel 8 . Adjustable feet (2) CONTROL PANEL 1 . -
Page 11: Detergent Dispenser
DETERGENT DISPENSER Prewash Compartment • Detergent for prewash Main Wash Compartment • Detergent for the main wash • Stain remover • Water softener Softener compartment • Softener • Liquid starch Pour softener or starch solution into the compartment without exceeding the “max”... -
Page 12: Technical Specifications For The Water Connection
TECHNICAL SPECIFICATIONS FOR THE WATER CONNECTION INPUT WATER Cold WATER TAP Threaded attachment for 3/4" flexible hose MINIMUM WATER INTAKE PRESSURE 100 kPa (1 bar) MAXIMUM WATER INTAKE PRESSURE 1000 kPa (10 bar) DOOR To open the door, pull the handle . To close the door, push on the handle until it clicks . -
Page 13: How To Use The Appliance
HOW TO USE THE APPLIANCE FIRST TIME USE Remove any manufacturing debris: • Start the programme without loading the washer dryer machine (with empty drum) . • Select the “Cotton” programme with a temperature setting of 90 °C . • Pour a small quantity of detergent powder into the main wash compartment of the detergent dispenser (maximum 1/3 of the quantity the detergent... -
Page 14: How To Use The Washer Dryer
HOW TO USE THE WASHER DRYER 1 . LOADING LAUNDRY . Select the type of drying desired, by • Prepare the laundry, following the pressing the “Dryness level” button for recommendations given in the section automatic drying levels or the «Drying time»... - Page 15 2 . Press button “Dry only” to dry without a wash 8 . CANCELLING A RUNNING PROGRAMME (IF cycle . NECESSARY) 3 . Select the type of drying desired, by pressing Press and hold the button until the washer the “Dryness level” button for automatic dryer stops .
-
Page 16: Programmes And Options
PROGRAMMES AND OPTIONS In order to select the most suitable programme for the type of load in question, refer to the instructions indicated on the garments' wash labels. PROGRAMME Wash type and recommendations Wash Settings symbols COTTON For washing normally to heavily soiled wash load 5 kg towels, underwear, table and bed linen... - Page 17 PROGRAMME Wash type and recommendations Wash Settings symbols Spins the load then empties the water . SPIN & DRAIN wash load 5 kg For resilient garments . drying load eMperaTure spin speed Start selecTable opTions Delay, Dry Only, Half spin RINSE &...
- Page 18 The programme used for the evaluation of (WWDE 7512) under the mandatory Singapore Water Efficiency Labelling Scheme (WELS) and the recommended Washing Programme for soiled clothes is as follows: e cotton 60 °c...
-
Page 19: Functions
FUNCTIONS ON/OFF To turn on the washer dryer: press To shut off the washer dryer at the end of the programme: this button until the Start/Pause button turns on . press the button until the lights turn off . To cancel a programme in progress: Press and hold the button until the washer dryer stops . -
Page 20: Hints And Tips
HINTS AND TIPS RULES FOR SEPARATING LAUNDRY • Fabric type / indications on label (cotton, mixed fibres, synthetic, wool, handwash items) • Colour (separate coloured garments from whites, wash new coloured items separately) • Size (wash items of different sizes in the same load to improve washing efficacy and weight distribution in the drum) • Delicates (place small items –... -
Page 21: Energy Saving Tips
ENERGY SAVING TIPS • Keeping within the load limits indicated in the • In order to save time and energy, be sure to programme chart will optimise energy, water, select a high spin speed in order to reduce the and detergent consumption, and will reduce amount of water remaining in the garments washing times . -
Page 22: Cleaning And Maintenance
CLEANING AND MAINTENANCE WARNING Never use flammable liquids to clean the washer dryer . Be sure to turn off the washer dryer and disconnect it from its electrical power supply before performing any cleaning or maintenance operations . CLEANING THE WASHER DRYER EXTERNALLY Clean the washer dryer's external parts using a soft Do not use generic detergents, glass detergents, damp cloth . -
Page 23: Checking The Water Intake Hose
CHECKING THE WATER INTAKE HOSE Periodically check the integrity of the water intake hose . If it is found to be damaged, contact Customer Support or an authorised dealer in order to obtain a replacement hose . Based on the type of hose: For flood protection hoses: check the safety valve's inspection window (see the arrow) . -
Page 24: Cleaning The Filters In The Water Intake Hose
CLEANING THE FILTERS IN THE WATER INTAKE HOSE . Close the water tap and unscrew the intake hose . . Re-insert the mesh filter . Reconnect the intake hose to the water tap and the washer dryer . Do not use tools to connect the intake hose . Open the water tap and check to make sure that all the connections have been tightened properly . -
Page 25: Cleaning The Detergent Dispenser
CLEANING THE DETERGENT DISPENSER Remove the detergent dispenser by pressing Dry with a soft cloth . the release button and pulling on the dispenser at the same time . Re-install the detergent dispenser and close it . Remove the insert from the fabric softener compartment . -
Page 26: Cleaning The Water Filter / Draining The Residual Water
CLEANING THE WATER FILTER / DRAINING THE RESIDUAL WATER WARNING programme has recently been used, wait for the water to cool before draining it . The water filter should be cleaned regularly in Make sure that the washer dryer has been shut order to prevent water from remaining inside off and disconnected from its electrical power the appliance after wash cycles due to filter... - Page 27 Clean the water filter: remove any residues from the filter and wash it under running water . Insert the water filter and reinstall the kick panel: Re-insert the water filter by turning it clockwise . Turn it as far as it will go; the filter's grip should be in its vertical position .
-
Page 28: Transport And Handling
TRANSPORT AND HANDLING WARNING Do not lift the washer dryer while holding onto its upper surface . Disconnect the electrical plug and close the water tap . Check to make sure that the door and the detergent dispenser are securely closed . Disconnect the intake hose from the water tap, then disconnect the drain hose . -
Page 29: Troubleshooting
TROUBLESHOOTING The washer dryer may sometimes not work properly for certain reasons . Before calling the Support Centre, it is recommended to check to see if the problem can be easily resolved using the following list . Anomalies: Possible causes / Solution: The washer dryer does not •... - Page 30 Too much foam is formed . • The detergent is not compatible with the washer dryer (it must bear the wording “for washing machines”, “ for hand washing and washing machines”, or something similar) . • The dosage was excessive. The washer dryer does not dry . •...
-
Page 31: Door - How To Open It To Remove The Laundry In The Event Of A Malfunction
DOOR – HOW TO OPEN IT TO REMOVE THE LAUNDRY IN THE EVENT OF A MALFUNCTION Shut off the washer dryer and disconnect it Wait for the drum to come to a complete stop . from its electrical power supply . Close the If a high temperature program was selected, water tap . -
Page 32: Customer Support Service
For any repairs that may be required, please contact an authorised Customer Support Centre in order to ensure that the repairs are performed correctly using original spare parts . Manufacturer: Whirlpool Europe s .r .l . - Socio Unico Viale Guido Borghi 27 21025 Comerio (VA) Italy... -
Page 33: Installation Guides
INSTALLATION GUIDES 10 mm - 0,39 inch 150 ml 100 ml 50 ml... - Page 34 2 cm - 0,7 inch...
- Page 35 max 0,5 cm max 0,2 inch...
- Page 36 10 . 11 .
- Page 37 12 . max 100 cm max 100 cm 39 inch 39 inch min 65 cm min 65 cm 25 inch 25 inch max 100 cm 39 inch min 65 cm 25 inch 14 . 13 .
- Page 38 Whirlpool® Registered trademark/TM Trademark of Whirlpool group of companies - © Copyright Whirlpool Europe s .r .l . 2014 . All rights reserved - http://www . w hirlpool .eu 1 9 5 1 3 8 0 9 4 . 0 0...
Need help?
Do you have a question about the WWDE 7512 and is the answer not in the manual?
Questions and answers