
Related Manuals for Milwaukee M18 FMS254-0


Summary of Contents for Milwaukee M18 FMS254-0
- Page 1 OPERATOR'S MANUAL Cat. No. M18 FUEL™ 10" DUAL BEVEL COMPOUND SLIDING MITR SAW WARNING To reduce the risk of injury, user must read and understand operator's manual.
-
Page 2: General Power Tool Safety Warnings
• Dress properly. Do not wear loose clothing or GENERAL POWER TOOL jewelry. Keep your hair and clothing away from SAFETY WARNINGS moving parts. Loose clothes, jewelry or long hair can Read all safety warnings, instruc- be caught in moving parts. WARNING •... - Page 3 • Cut only one workpiece at a time. Stacked multiple sive temperature. workpieces cannot be adequately clamped or braced above ° ( ° ) may cause explosion. and may bind on the blade or shift during cutting. • Follow all charging instructions and do not charge •...
-
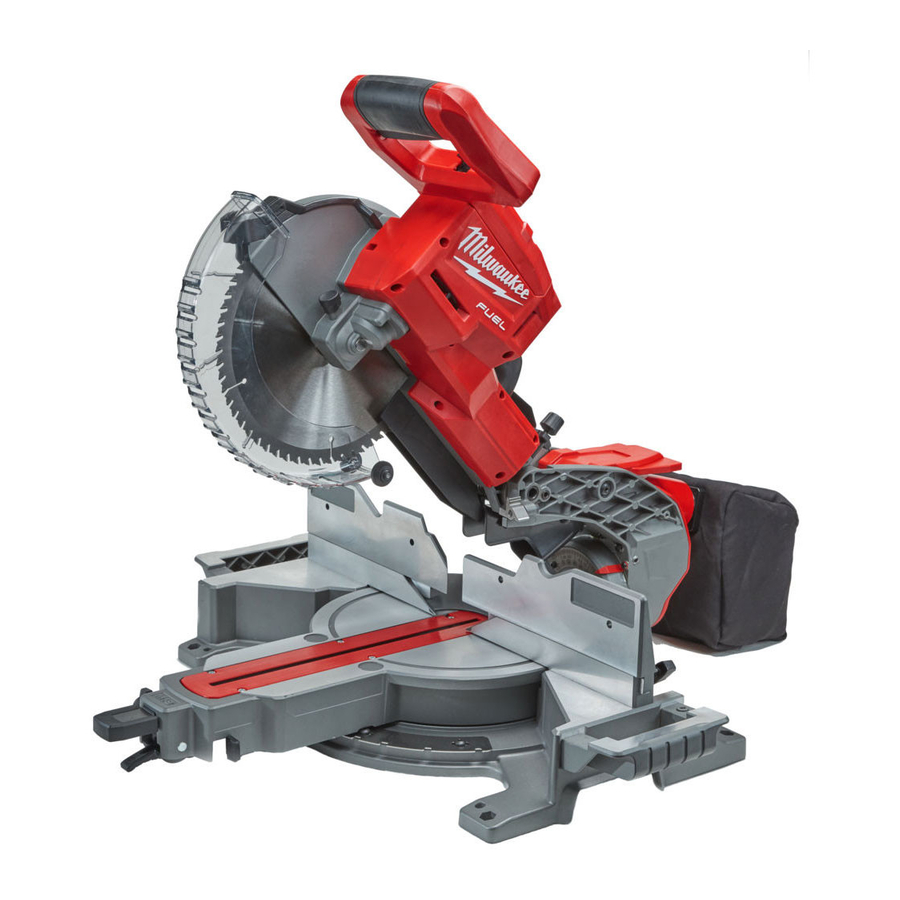
Page 4: Functional Description
FUNCTIONAL DESCRIPTION 16. Fence lock knobs (2) 1. Saw head 9. Detent lever 17.Face board mounting holes (4) 2. Trigger handle 10. Detent override knob 18. Workpiece clamp 3. Lower guard 11. Kerf plate 19.Slide rails 4. Fence hand holds 12.Mitr angle pointer 20. -
Page 5: Specifications
23. Trigger 26. Handle 29. Dust chute 24. Trigger lock 27.Depth stop adjustment knob 30. Dust bag 25. Cut-line indicator switch 28. Bevel adjustment lever 31. Slide rail transport lock 32. Kickstand 33. Hand stop 34. Workpiece clamp sockets (2) 35.Wrench storage 36. - Page 6 ASSEMBLY Selecting, Installing, and Changing Blades Always use clean, sharp blades. Dull blades tend to Installing the Carrying Handles overload the tool, bind, and cause pinching. Use only The carrying handles are used for transport as well 254mm (10")sliding mitre saw blades rated at least as support extensions for cutting longer workpieces.
- Page 7 Support of Longer Workpieces ADJUSTMENTS Longer workpieces need support along their full WARNING length. If you are using the saw on a level work bench, prop up the workpiece to a height of 89 mm making adjustments. Do not defeat the guards. (3-1/2") (50 mm x 100 mm set on its side) from the No Hand Zone bottom of the saw feet.
-
Page 8: Operation
Adjusting the Fences OPERATION Every time the bevel or mitre angle settings are changed, To reduce the risk of injury, always WARNING make sure the fences are set correctly. wear safety goggles or glasses Fences MUST: • Support the workpiece •... - Page 9 APPLICATIONS tool may stall or overheat the motor. 9. After the cut is complete, release the trigger and WARNING wait for the blade to stop completely. Raise the magnesium, or ferrous metals saw head and remove the workpiece. WARNING! (iron, steel, stainless steel, or alloys of these If small cut-off pieces get caught in the guard area, metals) with this saw.
-
Page 10: Maintenance
® positions the molding. tool, battery pack and charger to a MILWAUKEE NOTE: Always make a test cut on scrap material service facility for inspection. If the tool does not start or operate at full power with 3. - Page 11 ACCESSORIES 1. Remove battery pack. Use only recommended accesso- WARNING 2. Place a square against the fence and blade and ries. Others may be hazardous. ensure that the square is not touching blade teeth For a complete listing of accessories, go online to as this will cause an inaccurate measurement.
- Page 12 SERVICE - AUSTRALIA and NEW ZEALAND MILWAUKEE ® prides itself in producing a premium quality product that is Nothing But Heavy Duty ® . Your satisfaction with our products is very important to us! If you encounter any problems with the operation of this tool, please contact your authorised MILWAUKEE ®...
Need help?
Do you have a question about the M18 FMS254-0 and is the answer not in the manual?
Questions and answers