
Related Manuals for d&b audiotechnik D6


Summary of Contents for d&b audiotechnik D6
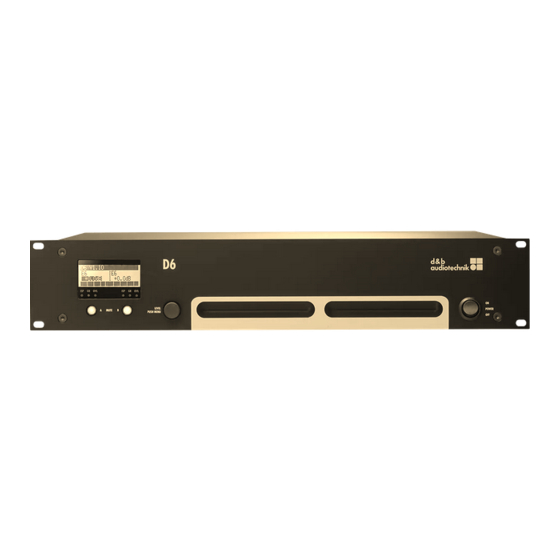
- Page 1 D6 Amplifier Software manual (1.1EN) (Firmware V1.x.x)
- Page 2 General Information D6 Amplifier Software manual (Firmware V1.x.x) Version 1.1EN, 02/2008, D2018.EN .01 Copyright © 2008 by d&b audiotechnik GmbH; all rights reserved. Keep this manual with the product or in a safe place so that it is available for future reference.
-
Page 3: Table Of Contents
2.6.3 Error messages during operation..........28 2.6.4 Further messages................29 2.7 System Reset.....................29 3. D6 Firmware update.............30 3.1 Firmware Installer..................30 3.2 D6 Firmware update via D6-D12-dbUpdate........30 3.3 D12 Firmware update via CAN-Bus and R10........30 D6 Software manual (Firmware V1.x.x) (1.1EN) Contents - 1... -
Page 4: Introduction
1. Introduction This manual describes the structure, access (user interface) and functions of the firmware of the d&b D6 amplifier. A detailed description of the D6 hardware and technical specifications is given in the D6 Hardware manual, which is also provided with the D6. -
Page 5: The D6 Operating Software
2. The D6 operating software Menu tree The menu structure of Channel A is shown in detail. The same structure applies to Channel B. The settings for the configuration switches Filter_1/_2/_3 are dependent on the loudspeaker configuration (please refer to section ⇒... -
Page 6: User Interface
User interface The LCD [4] acts as a user interface for all of the menus within the D6. The cursor is controlled via the digital rotary encoder, LEVEL/PUSH D6 Stage right MENU [3]. In the main menu the encoder acts as a level control. Pushing... -
Page 7: Boot Screen
Filter_2 Filter_3 EQ Master on Remote on Starting from the second line the main menu of the D6 is split into channel A and B and the following settings and information are displayed: - loudspeaker setups (Speaker type) - input gain - status of the delay and - Link A»B. -
Page 8: Settings Menu
Fig. 4: Supported sampling rates Signals with other common sampling rates (32/44.1/88.2 kHz) are detected but cannot be used by the D6. They are indicated by a Input digital 44kHz? question mark (?) as shown opposite. -
Page 9: Setup Channel A (B)
Notes on the digital AES/EBU input ⇒ ⇒ ⇒ ⇒ Input routing: According to the AES standard (AES3-2003 - Stereophonic mode) the AES channels are assigned to the D6 controller as follows: D6 Channel A: AES left or A channel (subframe 1) -
Page 10: Filter_1, Filter_2, Filter_3
If several EQ bands are set with a high boost in the same frequency range, this may cause overflows within the DSP. These errors are recognized internally and the D6 will mute the channel. The error message "DSP Error 16" is displayed. The error can be cleared by changing the filters or by switching off the EQ function. -
Page 11: Set
Delay time adjustable from 0.3 to 340 ms in steps of 0.1 ms or a corresponding value depending on the unit selected. [Unit] Delay Enables selection of the delay unit in either milliseconds [ms]; meters [m]; Delay or feet [ft]. D6 Software manual (Firmware V1.x.x) (1.1EN) Page 11 of 32... -
Page 12: Levels
3 dB. Impedance Z The impedance of the loudspeaker(s) presented to the output of the D6, displayed only as a numeric value in ohms. The value is measured with the actual output signal and may therefore vary with its spectral content. -
Page 13: System Check
System Check is a powerful and convenient tool to check the condition of either a single d&b loudspeaker or a complete d&b sound system driven by the D6. It is preferably used in conjunction with the d&b Remote network and the R1 software. -
Page 14: Load Monitoring
Load Monitoring does not work if: - the amplifier is switched off or to standby mode - the respective channel is muted. - the pilot signal level is too low. D6 Software manual (Firmware V1.x.x) (1.1EN) Page 14 of 32... -
Page 15: Load Monitoring Menu
Large signal threshold. If the output signal exceeds this voltage level during the measurement, the tolerance limits for this particular measurement are increased in order to compensate for the reduced accuracy. D6 Software manual (Firmware V1.x.x) (1.1EN) Page 15 of 32... -
Page 16: Calibrate
1000Hz As a precautionary measure the frequency generator will always be off Frequency Generators (Mode = off) after the D6 is powered on. The frequency generator are used by provides the Pilot Signals for the "Load Monitoring" function. When Load Monitoring using "Load Monitoring"... -
Page 17: Link A»B
Nine Presets which can be accessed locally or via the d&b Remote network (R10 Service software from V1.0.6). These Presets are used to set the complete D6 to a previously defined configuration for a particular application and can be named individually. - Page 18 Selecting "Ok" and pressing the encoder confirms the new setting and MyPreset exits the submenu. Cancel Cancel (⇒ ⇒ ⇒ ⇒ Back Exits the submenu leaving the previous name installed. D6 Software manual (Firmware V1.x.x) (1.1EN) Page 18 of 32...
-
Page 19: Remote
Remote Remote All functions of the D6 can be remotely interrogated via the dbCAN Remote (CAN-Bus). Back Mode Mode dbCAN Id 0. 01 Selecting "Mode" the following modes for remote control are available: Fig. 10: Remote menu off: no remote control. -
Page 20: Options
"Password". An incorrectly entered password will revert the device to the screen selected for "Lock" mode. Note: If the password has been lost, a protected D6 can be released by a System Reset (See Section 2.7 System Reset on page 29). Options Options The "Options"... -
Page 21: Device Name
1. Selecting "Device Name" enters the submenu and the cursor is Cancel positioned at the beginning of the "Device Name". As a factory preset "D6" followed by the firmware version is entered. Device Name 2. Pressing the encoder enters edit mode. The pointer, ( ), indicates... -
Page 22: Information
Information Information Selecting "Information" and pressing the encoder enters the submenu. Information Temp. Amp. The temperature of the D6 heat sink for both channel A and channel B. Back Temp.Amp. 35°C 38°C Temp. PS Temp.PS. 36°C The temperature of the D6 Power Supply. -
Page 23: Ps Log
Proportion of the "On Time" the D6 was muted. Back Mute Proportion of the "On Time" an input signal was present at the D6..GainRed Proportion of the "On Time" the D6 has been operated with gain reduction. -
Page 24: Input Monitoring
The D6 input mode is set to digital while the analog input connectors are monitored for incoming pilot signals (Analog Pilot). The program signal is fed to the digital input while for emergency calls the D6 will be switched (routed) to the analog inputs of the D6 and the program fed to the digital input will be interrupted. -
Page 25: Input Monitoring Menu
As the MUTE A/B switches isolate the D6 digital controller from the Note: power amplifiers the MUTE A/B switches do not affect the input connectors of the D6 and therefore "Input Monitoring" remains working (also refer to the D6 Hardware manual in section "Controls and indicators –... -
Page 26: Buzzer
The typical accuracy is 2 %. Mains 230V Frequency 50Hz Frequency The detected mains frequency. Buzzer Buzzer An additional acoustical signal for error messages. on/off Turning the buzzer on or off. D6 Software manual (Firmware V1.x.x) (1.1EN) Page 26 of 32... -
Page 27: Display Messages
Channel Amp. Temp. Warn. ([xx] °C): the temperature of the heat sink is very high, the air flow should be checked or the load should be reduced. D6 Software manual (Firmware V1.x.x) (1.1EN) Page 27 of 32... -
Page 28: System Check, Load And Input Monitoring
Channel (IM) Input Monitoring Fault: an Input Monitoring error has occurred, e.g. the detection of an incoming pilot signal has failed. This message applies to all operating modes of Input Monitoring. D6 Software manual (Firmware V1.x.x) (1.1EN) Page 28 of 32... -
Page 29: Further Messages
Further messages The following messages are intended for information on the status of the D6. They are no error messages. Standby: indicates that the device is in standby mode. Unlock: Press knob 2s: indicates that the device has been locked to protect it against accidental or unauthorized operation. -
Page 30: D6 Firmware Update
D6 amplifier. To execute a firmware update the computer has to be connected to the SERVICE connector on the rear panel of the D6 using a standard USB D6 SERVICE connector (USB type B) cable (connector type A to B). - Page 31 D6 Software manual (Firmware V1.x.x) (1.1EN) Page 31 of 32...
- Page 32 d&b audiotechnik GmbH, Eugen-Adolff-Str. 134, D-71522 Backnang, Germany, Phone +49-7191-9669-0, Fax +49-7191-95 00 00...
Need help?
Do you have a question about the D6 and is the answer not in the manual?
Questions and answers