
Related Manuals for CONVECTAIR opera 12 7732-C07


Summary of Contents for CONVECTAIR opera 12 7732-C07
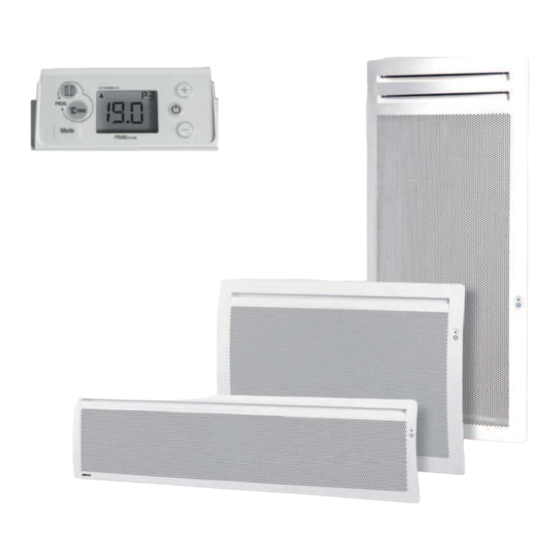
- Page 1 OPERA 12, 17 & 46 Radiant panel heater horizontal, vertical and low Installation & Installation & Operating Instructions ATTENTION : Documents to be kept by the end-user. 421AA2814.B00 09-2016 Please read before any operation.
-
Page 2: Dear Owner
Dear owner, Congratulations on the purchase of this premium electric heater. CONVECTAIR develops and produces the highest quality heating product in the electrical industry. To obtain the best results and the ultimate in performance and comfort, please take a moment to read the installation, operation and maintenance instructions detailed in this manual. - Page 3 Safety...
- Page 5 (30 in) 0,15 m 2.5 cm (1 in) Floor CAUTION: PLEASE MAINTAIN THE MINIMUM REQUIRED CLEARANCES (Fig. A). CONVECTAIR RECOMMENDS AN INSTALLATION HEIGHT OF 15 CM (6 IN). Minimum In front (A) Sides (B) Above (C) Underneath (E) Recommended height...
- Page 6 CONVECTAIR), follow these directions: 1- Free mounting brackets by pressing and pulling both locking tabs on the back of the heater (Fig. B). 2- Place the center of the mounting bracket's bottom holes (no. 2 Fig. B2) at the measure C (see tables Fig. C - D - E - F) from the ground and make a mark.
- Page 7 Outline of Cap. (W) unit Measures Hole spacing Heater width Heater height Junction 45 cm (18 in) 15 cm (6 in) Cap. (W) Measures Hole spacing Heater width Hauteur height Outline of unit Junction 20 cm (8 in) 15 cm (6 in)
- Page 8 Please read carefully the whole installation and operating instructions before connecting the heater WARNING : To prevent short circuits and electrical shocks turn the power off at the main panel before attempting the installation or making any repairs. If you are using a programmer system, make sure to cut the power off ALL electrical heating circuits of the heaters wired to the pilot wire.
- Page 9 - urnin O /S A - urnin O /S A t e eater t e eater ress t e e to turn t e eater O or S A - o set t e te perature - o set t e te perature - T e selector selector...
- Page 10 Consumption « Open Window» indicator function rogram - reset 1/ 2/ 3 Heating - Custom 4/ 5/ 6 indicator ress bot eys to Temperature - rogram t e setting eys eater - Set t e time ocation of t e programming cassette optional .
- Page 11 5.2 - Comfort Mode / Setting the desired temperature: ress t e eys to raise or lower t e desi- red Comfort temperature in steps of 0.5°C 1°F . To ensure t at t e temperature stabilises at t e desired temperature, t e doors and windows of t e room s ould be closed.
- Page 12 5.4 - AUTO Programming mode T is mode enables automatic operation of t e eater over pilot wire from a central programming system e CTAIR S rogrammer system or power management system. AUTO Mode ress successively on t e ey until t e Mode A TO symbol is displayed.
-
Page 13: Time Display
Speci c conditions In Comfort, conomy and Frost rotection override mode, Frost rotection and Heating OFF commands sent by t e central programming CTAIR S rogrammer system or energy management systems will ave a priority. T is is indicated by a blin ing A TO symbol. Central Programming System or Energy Management System Selected... -
Page 14: Setting The Time And Date
5.7 - Setting the time and date : -In all cases, to use t e preset programs, you rst must set t e time and date of your eater factory default 00 00 . -In case of a power outage e ceeding 12 ours, you must reset t e time on your device. - Page 15 5.8 - Setback functions: 4.8.1- Setbac CO Mode ress successively t e Mode ey until t e Setbac Mode CO is displayed. Mode To view t e CO set point, press brie y t e eys. To c ange t e CO set point temperature ress on t e ey for 3 seconds until t e CO set point temperature as es.
- Page 16 Option 1 : Turn off the heater, press (default mode) : simultaneously the ECO order from internal pro- gramming or pilot wire is seconds until detection Auto prioritary even if a presence has been detected. appears. Option 2 : ECO order from program- - Select the desired ming is not prioritary.
- Page 17 movement or P2 ...P6 Priority to comfort Detection Movement detection mode and programming Command over Pilot Wire Result or interne programming AUTO Gradual transition Comfort to ECO (in 1:30 hr) absence Comfort Mode movement Priority to energy savings Detection Movement detection mode without programming Command over Pilot Wire Result...
- Page 18 5.8.5 - Consumption indicator It is an indicator of be aviour t at allows viewing t e Indicateur de Consumption indicator consommation energy consumption status of your eater. reen indicator lig t = economical - Indicator lig t s ifting toward red = less economical. T is indicator allows to monitor and ad ust t e desired temperature depending on its impact on consumption.
- Page 19 Operating Mode 5.8.8 - reset programs 1/ 2/ 3 or customi- sable programmes 4/ 5/ 6 3 seconds In t is mode, t e eater operates in automatic daily mode according to t e Comfort set point or t e Setbac set point.
- Page 20 Preset Select Meaning programme Monday to Friday du Lundi au Vendredi T e 1 program sets t e Comfort temperature 17h à 23h 5h à 9h set point in t e morning from 5 00 to 9 00 and from 17 00 to 23 00 in t e evening. 0h 2 4 10 12 14 16 18 20 22 24 T e 2 program sets t e Comfort temperature...
- Page 21 OPERATING MODE: CUSTOM PROGRAMMING - P4/P5/P6 : In t is mode, t e eater operates in automatic daily mode at t e Comfort or Setbac set points. To do t is 3 seconds Regardless of t e current operating mode - ress t ese eys simultaneously for 3seconds.
- Page 22 HOW DO I CUSTOMISE THE PROGRAM? EXEMPLE - P4 For example for MON AY program L 4 , we wis to set t e Comfort set point temperature for 3 different time intervals in t e morning from 6 00 to 9 00, at noon from 11 00 to 14 00 and in t e evening from 18 00 to 22 00 rs.
- Page 23 5.9 - Coordinating the displays (thermostat/thermometer) : Exceptionally, under certain conditions, t ere may be a temperature display difference between t e eater s display and t e t ermometer display. In suc a case, t e two displays can be coordinated. T is coordination is possible only if t e unit is set between 17 and 23°C.
- Page 24 T is eater is e uipped wit an automatic reset over eat protection. In case of a malfunction of t e unit bloc ed air output or inta e , t e eater will stop eating automatically. To reset t e eater C ec t at t e front panel, top and bottom of t e eater are free of obstruction.
- Page 25 NEVER USE ABRASIVE OR ACETONE-BASED PRODUCTS TO CLEAN YOUR HEATER AS THIS MAY DETERIORATE THE EPOXY FINISH. ANY REPAIR ON YOUR CONVECTAIR HEATER SHOULD ONLY BE DONE BY A QUALIFIED TECHNICIAN, AND ONLY AFTER THE HEATER HAS BEEN DISCONNECTED. Recommendations and advice Your CON ECTAIR eater will become ot w en in use.
- Page 26 24 ours. Once t is time T e eater does as passed, replug t e eater. not wor . If t e problem persists, contact CONVECTAIR. IN ALL OTHER CASES, CONTACT CONVECTAIR. 1 800 463-6478 support@convectair.ca OR the nearest Service Center.
-
Page 28: Service Centers
Constructeur N°412 2 years against all defects / 5 years on heating element. All CONVECTAIR eaters are sub ects to a double warranty. Warranty is applicable from date of purc ase by t e customer and under certain speci c conditions. All details furnis ed wit eac eater.
Need help?
Do you have a question about the opera 12 7732-C07 and is the answer not in the manual?
Questions and answers