Table of Contents
Advertisement
Quick Links
Advertisement
Table of Contents

Related Manuals for AEE CONDOR series


Summary of Contents for AEE CONDOR series
-
Page 3: Table Of Contents
Warnings..............................5 Disclaimer..............................5 Product.Description........................... 6 Precautions.for.UAV.Use........................... 6 Precautions.for.On-board.Camera.Use....................7 Precautions.for.Battery.Use.and.Charging....................7 Limitation.of.Liability..........................8 User’s.Manual.for.AEE.CONDOR......................9 Preface................................. 9 WARNING..............................9 I..Overview..............................10 1..List.of.Items............................10 2..Product.Introduction..........................10 II..Preparations.for.Use..........................11 1..Prepare.the.Battery..........................11 1.1.UAV.Battery.Introduction........................11... - Page 4 4.7.Remote.Control.Operations......................25 4.8.Connection.between.Remote.Control.and.UAV................27 4.9.WiFi.Password.Change.and.Reset....................27 4.10.OSD.Language.Selection........................ 27 4.11.Joystick.and.Thumb.Wheel.Calibration..................28 4.12.Repeater.Remote.Control.Calibration................... 28 5..APP.Downloading.and.Installation..................... 28 6..Introduction.for.AEE.CONDOR.APP....................29 6.1.Main.Menu............................29 6.2.Main.Interface............................ 30 III..Flight..............................32 Preflight.Checks............................32 1..Compass.Calibration..........................32 1.1.Calibration.Steps..........................32 1.2.Recalibration.Conditions........................
-
Page 5: Warnings
Note: we shall not be held liable for any radio/video interference caused by unauthorized product modifications or changes, as such modifications or changes go beyond your operation authorization. Note: as tested and verified, this product complies with the requirements on Class-B digital products in § 15.247 FCC; such requirements require that the installation and use of this product have no harmful effect on residents’ living environment; improper installation and use may interfere with radio communication, as this product radiates RF energy in use; we cannot guarantee that no interference will be caused under special installation and use conditions; by powering on/off this product, you can determine whether the interferences caused by this product; if this product causes any interference to the radio/video receiving device, take the following corrective measures: ※ Adjust the direction of the antenna; ※ Increase the distance between this product and the radio/video receiving device; ※ Contact your local dealer or an experienced radio/video technician for help. (2) Make sure the distance between the antenna and human body reaches 20cm. Connect the USB ports of the remote control and UAV to USB V2.0 or above communication interfaces only, never to USB power interfaces. Note: for explosion prevention purpose, please use the battery of correct type; follow the applicable directives to dispose of the used battery properly. We hereby undertake that this product complies with the basic requirements in 1999/5/EC and other applicable directives. (3) This product is intended for personal use only, never for any use that violates any international or local law or regulation. Do not use this product (including but not limited to): (i) to defame, abuse, harass, stalk, threaten or otherwise violate the legal rights (such as rights of privacy and publicity) of others; (ii) to take any photo of others or private areas without permission; (iii) for any illegal or inappropriate purpose (espionage, unauthorized investigation, etc.)other than general commercial purposes; or (iv) in such manner that any local law, administrative regulation or social convention is violated. Disclaimer Please read this Disclaimer carefully before using this product. Using this product shall be deemed to have agreed and accepted the entire contents of this Disclaimer: no juvenile aged under 18 shall be the intended user of this product; the user shall be held liable for his/her use of this product and all consequences arising there from; the user shall use this product for legitimate purposes only and abide by this Disclaimer and our other applicable policies and standards. (1) This Disclaimer is subject to change without further notice. Visit www.aee.com for the latest Disclaimer. (2) We shall reserve the final interpretation right to this Disclaimer. (3) This Disclaimer is made in various languages. In case of any discrepancy among different language versions, the Chinese version shall prevail. -
Page 6: Product.description
Product Description CONDOR is a hi-tech electronic product integrated with flight and photography functions, equipped with the integrated three-axis gimbal camera and advanced intelligent flight control system. With the APP on your mobile device, you can receive the video recorded by the 16-megapixel onboard camera and the flight data of the UAV in real time and control the onboard camera remotely. (1) The outstanding performance of this product relies on our original accessories. We shall not be held liable for any loss or damage caused by using any other accessory. (2) Equipped with the intelligent control system, this product will enter a safe working state if powered on. However, we recommend you remove the propellers before performing the calibration or setting any parameter. (3) Make sure the power supply system and other functional modules are installed properly before using this product. Remove the propeller blades and keep the UAV away from the crowd and vulnerable, fragile and hazardous materials before performing the calibration. Precautions for UAV Use Check the following items one by one before each flight: (1) Check if all components are in good condition. Do not start the flight if any component is aged or damaged. (2) Make sure the UAV battery and remote control battery are fully charged. (3) To prevent communication interference, do not use 3 or more UAVs simultaneously in an area (of football field size) or use the UAV near 3 or more high-power 2.4G (Wi-Fi) equipment. (4) Make sure the UAV will fly at the specified load. (5) Power on the UAV and remote control in no particular order before taking off. Power off the UAV and remote control successively after landing. (6) Check if the propellers and motors are installed properly and reliably. Make sure the forward-rotating propeller and counter-rotating propeller are put in their places. To prevent cuts, do not get close to or come into contact with the rotating motors or propellers. -
Page 7: Precautions.for.on-Board.camera.use
(3) Do not store the camera in a humid or dusty place. (4) Do not use or store the camera in a strong-sunlight or high-temperature place. (5) Stop using the camera immediately when it smokes or smells. (6) Before using the camera to shoot important images, check if it works properly by taking several test shots. Precautions for Battery Use and Charging The Li-polymer battery is a hazardous material. Please follow the precautions below to use it: (1) Do not dip the battery in water. If the battery will be idle for long, store it in a cool and dry place. (2) Place the battery beyond the reach of children. (3) Do not use or store the battery near any heat source, like fire or furnace. (4) Charge the UAV battery with an AEE authorized charger only. (5) To use the UAV battery, make sure the battery fastener is fit in place. (6) Do not throw the battery into fire or heat it. (7) Do not use wires or other metal objects to short-circuit the battery’s anode and cathode. (8) Do not transport or store the battery together with metal objects. (9) Do not impact or throw the battery or expose it to any hard impact. (10) Do not use nails or other sharp objects to pierce the battery housing. Never hammer or step on the battery. (11) Do not decompose the battery in any way (do not disassemble, punch or cut it; never try to repair it). (12) To maintain the battery’s performance and service life, do not use or store the battery in extremely hot environments (like in direct sunlight or in a car in hot days), or it may overheat to catch fire (spontaneously combust). -
Page 8: Limitation.of.liability
(16) Use the AEE supplied battery only. (17) Do not use it if the battery leaks, bulges, smells or is broken. (18) Never allow the battery to contact any liquid. Do not expose the battery to rain or put it in humid places. (19) Do not place the battery in any microwave oven or pressure vessel. (20) Remove the battery when the UAV is not in use. To prevent power interface damage, do not remove the battery until the UAV is powered off. (21) To prevent battery damage, do not place the battery near strong static or electromagnetic waves. (22) Do not place heavy objects near the battery or charger, or they may fall on the battery. (23) To charge the battery, place the battery and charger on the ground free of flammable and combustible materials and keep an eye on the charging process to prevent accidents. (24) Never contact the electrolyte and electrolytic gas inside the battery. They are harmful to your health. (25) Replace the battery after 300 charging and discharging cycles. (26) To prevent burns, do not touch the UAV battery cells after the flight. (27) Do not throw the damaged or unusable battery away irresponsibly. Follow the local standards and regulations to dispose the waste battery. Contact your local solid waste administration or battery stores for more information. (28) Do not charge the UAV batter yuntil it cools down to the room temperature after used. (29) To save battery energy, the battery will be auto shut down if the flight state is not started (the propellers are not started) in 10min after the battery is powered on, whether installed onto the UAV or placed separately. (30) The battery supports power-off delay: cut off the power 4s after receiving the shutdown instruction in order to save the recorded video. (31) If the battery will be idle for long, discharge it to 40%~50% power (individual cell: 3.7V~3.9V) and store it in the special battery box. To keep the battery active, charge and discharge it every three months. -
Page 9: User's.manual.for.aee.condor
(12) You operate the UAV in poor weather conditions, such as rain, strong wind (above force 4), snow or hail; (13) The UAV encounters any impact, overturn, fire, explosion, lightning stroke, storm, tornado, rainstorm, flood, tsunamis, ground settlement, ice settlement, cliff fall, avalanche, hailstorm, mudslide, landslide or earthquake; (14) Any data or audio/video material acquired through the UAV constitutes an infringement; (15) By any flight or shooting against this Manual; (16) By your violation of any local law; (17) Other losses beyond the scope of our liability. User’s Manual for AEE CONDOR Version: V1.0 2017.08 Please follow this Manual strictly to use Condor Preface All functions described herein are the functions of Condor in working state, unless otherwise specified. In case of rain or snow in the flight, recall the UAV immediately and scrub it. WARNING: To install the propellers without damaging the product, follow the direction marks strictly to turn them with appropriate pressure. -
Page 10: List.of.items
I. Overview Featured by professional and stylish appearance and new flight control platform, Condor is a multifunctional quad-rotor UAV with onboard camera integrated with such advanced technologies as dynamics, intelligent control, electronics, communication and software engineering. 1. List of Items Check items in the package according to the List of Items carefully before using the UAV. 2. Product Introduction In high-standard integrated design and equipped with the integrated three-axis gimbal camera, Condor will offer you an excellent flight and photography experience in low-altitude outdoor areas or large indoor spaces. Complete the simple installation before preparing for the flight and video recording. In the flight, manual operations are required to record and save videos. You can use the remote control to control the UAV in real time or view the flight videos in real time on your mobile device. Intended for civil or commercial use, this product is featured by easy and flexible operation and stable and reliable performance. External UAV Built-in UAV Remote Control UAV Working Modes Components Components Remote control Integrated three-axis Position mode (P) Flight control system Two joysticks, multiple gimbal camera Normal mode (M) Wi-Fi module channels... -
Page 11: Prepare.the.battery
II. Preparations for Use Follow the instructions below to install and check the UAV before a flight. 1. Prepare the Battery Make sure the following items are fully charged before using this product. Item Power Supply Powered by the UAV battery Repeater remote With built-in rechargeable lithium battery, charged and powered via the DC-IN port control Remote control base Cannot be powered or used without the repeater remote control Mobile device To use the APP, make sure your mobile device is fully charged Here we show you how to use the UAV battery. 1.1 UAV Battery Introduction The specially designed UAV battery (Fig. 3) is a 6,800mAh and 11.1V smart battery with charging and discharging management function. Use the AEE special charger (Fig. 4) to charge the UAV battery only. Fig. 3 Fig. 4 Shortly press the power button (Fig. 5) to display the battery level on the screen. Charge the battery when the battery level icon indicates less than two bars of power. Fig. 5... -
Page 12: Uav.battery.charging
UAV battery specifications: Type Li-Po battery Capacity 6,800mAh Ambient temperature for charging 5℃~40℃ Ambient temperature for discharging -10℃~40℃ Ambient RH for charging/discharging <80% Read this Manual carefully before using the UAV battery. You shall be held liable for all consequences caused by failure to follow this Manual. 1.2 UAV Battery Charging (1) Connect the charger to the AC power source (100~240V, 50/60Hz). Use a power adapter if necessary. (2) In the charging process, the battery LED will flash dynamically. (3) The battery LED will remain on at four bars when the battery is fully charged. Now, remove the battery. Fig. 6 1.3 Install the UAV Battery Push the battery into the battery compartment in the correct direction (Fig. 7).The battery fastener is fit in place if you hear a click sound. Fig. 7... -
Page 13: Prepare.the.uav
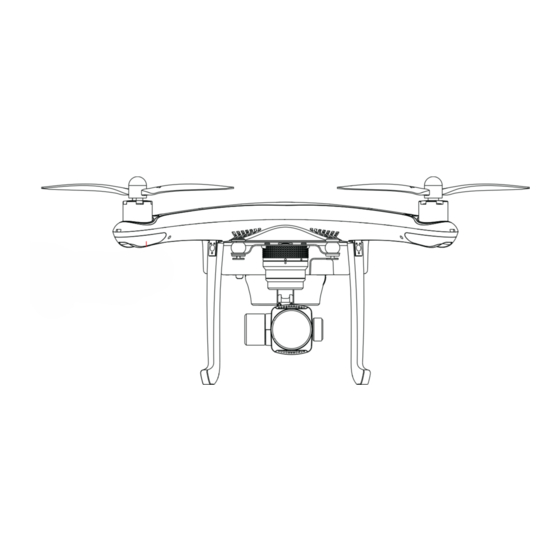
2. Prepare the UAV 2.1 Components Fig. 8 1. Blade 6. Optical flow module 11. Front arm LED 2. Motor 7. Landing gear 12. Battery LED 3. Rear arm LED 8. Retract button 13. Power button 4. Battery 9. Airbag 5. Battery fastener 10. Three-axis gimbal camera 2.2 Flight Control System The AEE flight control system of Condor is stable and easy to operate. It supports the basic lifting and pitching actions and the fail-safe, low power alarm and low-power landing functions. -
Page 14: Flight.leds
2.3 Flight LEDs Flight LEDs include the front arm LED (white), rear arm LED (red/green/blue) and tail LED and Breathing Logo LED. The rear arm LED is referred to as “tri-color LED” hereinafter. Fig. 9 Flight LEDs of Condor System Status White Green Tail White Front Arm LED Red/Green/Blue Rear Arm Logo LED Powering on Remain on (power-on self-test) Warming up Flash in blue, green and red Breathe Remain on by turns Powered on Same as the relevant mode Breathe Remain on Remain on GPS mode Breathe Remain on Remain on Remain green NORMAL mode Remain yellow (red + green) Breathe Remain on Remain on Visual positioning Remain blue Breathe... -
Page 15: Micro.sd.slot
Level-1 alarm: flash Level-1 low power: both the slowly (1s on and 1s off. front and rear (red) arm LEDs The UAV will auto land flash slowly in 6min) Level-2 low power: both the Low power Breathe Flash slowly Level-2 alarm: flash front and rear (red) arm LEDs quickly (0.1s on and flash quickly 0.1s off. The UAV will auto land in 5s) System error (smart Breathe Flash slowly The front and rear (red) arm LEDs flash alternately. battery error) Compass calibration: At the beginning: flash slowly Calibrating Breathe Flash slowly Remain on in yellow In the process: flash slowly in green Calibrated Same as the relevant mode Breathe Remain on Remain on successfully Note: (1) Low power alarm sound:... -
Page 16: Install.and.use.the.gimbal
2.5 Install and Use the Gimbal Please install the gimbal I12 onto the UAV as shown in fig. 12 below. Fig. 11 Note: turn the gimbal fastener to the UNLOCK position before the installation. 2.6 Onboard Camera The onboard camera is powered by the UAV battery. Through the APP on your mobile device or the functional keys on the remote control, you can shoot photos, record videos, stop recording videos and perform other operations. The camera supports the single shot mode. Camera Specifications Resolution 16.0M Video FOV Up to 100° Sensor 1/2.3 12.4M Exmor R sensor Lens F/NO=2.6±5%, spherical UHD: up to 3840×2160P, 30fps HD video resolution FHD: up to 1440P, 60fps HD: up to 720P, 200fps Photo: JPG File format Video: MP4 (H.264 compression) Storage card External TF card, up to 64G (data rate: U1 or above) 2.6.1 Functional Keys of the Camera Shoot key: press the shoot key on the remote control or in the APP to shoot one photo. -
Page 17: Landing.gear.operations
2.7 Landing Gear Operations (1) Pull the landing gear (Fig. A) up to erect it until you hear a click sound. (2) Press the retract button (Fig. B) and retract the landing gear. Note: there are two types of landing gears: automatic retractable landing gear (Condor Elite) and manual retractable landing gear (Condor Advanced). 2.8 Install the Optical Flow Module (Only for Condor Elite) Follow the steps below to install the optical flow module: (1) Fit the right fastener of the optical flow module into the right locking seat of the UAV. (2) Press and hold the button of the left fastener of the optical flow module, fit the pin and leftfastener of the optical flow module respectively into the pin hole and left locking seat of the UAV, press the leftfastener down, and then release the button. (3) Pull the optical flow module up lightly to check whether it is installed reliably. If not, repeat step (1) and (2) until it is installed reliably. (4) Do not plug or remove the Visual module and ultrasonic module when the UAV is powered on. (5) The figure 12 below shows the installation effect. Fig. 12... -
Page 18: Prepare.the.propellers.and.propeller.guard.rings
3. Prepare the Propellers and Propeller Guard Rings Condor uses 10.5 inch propellers, whose caps are marked or unmarked with “P”. Propeller is a consumable. Purchase new propellers when necessary. 3.1 Introduction for Propellers Propeller With “P”-unmarked Cap (1045) With “P”-marked Cap (1045P) Sketch Install onto the motor shafts of Install onto the motor shafts of Installation position the arms unmarked with “P” the arms marked with “P” Direction marks Tighten: install the propeller onto the motor in this direction. 3.2 Install the Propellers As shown in Fig. 13, prepare two propellers with “P”-marked cap and two propellers with “P”-unmarked cap and install them respectively onto the motor shafts of the arms marked with “P” and the motor shafts of the arms unmarked with “P”. Tighten the propellers in the tighten mark direction. Fig. 13 (1) Tighten the self-propelled propellers rather than use any screw glue.. (2) Make sure all propellers are installed in their places. Improper installation may cause the UAV to work improperly. To protect the thin blades against scratches, please wear gloves while installing the propellers. -
Page 19: Precautions
3.4 Precautions (1) Check if the propellers are installed properly and reliably before each flight. (2) Check if the propellers are in good condition before each flight. Replace the aged or damaged propellers if any. (3) For your safety, do not get close to or contact the rotating motors or propellers. (4) For the best flight effect, use AEE propellers only. WARNING: (1) To install the propellers without product damage, follow the direction marks strictly to turn them with appropriate pressure. (2) The motor is in high-temperature state after each use. To prevent burns, do not remove the propellers until the motor cools down. 3.5 Install the Propeller Guard Rings Follow the steps below to install the propeller guard rings: (1) Prepare the UAV, four propeller guard rings, eight PM2.5×12 screws and a hexagonal screwdriver. (2) Press the propeller guard rings down from the top of the motors (Fig. A). (3) Tighten the PM2.5×12 screws (Fig. B) to secure the four propeller guard rings and then install the four blades. (4) Fig. C shows the installation effect. Fig. A Remove the original screws. Fig. B Install the propeller guard rings. Fig. C Installation Effect... -
Page 20: Prepare.the.remote.control
4. Prepare the Remote Control Intended to work with the UAV, the remote control is already paired with the UAV. Its default mode is U.S. hand: use the left joystick to control the throttle. ※ The phone holder does not support any mobile device wider than 6 inches. 4.1 Remote Control Introduction Note: To fold the phone holder without damage, remember to press the phone holder fastener. Fig. 15 Name Description Thumb wheel switch Control the gimbal’s pitching angle Shoot key Press it to shoot one photo Automatic retractable landing gear: press it to erect/retract the landing gear. Retract button Manual retractable landing gear: this button is inoperative. Three positions: Position S (professional player): high horizontal speed, high turning speed and high descending speed. - Page 21 Three positions: Position P: position mode, support spot hover with GPS or Visual Toggle switch B Position M: normal mode, support attitude stability augmentation, no GPS or (flight mode) Visual; Position N: neutral mode. Home point lock Press and hold it to enable/disable the home point lock function Record key Press it to start/stop recording the video Joystick A 1 two-way joystick, support yawing and throttling Joystick B 1 two-way joystick, support pitching and rolling Phone holder Place your mobile device Trigger the remote control base calibration or remote control language Custom key selection Press it to open the hook and press it again to close the hook. Hook key Note: the hook is an optional accessory. Repeater fastener Power button Press it once and then long press it for 3s to power on/off the UAV Repeater fastener Signal transmitting/receiving antenna: Antenna (1) 2.4G (WiFi) HD image transmission antenna (2) 2.4G (WiFi) data transmission antenna LED screen Lanyard hole 1 lanyard hole, hang the remote control Takeoff/land key Press and hold it to take off or land Push it to position ON: enable the repeater follow me function. Follow me switch Push it to position OFF: disable the repeater follow me use function.
-
Page 22: Remote.control.charging
Keys on the Remote Control Function Description Operations If the follow me function is enabled, the UAV will auto follow the repeater remote control. The gimbal pitching angle will be auto controlled by the UAV, not Take the repeater. When the repeater controllable by the remote control. The remote control finds six satellites, push Follow me UAV and remote control will maintain the the follow me switch to “ON” position to 15m altitude and 20m distance. enable the follow me function. In the APP, the follow me mode can be set to phone or remote control. If it is set to phone, the UAV will follow the connected mobile phone. If the return home function is enabled, the UAV will return to the home point at the Press and hold the home key until you hear current altitude or ascend to the altitude two “Di” sounds to enable the return home Home key (15~80m, default 30m) set on the APP first function. Press and hold it again to exit if the current altitude is lower than such this function. altitude. If the UAV is 20M away from the home Press and hold the home point lock until point and you are not sure about its you hear two “Di” sounds to enable the Home heading, this function allows you to pull the home point lock function. Press and hold... -
Page 23: Power.on.the.remote.control
4.3 Power On the Remote Control Press the power button and then long press it for 3s to power on the remote control. ※ Make sure the remote control is fully charged before each use. In case of low power, the low power alarm will be triggered with the red LED flashing quickly and an alarm signal appearing on the remote control screen. Charge the remote control soon. ※ If no operation is performed in 5min after the remote control is powered on, you will hear “Di-Di” sounds. After 15min “Di-Di” sounds, the remote control will be auto powered off. WARNING: Do not touch the propellers while operating the remote control! 4.4 Remote Control LED Indicator The red/green/blue status LED (Fig. 16) on the remote control indicates the current status of the power-on UAV. (1) Remain amber (green+blue): full power. (2) Flash in red slowly twice: level-1 low power. Flash in red quickly twice: level-2 low power. (3) Flash in red quickly (accompanied by “Di-Di-Di” sound): less than 15% power. Charge the battery soon. (4) Flash in blue and amber (green+blue) alternately: the repeater remote control is not in full contact with the remote control base. Fig. 16 4.5 UI Interface of the Remote Control... -
Page 24: Antenna.signal
4.6 Antenna Signal The optimal communication range of the remote control signal is described below. Case 1: when flying to a long distance, the optimal communication range is in the mouth of the horizontal horn. Angle between antennas: 90°~150° Case 2: when flying to a high altitude, the optimal communication range is in the mouth of the vertical horn. Angle between antennas: 90°~150° To control the UAV, keep it in the optimal communication range by adjusting the angle and distance between the operator and UAV or the antenna direction. -
Page 25: Remote.control.operations
4.7 Remote Control Operations Joystick in neutral: the remote control joystick is in the neutral position. Joystick shift: the extent of the remote control joystick shift from the neutral position. Remote Control Operations UAV (“ ” indicates the heading) Control the UAV’s altitude: push/pull the left joystick up/ Ascend down to enable the UAV to ascend/descend. In case of joystick in neutral, the UAV Ascend will not move up or down. To take off, push the left joystick up slowly (quick pushing may Descend cause the UAV to ascend Descend rapidly suddenly) until above the neutral position. Control the UAV’s heading: Turn Left Turn Right push the left joystick left/ right to enable the UAV to turn counter clockwise/ clockwise. In case of joystick Turn Left Turn Right in neutral, the UAV will not turn. A greater joystick shift... - Page 26 Three flight speed positions: Position S: high speed Position D: medium speed Position E: low speed We recommend position Position -1 (left) Position -2 (middle) E (low speed) to beginner Position -3 (righ t) players. Three flight mode positions: Position P: intelligent position mode (auto switch between the GPS mode and visual positioning mode) Position -1 (left) Position -2 (middle) Position M: normal mode Position -3 (right) Position N: neutral mode ※ In position P (GPS/Visual), the UAV will get into spot hover if both joysticks are in the neutral position. ※ When use P mode outdoor, it is recommended to take off after the GPS find satellites successfully (the rear arm LED remains green). ※...
-
Page 27: Connection.between.remote.control.and.uav
• Keep the working UAV away from animals, as the ultrasonic waves (not perceived by human ears) emitted by the visual positioning system will disturb animals. 4.8 Connection between Remote Control and UAV The remote control is already paired with the UAV. When power on the remote control and UAV, the remote control indicates successful connection, you can use it to start the UAV. 4.9 WiFi Password Change and Reset 4.9.1 Change WiFi Password Connect the remote control to the UAV, connect your mobile phone to the WiFi hotspot of the remote control and start the APP. In the connection interface, tap [Settings]→[Change WiFi Password] and follow the instructions to change the WiFi password of the remote control and UAV simultaneously. 4.9.2 Reset WiFi Password If you’ve forgotten the WiFi password, reset the WiFi password to the factory default “00000000” as described below: (1) Reset the remote control WiFi password to the factory default: slide switch A (speed switch) quickly for more than six times (the message “WiFi password reset successfully!” will appear on the screen of the remote control). (2) Reset the UAV WiFi password to the factory default: insert the test pin into the reset hole in the support plate as shown below and press and hold it for 10s. Note: do not change or rest the WiFi password in case of low power. -
Page 29: Introduction.for.aee.condor.app
Compatible mobile devices: AEE ZONE is compatible with the dominant mobile phones running on system Android 4.4(or above) or iOS 9.0 (or above). ※ AEE will continue to update the APP in order to support more types of mobile devices. 6. Introduction for AEE CONDOR APP AEE ZONE is mainly used to control the onboard camera remotely, including shooting photos, taking videos, setting camera parameters etc. 6.1 Main Menu Connect your mobile device to the WiFi hotspot (AEE_RC_CONxxxxxx) of the remote control. Start the APP to go to the interface shown in Fig. 17: Fig. 17 Fig. 18 Click “ ” to enter the UAV connection interface (Fig. 18). ※ When your mobile device receives an incoming call in the flight, the preview image will be covered. To protect the flight safety, do not answer calls in the flight. ※ To achieve long-distance control, connect your mobile device to the WiFi hotspot (AEE_RC_CONxxxxxx) of the remote control. -
Page 30: Main.interface
6.2 Main Interface Upon successfully connected to WiFi, start the APP and click the “Connect” to enter the main interface as below. Upon successful Wi-Fi connection, click [Connect UAV] to enter the main interface (Fig. 19). Fig. 19 Icons on the APP Number Function Name Function Description Operation Instruction Same as the takeoff/land key on the Click the takeoff/land key on the APP Takeoff/land remote control. to take off/ land the UAV. The UAV will return to the home point Tap the home icon and then tap [Yes] at the current altitude or ascend to to return home. Tap the home icon Home the altitude (15~80m, default 30m) set again to cancel returning home. on the APP first if the current altitude is lower than such altitude. Voice commands: take off, land, return Tap and hold the voice icon to enable Voice control home, shoot photo, and record videos this function. (can only support Chinese). Lock the current heading as the Tap [Azimuth Lock] to enable this Azimuth Lock nose direction and fly in such nose function. Tap [Normal] to exit this... - Page 31 Fly on preset route (preset the altitude Download the offline map, tap and and stay time for each waypoint) and hold the target position on the map to Waypoint (On-route hover at the last waypoint. To control add it as a waypoint, upload the route Flight) the UAV, cancel the on-route flight and tap [Waypoint]. Tap [Waypoint] function manually. again to exit the Waypoint flight. Tap [Follow me] to enable the follow me mode. Tap it again to exit this Same as the follow me key on remote mode. The APP allows you to set the Follow me control, object to be followed (in the preview interface, tap [Settings]→[Follow Me]→[Remote Control]/[Phone]). Fly in the circle 20m around the current position. In the circle flight, Tap [Sphere Focus] to start the circle Sphere Focus you can control the flight altitude. flight. Tap it again to cancel such (Circle Flight) Disable the beginner mode before flight. stating the circle flight. The master controller allows you Remote to set the mobile phone or remote In the preview interface, control control flight control. The control way tap [Settings]→[Remote...
-
Page 32: Iii
III. Flight Get familiar with the operating instructions and precautions in this Manual before the flight. Preflight Checks (1) Check if the UAV, remote control and your mobile device are fully charged. (2) Check if the propellers are installed properly. (3) To shoot photos/videos, make sure the micro SD card is inserted. (4) Power on the UAV and remote control and check if they work properly. (5) Check if the motors can be started once the UAV is powered on (to prevent personal injuries and other unpredictable losses, remove the propellers). (6) Check if the APP is connected to the onboard camera successfully. 1. Compass Calibration To ensure the normal system functioning and flight safety, calibrate the compass before the first use, for each new flight area or if the heading is auto changed in the flight. The compass is vulnerable to the interference of other electronic devices, causing data error or even flight accidents. Frequent calibration can keep the compass in its best working condition. ※ Do not calibrate the compass in high-intensity magnetic fields (like magnetic mines, parking lots, building areas with underground reinforce concrete or large-sized steel towers). ※ Do not carry any ferromagnetic object, like key, mobile phone, etc. 1.1 Calibration Steps In an open area, power on the UAV and remote control (make sure they work properly) and follow the steps below to calibrate the compass: The left joystick Pull the throttle joystick down to the bottom... -
Page 33: Recalibration.conditions
1.2 Recalibration Conditions (1) Compass data error, the front arm LED remains on and the rear arm LED flashes in red and yellow alternately. (2) The flight area is far from the previous compass calibration area. (3) The UAV has any mechanical structure change. (4) The UAV drifts severely in the flight, for example, hovers in a circling or pot cleaning way. WARNING: To prevent accidental injuries and losses, remove the propellers before calibrating the compass. 2. Start/Stop the Motors 2.1 Start the Motors Method 1: push the joysticks to start the motors. Release the joysticks when the motors start rotating (Fig. 20). Method 2: In GPS or Visual mode, press the takeoff/land key on the repeater remote control to start the motors. Fig. 20 2.2 Stop the Motors Use either of the following methods to stop the motors: Method 1 (Fig. 21): after the UAV lands, pull the throttle of the left joystick down to the bottom until the motors idle, follow Fig. 22 to pull the left joystick to the lower left and right joystick to the lower right simultaneously, release the joysticks when the motors stop rotating. Method 2 (Fig. 22): after the UAV lands, pull the left joystick down to the bottom for 3s until the motors stop rotating (this method is recommended in general cases). Fig. 21 Fig. 22... -
Page 34: Basic.flight
※ In the flight, do not pull both joysticks to the toe-out position simultaneously, or the motors will stop rotating in the air and the UAV will crash. ※ Pull the joysticks quickly and release them when the motors start/stop rotating. ※ In GPS or Visual mode, the landing function is supported (auto stop the motors after landing). WARNING: Do not power off the remote control until the propellers are fully stopped, or the “return home upon out-of- control” function may be enabled (the propellers start rotating again at a high speed and the UAV takes off). 3. Basic Flight 3.1 Basic Flight Steps (1) Place Condor on the smooth and open ground with the tail LED facing you. (2) Power on the remote control and UAV. (3) After connecting the UAV to the remote control, enable the WiFi function of your mobile device to find the WiFi hotspot of the UAV (AEE-CONDORxxxxxx) and remote control (AEE-RC_CONxxxxxx). (4) Connect the mobile device to Condor and enter the camera preview interface (To achieve long-distance control, connect to the WiFi hotspot of the remote control.). (5) If you activate the position mode (position P), the UAV will switch the position mode between GPS mode and optical flow positioning mode if equipped with the optical flow module. For flight safety, the GPS mode is prioritized by default (the GPS mode is active if the tail LED remains green and “GPS” is displayed on the remote control screen; the visual positioning mode is active if the tail LED remains blue and “VISUAL” is displayed on the remote control screen). If you activate the normal mode (position M), the tail LED will remain yellow and “NORMAL” will be displayed on the remote control screen. Start the motors now. Only the GPS mode allows you to use the takeoff/land key on the repeater remote control for takeoff purpose. ※ To use the repeater remote control to control the flight, enable the GPS or Visual mode. (6) Push the throttle joystick up slowly to enable the UAV to take off steadily (refer to the section Remote Control Operations) (7) The APP can help you shoot aerial photos and videos (refer to the introduction for APP). -
Page 35: Fail-Safe
(6) For steady flight, push the joysticks to a limited extent. 4. Fail-safe Fail-safe: to reduce loss or crash accidents, the flight control system will auto land the UAV or return it to the home point and land it when the UAV loses the remote control signals (out of control). ※ Home point: the position where the UAV GPS finds satellites and takes off. 4.1 Fail-safe Conditions (1) The power of remote control is turned off during flight. (2) The flight distance is longer than the effective signal transmission distance of the remote control. (3) The remote control signals are interfered. 4.2 Return Home upon Out-of-Control In the flight, the out-of-control UAV will follow the process below: (1) Decelerate and hover; (2) If the remote control signals are recovered in 2s, the UAV will be connected to the remote control again and will not return home; (3) If the remote control signals are not recovered in 3s, the UAV will return home. If the vertical height difference between the UAV altitude and home point is greater than 30m, the UAV will return home directly. If such vertical height difference is smaller than 30m, the UAV will return home after ascending to the 30m altitude. ※ To enable the out-of-control UAV to return to the home point successfully, do not take off until the UAV GPS finds satellites. ※ The out-of-control UAV has no obstacle avoidance function while returning home. 5. Low Power Alarms To protect the UAV against crash and other risks after losing power, return home and land soon after the UAV battery gets into lower power state. To prevent the risks caused by low power, Condor may trigger the level-1... -
Page 40: Common.leds
V. Onboard Camera Upgrade (1) Visit our official website www.aee.com to download the latest Condor onboard camera upgrade package. (2) Decompress the downloaded upgrade package into two files: firmware.bin and autoexec.ash. Copy these two files to the formatted TF card. (3) Insert the TF card into the card slot of the onboard camera, power on the UAV with the propellers removed, start the upgrading process, and then wait about 2min until the upgrading process is completed. Format the TF card. VI. Appendix 1. Common LEDs Normal Status The front arm LED and green rear arm LED remain on In GPS mode The front arm LED and yellow rear arm LED remain on In normal mode The front arm LED and blue rear arm LED remain on In visual positioning mode Alarms and Errors The front and rear arm LEDs flash slowly Level-1 low power alarm The front and rear arm LEDs flash quickly Level-2 low power alarm The front arm LED remains on and the rear arm LED Compass error flashes red and yellow alternately The front and rear (red) arm LEDs flash alternately. Smart battery error The above LEDs are common flight LEDs. Refer to the section Flight LEDs for more information. 2. Specifications Battery... -
Page 41: Faq
Camera Sensor size 1/2.3 Effective pixels 16 Mega Resolution 16.0M (4608×3456) (default), 12.0M (4000×3000), 8.0M (3200×2400) HD video resolution UHD: up to 3840×2160P, 30fps FHD: up to 1440P, 60fps HD: up to 720P, 200fps Remote Control Data transmission distance ≥500m Duration ≤2h Working current/voltage ≤ 500mA/3.7V Battery 1,600mAh lithium battery Repeater Working frequency 2.4GHz Communication distance (open ≥500m (Open environment without interference) outdoor area) Transmitting power ≤27dBm Power consumption 0.5W 3. FAQ 3.1 The UAV disappears in my field of view with Wi-Fi disconnected. What can I do? Wi-Fi connection is disconnected, the aircraft will automatically return home under conditions as below, 1) the UAV has searched GPS successfully before flight. - Page 42 3.5 The map functions do not work. What can I do? You may not be able to use the map function because the map was not loaded correctly. To load the map, please connect your mobile phone to the Internet or download the offline map, and then connect to the WiFi hotspot of the remote control. Note: contact AEE authorized dealers or sales outlets for more help. Provided for reference, this Manual is subject to change without further notice. Visit our official website www.aee.com for the latest User’s Manual.
Need help?
Do you have a question about the CONDOR series and is the answer not in the manual?
Questions and answers
Why does my AEE drone give me an 'abnormal battery' warning before flight
The AEE CONDOR series drone may show an 'abnormal battery' warning before flight if the battery leaks, bulges, smells, is broken, overheats, deforms, discolors, or has any other anomaly. These conditions indicate that the battery is not functioning properly and should be removed and not used.
This answer is automatically generated
could you provide me with instructions on how to remove and install the battery in the hand held flight controller
To remove the battery:
1. Ensure the battery is fully charged (the battery LED shows four bars).
2. Remove the battery from the UAV.
To install the battery:
1. Push the battery into the battery compartment in the correct direction.
2. Ensure the battery fastener clicks into place, indicating it is secured.
This answer is automatically generated