Table of Contents
Advertisement
Available languages
Available languages
Quick Links
Lire attentivement la notice avant d'utiliser l'appareil
Before operating this product, please read user manual completely
Lea atentamente el manual del usuario antes de utilizar el aparato
Lea atentamente o manual de instruções antes de utilizar o aparelho
Less de handleiding door voordat u deze eenheid gebruikt
1
MANUEL D'UTILISATION
13
USER MANUAL
23
MANUEL DEL USUARIO
34
MANUAL DE INSTRUÇÕES
45
HANDLEIDING
ACI-6
Advertisement
Table of Contents

Related Manuals for Akai ACI-6


Summary of Contents for Akai ACI-6
- Page 1 USER MANUAL MANUEL DEL USUARIO MANUAL DE INSTRUÇÕES HANDLEIDING ACI-6 Lire attentivement la notice avant d’utiliser l’appareil Before operating this product, please read user manual completely Lea atentamente el manual del usuario antes de utilizar el aparato Lea atentamente o manual de instruções antes de utilizar o aparelho...
- Page 2 AVERTISSEMENT 1. Ne pas placer de flamme, telle qu’une bougie allumée, sur l’appareil. 2. Ne pas placer l’appareil dans un endroit clos telle qu’une étagère ou une bibliothèque sans assurer une ventilation suffisante. 3. Si la prise secteur est utilisée comme le dispositif de débranchement, celle¬ci doit rester facilement accessible.
-
Page 3: Avant L'utilisation
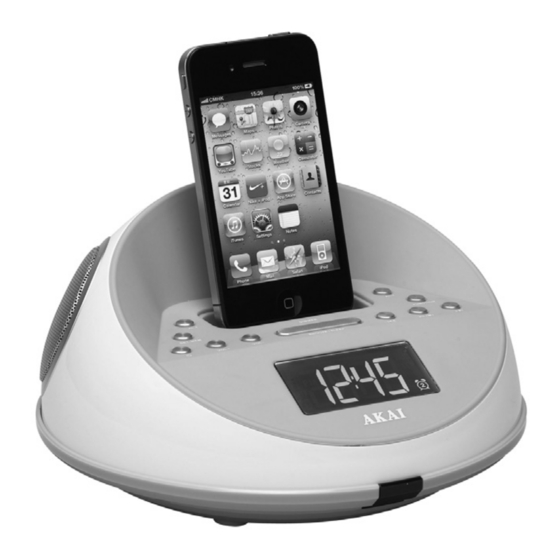
AVANT L’UTILISATION Cet appareil est spécialement conçu pour fonctionner avec votre iPhone ou iPod. Avant d’utiliser l’appareil, veuillez lire attentivement ce manuel d’instructions. Connexion de l’adaptateur AC-DC: Le radioréveil peut être alimenté par un adaptateur AC-DC externe avec une tension de sortie de 5V DC 2A (inclus). -
Page 4: Localisation Des Commandes
LOCALISATION DES COMMANDES FRANÇAIS Touche Marche/Arrêt Touche Réglage heure /Touche Mémoire Touche Alarme 1 Logement pour iPhone / iPod Touche Alarme 2 Touche Fonctions Touche SAUT PISTE SUIVANTE / FRÉQUENCE RADIO+ Touche VOLUME - Touche VOLUME + 10. Touche “Snooze” ALARME A REPETITION / Arrêt automatique / Variateur d’intensité... -
Page 5: Instructions D'utilisation
DESCRIPTION DES INDICATEURS AFFICHEUR AFFICHAGE HORLOGE/ALARME/ Indicateur PM/AM FRQUENCE RADIO INDICATEUR RADIO INDICATEUR AUXILIAIRE INDICATEUR IPOD INDICATEUR SOMMEIL INDICATEUR SONNERIE ALARME 1 ACTIVEE INDICATEUR ALARME 2 ACTUVEE INSTRUCTIONS D’UTILISATION Réglage de l’heure grâce à la synchronisation avec votre iPhone / iPod La fonction de synchronisation du radioréveil vous permet de synchroniser l’heure affichée sur le radioréveil avec celui des modèles récents de iPhone ou iPod tels que (iPod Touch / iPod Nano et iPod... - Page 6 la touche FRÉQUENCE – (11) pour régler les heures. Appuyez de nouveau sur la touche Réglage de l’heure/Mémoire(2): le chiffre des minutes clignote. Appuyez sur la touche FRÉQUENCE + (7) ou la touche FRÉQUENCE – (11) pour régler les minutes. Lorsque les réglages sont terminés, appuyez encore une fois sur la touche Réglage de l’heure/Mémoire (2): l’heure affichée à...
- Page 7 Note: Si le mode de réveil iPhone/iPod est sélectionné et que aucun iPhone / iPod n’est présent, le réveil bascule automatiquement en mode sonnerie. Écouter votre iPhone / iPod Lorsque l’iPhone / iPod est dans la sttation d’accueil et en mode veille, appuyez sur la touche Fonction (6) pour sélectionner le mode iPod/ iPhone.
-
Page 8: Entrée Auxiliaire
Fonction Sleep “ Sommeil ” Lorsque vous écoutez la radio ou votre iPhone / iPod, appuyez sur la touche Snooze/Sleep/Dimmer (10) pour passer en mode Sleep (arrêt différé). Vous pouvez régler la minuterie de 90 min à 10 min en apppuyant à... - Page 9 Mise au rebut en fin de vie Attention ! Ce logo apposé sur le produit indique qu’il s’agit d’un appareil dont le traitement en tant que déchet rentre dans le cadre de la directive 2002/96/CE du 27 janvier 2003, relative aux déchets d’équipements électriques et électroniques (DEEE).
- Page 10 TABLEAU DE COMPATIBILITE iPod and iPhone iPod touch 4ème IPod nano 4ème iPod classic 160GB génération génération (vidéo) (2007) 8GB-32GB-64GB 8GB-16GB iPod touch 3ème iPod nano 3ème iPod classic 160GB génération génération (2009) 32GB-64GB 4GB-8GB iPod touch 2ème iPod 5ème iPhone 4 génération génération (vidéo)
- Page 11 GUIDE DE DEPANNAGE Problème Cause possible Solution L’appareil ne s’allume L’adaptateur secteur n'est Branchez l'adaptateur à une prise pas branché à une prise murale et branchez le connecteur à la murale ou le connecteur prise d'alimentation sur l'appareil. n'est pas branché sur l'alimentation située à...
-
Page 12: Haut-Parleur
à un volume élevé SPECIFICATIONS TECHNIQUES Référence du modèle • ACI-6 Alimentation • AC~100-240V 50/60Hz DC 5V 2A Consommation en fonctionnement • 15W Consommation en mode VEILLE • <0.3W Gamme de Fréquence FM... - Page 13 WARNING 1. No naked flame sources, such as lighted candles, should be placed on the apparatus. 2. Do not place the product in closed bookcases or racks without proper ventilation. 3. Where the mains plug is used as the disconnect device, the disconnect device shall remain readily operable.
-
Page 14: Preparation For Use
PREPARATION FOR USE This unit designed specifically to work with your docking iPhone / iPod. Please read this instruction book carefully before operating the unit. AC-DC adaptor connection : The clock radio unit can be powered by an external AC-DC adaptor, required the output DC 5V 2A (included). Power connection This unit is equipped with a battery back up system;... -
Page 15: Location Of Controls
LOCATION OF CONTROLS ENGLISH 1. On/off button 2. Clock set/memory button 3. Alarm 1 button 4. iPhone / iPod compartment 5. Alarm 2 button 6. Function button 7. SKIP FORWARD / TUNING UP button 8. Volume DOWN button 9. Volume UP button 10. - Page 16 OPERATING INSTRUCTIONS Setting time using iPhone / iPod time Sync The clock radio time sync feature allows you to sync the time setting on the clock radio to the time from you iPhone or recent model iPod (iPod touch / iPod nano and iPod classic; older iPod models such as iPod mini do not support this feature).
- Page 17 Setting Alarm Time To preview the alarm time. Press the ALARM button once. While the display is showing the alarm time and you hold the ALARM button for 3 seconds and the hours will blink. Press the Tune UP or Tune DOWN to set the alarm hour. Press the ALARM button again;...
- Page 18 station. If you press and hold the Tune UP or Tune DOWN button for one second, then release, the unit will automatically scan to the next broadcasting station. Press the On/Off button to turn the radio off. To Set/Recall the radio presets Press the On/off button to turn the unit on.
- Page 19 End of Life Disposal Warning ! This logo set on the product means that the recycling of this apparatus comes within the framework of the Directive 2002/96/CE of January 27, 2003 concerning the Waste of Electrical and Electronic Equipment (WEEE). This symbol means that used electrical and electronic products should not be mixed with general household waste.
- Page 20 COMPATIBLE WITH THE FOLLOWING iPod and iPhone “Made for iPod”, and “Made for iPhone”, mean that an electronic accessory has been designed to connect specifically to iPod or iPhone respectively, and has been certified by the developer to meet Apple performance standards. Apple is not responsible for the operation of this device or its compliance with safety and regulatory standards.
-
Page 21: Troubleshooting Guide
TROUBLE SHOOTING GUIDE Symptom Possible Problem Solution AC Adaptor is not plugged Plug the AC adaptor into a wall outlet into a wall outlet or the and plug the connector into the supply The unit does not connector is not plugged jack on the unit. -
Page 22: Technical Specifications
TECHNICAL SPECIFICATIONS Model no. : ACI-6 Power Supply : AC~ 100-240V 50/60Hz DC5V 2A Power consumption : 15W Standby power consumption : <0.3W Radio Frequency : FM : 87.5 - 108 MHz Speaker : 2.5” x 2 Impedance : 4 ohm x 2... - Page 23 ADVERTENCIA 1. No deben ser colocadas sobre el aparato fuentes de calor sin protección, tales como velas encendidas. 2. No coloque el producto en estanterías cerradas u organizadores sin ventilación apropiada. 3. El enchufe de la corriente funciona como elemento de desconexión, por lo cual éste deberá...
- Page 24 PREPARACION PARA EL USO Esta unidad está diseñada específicamente para funcionar con el docking para iPhone / iPod. Por favor, lea este libro de instrucciones cuidadosamente antes de operar la unidad Conexión de adaptador de corriente: La unidad de radio reloj puede ser alimentada mediante un adaptador de corriente externo, con una potencia de salida requerida de 5V 2A (incluido).
- Page 25 UBICACION DE CONTROLES ESPAÑOL 1. Botón de encendido / apagado 2. Botón de ajuste del reloj / memoria 3. Botón de Alarma 1 4. Compartimento para iPhone / iPod 5. Botón de Alarma 2 6. Botón de función 7. Botón de SALTEAR HACIA ADELANTE / SINTONIA ASCENDENTE 8.
-
Page 26: Instrucciones De Funcionamiento
PANTALLA DE HORA/ALARMA/RADIO INDICADOR PM INDICADOR DE RADIO FRECUENCIA INDICADOR iPOD INDICADOR ENTRADA INDICADOR DE PITIDO AUXILIAR INDICADOR DE ALARMA 1 INDICADOR FUNCION DORMIR INDICADOR DE ALARMA 2 INSTRUCCIONES DE FUNCIONAMIENTO Ajuste de la hora usando sincronización de hora con iPhone / iPod La función de sincronía de hora con radio reloj le permite sincronizar los ajustes de hora en el radio reloj a la hora en su iPhone o reciente modelo de iPod (iPod touch / iPod nano y iPod classic;... - Page 27 Cuando haya terminado y haya presionado el botón de ajuste de reloj / memoria nuevamente, la hora en pantalla titilará 4 veces indicando que la hora actual ha sido ajustada. Ajuste de la Hora de Alarma Para previsualizar la hora de alarma, presione una vez el botón de ALARMA.
- Page 28 Escuchando su iPhone / iPod Cuando el iPhone / iPod está acoplado y en modo standby, presione el botón de función para seleccionar el modo iPod/iPhone. El ícono de iPhone / iPod aparecerá en la pantalla. Carga del iPhone / iPod Al acoplar su iPhone / iPod éste será...
-
Page 29: Entrada Auxiliar
La función Dormir Cuando escuche la radio o iPhone / iPod, presione el botón SNOOZE para entrara al modo de dormir. Puede ajustar el temporizador para dormir desde los 90 mins a los 10 mins, presionando el botón SNOOZE. La unidad se apagará automáticamente tras el tiempo seleccionado. - Page 30 Desecho del producto Atencion ! Este juego de logo sobre el producto quiere decir que el reciclaje de este aparato viene dentro del marco de la Directiva 2002/96/CE del 27 de enero de 2003 concernir la Basura(el Gasto) de Equipo Eléctrico y Electrónico (WEEE). Su producto esta marcado con este simbolo.
- Page 31 COMPATIBLE CON LOS SIGUIENTES iPod Y iPhone “Hecho para iPod”, y “Hecho para iPhone”, significa que un accesorio electrónico ha sido diseñado para conectar específicamente al iPod o iPhone respectivamente, y ha sido certificado por el fabricante para reunir los estándares de performance de Apple. Apple no es responsable por el funcionamiento de este aparato o su cumplimiento con los estándares de seguridad y regulatorios.
- Page 32 GUIA DE SOLUCION DE PROBLEMAS Síntoma Posible Problema Solución La unidad no responde El adaptador de Enchufe el adaptador de (sin alimentación) corriente no está corriente a un tomacorrientes enchufado al y enchufe el conector en el tomacorrientes o el toma de la unidad.
-
Page 33: Especificaciones Tecnicas
Apague la unidad por un rato tras un extendida o baje el volumen. reproducción en alto volumen ESPECIFICACIONES TECNICAS Modelo no. : ACI-6 Alimentación: Corriente eléctrica : ~ 100-240V 50/60Hz DC5V 2A Consumo : 15W Consumo en estado standby : <0.3W Radio Frecuencia : FM: 87.5 - 108 MHz... - Page 34 AVISOS 1. Nenhuma fonte de fogo, como velas acesas, devem ser colocadas sobre o aparelho. 2. Não coloque o produto em estantes fechadas nem sem a ventilação correta. 3. Quando a tomada for utilizada para desligar o aparelho, esta deve ser de fácil acesso.
- Page 35 PREPARAÇÃO PARA A UTILIZAÇÃO Esta unidade foi desenhada especificamente para trabalhar com a base iPhone / iPod. Por favor leia este manual de instruções cuida- dosamente antes de utilizar a unidade. Conexão do adaptador AC-DC: A unidade do rádio relógio pode funcionar com um adaptador externo AC-DC.
- Page 36 POSIÇÃO DOS CONTROLES PORTUGUÊS 1. Tecla ligar / desligar 2. Tecla ajuste do relógio / memória 3. Tecla do Alarme 1 4. Compartimento iPhone / iPod 5. Tecla do Alarme 2 6. Tecla função 7. Tecla AVANÇAR / SINTONIZAR PARA CIMA 8.
-
Page 37: Instruções Para A Utilização
DISPLAY HORA/ALARME/RÁDIO INDICADOR PM FREQUÊNCIA INDICADOR DO RÁDIO INDICADOR DA ENTRADA AUX INDICADOR DO IPOD INDICADOR DE DORMIR INDICADOR DO BIPE INDICADOR DO ALARME 1 INDICADOR DO ALARME 2 INSTRUÇÕES PARA A UTILIZAÇÃO Ajuste da hora utilizando a sinc da hora do iPod/iPhone A característica da sincronização da hora do rádio relógio permite sincronizar o ajuste da hora no rádio relógio com a hora no iPhone ou com o modelo mais novo do iPod (iPod touch / iPod nano e iPod... - Page 38 Quando acabar, pressione a tecla ajuste relógio / memória novamente e a hora do display vai piscar 4 vezes para indicar que a hora atual está ajustada. Ajustar a hora do alarme Para ver a hora do alarme, pressione a tecla ALARME uma vez. Quando o display mostrar a hora do alarme, segure a tecla ALARME por 3 segundos e as horas vão piscar.
- Page 39 Carregando o seu iPhone/iPod Quando o seu iPhone/iPod estiverem na base, eles recarregarão (até completamente carregados). Nota: Os iPod Shuffles NÃO carregarão. Escutando o rádio Pressione a tecla Ligar /Desligar para ligar a unidade. Pressione a tecla FUNÇÃO para selecionar o Modo Rádio. Utilize a tecla Sintonizar para Cima ou Sintonizar para Baixo para selecionar a estação FM desejada.
- Page 40 Entrada AUX A tomada ENTRADA AUX pode ser utilizada como sinal alternativo das unidades dos alto-falantes. A tomada ENTRADA AUX precisa de um cabo de audio de 3,5mm para o sinal de entrada. Nota: Esta unidade não vem com uma gravação da ENTRADA AUX ao iPhone/iPod.
- Page 41 Eliminação no fim de vida Atenção : Este logotipo anexado no produto indica que a recligagem de este aparelho esta submisso à diretiva 2002/96/CE do 27 de Janeiro de 2003, relativa ao lixo de instalações eléctricas e eletrônicas (DEEE) O seu produto está identificado com este símbolo. Significa que os produtos eléctricos e electrónicos não devem ser misturados com o lixo doméstico comum.
- Page 42 COMPATĺVEL COM OS SEGUINTES iPod e iPhone “Feito para iPod” e “Feito para iPhone” significam que o acessório eletrônico foi desenhado para ser específicamente conectado ao iPod ou ao iPhone respectivamente, e foram certificados pelo produtor em conformidade com os requisitos da Apple. Apple não se responsabiliza pela operação deste aparelho ou o seguimento das normas de segurança e os requisitos regulamentários.
- Page 43 GUIA DE PROBLEMAS E SOLUÇÕES Sintoma Possível Problema Solução A unidade não responde O adaptador AC não está Conecte o adaptador AC à (sem energia) conectado à tomada ou o tomada caseira e conecte o conector não está conector à tomada na conectado na tomada de unidade.
-
Page 44: Especificações Técnicas
ESPECIFICAÇÕES TÉCNICAS Modelo no. : ACI-6 Fonte de Energia : AC~ 100-240V 50/60Hz DC5V 2A Consumo de Energia : 15W Consumo de Energia em Standby : <0,3W Frequência do Rádio... - Page 45 WAARSCHUWING 1. Zet geen open vuur, zoals van brandende kaarsen, op of vlakbij het apparaat neer. 2. Plaats dit apparaat niet in een gesloten boekenkast of rek waar geen goede ventilatie mogelijk is. 3. De netstekker doet dienst om het apparaat volledig van de netvoeding los te koppelen en dient te allen tijde bereikbaar te zijn.
-
Page 46: Voorbereiding Voor Ingebruikname
VOORBEREIDING VOOR INGEBRUIKNAME Dit apparaat werd speciaal ontworpen om te werken met uw docking iPhone/iPod. Gelieve deze gebruiksaanwijzing aandachtig te lezen voordat u het apparaat in gebruik neemt. Aansluiting van de AC-DC adapter: de wekkerradio kan worden gevoed door een externe AC-DC adapter met een uitgang van 5V 2A gelijkstroom (meegeleverd). - Page 47 PLAATS VAN DE BEDIENINGSKNOPPEN NEDERLANDS 1. Toets aan / uit 2. Toets klok instellen / geheugen 3. Toets wekker 1 4. iPhone / iPod compartiment 5. Toets wekker 2 6. Functietoets 7. Toets VOORWAARTS OVERSLAAN / AFSTEMMEN OP 8. Toets volume NEER 9.
- Page 48 DISPLAY MET TIJD / WEKKER / PM INDICATOR RADIOFREQUENTIE RADIO-INDICATOR AUX IN-INDICATOR IPod-INDICATOR SLAAPINDICATOR INDICATOR PIEPTOON INDICATOR WEKKER 1 AAN INDICATOR WEKKER 2 AAN GEBRUIKSAANWIJZING De tijd instellen met behulp van iPhone / iPod time Sync Met de functie tijdsynchronisatie van de wekkerradio kunt u de tijdinstelling van de wekkerradio laten synchroniseren met uw iPhone of recentste model van iPod (iPod touch / iPod nano en iPod classic, de oudere iPod-modellen zoals iPod mini ondersteunen deze functie...
- Page 49 Wanneer u klaar bent en nogmaals op de toets klok instellen/ geheugen drukt, gaat de tijd op de display 4 keer knipperen, aangevend dat de huidige tijd is ingesteld. De wekker instellen Druk eenmaal op de toets WEKKER om de wektijd na te kijken. Terwijl de wektijd op de display wordt aangegeven, houdt u de toets WEKKER 3 seconden ingedrukt, zodat de uurcijfers gaan knipperen.
- Page 50 Naar uw iPhone / iPod luisteren Wanneer de iPhone / iPod gedockt en in de stand-bymodus is, drukt u op de functietoets om de modus iPod/iPhone te selecteren. Het icoon van de iPhone / iPod verschijnt dan op de display. Uw iPhone / iPod opladen Uw iPhone / iPod laadt op terwijl hij gedockt is (tot hij volledig is opgeladen).
- Page 51 De slaapfunctie Terwijl u naar de radio of iPhone / iPod luistert kunt op de toets SLUIMER drukken om de slaapmodus binnen te gaan. U kunt de inslaaptimer instellen tussen 90 minuten en 10 minuten door telkens op de toets SLUIMER te drukken. Het apparaat schakelt automatisch uit na de ingestelde tijdsduur.
- Page 52 Wegdoen na het einde van de levensduur Attention ! Ce logo apposé sur le produit indique qu’il s’agit d’un Let op : Dit symbool geeft aan dat elektrische en elektronische apparatuur, aan het eind van hun levensduur, niet mag worden gedeponeerd bij het normale huishoudelijk afval Uw product is van dit merkteken voorzien.
- Page 53 COMPATIBEL MET DE ONDERSTAANDE iPod en iPhone “Made for iPod” en “Made for iPhone” betekent dat een elektronisch accessoire specifiek werd ontworpen voor aansluiting op respectievelijk de iPod of de iPhone en door de ontwikkelaar gecertificeerd is volgens de performancenormen Apple. Apple is niet aansprakelijk voor de werking van dit apparaat of de naleving van de veiligheidsnormen en regelgeving.
- Page 54 GIDS VOOR HET OPLOSSEN VAN PROBLEMEN Symptoom Mogelijk probleem Oplossing Het apparaat reageert De gelijkstroomadapter is Sluit de stekker van de niet (geen stroom) niet op een stopcontact gelijkstroomadapter aan op een aangesloten of de stopcontact en de andere stekker in stekker is niet in het het voedingscontact van dit voedingscontact op de...
-
Page 55: Technische Gegevens
Schakel het apparaat een tijdje uit na lang spelen op een of zet het volume zachter. hoog volume TECHNISCHE GEGEVENS Model nr. : ACI-6 Voeding : wisselstroom ~ 100-240V 50/60Hz gelijkstroom 5V 2A Stroomverbruik : 15W Stroomverbruik in stand-by : <0,3W Radiofrequentie : FM: 87.5 - 108 MHz... - Page 56 ACI-6...
Need help?
Do you have a question about the ACI-6 and is the answer not in the manual?
Questions and answers