Table of Contents
Advertisement
Quick Links
AR280P Clockradio manual
Index
1. Intended use
2. Safety
o
2.1. Labels in this manual
o
2.2. General safety instructions
3. Preparations for use
o
3.1. Unpacking
o
3.2. Package contents
4. Installation
o
4.1. (Optional) Insert the battery
o
4.2. Connecting to the mains
5. Functions
6. Operation
o
6.1. Setting the date and time
o
6.2. Using the radio
o
6.3. Using the projection function
o
6.4. Setting the timer and display
o
6.5. Setting the alarm
7. Cleaning and maintenance
8. Technical data
9. Disposal of used electric and electronic equipment
Advertisement
Table of Contents

Subscribe to Our Youtube Channel
Summary of Contents for Akai AR280P
- Page 1 AR280P Clockradio manual Index 1. Intended use 2. Safety 2.1. Labels in this manual 2.2. General safety instructions 3. Preparations for use 3.1. Unpacking 3.2. Package contents 4. Installation 4.1. (Optional) Insert the battery 4.2. Connecting to the mains ...
-
Page 2: Intended Use
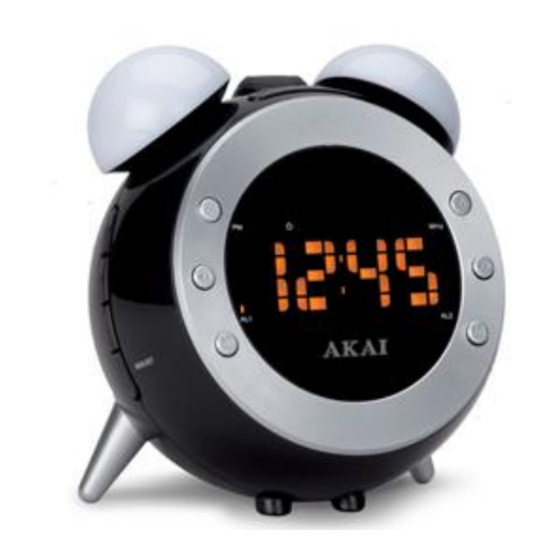
1.Intended use The AR280P is intended for use as an alarm radio. The AR280P has an FM radio function, a projection function and includes a lamp. The temperature can also be displayed. Read the manual carefully before the first use. -
Page 3: Preparations For Use
3.2. Package contents The following items are included in the received package: 1 x AR280P Clockradio 1x Quick start guide If any item is missing, please contact your reseller. -
Page 4: Installation
4.Installation CAUTION Do not put the appliance near a heat source. CAUTION Do not expose the appliance to direct sunlight. Put the appliance on a horizontal flat surface. Connect the appliance to the mains. 4.1. (Optional) Insert the battery To ensure that your alarm radio remains switched on during a power outage, you can insert a battery (type CR2032). - Page 5 4.2. Connecting to the mains Connect the appliance to the mains.
-
Page 6: Functions
5.Functions Setting the brightness higher Setting the brightness lower Switch the lamp on or off M+/NAP button a. Save a radiostation into the memory b. Setting the timer c. Turn off display Lamp SNOOZE/SLEEP/DIMMER button a. Adjusting the brightness of the display b. - Page 7 14. button a. Adjust the volume (+) Screen Switch between time and date 15. Adjust the volume (-) 16. button a. Turning the projection 180 degrees Projection function b. Switch between time and temperature 17. Turn the projection function on or off 18.
-
Page 8: Operation
6.Operation 6.1. Setting the date and time Note! Turn the radio off before proceding. Keep key (7), pressed for 2 seconds The date is flashing Press the (8) or (12) key to set the desired year. Press (7) to confirm. The month is flashing ... - Page 9 Press (7) to confirm. The hours are flashing on the display. Press the (8) or (12) key to set the desired hour. Press (7) to confirm. The minutes are flashing on the display. Press the (8) or (12) key to set the desired minutes. ...
- Page 10 Press (4) to confirm. 3 memory locations are available. Activating a stored function Press the button (4) repeatedly until the desired frequency is found. Setting the timer While listening to the radio press the (6) button several times to set the "swith-off" time between 90 and 10 minutes.
- Page 11 Focusing the projection Turn the key (18) until the desired sharpness is achieved. Turning the projection 180 degrees Press the (16) button . Switch between time and temperature Keep key (16), pressed for 2 seconds...
- Page 12 6.4. Setting the timer and display Note! Turn the radio off before proceding. Setting the timer Press the (4) button . "N90" appears on the display. This shows after how many minutes the beep is activated. Press the button (4) repeatedly until the desired setting is found. Setting the display ...
- Page 13 6.5. Setting the alarm Note! Turn the radio off before proceding. Caution! You can set and activate two alarms. Press the (9) button . An orange bar appears in the display above AL1, the alarm is now activated. "7:00" appears on the display. ...
- Page 14 Press the (8) or (12) key to set the desired day. 1-5: Monday to Friday 1-7: Monday to Sunday 6-7: Saturday and Sunday 1-1: Setting one single day. When you choose this option, please indicate which day you want to set. 1 Monday, 2 Tuesday, 3 Wednesday, 4 Thursday, 5 Friday, 6 Saturday and 7 Sunday.
-
Page 15: Cleaning And Maintenance
7.Cleaning and maintenance WARNING Before performing any cleaning or maintenance, switch off and unplug the appliance. Clean the outside of the appliance with a soft cloth. When the appliance is very dirty, dampen the cloth slightly with water and a neutral solution. -
Page 16: Technical Data
8.Technical data Specifications Power supply: AC 220-240V ~ 50/60 Hz Frequency range: 87,5-108Mhz 8' LED Display Weight: 460 g Dimensions: 140x140x96mm Projection function Sleep timer Alarm clock Temperature indication Digital FM Radio Accessories Mains cable User manual... -
Page 17: Disposal Of Used Electric And Electronic Equipment
For more detailed information about recycling of this product, please contact your local city office, your household waste disposal service or the shop where you purchased the product. For more information and warranty conditions, please visit: www.akai.eu Do not dispose of batteries as household waste but take them to a battery recycling facility.


Need help?
Do you have a question about the AR280P and is the answer not in the manual?
Questions and answers