Advertisement
Quick Links
Document:
Document Title: MANUAL, SP INSTALLATION, NXT
Document Number:620-8006
Page Number: 1 of 16
Material:
n/a
Notes:
n/a
Approvals:
Originator
Print:
Approved By:
Print:
Document Revision History:
REV
EFFECTIVE DATE
01
A
14 June 2011
THE INFORMATION CONTAINED HEREIN IS PROPRIETARY AND CONFIDENTIAL TO UNISEN INC/STAR TRAC.
AND SHALL NOT BE USED OR DISCLOSED, IN WHOLE OR IN PART, WITHOUT FIRST OBTAINING THE WRIT-
TEN PERMISSION OF UNISEN, INC.
COVER PAGE FOR DOCUMENT CONTROL PURPOSES ONLY, NOT TO BE PRINTED
Rev: 001
Deo Magakat
BY
DMM
DMM
STAR TRAC
14410 Myford Road
Irvine, CA 926060 USA
Sign:
Sign:
DESCRIPTION
DRAFT
RELEASE
Date: 04/12/11
Date:
ECO NO.
13510
620-8006 Rev A
Advertisement

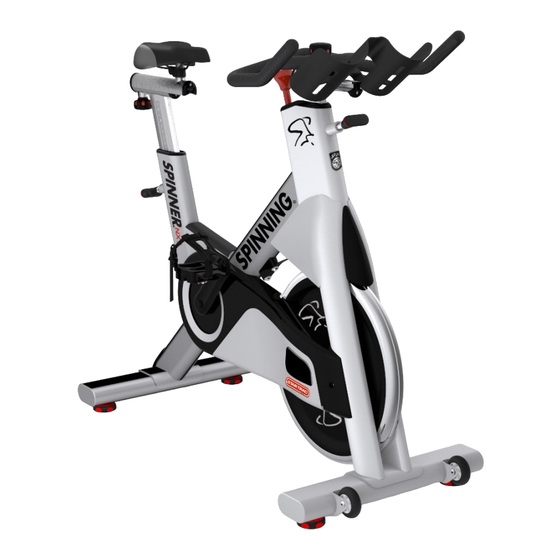
Related Manuals for Star Trac Spinner NXT 7090


Summary of Contents for Star Trac Spinner NXT 7090
- Page 1 RELEASE 13510 14 June 2011 THE INFORMATION CONTAINED HEREIN IS PROPRIETARY AND CONFIDENTIAL TO UNISEN INC/STAR TRAC. AND SHALL NOT BE USED OR DISCLOSED, IN WHOLE OR IN PART, WITHOUT FIRST OBTAINING THE WRIT- TEN PERMISSION OF UNISEN, INC. COVER PAGE FOR DOCUMENT CONTROL PURPOSES ONLY, NOT TO BE PRINTED...
- Page 2 STAR TRAC 14410 Myford Road Irvine, CA 926060 USA SPINNER ASSEMBLY AND INSTALLATION MANUAL 620-8006 Rev A...
-
Page 3: Tools Required
• Copyright 2011. Star Trac by Core Industries, Inc., Star Trac Fitness, Star Trac®, and the Star Trac Logo are registered trademarks of Core Ind, Inc. All rights reserved, including those to reproduce this book or parts thereof in any form without first obtaining written permission from Star Trac. -
Page 4: Unpacking Instructions
UNPACKING INSTRUCTIONS Step 1. Step 2. Arrange the assembly area so that the area is free Open the carton first at the top and bottom. Use from objects that could potentially damage the scissors or a knife to cut the tape. parts. - Page 5 Step 5. Step 6. Arrange the unpacking area so that the area is Remove the foam inserts from the shipment by free from objects that could potentially damage first taking out foam insert (1), then foam inserts unpacked components. (2), and then last foam insert (3). Step 8.
- Page 6 Step 9. Step 10. Verify that all shipment components are included: Place the main frame assembly on a flat surface 1. Hardware, Pop-pin, and Pedals (set of two) that is free from objects that could potentially 2. Handlebar w Grip and Water Bottle Holders (1) damage the unit.
-
Page 7: Assembly Instructions
ASSEMBLY INSTRUCTIONS Step 13. Step 14. Place the rear leg assembly in the mating position Locate (2) M10 Hex Head screw. Pre-install an M10 under the frame. Split Lock Washer and an M10 Flat Washer onto each Hex head screw. Note: Make sure the thread posts in the frame Note: Pay attention to the order of assembly of the and the holes in the rear leg assembly are in... - Page 8 Step 17. Step 18. Slide the Handlebar w/ Grip and Water Bottle Using a 2.5mm Hex Key, tighten the Button Head Holder onto the Handlebar Post. Screw all the way down. This screw limits the travel of the Handlebar and prevents the Handle- Note: You may have to pull up on the Lock Knob bar from sliding off the Handlebar post acciden- to help align the Slider Clamp with the guide rail.
- Page 9 Step 22. Step 21. Install the Pop-pin into the Frame Seat Post using With the Pop-pin loose pull and hold it away from a 21mm Open-end Wrench. the frame seat post. Install Seat Post into the Frame Seat Post. Step 23. Step 24.
- Page 10 Step 26. Step 25. Locate one (1) M8x1.25 Flanged Hex Head Locate the set of left and right pedals and follow Screw, and (1) Plastic End Cap. the orientation as shown in the picture above dur- ing installation. Note: Check to make sure the screw has a blue or red Loctite patch on the threads.
- Page 11 Step 29. Step 30. Repeat pedal installation for the right side. Verify that the bike is placed on a flat surface. Verify that the pedal is properly installed by Next, make sure that all four feet are screwed up checking that the gap as shown is between 5- all the way into the stabilizer bars.
-
Page 12: Functional Test
FUNCTIONAL TEST Step 32. Step 33. Verify that the Seat Slider travels all the way back Verify that the Seat Slider travels all the way for- until the indicator points at position 7 (or 9 de- ward until the indicator points at position 0 pending on your model). - Page 13 Step 35. Step 36. Adjust the handlebar. Loosen and pull out the Check Fore-and-Aft Adjustment of the Handlebar Pop-Pin, then lift the Handlebar Post up to higher by sliding the handlebar forward and backward. levels while holding the Pop Pin out. Position the Handlebar to its rearmost stop and Check for Pop-Pin engagement with the mating lock in position by turning Lock Knob clockwise.
- Page 14 Step 38. Step 39. Test bike operation: Push down Resistance Knob sharply (emergency braking) to make sure the Flywheel 1. Mount the bike. rotation stop abruptly. 2. Turn Resistance Knob in the counterclockwise direction to reduce brake resistance as indicated by the “-” symbol. 3.
- Page 15 ATTENTION • Star Trac recommends that Spinner bikes be spaced a minimum of 20.0 inches (0.5 m) apart to allow safe and easy ingress and egress. • As with any exercise equipment, the area where Spinner bikes are located must be free of obstructions and fixtures with sharp edges to prevent injury in the event that a user trips or loses balance and falls.
- Page 16 STAR TRAC 14410 Myford Road Irvine, California 92606 Telephone: (800) 228-6635, (714) 669-1660 Fax: (714) 508-3303 http://www.startrac.com 620-8006 Rev A...
Need help?
Do you have a question about the Spinner NXT 7090 and is the answer not in the manual?
Questions and answers