Table of Contents
Advertisement
Quick Links
Advertisement
Chapters
Table of Contents

Related Manuals for Docomo Premini-II


Summary of Contents for Docomo Premini-II
- Page 1 Before Using the Mova Placing/Receiving Calls Phonebook Setting Ringer/Display/Display Light For Safety Operation Camera i-mode Mail i-αppli Displaying/Editing/Managing Data Other Useful Functions Network Services Entering Text Appendix Index/Quick Manual...
-
Page 2: Before Using The Mova
SSL. In the event that the user shall sustain damage or loss due to the use of SSL, neither DoCoMo nor the certifiers shall be responsible for any such damage or loss. -
Page 3: How To Use This Manual
How to Use This Manual Quick Manual (P.380) ■ Typical Layout of the Operating Instructions Page Section title Setting the Keypad Sound Additional notes You can set the type, volume and duration of the keypad sound that An outline and ob- is heard when you press a key of the Mova. -
Page 4: Table Of Contents
Contents Before Using the Mova How to Use This Manual ............1 Features of the Mova SO506i ..........4 Safety Precautions ..............6 Handling Precautions ............. 16 Intellectual Property Right ............18 Supplied and Optional Accessories ........20 Before Using the Mova ........... 21 Part names and functions, Display, Menus, Battery pack, Charge the Mova, Battery level, Power ON/OFF, Initial setting, Date/time, Send own number, Own number Placing/Receiving Calls .......... - Page 5 i-mode ..............131 What is i-mode?, i-mode menu, Display sites, Change i-mode password, Internet connection, Bookmark, Screen memo, Phone To/Mail To/Web To/i-αppli To, Set i-mode, i-mode lock, Message R, Message F, and so on... Mail ............... 167 What is i-mode mail?, Mail menu, Compose and send mail, Melody mail, Graphics mail, Receive mail, Check new mail, Mail setting, Chat mail, Short Mail, What is i-shot?, Send i-shot, and so on...
-
Page 6: Features Of The Mova So506I
Features of the Mova SO506i It’s amazing because it’s i-mode ※ i-mode is a paid service that requires a subscription. i-mode Mail A service that allows you to exchange mail with the Site Connection Service mobile phone alone. Mail exchange is available not An online service that allows you to use the only between i-mode subscriber mobile phones, services provided by IPs (information ser-... - Page 7 Prediction Conversion Entry “POBox” Camera Function “POBox” (Predictive Operation Based On Clear images can be recorded using the eXample) enables an effective text input. It high-definition camera with about 1.3 mil- displays a list of recommended words pre- lion effective number of pixels (maximum dicted from the entered characters.
-
Page 8: Safety Precautions
Safety Precautions (Observe Strictly) For safe and proper use of the Mova, please read the “Safety Pre- cautions” prior to use. Keep the Manual in a safe place for future reference. ALWAYS observe the safety precautions since they intend to pre- vent personal injury or property damage. - Page 9 Handling the Mova, Battery Pack and Adapter (including the charger) DANGER Use the battery packs and adapters (including chargers) speci- fied for the Mova by DoCoMo. The use of products that are not specified may cause the Mova and the battery pack to leak, overheat, explode, catch fire or malfunction.
- Page 10 WARNING Do not use the Mova in a place where a fire or explosion could occur, such as gas stations. The use of the Mova in a place where flammable gases such as Don’t propane or gasoline, or dust exist may cause explosion or fire. CAUTION Do not keep in a place that is very humid, dusty or subject to high temperature.
- Page 11 WARNING Do not turn up the headphone volume to a level where you can- not hear the sounds around you while you are walking. Also, look out for the surrounding traffic and road surface conditions. Don’t Doing so may cause accident. Do not put the Mova in your breast pocket or inside pocket if you are wearing any electronic medical equipment.
- Page 12 CAUTION Do not swing the Mova around by holding the strap. The Mova may hit you or others or the strap gets cut away from the Mova. It may cause accident such as injury, or damage to Don’t the Mova or other property. Do not place your ear too close to the speaker while the ring tone sounds or the melody is played back.
- Page 13 Handling the Battery Pack ■ Check the type of the battery by the label on the battery pack. Display Type of Battery Li-ion Lithium ion Battery DANGER Do not use or leave the battery pack in a place with high tempera- ture such as close to fire or heater.
- Page 14 WARNING If you notice anything unusual about the battery pack such as an unusual odor, overheating, discoloration or deformation during operation, charging or storage, immediately remove the battery Don’t pack from the Mova and do not use the battery pack. Failure to do so may cause the battery pack to leak, overheat, explode or catch fire.
- Page 15 WARNING Do not short-circuit the charge terminal of the charger while the power plug is connected to the power outlet or cigarette lighter socket. Do not touch the charge terminal with your hands, fingers Don’t or any part of your body. Doing so may cause fire, malfunction, electric shock or injury.
- Page 16 WARNING If the fuse of the DC adapter or car adapter is blown, replace it with the specified fuse. The use of an incorrect fuse may cause fire or malfunction. See the user’s manual supplied with the adapter for the specified fuse.
- Page 17 Handling the Mova Near Electronic Medical Equipment ■ The following instructions observe the guidelines of the Elec- tromagnetic Compatibility Conference, Japan to protect elec- tronic medical equipment from radio waves from mobile phones. WARNING Please observe the following guidelines in medical facilities. •...
-
Page 18: Handling Precautions
Make sure to move far away from them when using the Mova. ● Always keep the information saved in the Mova in a separate note. • Under no condition will DoCoMo be held liable for any damaged or lost data saved in the Mova. - Page 19 ● The Mova could become warm while in use and charging. This condition is not abnor- mal and you can continue using the Mova. Please be considerate of the privacy of individuals around you when taking and send- ing photo using camera-equipped mobile phone. ◆...
-
Page 20: Intellectual Property Right
“i-shot”, “i-motion mail”, “decomail”, “WORLD CALL”, “Dual Network”, “QUICKCAST”, “mova” logo, “i-mode” logo and “i-αppli” logo are trademarks or registered trade- marks of NTT DoCoMo. • The Call Waiting Service is a registered trademark of Nippon Telegraph and Tele- phone Corporation. - Page 21 ◆ Others • Powered by JBlend ® , © 1997-2005 Aplix Corporation. All rights reserved. • The Java applications of this product are accelerated by Nazomi Communications JA108 technology. ® • This product incorporates RSA BSAFE™ SSL-C softwares registered by RSA Se- curity, Inc.
-
Page 22: Supplied And Optional Accessories
Supplied and Optional Accessories ■ Supplied Accessories Mova SO506i (w/warranty and rear cover SO013) User Guide (this manual) (w/Quick Manual P.380) ■ Optional Accessories AC Adapter SO004 Desktop Holder SO012 Battery Pack SO009 (w/warranty and user’s (w/user’s manual) (w/user’s manual) manual) •... -
Page 23: Before Using The Mova
Before Using the Mova Part Names and Functions ............22 Using the Display ................. 25 Selecting the Menu ..............26 Attaching and Removing the Battery Pack ........28 Charging the Mova ..............29 Checking the Battery Level ........33 <Battery level> Powering ON/OFF .......... -
Page 24: Part Names And Functions
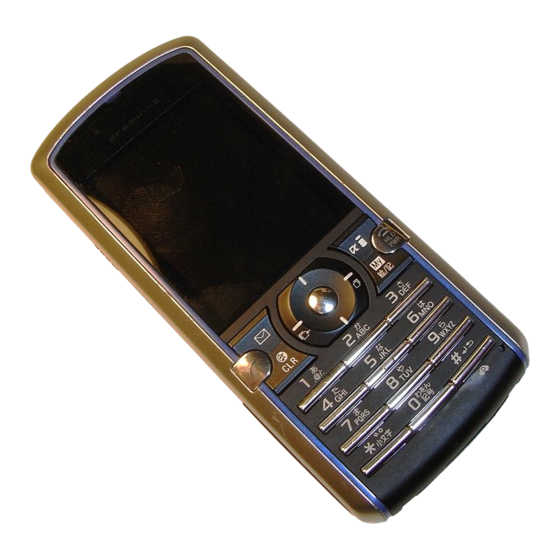
Part Names and Functions wl e; Connecting the Earphone Mic (optional) Mova SO506i Dimensions : 46 × 105 × 19.4 mm (W × H × D) Weight : About 97 g (with battery pack attached) - Page 25 1 Earpiece ql Camera The caller’s voice is heard from here. Record images from here (P.116). 2 Display (P.25) w; Incoming Indicator/Photo Mirror Flashes when receiving a call/mail. It flashes 3 Four-way Keys and Enter Key (P.24) when there is a missed call or new mail/unread Mail Key message (P.92, 93).
-
Page 26: Move The Cursor
Using the Four-way Keys To utilize the Mova’s function, use the mail key, the four-way keys (Up/Down/Left/Right arrow keys), the enter key and the i-mode key according to the instructions shown in the guide display. • For details on the guide display in the Camera mode, see P.115. Four-way Keys and Enter Key Symbols in Operation... -
Page 27: Using The Display
Using the Display • For details on icons in the Camera mode, see P.114. 9 qa While running i-αppli (i-αppli stand-by display)/While running i-αppli DX i-αppli stand-by display/i-αppli DX stand-by display is set (P.222) qf qg While an external device is being connected (P.353) While the Car Adapter is being connected (P.47) -
Page 28: Selecting The Menu
Selecting the Menu The Mova provides various functions. Press (menu) in the stand-by display to display the menu dis- play as below. You can change the menu display icons (P.91). Icon Menu name Description Entertainment Used to access the camera, My picture, Music panel, and Memory Stick. - Page 29 Selecting a Function Using the Menu Number If you remember the menu number, a function can be accessed easily by entering the menu number. For the menu number, see the List of Menus (P.332). Example: Selecting the Memo with the menu number “21” Press (menu) in the stand-by display.
-
Page 30: Attaching And Removing The Battery Pack
(The average life of a battery pack is about 1 year. However, depending on the fre- quency of use, the life may become shorter.) Return all spent battery packs to NTT DoCoMo or a dealer, or a recy- cling shop to protect the environment. -
Page 31: Charging The Mova
• If the charge indicator of the Mova flashes in red, remove and attach the battery pack again (P.28). If it continues to flash in red, the battery pack may be defective. Stop charging imme- diately and contact our service counter (DoCoMo shop, etc.). ■ Charging Time/Battery Time (guidelines) Charging time... -
Page 32: Charging With The Ac Adapter
Charging with the AC Adapter Make sure to see the user’s manual of the optional AC Adapter SO004. Open the terminal cover of the Mova and attach the connector of the AC Connect the adapter adapter to the terminal with the with the warning label facing up warning label facing up. - Page 33 Charging with the Desktop Holder and AC Adapter Make sure to see the user’s manual of the optional AC Adapter SO004 and Desktop Holder SO012. The battery pack cannot be charged alone. While holding the desktop holder bottom side up, attach the connector Connect the adapter of the AC adapter to the terminal of with the warning label...
- Page 34 Charging with the DC Adapter Make sure to see the user’s manual of the optional DC Adapter SO001. The DC adapter is a DC 12 V/24 V adapter that enables to charge the Mova using the cigarette lighter socket of a vehicle. Open the terminal cover of the Mova and attach the connector of the DC Lock...
-
Page 35: Checking The Battery Level
Checking the Battery Level The estimated battery level is indicated in the display. • Use this level only estimated. Display Charge level Sufficiently charged. Slightly low. Very low. It is recommended to charge. (Flashes) The battery level is 0. Charge. Checking the Battery Level with the Sound and Display •... -
Page 36: Powering On/Off
Powering ON/OFF Powering ON When the Mova is powered ON, the display and keypad backlights are turned on. Press for over a second. The Mova is powered ON and the Wake-up image (anima- tion) is displayed. After a while, the stand-by display ap- pears. -
Page 37: Setting The Basic Functions
Setting the Basic Functions The Initial setting can be used to make basic settings such as the Security code, Date/time and Send own number. See the respec- tive pages for details on the settings. ■ Items You Can Set Option Description Change code Change the Security code (P.97). -
Page 38: Setting The Date And Time
Setting the Date and Time Set the date and time of the Mova. • The date and time can be set even during a call. From the Menu, select [Tool] → [Clock] → [Date/time] and press Date/time 2000/ 00/00 00:00 Enter the year, date and time. Enter the year and date from 2000/Jan/01 to 2099/Dec/31. -
Page 39: Showing Your Phone Number On The Recipient's Phone
Showing Your Phone Number on the Recipient’s Phone When placing a call or sending Short Mail, your phone number can be shown in the display of the recipient’s phone you are calling. • Set to [ON] to use the i-shot service. If you set to [OFF], the screen confirming whether to send your phone number for once appears when sending i-shot. -
Page 40: Checking Your Own Phone Number
Checking Your Own Phone Number Your Mova’s phone number can be checked. You can also save your name, mail address, etc. • If the Own number is saved as Secret, the data other than the Mova’s phone number, Mova’s mail address and My phone no. is not displayed. Set the Secret mode to [Dis- play ON] to display all data (P.109). - Page 41 Enter your home phone number at [ Enter a number within 24 digits. Enter your home mail address at [ Enter a mail address within 50 half-width alphanumeric characters. Enter your office name at [ Enter a name within 64 full-width or 128 half-width characters. Enter your office postal address at [ Enter an address within 64 full-width or 128 half-width characters.
-
Page 43: Placing/Receiving Calls
Placing/Receiving Calls ■ Placing Calls Placing a Call ................42 Redialing Previously Dialed Numbers ......43 <Redial> Changing the Caller ID Setting ON/OFF for an Individual Call ..44 <186/184> <Short Dial> and <Malicious Caller Block> ......... 44 Placing an International Call ....... -
Page 44: Placing A Call
Placing a Call Check the radio wave condition and enter a phone number. • Do not cover the antenna with your hands for a call in better radio wave condition. Enter a phone number in the stand-by display. • You can enter a phone number of up to 24 digits. ... -
Page 45: Redialing Previously Dialed Numbers
Redialing Previously Dialed Numbers Up to 30 previously dialed calls are saved in the Redial record with their dates/times, phone numbers and names. The redial records can also be listed in the order of most frequently dialed numbers (the Dial frequency record). •... -
Page 46: Changing The Caller Id Setting On/Off For An Individual Call
Up to 20 phone numbers (max. 11 digits) can be saved in the DoCoMo network. Malicious Caller Block Up to 19 ordinary phone numbers can be saved in the DoCoMo network from which you wish to block calls (such as a malicious caller’s numbers). - Page 47 Saving Short Dial Press + XX + phone number + • In the place of “XX”, enter a short dial number between 00 and 19. If you enter “00”, save “9999” and press , the Malicious Caller Block is enabled and all short dial numbers saved for 00 to 19 are deleted.
-
Page 48: Placing An International Call
For the WORLD CALL details, call the “General Contact” on the backcover of this manual. A subscription to WORLD CALL is also accepted on DoCoMo e-site. For information on DoCoMo e-site, see the backcover of this manual. ※ To use an international call service company other than DoCoMo, contact them di- rectly. -
Page 49: Talking Hands-Free While Driving
Up to 3 numbers can be saved that are prefixed to a phone number when placing an international call. • At the time of purchase, the DoCoMo WORLD CALL number “009130-010” is saved. • If you change the number or add numbers in the Int’l prefix, the default setting cannot be restored even if you reset the Mova. -
Page 50: Sending Touch-Tones
When the sending of the first series is completed, the next series of touch- tones appears. Repeat step 2. ● Full-width characters cannot be sent to the DoCoMo QUICKCAST “02·DO” service. ● Contents saved in the Memo can be sent to a pager with a display. During a call,... -
Page 51: Reconnecting A Dropped Call Automatically
[Standard] : Adjust the recipient’s voice so that you can hear it more clearly. [Low] : Adjust the recipient’s voice so that you can hear it clearly. The Noise reduction is set. * The paging service provided by NTT DoCoMo is called QUICKCAST as of January 2001. -
Page 52: Receiving A Call
Receiving a Call The Mova notifies you of a call being received by indicator flashes, ring tone, vibrator, etc. • The operation of the Mova when receiving a call varies depending on the current set- tings for the Vibrator, Manner mode, etc. When receiving a call, press A phone number appears in the display when a caller sends ... -
Page 53: Using The Received Record
Using the Received Record Up to 30 previously received calls are saved in the Received record with their dates/times, phone numbers and names. A ring time for a missed call can be checked. • A ring time cannot be checked for a missed call with a record message. Press ) in the stand-by display. -
Page 54: Using The Low Voice Feature
Using the Low Voice Feature You can set the Mova so that the recipient can hear your voice at a normal volume level even if you speak in low voice. Press during a call. • The Whisper mode can also be set by selecting [Whis- per mode] from the submenu during a call. -
Page 55: Putting A Call On Hold
Putting a Call on Hold When unable to answer a call immediately, the call can be put on hold. • Even if the answer is put on hold, the caller is charged for the calling charge. When receiving a call, press The beeps sound and the answer is put on hold. -
Page 56: Rejecting Calls When Driving
Rejecting Calls When Driving The Driving mode (answering message function while driving) is an automated answering service that supports safe driving. When the Driving mode is set, the guidance informs the caller that you are unable to answer the call because you are driving. After the guid- ance the call is disconnected. - Page 57 ■ During i-mode communication (if “1450” is set when subscribing to the Voice Mail Service or the Call Forwarding Service) The guidance to be played back during i-mode communication varies depending on the settings of the i-mode incoming (P.156). Settings of the i-mode Guidance messages incoming Voice mail...
-
Page 58: Recording Caller's Messages When Unable To Answer Calls
Recording Caller’s Messages When Unable to Answer Calls When the Record message is set, the Mova can play back an an- swering message and record a caller’s message when you are un- able to answer a call. • When 3 messages are recorded, the Record message no longer operates. Delete unnecessary messages. -
Page 59: Move The Cursor
Setting the Operation of the Record Message Press in the stand-by display, select [Set message] and press Set record message Set OFF To answer 10sec (01−29) Rec answer msg Msg setting Std Enter the time before starting the answering message at [To answer]. Enter from 01 to 29 seconds. Record an answering message at [Rec answer msg]. -
Page 60: Recording A Caller's Message When Unable To Answer A Call Just Receiving
Recording a Caller’s Message When Unable to Answer a Call Just Receiving You can start the Record message manually for temporary use when receiving a call even if the Record message is [OFF] (Quick record message). • When 3 messages are recorded, the Quick record message no longer operates. De- lete unnecessary messages. -
Page 61: Playing Back/Deleting A Record Message/Voice Memo
Playing Back/Deleting a Record Message/Voice Memo The record message or voice memo (P.284) can be played back or deleted. Playing Back a Record Message/Voice Memo Example: Playing back a record message Press in the stand-by display, select [Play message] and press To play back a voice memo Play record message... -
Page 63: Phonebook
Phonebook Saving an Entry in the Phonebook <Add to phonebook> ....Saving the Redial and Received Record in the Phonebook ..65 Placing a Call from the Phonebook ..........65 Setting a Group <Group setting> ............. Searching the Phonebook <Search phonebook> ........Setting the Display of the Phonebook <Record display>... -
Page 64: Saving An Entry In The Phonebook
Saving an Entry in the Phonebook Up to 1,000 entries can be saved in the Phonebook. • When you enter one of the name, phone number and mail address, (cmplt) ap- pears, indicating you are ready to save the entry in the Phonebook. Press in the stand-by display and press (new). -
Page 65: Move The Cursor
Enter the specified Secret code (P.169) when the recipient saves it. Used when sending mail. • If you save a mail address as “phone number + Secret code@docomo.ne.jp” in the Phonebook, you cannot send mail or reply mail to this address. To avoid this problem, change the mail address to “phone number@docomo.ne.jp”... - Page 66 Although the data of the Phonebook is kept for about 1 month even after the battery pack is removed or run out, the data may be lost after the period. Under no condition will DoCoMo be held liable for any damaged or lost data saved in the Phonebook, etc.
-
Page 67: Saving The Redial And Received Record In The Phonebook
Saving the Redial and Received Record in the Phonebook A phone number saved in the record can be directly added to the Phonebook. Example: Saving a received record in the Phonebook as a new entry Press ) in the stand-by display. To save a number from the redial record Press ) in the stand-by display. -
Page 68: Setting A Group
Setting a Group Up to 20 groups can be saved in the Phonebook. Press (func) in the Phonebook. The submenu appears. Select [group setting] and press To display group numbers Group setting When saved, group icons are displayed instead of group numbers. -
Page 69: Searching The Phonebook
● When you receive a call to My phone no. for the Number Plus Service, the ring tone set in My phone no. (P.314) sounds. When the Des phone tone is set in both the Add to phonebook and the Group setting, the setting in the Add to phonebook has priority. -
Page 70: Setting The Display Of The Phonebook
Setting the Display of the Phonebook Setting the Display Style of the Phonebook The display style of the Phonebook can be selected from 3 types. Alphabet Group Number た な は ま や ら わ A Group Anthony Smith 000:Carol Wong Friends 001:Brian Miller... -
Page 71: Editing An Entry
Editing an Entry From the Phonebook, select an entry and press Press (edit). The Edit phonebook display appears. Edit each item. • Follow the same steps as in the Add to phonebook (P.62, step 2 to 15). Press (cmplt). The edited data is saved in the Phonebook. Deleting an Entry You can delete Phonebook entries using the following 3 methods. -
Page 72: Checking The Number Of Entries Saved
Checking the Number of Entries Saved The number of entries saved in the Phonebook can be checked as well as the number of entries still available or saved as Secret. Press (func) in the Phonebook. The submenu appears. Select [memory status] and press [Remained]: Memory status... -
Page 73: Setting Ringer/Display/Display Light
Setting Ringer/Display/ Display Light ■ Setting the Ringer Changing the Sound ..............72 Changing the Volume of Sound ........... 75 Informing Incoming Calls with Vibration ....... 77 <Vibrator> Setting the Keypad Sound ........78 <Keypad sound> Setting the Duration of Mail/Message Ring Tone .. -
Page 74: Changing The Sound
Changing the Sound ■ The list of preset melodies Display Melody name Composer − − Type 1 to 5 Spital hall Ⅱ Spital hall Ⅱ − Beginning is now Beginning is now − − Splash guitar Splash guitar Salut d’amour Salut d’amour Edward Elgar Getting at ya... -
Page 75: Move The Cursor
Changing the Ring Tone The ring tone can be set depending on what is incoming (a call or mail, etc.). Example: Setting the Phone tone From the Menu, select [Settings] → [Ringer] → [Ring tone] and press [Phone tone]: Ring tone Set a ring tone for a call. -
Page 76: Move The Cursor
Changing the Sound Effect You can set the type, volume and duration of the sound effect that can be used when the Mova is powered ON or mail is sent, etc. • The preset ring tones (5 types) and melodies (10 types) (P.72) and a melody exceed- ing 20Kbyte cannot be set for the sound effect. -
Page 77: Changing The Volume Of Sound
Changing the Volume of Sound Adjusting the Volume of Ring Tone Depending on what is incoming (a call, mail, etc.), the ring volume can be adjusted in 8 levels: OFF (silent), level 1 (smallest) to level 5 (largest), StepUp (the sound becomes gradually larger about ev- ery 6 seconds) and StepDown (the sound becomes gradually smaller about every 6 seconds). - Page 78 Adjusting the Volume of Caller’s Voice The volume of caller’s voice can be adjusted in 5 levels from level 1 (smallest) to level 5 (largest). • The volume of caller’s voice can also be adjusted during a call. Whichever way you may take, the most recently adjusted volume is used until it is adjusted next time.
-
Page 79: Informing Incoming Calls With Vibration
Adjusting the Volume While Running i-αppli The sound volume while running i-αppli can be adjusted in 6 levels: OFF (silent), level 1 (smallest) to level 5 (largest). • The software volume cannot be adjusted when the Manner mode is set. Press (i-mode) for over a second in the stand-by display and press... -
Page 80: Setting The Keypad Sound
Setting the Keypad Sound You can set the type, volume and duration of the keypad sound that is heard when you press a key of the Mova. • The preset ring tones (5 types) and melodies (10 types) (P.72) and a melody exceed- ing 20Kbyte cannot be set for the keypad sound. -
Page 81: Setting The Duration Of Mail/Message Ring Tone
Setting the Duration of Mail/Message Ring Tone The alert duration of the ring tone when mail or message is received can be set. Example: Setting the alert duration of the Mail tone From the Menu, select [Settings] → [Ringer] → [Alert time] and press Alert time... -
Page 82: Setting The Poor Signal Quality Alert
Setting the Poor Signal Quality Alert You can set to inform you with alarm of the possibility of the call being disconnected due to the radio wave condition. From the Menu, select [Settings] → [Call] → [Fringe alarm] and press The Fringe alarm display appears. -
Page 83: Muting The Ring Tone
Muting the Ring Tone All sounds from the Mova can be disabled to avoid disturbing oth- ers by using the Manner mode. There are 3 types of the Manner mode. Set the mode by using the Manner mode setting (P.82). •... -
Page 84: Changing The Manner Mode Settings
Changing the Manner Mode Settings The Manner mode can be selected from 3 types: “Manner”, “Silent” and “Original manner”. Press in the stand-by display, select [Manner mode] and press Manner mode Set OFF Mode Manner Select the type of the Manner mode at [Mode]. Press (cmplt). -
Page 85: Setting The Display/Display Light Setting The Stand-By Display
Setting the Stand-by Display An image, the type of the calendar/clock and whether to display the guide display can be set for the stand-by display. • When i-αppli is set for the stand-by display, the i-αppli stand-by display appears in- stead. - Page 86 Select an interval to change images at [Shuffle]. [OFF] : Do not change the stand-by image. The standard image is constantly displayed. [Hourly] : Change the image on the hour cyclically among the standard image and shuffle images 1 to 6. [Daily] : Change the image at midnight every day cyclically among the stan- dard image and shuffle images 1 to 6.
- Page 87 to adjust the position and press (ok). Every time you press , the calendar/clock changes its position. When you select [Digital-L]/[Digital-S] Press to fine adjust the position. When you select [Calendar-L/Clock]/[Calendar-L]/[Analog] The position cannot be adjusted. Select the font color of the calendar/clock at [Select color]. •...
-
Page 88: Setting Pictures For Various Displays
Setting Pictures for Various Displays You can set the image that appears when powering ON/OFF and placing/receiving a call, etc. • An image obtained from the “Memory Stick Duo” or the infrared communication and an image exceeding 100Kbyte or 600 × 600 dots in size may not be set in the Anima- tion setting. -
Page 89: Setting The Display For Incoming And Outgoing Calls
Setting the Display for Incoming and Outgoing Calls Displaying the Picture Set in the Phonebook When Receiving a Call You can display the image set for the Call image in the Phonebook (P.63, 66) when placing/receiving a call and right after receiving mail. -
Page 90: Setting The Display Backlight
Setting the Display Backlight The brightness and lighting time of the display backlight can be set. From the Menu, select [Settings] → [Display] → [Display light] and press [Lighting time]: Display light Set the time to turn on the display backlight. Lighting time... -
Page 91: Saving Power For The Display
Saving Power for the Display The display is automatically turned off to save battery power when no operations are made for a certain period of time. You can set the time before turning off the display and whether to flash the power saver indicator. -
Page 92: Setting The Menu Color
Setting the Menu Color You can select the color of the menu display from 3 types. • Depending on the type you selected, the text is hard to read or invisible on some sites. On these sites, try to use another type. From the Menu, select [Settings] →... -
Page 93: Changing The Menu Icon
Changing the Menu Icon You can set an image as one of 5 icons (P.26) in the menu display. • An image of 100 × 100 dots or less in size can be set as a menu icon. If you set an image larger than this size, it is displayed in reduced size. -
Page 94: Setting The Color For The Incoming Indicator
Setting the Color for the Incoming Indicator You can select the illumination color for each incoming type, such as a call and mail, from 12 types of illumination colors or 7 types of illumination patterns. Example: Setting the illumination color when receiving a call From the Menu, select [Settings] →... -
Page 95: Informing Missed Call/New Mail With Indicator
Informing Missed Call/New Mail with Indicator The indicator and the side indicators can be set to flash to notify you that there is a missed call or new mail/unread message. The indicator is turned off after a missed call is checked or mail/mes- sage is displayed. -
Page 96: Setting The Font Size
Setting the Font Size The font size can be set separately for the Phonebook, Call record, mail and display of site. • The font size for [Mail], [Chat mail] and [Internet] cannot be changed during a call. Example: Setting the font size of the Phonebook From the Menu, select [Settings] →... -
Page 97: For Safety Operation
For Safety Operation ■ About the Security Code Security Codes Used on the Mova ..........96 Changing the Security Code ......... 97 <Security code> ■ Restricting Operations and Functions Available on the Mobile Phone Various Locking Functions ............98 Restricting Access to the Phonebook .... -
Page 98: About The Security Code Security Codes Used On The Mova
• Note that you are required to bring the Mova and your official identification (such as driver’s license) to our service counter (DoCoMo shop, etc.) when you forget the Security code. • The Security code is required to use the following functions. -
Page 99: Changing The Security Code
• Note that you are required to bring your official identification (such as driver’s license) to our service counter (DoCoMo shop, etc.) when you forget the i-mode password. Authentification Password When sending/receiving all data using the infrared communication, you need to enter the authentification password to recognize the receiver/sender. -
Page 100: Various Locking Functions
Various Locking Functions The Mova offers many lock functions to assure safety operation, such as preventing unauthorized use of the Mova, protecting the Phonebook from being seen by others. You can use any mix of these functions depending on the purpose. Functions Description Phonebook lock... -
Page 101: Restricting Access To The Phonebook
Restricting Access to the Phonebook All functions for the Phonebook, such as to display, save, edit and search Phonebook entries, are disabled. The 2-touch dial and EV- Link as well as a call from the Received record are also disabled. To cancel the Phonebook lock temporarily, enter the Security code. -
Page 102: Locking The Keypad To Prevent Unauthorized Use
Locking the Keypad to Prevent Unauthorized Use The Keypad lock secures the Mova from unauthorized use. • Only the following operations are available when the Keypad lock is set. Answer while receiving a call, put the answer on hold and play back the answering message for the Record message Hang up a call, adjust the volume and switch to the Whisper mode Call emergency numbers (110, 119, 118) -
Page 103: Move The Cursor
Enter the Security code. Remote keypad lock Set OFF Monitoring 03min (01−10) Times 05Count (03−10) Registered no. 0/3 Search mode OFF Select [ON]/[OFF] of the Remote keypad lock at [Set]. Enter the duration for counting a set number of calls at [Monitoring]. Enter from 01 to 10 minutes. Enter a number of calls to be placed within the monitoring duration at [Times]. -
Page 104: Restricting Placing/Receiving Calls
Mova is outside the service area or the Mova is powered OFF. When using the DoCoMo Voice Mail Service or Call Forwarding Service, these services can be used in the same manner as when the Mova is powered OFF. -
Page 105: Locking The Keypad To Prevent An Accidental Use
Locking the Keypad to Prevent an Accidental Use While carrying around the Mova that is powered ON, the keypad can be locked to prevent from pressing the keypad accidentally. • The keypad cannot be locked when the i-αppli display is running. •... -
Page 106: Specifying Phone Numbers To Accept/Reject Calls
Specifying Phone Numbers to Accept/Reject Calls You can set to accept/reject calls only from specific phone num- bers. For each of the Accept/Reject calls, up to 20 phone numbers can be saved (Number). The Mova can also be set to accept/reject calls only from specific groups in the Phonebook. -
Page 107: Move The Cursor
Example: Accepting calls only from specified phone numbers From the Menu, select [Settings] → [Security] → [Accept calls] and press The Security code display appears. To set the Reject calls From the Menu, select [Settings] → [Security] → [Reject calls]. Enter the Security code. -
Page 108: Rejecting Calls With No Caller Id
Rejecting Calls with No Caller ID When receiving a call without the caller’s phone number displayed, the reason for not displaying it is shown. You can decide whether to accept a call based on the reason. Non-display reason Description User unset When a call is received from a caller who does not notify the caller’s phone number intentionally. -
Page 109: Muting The Ring Tone For Calls With No Phonebook Entry
Muting the Ring Tone for Calls with No Phonebook Entry You can set the time before starting the ring tone, indicator and vibrator for an incoming call from a caller not saved in the Phonebook. This function is also useful for blocking a nuisance call such as from a malicious caller. -
Page 110: Rejecting Calls From Callers With No Phonebook Entry
Rejecting Calls from Callers with No Phonebook Entry You can set to reject calls from callers not saved in the Phonebook. This function is valid only when a caller sends the phone number. It is recommended to set the Caller ID Display Request Service (P.316) and the Denied no ID (P.106) together with this function. -
Page 111: Displaying The Data Saved As Secret
Displaying the Data Saved as Secret The Phonebook, Own number and Schedule saved as Secret are not displayed unless the Secret mode is set to [Display ON]. Make sure to save the Phonebook, Own number and Schedule as Secret if you do not wish others to see them. •... -
Page 112: Other Measures "For Safety Operation
Other Measures “For Safety Operation” The following items are available for safety use of the Mova. Purpose Function/Service name Page Do not receive mail from unknown Change Mail Address, Register a See the senders. Secret Code “i-mode User’s Receive mail only from the specific Receive Mail from Selected Domains Manual”. -
Page 113: Camera
Camera Before Using the Camera ............112 Recording Images ..........116 <Record image> Changing the Camera Settings ..........120 Using the Bar Code Reader ......128 <Bar code reader>... -
Page 114: Before Using The Camera
Before Using the Camera You can record images by the Mova’s built-in camera, which you can send using i-shot and set for the stand-by display, etc. To use “Memory Stick Duo”, you need to obtain it separately. If you do not have a “Memory Stick Duo”, you can purchase it at a home electric appliance store or other similar store (P.245). - Page 115 About the Camera Mode To use the camera, press the AV key (shutter) for over a sec- ond in the stand-by display. The Camera mode is set and an image through the camera appears in the display. ● The Camera mode is terminated automatically if the keypad is not pressed for about 2 minutes.
- Page 116 The Icon for the Camera Mode In the Camera mode display, the following icons appear depend- ing on the settings and functions selected. • You can use (disp) to switch the display of the icons and guide display (Standard, Simple, or Display off). Even if you select “Display off”, related icons are displayed when you perform any operations.
- Page 117 Saving folder number : Displayed during recording : Displayed during playback ※ Appears when the “Memory Stick Duo” is selected as a saving space. Zoom (P.121) : Spot photometry (P.121) Estimated recordable number of images : Protected image (P.259) : Image in the print order (P.234) Order of the image being played back in the folder/total number of images in the folder Guide display (P.115)
-
Page 118: Recording Images
The File Name/Number of Images The following file numbers and names are automatically assigned to the recorded images. When you select the “Memory Stick Duo” for saving space, the recorded images are automatically saved to one of the 100MSDCF to 999MSDCF folders, which are predefined and cannot be changed. - Page 119 Recording Images in Close to the Object You can record an object in close distance (about 12 cm). Slide the macro switch to the position in the Camera mode display. The Macro mode is set and “ ” appears. 12:45 To cancel the Macro mode Slide the macro switch to the opposite...
-
Page 120: Move The Cursor
Recording Images with Frames You can record an image with a frame, which can be selected from the preset frames in the Mova or downloaded frames. • The size of images recorded with a frame is automatically set to [i-shot (S)], [320 × 240] or [i-shot (L)] according to the frame size you selected and cannot be changed. - Page 121 Playing Back Images The images can be checked immediately after recording. After recording an image, press (play) in the Camera mode display. The recorded image appears. 12:45 1/16 To delete an image Press (func) and select [Delete one] → [Yes]. To set an image for the stand-by display Press (func) and select...
-
Page 122: Changing The Camera Settings
Changing the Camera Settings Selecting an Image Size The size of an image to be recorded can be selected from 5 types (P.113). • When the Shoot mode is set to [continuous mode] or [shoot with frame], the image size cannot be set. -
Page 123: Adjusting Zoom
Adjusting Zoom The zoom can be adjusted in 25 levels within the range of ×1 to ×16. • When the image size is set to [1280 × 960], the zoom magnification higher than [×8] cannot be set. Press in the Camera mode display. •... - Page 124 Using the Auto timer The Auto timer can be used when recording yourself or others with- out holding the Mova with your hands. The image is recorded about 10 seconds after you press the AV key (shutter). • After recording with the Auto timer, the Auto timer is automatically reset to [OFF]. Press (func) in the Camera mode display, select [Auto timer] and press...
- Page 125 Inserting the Recording Date The date is stamped at the lower right of an image to be recorded. The date stamp can be used when you print the image. • The date stamp is not displayed in the Camera mode display. Even if you display the recorded image, the date stamp on it may not be seen depending on the size of the image or the direction of the display.
- Page 126 Setting Where to Save Images A place to save recorded images can be set. • Folders in the Mova can be added, deleted or renamed (P.257). Press (func) in the Camera mode display, select [Select save to(photo)] and press Select save to(photo) Memory Stick...
-
Page 127: Move The Cursor
Mova is outside the service area or the Mova is powered OFF. When using the DoCoMo Voice Mail Service or Call Forwarding Service, these ser- vices can be used in the same manner as when the Mova is powered OFF. - Page 128 Resetting File Numbers of “Memory Stick Duo” When an image with the file number (P.116) “999-9999” is saved in the “Memory Stick Duo”, no more images can be saved even if there is a vacant space in the “Memory Stick Duo”. The Reset file number allows you to reset the file numbers up to the largest file number saved in the “Memory Stick Duo”...
- Page 129 Terminating the Camera Mode Automatically The Camera mode is automatically terminated to save power when no operations are made in the Camera mode. Press (func) in the Camera mode display, select [Auto camera off] and press 30sec 1min 2min 3min Auto camera off...
-
Page 130: Using The Bar Code Reader
Using the Bar Code Reader You can use the camera to scan JAN code or QR code. The scanned text data can be used for Phone To, Mail To, Web To and i-αppli To functions, Bookmark and Phonebook entries, and also for display- ing and copying/pasting text. -
Page 131: Move The Cursor
Scanning JAN Code/QR Code You can scan JAN code or QR code and save the maintained data for later use. Specifically, you can use text data from the scanned JAN code or QR code to enter information in a textbox while dis- playing a site (P.140). -
Page 132: Move The Cursor
Displaying the Saved Data You can save up to 10 data entries for JAN codes or QR codes that are scanned. • When a total of 10 data entries is saved and a new JAN code/QR code is scanned, unprotected data is overwritten from the oldest. From the Menu, select [Tool] →... -
Page 133: I-Mode
i-mode ※ i-mode is a paid service that requires a subscription. What is i-mode? ................. 132 Displaying the i-mode Menu ........ 138 <i-mode menu> ■ Displaying a Site Displaying Sites ................. 138 Using Sites ................. 140 Saving a Site in My Menu ......... -
Page 134: What Is I-Mode
What is i-mode? i-mode allows you to use the i-mode compatible mobile phone to access various online services such as site (program) connection, Internet connection and i-mode mail. ● Site (program) Connection Various online services offered by IP (information service providers), such as weather information and news, are available by selecting Menu List accessible from the i-mode menu. - Page 135 (P.138) オプション設定 Perform i-mode mail settings and change (Options) the i-mode password. お知らせ&ヘルプ Present notices from DoCoMo and (Information & describe the help on i-mode usage and Help) rules. 料金&お申込 Check charges and pay for it, make (Charge &...
- Page 136 Other Features ● i-αppli By downloading i-αppli from its site, the i-mode compatible mobile phone can be made more useful in many ways. For example, you can enjoy many kinds of games by down- loading them to it. Downloading i-αppli for stock information allows you to check the stock price automatically at the set time.
- Page 137 ● SSL Communications SSL is a data communication system that secures user privacy by means of authenti- cation/encryption technology. The SSL page encrypts data to prevent eavesdropping, tampering, impersonation and forgery, assuring secure transmission of user’s private information, such as a credit card number and postal address (P.139). Impersonation i-mode compatible mobile phone...
-
Page 138: Internet Connection
(P.142). ● News Delivery Service (Tokudane News Bin) This is a news delivery service from DoCoMo, which delivers information, such as news and weather forecasts, to an i-mode compatible mobile phone using the Mes- sage R (Request). - Page 139 It is recommended that you always keep the saved data and the important data in a separate note. Under no condition will DoCoMo be held liable for any damaged or lost data saved in the Mova.
-
Page 140: Displaying The I-Mode Menu
Displaying the i-mode Menu Press (i-mode) in the stand-by display. Menu name Function mode menu i Menu Connect the Mova to the i-mode Menu center (P.138). Msg Request Msg Free Msg Request Display the list of Message R received Go to location (P.164). Bookmark Msg Free Display the list of Message F received Screen Memo... - Page 141 What is the SSL Site? An SSL site encrypts data so that private information can be sent/ received safely without eavesdropping or tampering. The message on the left appears when connecting to an SSL site. “ ” appears when displaying an SSL site. Establishing...
-
Page 142: Using Sites
Using Sites Selecting Links/Textbox/Check Box, etc. When using a site, you may display a linked site, enter texts (textbox) or select an item from multiple options (radio button and check box). ■ Link Select a link to display the page. ... - Page 143 Displaying a Previous/Next Page The Mova records 1 to 10 site pages displayed most recently in its memory (Cache). Site pages recorded in the memory are cleared when you return to the stand-by display. When left or right arrows are displayed in the guide display, the previous or next page can be displayed by pressing •...
- Page 144 Displaying a Site URL The URL of the site can be displayed. Up to 256 characters (includ- ing http://) can be displayed. While displaying the site, press (func). The submenu appears. Select [URL] and press The URL of the site is displayed. Displaying a Site Correctly If the display of the text is incorrect on a site, you can reload the page after changing the character code.
-
Page 145: Saving A Site In My Menu
Terminating i-mode Press during i-mode, select [Yes] and press i-mode is closed and the Mova remains in i-mode stand- by. “ ” flashes. Press i-mode is terminated and “ ” changes from flashing to light- ing. Saving a Site in My Menu If you save the frequently used sites in My Menu, you can access them easily from next time. -
Page 146: Changing The I-Mode Password
Changing the i-mode Password The “i-mode password” is used for saving/deleting My Menu, sub- scribing to/unsubscribing from the message service or paid i-mode sites, and changing i-mode mail settings. The i-mode password is set to “0000” when you subscribe to i-mode. Change it to your own i-mode password. -
Page 147: Displaying Internet Sites
Displaying Internet Sites i-mode compatible Internet site can be displayed from i-mode com- patible mobile phone. • Sites that are not compatible with i-mode may not be displayed correctly. From the i-mode menu, select [Go to location] → [URL address] and press The URL address display appears. -
Page 148: Saving A Site To Display It Quickly
Saving a Site to Display It Quickly Up to 200 URLs of the sites you display frequently can be saved in the Bookmark. The sites can be directly accessed from the Book- mark. • Both i-mode sites and Internet sites can be saved as bookmarks. Saving a Site in the Bookmark •... -
Page 149: Move The Cursor
Adding/Deleting Folders Folders in which bookmarks are saved can be added or deleted. Up to 10 folders can be used to manage bookmarks and folder names can also be changed. • You cannot delete the top folder in the list (default: [ブックマーク] (Bookmark)). Example: Adding a folder From the i-mode menu, select [Bookmark] and press , then... -
Page 150: Deleting A Bookmark
Deleting a Bookmark You can delete bookmarks using the following 4 methods. delete one Delete a bookmark in the folder. select&delete Delete selected bookmarks in the folder. Up to 30 bookmarks can be selected at a time. delete in folder Delete all bookmarks in the folder. delete all Delete all bookmarks. -
Page 151: Saving A Site In The Screen Memo
Saving a Site in the Screen Memo Up to 25 to 50 favorite sites can be saved in the Screen Memo. The saved screen memo can be easily displayed. • The number of screen memos that can be saved varies depending on the size of saved screen memos. -
Page 152: Move The Cursor
Protecting a Screen Memo Screen memos can be protected from being overwritten. From the list of screen memos, select a screen memo and press (func). The submenu appears. To cancel the protection Move the cursor to the protected screen memo and press (func). -
Page 153: Move The Cursor
Moving a Screen Memo to a Different Folder Up to 30 screen memos can be selected and moved to a different folder. All screen memos in a folder can also be moved. Press (func) in the list of screen memos. The submenu appears. - Page 154 Deleting a Screen Memo You can delete screen memos using the following 4 methods. delete one Delete a screen memo in the folder. select&delete Delete selected screen memos in the folder. Up to 30 screen memos can be selected at a time. delete in folder Delete all screen memos in the folder.
-
Page 155: Downloading Graphics, Melodies Or Other Data From Sites Saving Graphics From A Site/Message
Saving Graphics from a Site/Message Up to 36 to 256 favorite graphics obtained from sites, screen memos, messages, or mail can be saved (i-anime compatible). You can set the obtained GIF and JPEG images for the stand-by display, as a call image, menu icon, etc., and the Flash movie for the stand-by display. -
Page 156: Downloading I-Melody From A Site
Downloading i-melody from a Site Up to 19 to 256 i-melodies downloaded from sites can be saved (harmonized ringing melody compatible, 64-chord). • The number of melodies you can save varies depending on the size of saved melo- dies. • Some downloaded melodies may not be played back correctly. •... - Page 157 Sending Mail from the Current Display If the current display contains any mail address, mail can be sent directly from the display (Mail To). Select a mail address in the display and press The Edit mail display appears. The selected mail address is entered as the address. Compose mail and send it.
-
Page 158: Make Settings For I-Mode Setting I-Mode
Setting i-mode Setting Responses to Calls During i-mode Communication When there is a voice call during i-mode communication, you can make settings to keep using i-mode while saving the call in the Received record, or to continue using i-mode without saving the call in the Received record. -
Page 159: Move The Cursor
■ Not to save an incoming call during i-mode in the Received record This setting does not notify incoming calls to the Mova, so it is set just in the network service (P.301, 304, 307). With this setting, the i-mode incoming settings made on the Mova are ignored. - Page 160 Changing the i-mode Host (ISP Connection Communication) ※ The Host setting does not require changes when using the i-mode service of DoCoMo. The Mova provides access to various providers (ISP) by changing the host. To use the ISP connection communication, you must sub- scribe to the packet communication service.
-
Page 161: Move The Cursor
From the submenu, select [reset], enter the Security code and select [Yes]. ● The host number of [ドコモ] (DoCoMo) varies depending on the subscription area. The areas are “DoCoMo Hokkaido”, “DoCoMo Tohoku”, “DoCoMo”, “DoCoMo Tokai”, “DoCoMo Hokuriku”, “DoCoMo Kansai”, “DoCoMo Chugoku”, “DoCoMo Shikoku”... -
Page 162: Move The Cursor
Disabling the Display of Graphics You can set whether to display graphic data when displaying sites, screen memos or messages. • Some graphics may not be displayed correctly even if the Set image display is [ON]. From the i-mode menu, select [i-mode setting] → [Common setting] →... -
Page 163: Disabling I-Mode
Displaying a Site Automatically with the Correct Character Code You can set to identify the character code of a site automatically. • Even if the Auto distinct is [ON], some sites may not be displayed correctly. From the i-mode menu, select [i-mode setting] → [Auto distinct] and press The Auto distinct display appears. -
Page 164: Using The Message Service Receiving A Message
Receiving a Message When a message is received, the contents of the message are au- tomatically displayed. Up to 20 Message R (Request) and Mes- sage F (Free) each can be saved. Message R Deliver desired information automatically if you subscribe to a (Request ) site that provides message services. -
Page 165: Checking A New Message
Setting Auto-display The contents of the message can be automatically displayed when it is received. You can also select which message should be dis- played first when receiving both Message R and Message F at the same time. From the i-mode menu, select [i-mode setting] → [Auto-display] and press The Auto-display appears. -
Page 166: Displaying A Message
Displaying a Message The list of received messages can be displayed. From the i-mode menu, select [Msg Request]/[Msg Free] and press • The figures at the right end of the title line show the or- Msg Request 1/6 der of the message at the cursor/the total number of 2005/03/28 10:50... -
Page 167: Deleting A Message
Deleting a Message You can delete messages using the following 4 methods. delete one Delete a message. select&delete Delete selected messages. Up to 20 messages can be selected at a time. dlt read msg Delete all saved read messages. delete all Delete all saved messages. -
Page 168: Sorting Messages
Sorting Messages Messages can be sorted for display temporarily. Example: Sorting Message R From the i-mode menu, select [Msg Request] and press then press (func). The submenu appears. To sort Message F Select [Msg Free] in the i-mode menu. Select [sort] → the sorting order and press [Date(new →... -
Page 169: Mail
Mail ※ i-mode is a paid service that requires a subscription. What is i-mode Mail? ..............168 Displaying the Mail Menu ........172 <Mail menu> ■ Composing i-mode Mail Composing and Sending i-mode Mail ..173 <Compose and send mail> Saving i-mode Mail to Send Later ...... -
Page 170: What Is I-Mode Mail
• Users of i-mode compatible mobile phones need to enter only the mail address por- tion before the @ mark to exchange mail. • PC users need to enter the full mail address (i.e. including “@docomo.ne.jp”) to send e-mail to the Mova. - Page 171 (Mail Address (Other Settings) → Register a Secret Code) The 4-digit Secret code can be saved in addition to the mail address when the ad- dress is set to “phone number@docomo.ne.jp”. As mail without this Secret code at- tached is not received, you can prevent receiving unwanted mail.
- Page 172 The Number of Characters You Can Send/Receive The number of characters sent or received in i-mode mail is as follows. Send Receive Full-width Half-width Full-width Half-width Item characters characters characters characters (kanji, hiragana, (alphanumeric characters, (kanji, hiragana, (alphanumeric characters, pictographs, etc.) katakana, etc.) pictographs, etc.) katakana, etc.)
- Page 173 Other Features ● Melody mail A melody downloaded from a site can be sent or received by attaching to mail. • Sending (P.174) • When receiving (P.179) ● Graphics mail If you insert an address (URL) of a site containing a graphic to the mail, the recipient can obtain and display the graphic directly.
-
Page 174: Displaying The Mail Menu
Displaying the Mail Menu Press (mail) in the stand-by display. Menu name Function Mail menu Inbox Display, reply to or forward received mail Inbox (P.182). Outbox Compose message Outbox Display, forward or edit sent mail (P.182). Chat mail Compose Compose and send new mail (P.173). Recv ranking... -
Page 175: Compose And Send Mail
Composing and Sending i-mode Mail Up to 500 sent mail can be saved. • Mail may not be displayed correctly on the recipient’s phone depending on the radio wave condition. From the Mail menu, select [Compose message] and press To select a mail address from a mail list Edit mail... -
Page 176: Saving I-Mode Mail To Send Later
Saving i-mode Mail to Send Later When you do not wish to send composed mail immediately, it can be saved. Press (func) in the Edit mail display. The submenu appears. Select [save] and press The composed mail is saved as unsent mail in [Outbox]. To edit the saved mail From the Mail menu, select [Outbox] →... -
Page 177: Sending I-Mode Mail Attaching A Graphic
Sending i-mode Mail Attaching a Graphic A URL of a graphic contained in received mail, a site or a screen memo can be sent as Graphics mail by attaching it to the main body of mail. • Only GIF format graphics whose URL is “http://···.gif” can be sent as Graphics mail. Example: Sending a graphic in a site While displaying the site, press (func). -
Page 178: Composing I-Mode Mail Quickly
Composing i-mode Mail Quickly Mail can be sent easily to recipients saved in memory numbers from 000 to 099 of the Phonebook by using a shortcut (Quick mail). It is useful to save frequently used mail addresses in memory num- bers from 000 to 099. -
Page 179: Selecting To Receive I-Mode Mail
Selecting to Receive i-mode Mail Mail held at the i-mode center can be checked for its subject and other information and only the mail you need can be received se- lectively. Unnecessary i-mode mail can be deleted without receiv- ing them. •... -
Page 180: Checking New I-Mode Mail
• You cannot reply to mail with a mail address exceeding 50 half-width characters or when “ ” (reply disabled mail such as iMS) is displayed. • If mail is sent from “photo-server@docomo-camera.ne.jp”, the reply to this mail does not reach the original sender. From the received mail list, select mail and press (reply). -
Page 181: Forwarding I-Mode Mail
Forwarding i-mode Mail Received and sent mail can be forwarded. Example: Forwarding received mail From the received mail list, select mail and press (func). The submenu appears. Select [forward] and press The Edit mail display appears. “Fw: title of the received mail” as subject and “main body of the received mail” as main body are entered beforehand. -
Page 182: Displaying A Graphic From I-Mode Mail
Displaying a Graphic from i-mode Mail A graphic attached to received mail is displayed. Up to 10 mail from which you have obtained a graphic can be saved as Graphics mail. • Only GIF format graphics whose URL is “http://···.gif” can be displayed as Graphics mail. -
Page 183: Saving The Mail Address/Phone Number In The Phonebook
Saving the Mail Address/Phone Number in the Phonebook Saving the Sender’s/Recipient’s Mail Address in the Phonebook The mail address of a received mail sender ( ) or sent mail recipi- ent ( ) can be saved in the Phonebook. Example: Adding the sender of the received mail to a new Phonebook entry From the received mail list, select mail and press (func). -
Page 184: Displaying I-Mode Mail In Inbox/Outbox
Displaying i-mode Mail in Inbox/Outbox The saved sent or received mail can be displayed at any time. From the Mail menu, select [Inbox]/[Outbox] and press Received mail • The figures at the right end of the title line show the num- Inbox 25/66... -
Page 185: Move The Cursor
Sent mail • The title line shows the folder name and the figures at Outbox 1/25 the right end of the title line show the order of the mail at 2005/03/13 20:12 the cursor/the total number of mail in the folder. Departure date 2005/03/13 10:24... -
Page 186: Move The Cursor
Adding/Deleting Folders Folders in which mail is saved can be added or deleted. Up to 15 folders can be used to manage each of received or sent mail. Folder names can be changed and folders can be sorted. • You cannot delete [Inbox], [Outbox], folders including protected mail and mail folders supported by i-αppli mail software. -
Page 187: Move The Cursor
Moving Mail to a Different Folder Up to 30 mail can be selected and moved to a different folder. All mail in a folder can also be moved. Example: Moving received mail Press (func) in the received mail list. The submenu appears. Select [move folder] and press The Select moved display appears. -
Page 188: Deleting Mail
Deleting Mail You can delete the received or sent mail using the following 5 meth- ods. delete one Delete mail in the folder. select&delete Delete selected mail in the folder. Up to 30 mail can be selected at a time. dlt read msg Delete all read mail or all read mail in the folder. - Page 189 Collecting Mail to a Corresponding i-αppli Mail Folder i-αppli mail saved randomly in regular mail folders and folders of other i-αppli mail software can be moved to a folder of the corre- sponding i-αppli mail. From the Mail menu, select [Inbox] and press Select the folder of i-αppli mail and press (func).
- Page 190 Displaying i-αppli Mail as Regular Mail i-αppli mail can be displayed as regular mail. If any i-αppli mail software is deleted, mail saved in the folder of the i-αppli mail can be displayed in the same way as regular mail. From the Mail menu, select [Inbox] and press Select the folder of i-αppli mail and press (func).
- Page 191 Sorting Mail Mail in a folder can be sorted for display temporarily. Example: Sorting received mail Press (func) in the received mail list. The submenu appears. Select [sort] → a sorting order and press To receive mail Sort [Date(new → old)]: ...
-
Page 192: Searching Mail
Searching Mail Mail can be searched by a subject or a text in the main body. Example: Searching received mail Press (func) in the received mail list. The submenu appears. To search all received mail Display all received mail (P.182) and press (func). -
Page 193: Setting The Mail Function Of The Mova
Setting the Mail Function of the Mova Adding a Signature to Mail When saved beforehand, your signature can be attached at the end of the main body of mail. • The number of signature characters is counted as the number of main body charac- ters. -
Page 194: Move The Cursor
Assigning Separate Folders for Mail You can save requirements to sort received or sent mail so that they can be automatically assigned to up to 15 folders, respectively. Up to 30 sorting requirements each for received and sent mail can be saved. - Page 195 ● Unsent mail and unsuccessfully sent mail are saved in [Outbox] regardless of the sorting requirement. ● For sent mail with multiple addresses, the address indicated at the top is deter- mined as the sorting requirement. ● When any entry saved as Secret is included in the group specified in the sorting requirement, mail from a person corresponding to that entry is sorted to [Inbox].
-
Page 196: Move The Cursor
Setting a Mailing List By saving mail addresses in a mail list, you can send mail to all members in the list at the same time. Up to 10 mail lists can be saved. Up to 10 mail addresses can be saved in each mail list. - Page 197 Setting to Select and Receive Mail You can set whether to selectively receive i-mode mail. • Even if the Receive option setting is [ON], all mail is received if you use the Check new mail. If you do not want to receive mail, set [Mail] to [Invalid] in the Inquiry setting (P.193).
- Page 198 Inserting “>” When Adding Received Mail in Your Reply When the main body of received mail is quoted in your reply, “>” can be inserted automatically at the beginning of the main body. From the Mail menu, select [Mail setting] → [Attach>] and press Attach>...
- Page 199 Receiving a Graphic Automatically from Mail The graphic data can be automatically downloaded when display- ing Graphics mail. • For mail sent using i-shot, graphics cannot be automatically displayed even if the Image data is [ON]. From the Mail menu, select [Mail setting] → [Image data] and press The Image data display appears.
-
Page 200: Composing And Sending Chat Mail
Composing and Sending Chat Mail You can exchange mail with persons as if you are actually talking with them. You can save up to 10 persons except for you in the member list for chat mail. • When the Receive option setting is [ON], you cannot use the chat mail. •... - Page 201 Press (send). The chat mail is sent and the statement appears in the Chat Chat mail mail display. The chat mail you sent is saved in the Outbox. 自分 > Come togethe r in Shinagawa tom orrow for the subj ect next week. When you receive chat mail When you receive chat mail from a person saved in the member list during a chat mail session, the latest 50 chat mail messages are displayed in the Chat mail display.
- Page 202 Starting Chat Mail from Received Mail If you receive chat mail while you are not in a chat mail session, it is saved in the Inbox as i-mode mail. You can start a chat mail session from the received mail. From the received mail list, select mail and press , then press...
-
Page 203: Composing And Sending Short Mail
Composing and Sending Short Mail Regardless of whether you subscribe to i-mode, text messages can be sent to i-mode compatible mobile phones as well as mobile phones using the Short Mail service. • Sending Short Mail requires call charges. • If you send Short Mail without main body, it may not reach the recipient. However, Short Mail requires call charges regardless of whether it reaches the recipient. -
Page 204: Receiving Short Mail
● A maximum of 50 characters can be sent to a mobile phone that does not support the kanji characters of the Short Mail Service (203, 204, 205 and 153 series). If kanji, hiragana, or full-width characters are sent to these phones, the message is not displayed correctly on the recipient’s phone. -
Page 205: What Is I-Shot
(Mova) • When you send an image to PCs, FOMA or mobile phones other than DoCoMo’s using i-shot, it is delivered as attachment file. • The image is held for a maximum of 10 days at the i-shot center and automatically deleted after the expiry date. - Page 206 Before Using i-shot ● Images you can send • Only the images recorded by the camera of the Mova can be sent. • Graphics downloaded using i-mode or screen memos cannot be sent. • Only 1 i-shot image per mail can be sent regardless of the volume of image data. •...
- Page 207 (In the following example, the recipient is the i-mode compatible mobile phone.) In 5/25 2005/03/26 11:54 photo−server@doco Sender (indication that it is sent using i-shot) mo−camera.ne.jp The address is always “photo-server@docomo-camera.ne.jp”. My kitty cat Sender’s information 090XXXXXXXXさんから のメールです。このメ Sender’s mobile phone number, etc. is added at the begin- ールに返信しても相手...
-
Page 208: Sending Still Images Using I-Shot
Sending Still Images Using i-shot Only 1 recorded still image can be attached to mail and sent using i-shot. • When you select a still image recorded in [320 × 240], [640 × 480] or [1280 × 960], it is automatically resized to the i-shot (S) or i-shot (L) size. Select a preferred size using the i-shot setting function (P.119) beforehand. -
Page 209: Displaying A Graphic From I-Shot
Displaying a Graphic from i-shot The URL for displaying an image is attached to mail sent using i-shot. When you select the URL, the Mova is connected to the i-shot center by the Web To function, then it downloads and dis- plays the image. -
Page 210: Changing The I-Shot Host
※ The Host setting does not require changes normally. You can save “Host name”, “Host number”, “User ID”, etc. that are used when using services other than DoCoMo i-shot. i-shot cannot be used if the host is changed. • Make sure to enter [Host name], [Host number], [SMTP server] and [Mail address]. -
Page 211: I-Αppli
i-αppli What is i-αppli? ................210 Downloading i-αppli ..............212 Running i-αppli ................214 Running i-αppli Automatically ........220 <Auto start> Running i-αppli from a Site/Mail ....... 221 <i-αppli To> Setting i-αppli for the Stand-by Display ... 222 <i-αppli stand-by display> Managing i-αppli ................ -
Page 212: What Is I-Αppli
What is i-αppli? By downloading i-αppli from its site, the i-mode compatible mobile phone can be made more useful in many ways. For example, you can enjoy many kinds of games by downloading them to it. Down- loading i-αppli for stock information allows you to check the stock price automatically at the set time. - Page 213 Save in Phonebook View Phonebook Use icon information Save in Bookmark Save in Schedule Use Mail menu Use i-mode mail compose display View latest redial record View latest received record View latest unread mail Save ring tone Change ring tone (call, mail, message) Obtain picture from My picture Save picture in My picture Change display settings (stand-by display, placing/receiving a call, receiving/send-...
-
Page 214: Downloading I-Αppli
Downloading i-αppli i-αppli software can be downloaded from a site and saved in the Mova. Up to 16 to 256 i-αppli software can be saved. • The number of i-αppli software you can save varies depending on the size of saved i-αppli software. - Page 215 ● The pre-installed software cannot be used after deleting. To use it again, please download from the “SO@Planet”. [i Menu] → [メニューリスト] → [ケータイ電話メーカー] → [SO@Planet] (as of January 2005) ※ Please be aware that the access method is subject to change without notice. ●...
-
Page 216: Running I-Αppli
Running i-αppli i-αppli software can be set to run manually. Press (i-mode) for over a second in the stand-by display, select a folder and press A list of i-αppli software appears. ソフト一覧 1/5 • A combination of the following icons shows the type of XXX game... - Page 217 ● Some i-αppli software performs the network transmission. The setting can be made beforehand not to perform it (P.215). ● The software pauses when the Clock alarm or Schedule alarm time comes while running the software. The previous display returns when the alarm stops. ●...
- Page 218 Setting the Use of Icons You can set whether to use the icon information (such as mail, mes- sage, radio wave condition, battery level, and Manner mode) for each software. • When you set the Use icons to [Yes] for the i-αppli stand-by display, the icon of unread mail/message as well as the mobile phone information (model and serial number) is sent to IP (information service providers) via the Internet.
- Page 219 Setting the Use of Saved Data You can set whether to permit looking up the Phonebook, redial/ received records, and unread mail for each i-αppli DX software. From the list of i-αppli software, select the software and press (func). The submenu appears. Select [indiv setting] →...
- Page 220 Pre-installed Software ● Dimo 絵文字 メール (Dimo Emoji Mail) Characters move around in reaction to pictographs included in the mail subject, making it much more fun to send and receive mail. You can enjoy talking with the characters by entering text, and also have the characters inform you of incoming calls or unread mail by setting this software for the i-αppli stand-by dis- play.
-
Page 221: Move The Cursor
■ 新規メール作成 (Compose mail) • Before sending mail, confirm whether the recipient is using TextAlive. Item Description Enter the mail address of the recipient. 電話帳から Select the mail address from the (Phonebook) Phonebook. 直接入力 Enter the mail address directly using (Manually) the keypad. -
Page 222: Running I-Αppli Automatically
Running i-αppli Automatically The i-αppli software can be started automatically. You can set the starting date/time and day of the week and whether to use the software’s automatic start for each i-αppli software. • Make sure to set the date and time with the Date/time setting beforehand. From the list of i-αppli software, select the software and press (func). -
Page 223: Running I-Αppli From A Site/Mail
● The software does not start automatically if a screen other than the stand-by dis- play is displayed or the Keypad lock is set at the specified date and time. You can check the Soft description (P.214) for the result of the Auto start. ●... -
Page 224: Setting I-Αppli For The Stand-By Display
Setting i-αppli for the Stand-by Display Only 1 supporting software can be set for the i-αppli stand-by dis- play. The software that supports the i-αppli stand-by display is iden- tified by “ ”. • When the software using network transmission is set for the i-αppli stand-by display, it may not operate properly depending on the radio wave condition. -
Page 225: Managing I-Αppli
Managing i-αppli • For some software, IP (information service providers) may directly access the software saved in the Mova and stop the use of it. In this case, most operations including run- ning the software, setting the software for the stand-by display and upgrading the software are disabled. -
Page 226: Move The Cursor
Adding/Deleting Folders Folders in which software are saved can be added or deleted. Up to 10 folders can be used to manage software and folder names can also be changed. • You cannot delete the top folder in the list (default: [ソフト一覧] (Software list)). Example: Adding a folder Press (i-mode) for over a second in the stand-by display... - Page 227 Deleting i-αppli You can delete software using the following 4 methods. delete one Delete a software in the folder. select&delete Delete selected software in the folder. Up to 30 software can be selected at a time. delete in folder Delete all software in the folder. delete all Delete all software.
- Page 228 Checking Error History and Trace Result The error histories for the i-αppli stand-by display and the results output by the i-αppli trace feature can be displayed. stby err hist When the i-αppli stand-by display is terminated by an error, etc., up to 10 records (including the time of error occurrence, etc.) are displayed.
-
Page 229: Using Various I-Αppli Functions
Using Various i-αppli Functions Using the Camera Function from i-αppli You can use the camera function (P.116) from the software running on the Mova. • Images are used and saved in the software. • Items that can be set and the startup procedure of the camera vary depending on the software. -
Page 231: Displaying/Editing/Managing Data
Displaying/Editing/ Managing Data ■ Using the Album Displaying Images <Album> ..............Editing Images ............236 <Edit image> ■ Using the Music Panel Playing Back Music Data ........240 <Music panel> ■ Using “Memory Stick Duo” “Memory Stick Duo” ..............245 Displaying Data on “Memory Stick Duo”... -
Page 232: Move The Cursor
Displaying Images Images recorded by the camera are saved in the Album and can be displayed at any time. • For details on the Album folder, see P.253. Press ) in the stand-by display, select [Album] and press The Folder list of the Album appears. Folder list 16/16... - Page 233 Select an image and press The selected image appears. 5/16 To hide the icons and guide display Press (viewer). To return to the image list From the submenu, select [to image list]. To return to the folder list, from the submenu, select [to folder list]. To send the image using i-shot From the submenu, select [send i-shot].
- Page 234 Displaying Images as a Slideshow Images saved in the Album can be displayed by switching them automatically. Example: Displaying all images in the Album as a slideshow Press (func) in the Folder list of the Album. The submenu appears. To display images in a specific folder as a slideshow From the Folder list of the Album, select a folder and press (func).
- Page 235 Setting How to Display a List of Images The display style of a list of recorded images can be selected from 3 types. The set display style is applied to all folders. 4 images 12 images List only Photo 1/12 Photo 1/12 Photo 1/12...
-
Page 236: Move The Cursor
Sorting Images Images saved in the Album can be sorted for display temporarily. • Images in [Memory Stick] and [Preset image] cannot be sorted. From the Folder list of the Album, select a folder and press , then press (func). The submenu appears. - Page 237 Checking Vacant Space of the Mova and “Memory Stick Duo” Vacant space in the Mova and the “Memory Stick Duo” can be checked. • The vacant space displayed is an estimated value and not accurate. Press (func) in the Folder list of the Album. The submenu appears.
-
Page 238: Using The Album Displaying Images 230 Editing Images
Editing Images You can edit an image saved in the Album by adding a stamp, a frame, etc. • The preset images cannot be edited. • Images recorded by other than SO506i may not be edited. • Some types of images may take time to save when saved after editing. •... - Page 239 Trimming an Image to the i-shot Size You can trim an image recorded in [320 × 240], [i-shot (L)], [640 × 480], or [1280 × 960] to the i-shot (S) size and an image recorded in [640 × 480] or [1280 × 960] to the i-shot (L) size. The trimmed image is saved as a new image.
-
Page 240: Move The Cursor
Adding a Stamp A stamp can be added to an image of [i-shot (S)], [320 × 240] and [i-shot (L)]. Example: Adding a stamp and saving by overwriting From the Folder list of the Album, select an image and press (func). - Page 241 Enter a text to be added at [Input text]. Enter a text within 10 full-width or 20 half-width characters. • For an image of the i-shot (S) size, the text is displayed to the extent of 5 full- width or 10 half-width characters. Select a type of a text at [Font type].
-
Page 242: Using The Music Panel Playing Back Music Data
Playing Back Music Data ATRAC3 formatted music data that has been saved in the MagicGate-compatible “Memory Stick Duo” using a PC or other device can be played back on the Mova. While playing back music data, you can perform other functions such as displaying a site and sending/receiving mail (background playback). -
Page 243: Key Operation
■ Music panel The Music panel provides 3 types of display modes, and you can switch the display modes by pressing (viewer). Normal display Track information display List display Title 1 Title 1 001 Title 1 Artist A Artist A 002 Title 2 003 Title 3 Album Album 1 004 Title 4 Genre J−POP... - Page 244 ● When the AV key setting is [Valid], press in the stand-by display to display the Music panel. Press while playing back music data to start background play- back in the stand-by display (P.244). ● If there is an incoming call, mail, etc., or the Clock alarm/Schedule alarm sounds while playing back music data on the Music panel, the Mova stops playback and starts the necessary operation accordingly.
- Page 245 Limiting the Playback Volume You can limit the maximum volume to reduce pressure to your ears and possible hazards from being unable to hear the surrounding sounds because of high volume. • When you set the AVLS to [Limit], the volume is limited to level 16 or below. Addition- ally, if you set the AVLS to [Limit] when the current volume level is higher than 16, the volume is automatically set to level 16.
-
Page 246: Move The Cursor
Deleting Music Data You can delete music data using the following 2 methods. delete one Delete music data. delete all Delete all music data. • You cannot delete music data during playback. Example: Deleting music data in the Normal display mode Display the music data in the Music panel and press (func). -
Page 247: Memory Stick Duo
“Memory Stick Duo” You can save Phonebook, mail, Bookmark, and other data in the Mova to the “Memory Stick Duo”, as well as copy data in the “Memory Stick Duo” to the Mova. You can also use the Mova to view data in the “Memory Stick Duo”. - Page 248 ■ Folder view when displayed on a PC When you copy data in the Mova to the “Memory Stick Duo”, a folder corresponding to the data is automatically created. “Memory DCIM nnnMSDCF Photo Stick Duo” MOBILE DOCOMO NAMECARD Phonebook MESSAGE OUTBOX Outbox INBOX Inbox CALENDAR...
-
Page 249: Displaying Data On "Memory Stick Duo
Displaying Data on “Memory Stick Duo” Data saved in the “Memory Stick Duo” can be displayed and checked. • When you select [Music], the Music panel is displayed. Data in [Others] cannot be displayed. • The data amount and total memory space of the “Memory Stick Duo” displayed are estimated values and not accurate. -
Page 250: Copying Data From The Mova To "Memory Stick Duo
Copying Data from the Mova to “Memory Stick Duo” You can copy data in the Mova such as Phonebook, Memo, Sched- ule, mail, Bookmark, melody and picture to the “Memory Stick Duo”. • It may take time to copy depending on the size of data to be copied. •... - Page 251 Copying Data Data in the Mova is copied to the “Memory Stick Duo” one by one. • Up to 30 images in the Album can be selected and copied. Select data and press (func). The submenu appears. Select [save one to M.S.] → [Yes] and press The selected data is saved.
-
Page 252: Copying Data From "Memory Stick Duo" To The Mova
Copying Data from “Memory Stick Duo” to the Mova You can copy data in the “Memory Stick Duo” such as Phonebook, Memo, Schedule, mail, Bookmark, melody and GIF image to the Mova. • When the data to be copied exceeds the maximum number of data items that can be saved in the Mova, only the data items within this number are copied and the extra data items are not copied. -
Page 253: Managing "Memory Stick Duo
Managing “Memory Stick Duo” Deleting Data from “Memory Stick Duo” You can delete data in the “Memory Stick Duo” such as Phonebook, Memo, Schedule, mail, Bookmark, melody and GIF image. • Data in [Others] cannot be deleted. • To delete music data in [Music], see P.244. Example: Deleting data by one file From the MemoryStick info display, select a category and press... -
Page 254: Move The Cursor
Protecting Data on “Memory Stick Duo” Data saved in the “Memory Stick Duo” can be protected from being overwritten. • Data in [Music] and [Others] cannot be protected. From the MemoryStick info display, select a category and press Select data and press (func). -
Page 255: Managing Data Using Pictures/Melodies
Using Pictures/Melodies Graphics downloaded using i-mode and images recorded by the camera are saved in My picture and can be displayed at any time. Also, melodies downloaded from sites/mail are saved in the Melody folder and can be played back at any time. ■... -
Page 256: Move The Cursor
Displaying a Graphic Display graphics in the Graphic folder of My picture. Press ) in the stand-by display, select [Graphic folder] and press The Graphic folder is displayed. Graphic folder16/16 • The figures at the right end of the title line show the num- Preset image... - Page 257 Example: Setting a graphic in the Graphic folder for the stand-by display From the Graphic folder, select a folder and press Select a graphic and press (func). The submenu appears. Select [stand-by display] → [Yes] and press The selected graphic is set for the stand-by display. When you select an image in the Album Select the image display style.
-
Page 258: Move The Cursor
Playing Back a Melody Play back melodies saved in the Melody folder. From the Menu, select [Entertainment] → [Melody fld] and press • The figures at the right end of the title line show the num- Melody folder 61/61 ber of melodies in the folder at the cursor/the total num- Preset melody... -
Page 259: Move The Cursor
Adding/Deleting Folders Folders in which pictures or melodies are saved can be added or deleted. Up to 11 folders in the Graphic folder, up to 12 folders in the Album and up to 11 folders in the Melody folder can be added to manage pictures or melodies. -
Page 260: Move The Cursor
Moving Pictures/Melodies to a Different Folder Up to 30 pictures or melodies can be selected to move to a differ- ent folder. All pictures or melodies in a folder can also be moved. • Pictures in [Preset image] or melodies in [Preset melody] cannot be moved. •... -
Page 261: Move The Cursor
Protecting Graphics/Melodies Graphics and melodies can be protected from being overwritten. • Graphics in [Preset image] or melodies in [Preset melody] cannot be protected. Example: Protecting a graphic in the Graphic folder From the Graphic folder, select a folder and press Select a graphic and press (func). - Page 262 Deleting Graphics/Melodies You can delete graphics or melodies using the following 5 meth- ods. • Graphics in [Preset image] or melodies in [Preset melody] cannot be deleted. delete one Delete a graphic or melody in the folder. select&delete Delete selected graphics or melodies in the folder. Up to 30 graphics or melodies can be selected at a time.
-
Page 263: Checking The Memory Space Of The Mova
Checking the Memory Space of the Mova The graphics in the Graphic folder, melodies in the Melody folder and i-αppli are saved in the same memory of the Mova. You can check the amount of data in the memory by data type. •... - Page 264 In Case of Insufficient Memory Space When the memory space is insufficient while saving or download- ing a graphic of the Graphic folder, a melody or software of i-αppli, save it after securing enough space by selecting existing graphics, melodies or software to be overwritten. Example: When the memory space is insufficient while downloading software Download the software.
-
Page 265: What Is The Infrared Communication
What is the Infrared Communication? You can send and receive data such as Phonebook, Schedule, Memo, Bookmark, mail and picture to and from other mobile phones equipped with the infrared communication. The Mova can also do much more in conjunction with other devices equipped with the infrared communication by using the infrared communication feature of i-αppli. -
Page 266: Receiving Data Using The Infrared Communication
Receiving Data Using the Infrared Communication You can receive data such as the Own number, Phonebook, Sched- ule, Memo, Bookmark, mail and picture from other mobile phones, etc. equipped with the infrared communication. • It may take time to exchange and save data depending on the size of data to be received. •... - Page 267 Receiving Data From the Menu, select [Tool] → [Rcv Ir data] → [Receive] and press The screen confirming whether to begin the infrared communication appears. Select [Yes] and press The infrared communication is started, “ ” changes to “ ” and data exchange is started.
-
Page 268: Sending Data Using The Infrared Communication
Sending Data Using the Infrared Communication You can send data such as the Own number, Phonebook, Sched- ule, Memo, Bookmark, mail and picture to other mobile phones, etc. equipped with the infrared communication. • It may take time to exchange and save data depending on the size of data to be sent. ■... - Page 269 Sending Data Select data and press (func). The submenu appears. Select [send Ir data] and press The screen confirming whether to begin the infrared communication appears. Select [Yes] and press The infrared communication is started, “ ” changes to “ ”...
-
Page 270: Using The Infrared Remote Control
Using the Infrared Remote Control Once infrared remote control software is downloaded from a site and saved in the Mova, the Mova can be used as the TV or VCR remote control. • The infrared remote control cannot be used when the Self mode is set. •... -
Page 271: Other Useful Functions
Other Useful Functions Powering ON Automatically ....... 270 <Auto power on> Powering OFF Automatically ......271 <Auto power off> Starting the Alarm at a Specified Time ......272 <Alarm> Saving Schedules ............ 274 <Schedule> Performing Frequently Used Functions Quickly ... 283 <MySelection>... -
Page 272: Powering On Automatically
Powering ON Automatically The Mova can be powered ON automatically at a specified time. You can also power the Mova ON every day at the same time. • Make sure to set the date and time with the Date/time setting beforehand. •... -
Page 273: Powering Off Automatically
Powering OFF Automatically The Mova can be powered OFF automatically at a specified time. You can also power the Mova OFF every day at the same time. • Make sure to set the date and time with the Date/time setting beforehand. •... -
Page 274: Starting The Alarm At A Specified Time
Starting the Alarm at a Specified Time The alarm sounds for about 1 minute at a specified time. You can also set the alarm to sound every day at the same time. Up to 5 alarms can be set. • Make sure to set the date and time with the Date/time setting beforehand. •... -
Page 275: Move The Cursor
Select an alarm tone from the Melody folder at [Select alarm tone]. To mute the alarm tone Select [Silent]. To check the alarm tone Move the cursor to the alarm tone and press (play). Select the vibration pattern at [Vibrator]. [OFF] : Do not set the vibrator. - Page 276 Saving Schedules The schedule such as date and place of events/appointments can be saved in the Mova. When a Schedule alarm is set, the Mova sounds the alarm at the scheduled time. Up to 300 schedules can be saved. • Make sure to set the date and time with the Date/time setting beforehand. •...
-
Page 277: Move The Cursor
Enter the repeat count at [Count]. Enter from 01 to 99 times and limitless. To set the repeat count to limitless ([ Press at [01] or at [99]. Select [ON]/[OFF] of a holiday at [Holiday]. [ON] : The schedule repeats even on a holiday. [OFF] : The schedule does not repeat on a holiday, but it is included in the repeat count. - Page 278 At the Schedule Alarm Time The alarm sounds for about 30 seconds with the indicator Schedule flashing and the schedule data and an image are displayed. 10:00∼18:00 Pleasure trip If there is more than one overlapping schedule with the same XX Park start time of the alarm, the number of schedules you have in 03XXXXXXXX...
-
Page 279: Move The Cursor
Select a date and press The schedule list is displayed. Mar/10/2005(Thu) • Press to display the schedule list of the next day −−:−−∼−−:−− Birthday and press to display the schedule list of the previ- 12:00∼12:50 ous day. Lunch meeting 18:00∼21:00 Baseball Select the schedule and press The details of the schedule appear. -
Page 280: Move The Cursor
Deleting a Schedule You can delete schedules using the following 4 methods. delete one Delete a schedule. If you delete a schedule set to repeat, all its repeats are also deleted. delete day Delete all schedules for the selected date. Schedules set to repeat cannot be deleted. - Page 281 Setting the Display Type When Starting the Schedule You can select a calendar displayed when starting the Schedule from 3 types. You can also select the start day of the week. Monthly Monthly/fut. Event Weekly Mar/2005 3/10 Mar/2005 3/10 Mar/2005 3/10 7 28 1...
-
Page 282: Move The Cursor
Setting Holiday You can set a day or a day of the week as a holiday and cancel the holiday settings. A day set as a holiday is displayed in red in the calendar. The public holidays and Sundays are set as holidays at the time of purchase. - Page 283 Setting Public Holidays The 15 public holidays a year defined by the Japanese National Holidays Law are displayed. Example: Setting a specific public holiday not to be displayed Press (func) in the calendar. The submenu appears. Select [public holiday] → [Set holiday] and press To restore the default Set holiday Set public holiday...
-
Page 284: Move The Cursor
Setting the Schedule Alarm Operations You can set the operations of the Schedule alarm. • The alarm volume cannot be adjusted when the Manner mode is set. Press (func) in the calendar. The submenu appears. Select [alarm setting] and press Alarm setting... -
Page 285: Performing Frequently Used Functions Quickly
Performing Frequently Used Functions Quickly You can save frequently used functions in MySelection and select a saved function directly. Up to 20 functions can be added to MySelection. • You cannot edit menus in MySelection during a call. • Even if you delete the i-αppli software added to MySelection, the actual software is not deleted. -
Page 286: Recording Recipient's Or Your Own Voice
Recording Recipient’s or Your Own Voice Your own voice during stand-by and the recipient’s voice during a call can be recorded. Up to 2 voice memos of up to about 20 seconds each can be re- corded. • If another voice memo is added to the existing 2 voice memos, the oldest one is over- written. -
Page 287: Notifying The Phone Number From The Mova During A Call
Notifying the Phone Number from the Mova During a Call The Mova notifies the phone number to the recipient of a call by voice. The Voice notify is available to notify your Mova’s phone number, numbers saved in the Phonebook and numbers saved in the Re- ceived/Dial frequency/Redial record. -
Page 288: Checking The Call Duration And Charge
Therefore, the actual charge may be different from the values displayed on the Mova. International calls provided by carriers other than DoCoMo (If you are using DoCoMo WORLD CALL, the charges for the calls are displayed.) Collect calls Telegrams... -
Page 289: Notifying The Call Duration With Sound During A Call
Resetting the Total Call Duration and Charge The display of the total call duration and charge can be reset. The count starts from 0 after the reset. From the Menu, select [Phone] → [Call data] → [Total calls] and press Total calls... -
Page 290: Using The Calculator
Using the Calculator The Mova has a calculator that can perform basic operations (ad- dition, subtraction, multiplication, and division) as well as calculate percentages (%). • Numbers up to 9 digits can be entered and displayed (excluding a decimal point (.) and minus sign (–)). -
Page 291: Move The Cursor
Using a Memo Necessary information can be saved in the Memo. Up to 10 memos can be saved. From the Menu, select [Tool] → [Memo] and press The Memo list display appears. Press (new) and enter a memo. Enter a memo within 50 full-width or 100 half-width characters. The memo is saved. -
Page 292: Using Ev-Link
Using EV-Link EV-Link is a function that enables easy cooperation between mail (E-mail) and audio call (Voice). Using this function, you can send reply mail to a redial/received record as well as place a reply call to mail with simple operation. Sending Mail Using the Redial/Received Record When the mail address and phone number of a recipient are saved in the Phonebook, mail can be easily sent from a redial or received... -
Page 293: Data/Fax Communications
Data/Fax Communications Data/fax communications are available on a PC connected to the Mova, using a DoCoMo’s optional data communication device such as “Mobile Card Triplex N”. For details, please see the user’s manual of each optional device. • Existing commercially available optional parts “Modem Unit” or “Fax Unit” cannot be used. -
Page 294: Using The Switched Earphone Mic
Using the Switched Earphone Mic By connecting the Flat-Plug Switched Earphone Mic (optional), etc. to the earphone mic jack, the call can be placed or received by simply pressing the switch. You can also set the operation of the Earphone Mic. •... -
Page 295: Receiving A Call Automatically With Earphone
Setting the Operation of the Switched Earphone Mic You can set whether to permit the switch on the Earphone Mic to place or receive a call. You can also set a Phonebook memory num- ber to be called by pressing the switch on the Earphone Mic. From the Menu, select [Settings] →... -
Page 296: Restoring The Default Settings
Restoring the Default Settings The default settings of each function can be restored. From the Menu, select [Settings] → [Security] → [Reset] and press The Security code display appears. Enter the Security code. The screen confirming whether to reset all settings appears. Select [Yes] and press The settings are reset. - Page 297 Menu Options Default Setting Record message To answer 10 sec. Msg setting Standard message Schedule Alarm setting Alarm volume: 3, Select alarm tone: Alarm(std), Vibrator: OFF, Select color: C5:Color5 Clock Alarm Set: OFF, Time: 00:00, Repeat: OFF, Alarm volume: 3, Select alarm tone: Alarm(std), Vibrator: OFF, Select color: C5:Color5 Auto power on...
- Page 298 Menu Options Default Setting Display Power saver Stand-by Set: ON, After: 3 min. Calling Set: ON, After: 1 min. Common Setting Illum. blink: ON Menu taste P1:Blue Visual effect Font size Large font 日本語 (Japanese) Select language Manner Manner mode Set: OFF, Mode: Manner Original manner Vibrator: OFF, Phone volume: StepDown,...
-
Page 299: Network Services
Network Services ※ For details on operation, see the User’s Manual for Network Services. Available Network Services ............298 The Voice Mail Service .............. 299 The Call Waiting Service ............303 The Call Forwarding Service ............. 305 The Nuisance Call Blocking Service .......... 309 The Three-Way Calling Service .......... -
Page 300: Available Network Services
For a service that requires a subscription, call the “General Contact” on the backcover of this manual. Subscriptions to the “Voice Mail Service”, “Call Waiting Service”, “Call Forwarding Ser- vice”, “Nuisance Call Blocking Service” and “Three-Way Calling Service” are accepted on DoCoMo e-site. For information on DoCoMo e-site, see the backcover of this manual. -
Page 301: The Voice Mail Service
The answering service to take messages for you The Voice Mail Service ■Convenient Features of the Voice Mail Service The Voice Mail Service takes messages when you cannot an- swer a call due to the radio wave condition or when the Mova is powered OFF. - Page 302 Basic Flow of the Voice Mail Service Step 1 Record the answering message. Step 2 Activate the service. Step 3 The caller leaves a message. Step 4 Play back the Voice Mail message. Operations from the Mova →Main Menu→ →Play Play back new messages →Main Menu→...
- Page 303 Mova is powered OFF, etc.), the service oper- ates according to the settings of the Voice Mail Service (1411: start / 1410: stop). * The paging service provided by NTT DoCoMo is called QUICKCAST as of January 2001.
- Page 304 Notifying You of New Messages If there are any messages held at the Voice Mail Service Center when placing or receiving a call, “ ” automatically appears in the stand-by display to notify you of new messages. • Depending on the radio wave condition, text informa- tion notifying you of a new message being recorded may be displayed in stead of “...
-
Page 305: The Call Waiting Service
The service to answer an incoming call during a call The Call Waiting Service The beeps sound during a call when there is another incoming call. You can answer an incoming call by putting the current call on hold. Receiving an Incoming Call During a Call When receiving a call, press The call is put on hold and the incoming call can be an- swered. - Page 306 Setting the Call Waiting Service ON/OFF The Call Waiting Service “ON”/“OFF” can be set in advance before a call. Type Keypad Operation when receiving a call Set the Call Waiting The guidance informs that the Call Service “ON” Waiting Service is available and it is set to “ON”.
-
Page 307: The Call Forwarding Service
The service to make sure you get that call The Call Forwarding Service ■Convenient Features of the Call Forwarding Service The Call Forwarding Service forwards a call automatically when the Mova is outside the service area or powered OFF. The Call Forwarding Service is available within any service area nationwide. - Page 308 Basic Flow of the Call Forwarding Service Step 1 Save the forwarding number. Step 2 Specify the forwarding number, and activate the Call Forwarding Service. Step 3 Receive a call on the Mova. Step 4 If you do not answer the call, it is automatically forwarded to the specified forwarding number.
- Page 309 Automatically forward a call to a forwarding number Do not forward a call to a forwarding number during a call • The caller hears a busy tone. * The paging service provided by NTT DoCoMo is called QUICKCAST as of January 2001.
- Page 310 Manually forward a call if the Call Forwarding Service is not acti- vated or activated by dialing 1450. The beeps notify you that there is an incoming call during a call. Press (func) when a ring tone sounds during a call, select [FW during call] and press The call is forwarded to the specified forwarding number.
-
Page 311: The Nuisance Call Blocking Service
The service to reject a nuisance call automatically The Nuisance Call Blocking Service You can block a nuisance call automatically. By saving the caller’s phone number immediately after a nuisance call, further calls from the same phone number is disconnected after being answered with a guidance message like “Your call is rejected”. - Page 312 ● Phone numbers of callers with no caller ID can also be saved. ● International phone numbers cannot be saved. ● Confirmation or inquiry about the saved phone numbers is not available. It is rec- ommended to take notes of the saved phone numbers. ●...
-
Page 313: The Three-Way Calling Service
The service to allow three parties to talk on one line The Three-Way Calling Service By subscribing to the Three-Way Calling Service, you can call an- other person during a call and start a three-party talk on one line. • The caller is charged for the call, even if the call is put on hold. •... - Page 314 ■ Starting a conference call by adding an incoming caller C to the call with B By subscribing to the Call Waiting Service, you can start a conference call by adding an incoming caller to the current call. Note that when you establish a conference call from the Call Waiting Service, the switched call is not available.
- Page 315 ■ Example of a conference call You are represented by A . indicates the basic flow. Active call with B Receive a call during a call Call C during (When A subscribes to the a call Call Waiting Service) Switched Call End call with Hold Talk with C...
-
Page 316: The Number Plus Service
※ This service was originally available for only fax and data communications. However, it can now also be used for a normal receiving phone line. By using the DoCoMo data communication equipment such as “Mobile Card Triplex N” and fax communication software, a fax can be automatically received when receiving call to the number for fax communication. -
Page 317: Move The Cursor
Setting a Number for the Number Plus Service The Mova informs you which phone number (original or My phone no.) is receiving a call on the receiving display and with the ring tone set for each number. From the Menu, select [Settings] → [Call] → [My phone no.] and press My phone no.... -
Page 318: The Caller Id Display Request Service
The caller ID request guidance automatically answers the call The Caller ID Display Request Service This service requests “Number Notification” by the guidance and automatically disconnects a call, if the caller is not notifying the caller ID. The Mova can be used safely by preventing unwanted calls from unknown callers. -
Page 319: Entering Text
Entering Text About Entering Text ..............318 Entering Text Using the 5-touch (Kana) Method <5-touch (Kana) method> ..Changing Input Method ........322 <Input method> Entering Common Phrases ............323 Entering Pictographs/Symbols ........... 323 Editing/Saving Common Phrases ....324 <Common phrases> Quoting Data from the Phonebook, etc. -
Page 320: About Entering Text
About Entering Text The overview of the text entry is described here. • Including JIS level 1 and level 2, 6,812 kanji characters are available. • Some complicated kanji characters are abridged or simplified in part. ■ Text Input Display 1 The name of a function for which characters are input Memo... -
Page 321: Move The Cursor
• [undo] is available for the following actions: Confirming character entry ( Deleting characters ( Cutting or pasting (P.325) Quoting data from Phonebook (P.324) Kuten code entry (P.326) [undo] * The paging service provided by NTT DoCoMo is called QUICKCAST as of January 2001. -
Page 322: Entering Text Using The 5-Touch (Kana) Method
Entering Text Using the 5-touch (Kana) Method Entering Text in the Prediction Conversion Mode • The selected words from the matching words list are displayed with priority over other words next time. • When the 2-touch method is selected, the Prediction conversion mode cannot be used. Example: Entering “健闘”... - Page 323 Entering Text in the User Conversion Mode • The word entered by the User conversion mode is automatically saved in the Predic- tion conversion dictionary and displayed in the matching words list next time. Example: Entering “健闘” (けんとう) Change the conversion mode to [User conversion]. •...
-
Page 324: Changing Input Method
Changing the Conversion Mode Select the conversion mode from Prediction conversion or User conversion. • The Prediction conversion mode is valid only when selecting the 5-touch method as the input method and kanji/hiragana as the character mode. The conversion mode is automatically changed to the User conversion mode when you change the input method to the 2-touch method. -
Page 325: Entering Common Phrases
Entering Common Phrases For common phrases, see P.341. • Common phrases that are available vary depending on the contents to be edited. Unavailable categories are disabled for selection. Press (func) in the Text input display. The submenu appears. Select [input phrases] → a common phrase from a category and press The selected common phrase is entered. -
Page 326: Editing/Saving Common Phrases
Editing/Saving Common Phrases The default set of common phrases can be edited according to the intended use. Your own common phrases can also be added as new entries. For common phrases, see P.341. Example: Editing “.co.jp” saved in the “Internet” category From the Menu, select [Tool] →... -
Page 327: Cutting/Copying/Pasting Text
Cutting/Copying/Pasting Text The entered characters can be pasted to the other input display by cutting or copying. This feature is useful when entering text in i-mode or composing mail. The characters cut or copied are saved in the clipboard and pasted when the Paste function is selected. -
Page 328: Entering Text Using Kuten Codes
Copying/Cutting Text Press (func) in the Text input display. The submenu appears. Select [copy] and press To cut Select [cut]. Select the Start point and press The first character to be copied is set. Select the End point and press The range of characters to be copied is set and saved in the clipboard. -
Page 329: Move The Cursor
Saving the Frequently Used Kanji Words Frequently used Kanji words can be saved in the Prediction or User dictionary. Saved words are displayed in the matching words list/ conversion target words by priority when you convert characters. Prediction dictionary Save words that you want to display in the matching words list by priority when you use the Prediction conversion. -
Page 330: Saving The Frequently Used Kanji Words
Using the Downloaded Dictionary Up to 20 dictionaries can be downloaded using i-mode for use with the Mova. When enabling a downloaded dictionary, words saved in it appear in the matching words list. When you download more than one dic- tionary, you can change the order of the dictionaries in the list to display words of a frequently used dictionary by priority. - Page 331 ● If many dictionaries are enabled at the same time, some words may not be dis- played in the matching words list. ● The dictionary can be downloaded from “SO@Planet”. [i Menu] → [メニューリスト] → [ケータイ電話メーカー] → [SO@Planet] (as of January 2005).
-
Page 332: Restoring The Default Settings
Restoring the Default Settings The Mova’s dictionary has a data learning feature. The data leaning feature memorizes the frequency in which individual words are used and give priority to the frequently used words when displaying them in the matching words list/conversion target words. If you reset the learning data, the order of priority resets to the de- fault. -
Page 333: Appendix
Appendix List of Menus ................332 Characters Assigned to Keys (5-touch [Kana] method) ..... 336 Characters Assigned to Keys (2-touch method) ......337 Special Symbols ................ 338 Pictographs ................339 Face Marks ................340 Common Phrases ..............341 Preset Images ................342 Kuten Codes ................ -
Page 334: List Of Menus
List of Menus • The functions marked with ■ are not available during a call. • The function with * cannot be operated during i-mode stand-by (“ ” is flashing). • Each menu name is followed by a number that indicates its menu number. Entertain- MySelection Schedule... - Page 335 mode Mail Mail setting Sort outbox P.192 Rcv opt setting P.195 i-shot host P.208 Mail center P.169 Check new message P.163, 178 Receive option P.177 − ppli P.214 − i-mode lock* 64 P.161 − Phone Own number P.38 Phonebook − P.62 Call record −...
- Page 336 Tool SW Update Software Update P.367 Confm last update Settings Initial Change code P.97 Date/time P.36 Phone tone P.73 Stand-by P.83 Font size P.94 Auto key guard P.103 Send own number P.37 Edit my data P.38 Ringer Ring volume 31 Phone tone P.75 Mail tone Chat mail tone...
- Page 337 Settings Display Menu icon P.91 Set call disp 44 Call picture P.87 Set name disp P.87 Display light 46 Lighting time P.88 Adjust light Charging Illumination 45 Select color P.92 Missed call P.93 Call light P.93 Power saver P.89 Menu taste P.90 Visual effect P.90...
-
Page 338: Characters Assigned To Keys (5-Touch [Kana] Method)
Characters Assigned to Keys (5-touch [Kana] method) Character mode Kanji/Hiragana Numeric Katakana mode Alphabetic mode mode mode Keys ※1 あ い う え お ア イ ウ エ オ . @ / : − ∼ ぁ ぃ ぅ ぇ ぉ ァ... -
Page 339: Characters Assigned To Keys (2-Touch Method)
Characters Assigned to Keys (2-touch method) Full-Width (2-byte) Uppercase Mode Full-Width (2-byte) Lowercase Mode Second column Second column 1 2 3 4 5 6 7 8 9 0 1 2 3 4 5 6 7 8 9 0 1 あ い う え お A B C D E a b c d e あ... -
Page 340: Special Symbols
Special Symbols • Symbols marked with ■ may not be displayed correctly when sending to i-mode non- compatible mobile phones or PCs. ■ Full-width Symbols ■ Half-width Symbols... -
Page 341: Pictographs
Pictographs • Pictographs are not displayed correctly when sending to i-mode non-compatible mo- bile phones or PCs. • “Pictographs 2” may not be displayed correctly depending on the type of recipient’s i-mode compatible mobile phone. ■ Pictographs 1 ■ Pictographs 2... -
Page 342: Face Marks
Face Marks When you enter the following readings in the kanji/hiragana mode, face marks are entered. Blue colored characters: Appear only when the Prediction conversion is used. Word Kao moji Word Kao moji Word Kao moji あいた かお にこ あせ あら... -
Page 343: Common Phrases
Common Phrases Category Common phrase Display the Mova’s phone number at the time of purchase. .co.jp .go.jp .ne.jp @docomo.ne.jp Internet .com http:// .or.jp https:// .ac.jp www. KAO MOJI おはようございます お疲れさまでした おやすみなさい お世話になっております Greetings こんにちは 昨日は、 どうもありがとうございました 行ってきます こんばんは いってらっしゃい よろしくお願い致します... -
Page 344: Preset Images
Preset Images The following images are available on the Mova at the time of pur- chase. ■ Images Graphic folder Album ■ Frames i-shot (S) i-shot (L) Stand-by display ■ Stamps Stamps (small) Stamps (middle) Stamps (large) -
Page 345: Kuten Codes
Kuten Codes In the following Kuten code list, a 4-digit kuten code is expressed by the combination of the row for the first 3 digits and the column for the last digit. Example: When you wish to input “★” (corresponding to kuten code “0190”), locate it in the Kuten code list and determine the kuten code for it from its row (“019”) and column (“0”). -
Page 353: Services Available For The Mova
(no area code) 106 Information on ordinary telephone numbers and (no area code) 104 DoCoMo mobile phones (paid) (Phone numbers of customers who declined to disclose their number information are not available.) Telegram service (paid: telegram fee): 8 a.m. - 10 p.m. -
Page 354: Optional And Related Equipment
Some accesso- ries are only available in some areas. For details, please contact our service counter (DoCoMo shop, etc.). For details on optional devices, see the user’s manual of each device. ● Carrying Case SO015 ●... -
Page 355: Connecting To Car Navigation System/"Playstation"
Connecting to Car Navigation System/“PlayStation” Connecting to Car Navigation System An i-mode compatible car navigation system (commercially avail- able) enables you to view a site or to send/receive i-mode mail via the navigation system display when the Mova is connected to it (i-navi link). -
Page 356: Introduction Of Data Link Software
Introduction of Data Link Software The “Mova SO-series Data Link Software” allows you to transfer data between the Mova and a PC. ■ Data that can be transferred Transfer media Transferable data Data Link Cable ※1 “Memory Stick Duo” ※2 ×... - Page 357 Introduction of the Music Panel To save ATRAC3 formatted music data in the MagicGate-compat- ible “Memory Stick Duo”, you need a PC or other device that has dedicated software installed and equipped with a MagicGate-com- patible Memory Stick slot or a MagicGate-compatible external Memory Stick Reader/Writer.
-
Page 358: Troubleshooting
Troubleshooting Check if the operation is correct before asking for the repairs. Trouble Cause and Remedy The Mova cannot be used. • Check if the battery pack is attached properly (P.28). • Check if the battery pack is not run out (P.33). •... - Page 359 Trouble Cause and Remedy The charge indicator stays lit. • Check if the Charging for the Display light is [ON] (P.88). In this setting, it may take time to complete the charging, but this is not a malfunction. • Check if the Power saver mode is [OFF] (P.89).
-
Page 360: Error Messages
Error Messages • In some cases, a 3-digit number may be displayed together with a message. This is a DoCoMo own code that DoCoMo displays on the Mova. Message Symptom/Cause Remedy Accessing external You cannot use i-mode, the Disconnect the external device Music panel, etc. - Page 361 Message Symptom/Cause Remedy Cannot save Failed to save the image. − Failed to save since an error Perform the infrared occurs during the infrared communication again communication. (P.263). Cannot write because You attempted to save the Insert the writable “Memory of M.S.
- Page 362 Message Symptom/Cause Remedy Dictionary data was Some words cannot be found error saved since part of the dictionary data has an error − (the words you could save can be used as the dictionary data). Error in image. Does The Flash movie cannot be not work correctly played back due to memory −...
- Page 363 Message Symptom/Cause Remedy Memory shortage i-mode cannot be continued Connect to i-mode again since the memory is (P.138). insufficient. The next page cannot be − displayed since the memory is insufficient. Memory Stick error Failed to access (load, etc.) Insert the “Memory Stick the “Memory Stick Duo”.
- Page 364 Message Symptom/Cause Remedy No more file number. The file number of the image Reset file numbers (P.126). Please reset saved in the “Memory Stick Delete the image with the Duo” has reached the largest file number (P.251). largest number (999-9999). No response Failed to recognize the Check if the infrared data...
- Page 365 Message Symptom/Cause Remedy 書換え失敗しました The software update has Contact the nearest DoCoMo Rewrite failed failed. repair handling service counter. Root certificate is not The SSL list is set to Set the SSL list to [Valid] valid [Invalid]. (P.160). Server is full...
- Page 366 Message Symptom/Cause Remedy This Memory Stick is The “Memory Stick Duo” Insert the “Memory Stick not supported which is not compatible with Duo” which is compatible the Mova is inserted. with the Mova (P.245, 246). This M.S. is not supported This name already The same name has been Save as a different name...
-
Page 367: Warranty And After Sales Services
• Malfunction due to use of devices and consumable parts other than those speci- fied by DoCoMo will only be repaired at the owner’s expense, even if the warranty period is still effective. - Page 368 ● If the Mova has gotten wet or moist, immediately power OFF the Mova and remove the battery pack from the Mova, and then bring the Mova to the DoCoMo repair handling service counter as soon as possible. However, note that we may not re- pair the Mova depending on the extent of the damage.
-
Page 369: Updating The Software
• To update the software, you are required to subscribe to i-mode or packet communi- cation service. • You can update the software even if the i-mode host is set to other than “ドコモ” (DoCoMo). • Before updating the software, be sure to fully charge the battery pack of the Mova. - Page 370 You do not need to update the software. Continue to use the Mova without updating. When the DoCoMo server is busy A message confirming whether to reserve the software update appears. To reserve, select [Reserve] and set a...
- Page 371 Updating the Software Immediately (Now update) From the screen for selecting the update type, select [Now update] and press Downloading Ready to Negotiating download? After a while, the software download starts. • When downloading starts, step 2 and step 3 are performed automatically (no need to operate).
- Page 372 Reserving a Date/Time for the Software Update (Reserve) If downloading takes too long or the server is congested, you can connect to the server and preset a date/time to start the software update. Example: Reserving the software update on March 14 (Mon) 1:05 am From the screen for selecting the update type, select [Reserve] and press The Mova connects to the server and displays a list of res-...
-
Page 373: Sar Certification Information
ICNIRP: http://www.icnirp.de/ MIC: http://www.soumu.go.jp/english/index.html TELEC: http://www.telec.or.jp/ENG/Index_e.htm NTT DoCoMo: http://www.nttdocomo.co.jp/ (Japanese only) Sony Ericsson Mobile Communications Japan, Inc.: http://www.SonyEricsson.co.jp/product/SAR/ (Japanese only) Ministry of Internal Affairs and Communications The technical regulation is provided in Article 14-2 of the Ministry Ordinance Regulat- ing Radio Equipment. -
Page 374: Index/Quick Manual
Index Auto power on ........270 Auto volume ........287 AC adapter ..........30 Accept calls ......... 104 Adjust light ..........88 Bar code reader ........128 After sales services ......365 Add bookmark ....... 129 Alarm Add phonebook ......129 Clock alarm ........ - Page 375 Delete ..........119 Clock alarm ......... 272 Number of recordable/savable images ... 113 Common phrase ......... 323 EV ..........120 List of common phrases ....341 File name/number ......116 Save ..........324 Guide display ........ 115 Copy ............ 325 Icon ..........
- Page 376 Stamp ..........238 Text stamp ........238 Edit prediction dictionary ..... 327 i-anime ..........135 Edit user dictionary ......327 Icon ..........25, 114 Error messages ........358 Illumination ..........92 EV-Link ..........290 Call light ........... 93 Missed call ........93 Select color ........
- Page 377 Chat mail ........198 Suspend mail function ....169 Check new mail ......178 i-mode password ........97 Compose and send ....... 173 Change .......... 144 Data paste ........197 i-navi link ..........353 Delete ..........186 Infrared communication ...... 263 Display ...........
- Page 378 Trace result ........226 Silent ..........81 Upgrade ........223 Melody folder ........253 Use icons ........216 Add/Delete folder ......257 i-αppli DX ..........210 Delete ..........260 Change tone/image ....... 216 Edit folder name ......257 Phonebook/Record ......217 Edit title ..........
- Page 379 Message R (Request) ....164 Nuisance Call Blocking Service ..309 Protect on/off ........164 Number Plus Service ..... 314 Receive .......... 162 Three-Way Calling Service .... 311 Ring tone ......... 73 Voice Mail Service ......299 Ring volume ........75 Noise reduction ........
- Page 380 2-touch dial ........70 Quick record message ....58 Phonebook lock ........99 Set record message ......57 Pictograph ........... 323 Redial record ......... 43 List of pictographs ......339 Add phonebook ....... 65 Place call ..........42 Delete ..........43 Phonebook ........
- Page 381 Edit folder name ......150 Suspend mail function ......169 Edit title .......... 149 Switched earphone mic ...... 292 Move folder ........151 Symbol ..........323 Protect on/off ........150 List of special symbols ....338 Save ..........149 Sort ..........151 URL ..........
- Page 382 Sound effect volume ......74 Vibrator ..........77 Visual effect .......... 90 Wake-up ..........34 Voice Mail Service ....... 299 Sound effect ........74 Voice memo ........284 Wake-up image ........ 86 Delete ..........59 Warranty and after sales services ..365 Play ..........
- Page 387 Don’t forget your Mova or your manners! When you use the Mova, be careful not to disturb others around you. Power OFF the Mova in the following cases ● When you are in a place where the use is prohibited There are places where the use of mobile phones is prohibited.
- Page 388 ドコモeサイト (DoCoMo e-site) or http://www.esite.nttdocomo.co.jp/ service) ※ For access using i-mode, your “network security code” you applied for to DoCoMo is required. ※ For access using i-mode, no packet charge is required, but with some exceptions. ※ For access via the Internet using a PC, etc., your “user ID” and “password” are required.
Need help?
Do you have a question about the Premini-II and is the answer not in the manual?
Questions and answers