Table of Contents
Advertisement
Quick Links
3600 Series
Art. 3686
Digital videophone
161
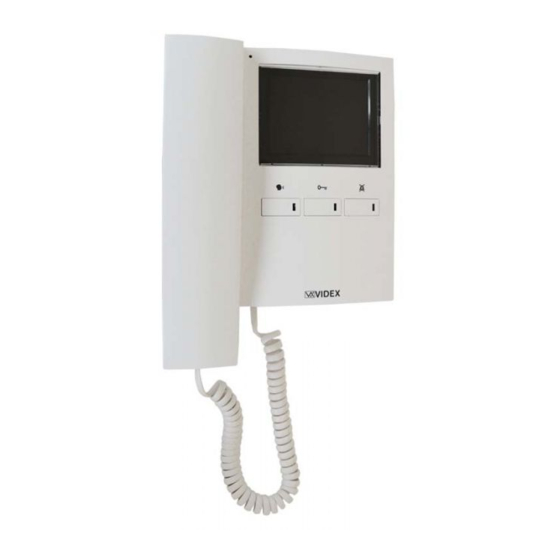
Fig. 1
DESCRIPTION
An intelligent Videophone using 3.5" full colour active matrix LCD monitor for VX2300. Including 3 buttons "camera recall", "door-
open/intercommunicating call", "privacy/service" plus 3 LED's* for visual indication of all functions. Adjustments & programmable
options: call tone volume on 3 levels (low, medium, high), picture hue, brightness and contrast, call tone melody, number of rings,
privacy duration and address. Also includes a local bell function. The Art. 3686 is surface mount and requires the Art. 5980 connec-
tion board and wall mounting plate.
PUSH BUTTONS, LEDS AND CONTROLS (FIG. 1)
Camera recall push button.
Pick up the handset and press as many times as the DEVICE N. of the door station to switch on.
Camera switch push button.
If the door station uses the Art. 4303N plus the Art. 4330N, pressing this button during a conversation switches the
video signal coming from the camera module to the video signal coming from the camera module input for external
camera. During the conversation, press and keep pressed the button until the camera switches. Repeat the opera-
tion to switch back to main camera.
Door open push button.
Press this button to open the door when you receive a call.
Dry contact relay push button.
During a conversation, keep pressed this button for more than 3 seconds to close the dry contacts relay (terminals "3" and "5"
on Art. 5980 PCB connection board). The internal link remains closed until the button remains pressed (Max 50Vdc@100mA).
Intercommunication push button.
For an intercommunicating call, pick up the handset and press as many times as the extension or address value to
call (see SW3 Intercommunication Settings).
Privacy ON-OFF push button.
To enable the function press this button when the videophone is in stand-by. The privacy duration time can be
programmed.
Activate bus relay board Art. 2305 push button.
To activate a bus relay, during a conversation, press this button quickly as many times as the address value of the relay.
Art. 3686 - Installation instructions
62
46
Fig. 2
1
SWCH1
SW3
SW1
ON
ON
1 2 3 4
1 2 3
4
5
TR1
JP1
66251060-EN - V2.1 - 15/06/16
6 7 8
Advertisement
Table of Contents

Related Manuals for Videx 3686


Summary of Contents for Videx 3686
- Page 1 3 levels (low, medium, high), picture hue, brightness and contrast, call tone melody, number of rings, privacy duration and address. Also includes a local bell function. The Art. 3686 is surface mount and requires the Art. 5980 connec- tion board and wall mounting plate.
- Page 2 15 minutes: i.e. to set 2 hours, press the button 8 times. • Once the required privacy time is reached, wait approx 5 seconds for the two LED’s to switch off. The new duration is set. Art. 3686 - Installation instructions 66251060-EN - V2.1 - 15/06/16...
- Page 3 If you set ON this switch for one slave videophone, you must set ON the same switch also for the relevant master video- phone. Art. 3686 - Installation instructions 66251060-EN - V2.1 - 15/06/16...
- Page 4 The product is CE marked demonstrating its conformity and is for distribution within all member states of the EU with no restrictions. This product follows the provisions of the European Directives 2014/30/EU (EMC); 2014/35/EU (LVD); 2011/65/EU (RoHS): CE marking 93/68/EEC. Art. 3686 - Installation instructions 66251060-EN - V2.1 - 15/06/16...
- Page 5 3600 Series Art. 3686 Digital videophone Art. 3686 - Installation instructions 66251060-EN - V2.1 - 15/06/16...
- Page 6 3600 Series Art. 3686 Digital videophone Art. 3686 - Installation instructions 66251060-EN - V2.1 - 15/06/16...
- Page 7 3600 Series Art. 3686 Digital videophone Art. 3686 - Installation instructions 66251060-EN - V2.1 - 15/06/16...
- Page 8 Fig. 5) and push down as suggested by the pointers in Fig. 4, the videophone will lock into place; 8. To remove the videophone, hold it firmly and push the unit in an upward direction until the videophone H unlocks from the mounting plate C. Art. 3686 - Installation instructions 66251060-EN - V2.1 - 15/06/16...
Need help?
Do you have a question about the 3686 and is the answer not in the manual?
Questions and answers