Subscribe to Our Youtube Channel
Summary of Contents for Trans instruments WalkLAB HP 9010
- Page 1 15,0,11,4,1,14,5,10,13,2,9,6,3,12,7,8 15,0,15,0,1,14,1,14,13,2,13,2,3,12,3,12,11,4,11,4,5,10,5,10,9,6,9,6,7,8,7,8 WalkLAB Professional pH Meter HP 9010 Operations Manual...
-
Page 2: Specification
INTRODUCTION Your purchase of this professional pH meter marks a step forward for you into the field of precision measurement. Although this meter is a complex and delicate instrument, its usability will allow many years of use if proper operating techniques are observe and practice. 1. -
Page 3: Product Layout
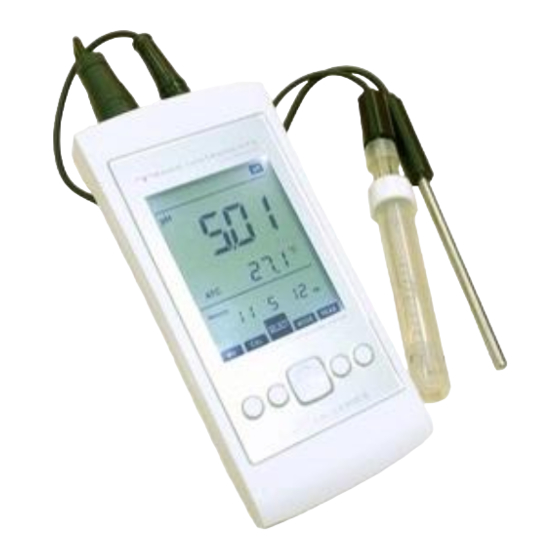
Temperature pH Electrode PRODUCT LAYOUT: Probe Socket Socket Lift up latch here to open Battery Cover Liquid Crystal Display Buttons correlate to display Legend On/Off Button Battery Cover Press once to switch ON. To switch OFF, press and hold-down. TO CLOSE BATTERY COVER 1 Align arrow to top of casing here 2 Press... -
Page 4: Display Panel
DISPLAY PANEL: Auto-lock Display put on Measuring hold or freezed indicator mode indicator Cond Salinity % ppm 8888 Auto Lock HOLD ... . Thousand Feet Thousand Meter battery Temperature -188.8 indicator reading ºC... - Page 5 SETTING UP THE UNIT: Before you begin using the unit, it is important to define your measuring requirements. This will allow the unit to display accurately on the condition of sample that is measured. While the unit is switched ON, press the SELECT button once and the Button Keys Legend will show SETUP appear.
- Page 6 - CALIBATION BUFFER STANDARDS This setting allows you to select ISO, NIST or customized buffer standard. Factory preset is ISO standard. ISO (I I I I SO SO)buffer standards are pH1.68, 7.00, 4.01, 10.01, 12.45 and NIST (I 7 I 7 I 7 I 7 I I I I St St) buffer standards are pH1.68, 4.01, 6.86, 9.18 and 12.45, which are preset in this meter, and will be automatically recognized during...
-
Page 7: Auto-Off Time Setting
- CLEAR SAVED MEMORY This setting will clear all saved memory in the unit. 1 Press the key to set; display will show No ENTER blinking. 2. Press the SELECT key up or down to choose between yes yes and no Memory 3. -
Page 8: Real Time Clock
- REAL TIME CLOCK This setting allows you to change the date and time on the meter. 1. Press the ENTER key to begin setting; display will show clock with hour digit blinking. 2. Press the SELECT key up or down to scroll digit. 3. - Page 9 CALIBRATION: * Calibration should be performed as frequently as possible to ensure accurate measurement, depending on the frequency of tests performed. Additional calibration solution should be purchased for future needs. Prepare standard solutions of at least 2 calibration points. measurements are to be made in the acidic range, select 2 points between pH-2 to 7.
- Page 10 Value will vary according to solution’s temperature listed below: Temperature ISO standard buffer solution (°C) Slope Offset Slope Slope Slope 1.68 7.00 4.01 10.01 12.45 1.67 7.11 4.00 10.32 13.43 1.67 7.08 4.00 10.25 13.21 1.67 7.06 4.00 10.18 13.00 1.67 7.03 4.00...
- Page 11 Calibration with Nist Standard (if you have NIST buffer solution) 7.21 Make sure the unit is properly installed and electrode connected. 7.22 This meter can automatically recognize the Nist Standard buffer solution. You will need at least 2 buffer solutions. Always begin with “Offset”...
- Page 12 7.26 If the meter does not recognize the buffer, it means the electrode could be defective or the buffer solution is wrong. Calibration cannot proceed until they are rectified. 7.27 When the meter beeps, Offset point is established. 7.28 Now 1.68, 4.01, 9.18 and 12.45 will alternate on main display. 7.29 Rinse the pH electrodes and temperature probe in distilled water, blot or shake dry then dip into next slope buffer solution.
- Page 13 7.46 Press the button up or down to adjust to the Slope value SELECT of the solution. 7.47 Press to confirm set value, wait a while for an endpoint ENTER reading to establish and press it again to calibrate to the point. 7.48 The remaining slope values will alternate on the main display.
-
Page 14: Data Memory
8.12 While temperature digit is blinking. Press the SELECT button up or down to adjust the value to that of the solution. 8.13 Press to confirm the set value or to abort. Display will ENTER EXIT resume measuring mode. MAKING REDOX(ORP) MEASUREMENT: Disconnect and remove the pH electrode and temperature probe. -
Page 15: Maintenance
ONLINE DATA LOGGING TO PC: (SOLD SEPARATELY) The USB Connection kit is sold separately. Full instruction is in the Readme.txt file of the attached CD. MAINTENANCE: The pH electrode is a vital part of the pH measuring system. Keeping 11.1 the electrode in good condition will ensure higher accuracy. -
Page 16: Calibration Certificate
Accuracy achieved: ±0.02 (Complete system, meter + probe) CL Teh Trans Instruments (S) Pte. Ltd. certified that the above products underwent stringent calibration in accordance with Trans Instruments product manufacturing standards and work procedures and the result of inspection or testing for calibration meets the product specifications above.


Need help?
Do you have a question about the WalkLAB HP 9010 and is the answer not in the manual?
Questions and answers