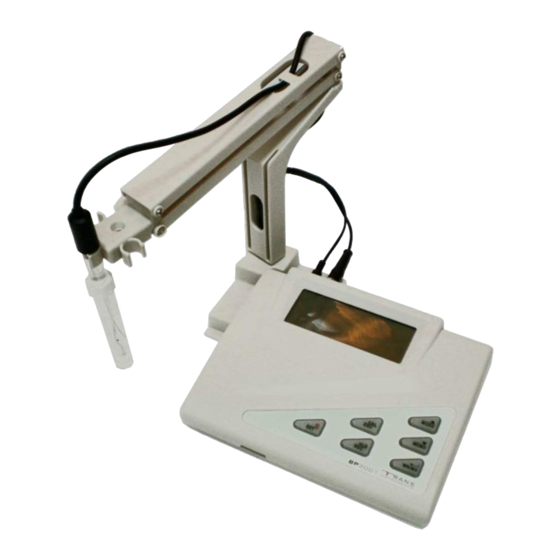
Summary of Contents for Trans instruments BP3001
- Page 1 15,0,15,0,1,14,1,14,13,2,13,2,3,12,3,12,11,4,11,4,5,10,5,10,9,6,9,6,7,8,7,8 Professional Benchtop pH meter BP3001 Operation Manual...
- Page 2 INTRODUCTION Your purchase of this professional bench-top pH meter marks a step forward for you into the field of precision measurement. Although this meter is a complex and delicate instrument; its usability will allow many years of use if proper operating techniques are observed and practiced. Please read the following instructions carefully and always keep this manual within easy reach.
-
Page 3: Specification
SPECIFICATION: Range 0 to 14 pH ±1999mV 0 to 90ºC 0.1mV ~199.9 Resolution 0.01pH 0.1ºC 1mV ~1999 ±0.2mV ~199.9 Accuracy ±0.02pH ±0.5ºC ±2mV ~1999 Calibration 5 point selectable Operating voltage 9 to 12VDC, min. 650mA Operating temperature 5 to 40ºC Storage temperature -20 to 60ºC Operating humidity... -
Page 4: Precaution On Use
ELECTRODE & SENSORS The pH electrode is one of the important sensing elements in the pH measuring system. Understanding and maintaining the electrode in good conditions will ensure consistent and accurate measurement all the time. PRECAUTION ON USE ! Do not touch or scratch the pH glass sensor. It is fragile and delicate. Do not clean sensor with alcohol. -
Page 5: Back Panel Connection
BACK PANEL CONNECTION: Socket for RS232 cable for PC data transfer Analog Recorder output AC-DC Adaptor using sub-miniature 2.5mm (Non-universal, phone jack (not supplied) connect to your local power point only) Socket for Analog Output Socket for earth grounding BNC socket for pH/ORP electrode Socket for temperature probe DISPLAY PANEL:... - Page 6 KEY PAD PANEL Get familiarized with the key buttons will help you to operate the meter with ease. ON-OFF & SETUP KEY 1. Press to switch ON or OFF the meter 2. Press and hold down to enter SETUP mode CALIBRATION &...
- Page 7 SETTING UP THE UNIT: 9.1 Before you begin using the unit, it is important to define your measuring requirements. These will allow the unit to display accurately on the condition of sample that is being measured. 9.2 After the unit is switched ON, press and hold down the until display shows tr 9.3 Press...
- Page 8 P3.0 0 0 0 ) REVIEW OF ELECTRODE STATUS This setting allows you to review the last calibration information about the electrode conditions. 1. There are 5 calibration points for review in the follow order: SAVED DATA NIST Buffer range ISO/ Custom Buffer range P3.1 % of Calibration slope...
- Page 9 P6.0 0 0 0 ) STABILITY INDICATOR This setting allows you to switch ON or OFF the stabilized reading indicator. Whenever the READY sign appear on the top left corner of the display, it indicates that a stable reading has reached. This will be helpful to eliminate guesswork.
- Page 10 P9.0 0 0 0 ) MASTER RESET This setting allows you to reset the unit to the original factory’s default. Original factory default: buf buf (P4 P4.0 0 0 0 ) = i i i i So rdY (P6 P6.0 0 0 0 ) = yes 1.
- Page 11 Calibration with ISO Standard 10.5 Make sure the unit is properly installed and electrode connected. 10.6 Press and display will show CAL CAL flashing on the left, indicating it is in calibration mode. 10.7 This meter has an internal setting of automatic buffer recognition on the ISO Standard.
- Page 12 Calibration with Nist Standard (if you have NIST buffer solution) 10.15 Make sure the unit is properly installed and electrode connected. 10.16 Press and display will show CAL CAL flashing on the left, indicating it is in calibration mode. 10.17 This meter has an internal setting of automatic buffer recognition on the Nist Standard.
- Page 13 Calibration with Custom Standard 10.25 Make sure the unit is properly installed and electrode connected. 10.26 Press and display will show CAL CAL flashing on the left, indicating it is in calibration mode to make an Offset point calibration. 10.27 Rinse the pH electrodes in distilled water then into the buffer solution for Offset calibration or the slope buffer on continuity.
-
Page 14: Data Memory
pH measurement without ATC (Manual temperature compensation on sensor error) 11.4 If an alternative specialized electrode is used without the temperature sensor, then the ATC jack should not be connected. Manual setting of the temperature should be made as follow: 11.5 Press and hold down until CAL CAL appears in a flashing mode. -
Page 15: Troubleshooting
ONLINE DATA LOGGING TO PC: 14.1 This unit can be linked to any computer via the RS232 connection port to perform real time online data logging on the computer. 14.2 Data will be collected at defined intervals and a graph will be plotted. 14.3 Connect the RS232 mini phone jack connector to the back of the meter and the RS232 jack to the COM1 or 2….8 computer socket. -
Page 16: Calibration Certificate
Accuracy achieved: ±0.02 (Complete system, meter + probe) CL Teh Trans Instruments (S) Pte. Ltd. certified that the above products underwent stringent calibration in accordance with Trans Instruments product manufacturing standards and work procedures and the result of inspection or testing for calibration meets the product specifications above.


Need help?
Do you have a question about the BP3001 and is the answer not in the manual?
Questions and answers