Black Box DTX1000-T User Manual
Dtx1000, dtx1002, dtx1000sa series invisapc kvm over ip technology
Hide thumbs
Also See for DTX1000-T:
- Installation and user manual (58 pages) ,
- Quick start manual (14 pages) ,
- User manual (60 pages)
Table of Contents
Advertisement
USER MANUAL
DTX1000, DTX1002, DTX1000SA SERIES
INVISAPC
KVM OVER IP
TECHNOLOGY
24/7 TECHNICAL SUPPORT AT 1.877.877.2269 OR VISIT BLACKBOX.COM
I n v i s a P C
BLACK BOX DIGITAL DESKTOP EXTENSION
I n v i s a P C
BLACK BOX DIGITAL DESKTOP EXTENSION
I n v i s a P C
BLACK BOX DIGITAL DESKTOP EXTENSION
I n v i s a P C
BLACK BOX DIGITAL DESKTOP EXTENSION
Advertisement
Table of Contents

Related Manuals for Black Box DTX1000-T


Summary of Contents for Black Box DTX1000-T
- Page 1 TECHNOLOGY 24/7 TECHNICAL SUPPORT AT 1.877.877.2269 OR VISIT BLACKBOX.COM I n v i s a P C BLACK BOX DIGITAL DESKTOP EXTENSION I n v i s a P C BLACK BOX DIGITAL DESKTOP EXTENSION I n v i s a P C...
-
Page 2: Table Of Contents
8. INVISAPC FAMILY ..................................21 9. INSTALLATION .................................... 22 9.1 InvisaPC Receiver (DTX1000-R, DTX1000SA-R, DTX1002-R) Checklist ....................22 9.2 InvisaPC Transmitter (DTX1000-T, DTX1000SA-T, DTX1002-T) Checklist ...................22 9.3 InvisaPC Transmitter Kit (DTX1000-T-K, DTX1002-T-K) Checklist ......................22 9.4 InvisaPC Manager (DTX1032-R) Checklist ..............................22 9.5 Installation Options ......................................23 9.6 Connect the InvisaPC Receiver ..................................23... - Page 3 NEED HELP? LEAVE THE TECH TO US LIVE 24/7 TABLE OF CONTENTS TECHNICAL SUPPORT 1.877.877.2269 10. NETWORKED INSTALLATION ..............................28 10.1 Point-to-Point Installation ..................................28 10.2 Unmanaged or Managed Matrix Installation .............................28 11. OPERATION OF INVISAPC SYSTEM ............................29 11.1 LED Identification ....................................29 11.2 Accessing the System ..................................29 12.
- Page 4 NEED HELP? LEAVE THE TECH TO US LIVE 24/7 TABLE OF CONTENTS TECHNICAL SUPPORT 1.877.877.2269 APPENDIX D. TROUBLESHOOTING ............................... 62 APPENDIX E. REGULATORY INFORMATION ..........................64 E.1 FCC Statement .......................................64 E.2 NOM Statement......................................65 APPENDIX F. DISCLAIMER/TRADEMARKS ..........................66 F.1 Disclaimer ........................................66 F.2 Trademarks Used in this Manual ................................66 1.877.877.2269 BLACKBOX.COM...
-
Page 5: Specifications
DTX1032-R: (1) DVI output, (4) USB Type A female, (1) RJ-45 network 10/100/1000, (2) 3.5-mm connectors for microphone/stereo, (1) 2.5-mm barrel coinnector for power DTX1000-T, DTX1000-R, DTX1002-T, DTX1002-R, DTX1032-R: 1.38”H x 6.44”W x 4.31”D (3.5 x 16.35 x 10.94 cm); Dimensions DTX1000SA-T, DTX1000SA-R: 1.15"H x 6.2"... -
Page 6: What's Included In The Kits
Š (1) USB CPU Cable Š Š (1) USB CPU Cable Š DTX1000 includes: DTX1003 includes: Š (1) DTX1000-T Š Š (1) Single-head transmitter (DTX1000-T) Š Š (1) DTX1000-R Š Š (1) InvisaPC Manager (DTX1032-R) Š Š (2) Power supplies Š... -
Page 7: Licensing
LEAVE THE TECH TO US LIVE 24/7 CHAPTER 1: SPECIFICATIONS TECHNICAL SUPPORT 1.877.877.2269 DTX1000SA-T-K includes: DTX1002 includes: Š (1) DTX1000-T Š Š (1) InvisaPC Transmitter Š Š (1) DTX1000-R Š Š (1) 5 VDC Power Supply Š Š (2) Power supplies Š... -
Page 8: Overview
Receiver unit to the remote PC/workstations or Virtual Desktop via the InvisaPC system. NOTE: Some USB 2.0 devices have been found to be incompatible. Please report these devices to Black Box. NOTE: References to the InvisaPC system in this document refer to both Receivers (DTX1000-R, DTX1000SA-R, DTX1002-R) and Transmitters (DTX1000-T, DTX1000SA-T, DTX1002-T), and Manager (DTX1032-R). -
Page 9: Overview Of Invisapc Devices
NEED HELP? LEAVE THE TECH TO US LIVE 24/7 CHAPTER 2: OVERVIEW TECHNICAL SUPPORT 1.877.877.2269 Š High Reliability and Highly Secure: The InvisaPC system minimizes maintenance for administrators. The intuitive On-Screen-Display Š is simple to learn and understand. The individual units have no moving parts to minimize potential for hardware failures. All media streams transmitted between the InvisaPC devices are encrypted using 128-bit SSL. -
Page 10: Support For Keyboards, Mice And Usb Devices
NEED HELP? LEAVE THE TECH TO US LIVE 24/7 CHAPTER 2: OVERVIEW TECHNICAL SUPPORT 1.877.877.2269 2.2.3 SUPPORT FOR KEYBOARDS, MICE AND USB DEVICES USB keyboards and mice are fully supported by the InvisaPC system. Composite mouse and keyboard devices are supported, along with other types of USB devices such as Flash/Thumb Drives, CD and DVD/ROM drives, printers, pen tablets, touch-panels, and isochronous USB devices such as headsets. -
Page 11: Invisapc Receivers
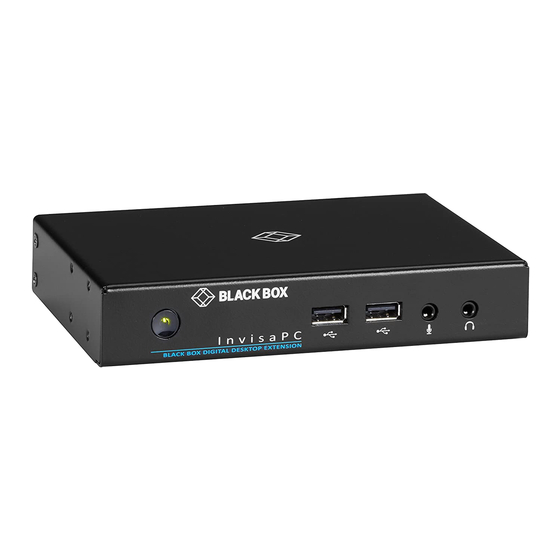
(typically DVI), USB (typically 4 ports of USB 2.0), line out, and microphone in (see individual Receiver’s data-sheets for specific ports provided). The Transmitter-Receiver connection uses Black Box’s compound compression algorithm for video called Dynamic Content Optimized Compression (DCOC). This algorithm optimizes compression based on content in the video stream and on available network bandwidth. - Page 12 NEED HELP? LEAVE THE TECH TO US LIVE 24/7 CHAPTER 3: INVISAPC RECEIVERS TECHNICAL SUPPORT 1.877.877.2269 7 8 9 FIGURE 3-3. REAR VIEW OF INVISAPC RECEIVER (DTX1000-R) 7 8 9 FIGURE 3-4. REAR VIEW OF INVISAPC RECEIVER (DTX1002-R) 7 8 9 FIGURE 3-5.
-
Page 13: Configuration Of Receiver
NEED HELP? LEAVE THE TECH TO US LIVE 24/7 CHAPTER 3: INVISAPC RECEIVERS TECHNICAL SUPPORT 1.877.877.2269 TABLE 3-1. INVISAPC RECEIVER COMPONENTS NUMBER IN FIGURES 3-1 COMPONENT DESCRIPTION THROUGH 3-5 Power LED Lights green when power is ON 2, 6 (4) USB Type A connectors Link to USB devices (1) 3.5-mm connector Connects to microphone... -
Page 14: Invisapc Transmitters
Receiver and manages the flow of information to it. It converts and compresses video and audio information for transmission over standard TCP/IP networks, along with USB peripheral communications. All data communication uses 128-bit encryption. FIGURE 4-1. FRONT VIEW OF THE INVISAPC TRANSMITTER (DTX1000-T OR DTX1002-T) FIGURE 4-2. FRONT VIEW OF THE INVISAPC TRANSMITTER (DTX1000SA-T) 1.877.877.2269... - Page 15 CHAPTER 4: INVISAPC TRANSMITTERS TECHNICAL SUPPORT 1.877.877.2269 4 5 6 FIGURE 4-3. REAR VIEW OF THE INVISAPC TRANSMITTER (DTX1000-T) 4 5 6 FIGURE 4-4. REAR VIEW OF THE INVISAPC TRANSMITTER (DTX1002-T) 4 5 6 10 11 FIGURE 4-5. REAR VIEW OF THE INVISAPC TRANSMITTER (DTX1000SA-T) 1.877.877.2269...
-
Page 16: Configuration Of Transmitter
(1) 3.5-mm connector Links to audio The Transmitter uses Black Box’s compound compression algorithm for video called Dynamic Content Optimized Compression (DCOC). This algorithm optimizes compression and latency on a frame-by-frame basis, depending on content in the video stream and on available network bandwidth. This enables an optimal user experience in challenging network environments. -
Page 17: Invisapc Manager
NEED HELP? LEAVE THE TECH TO US LIVE 24/7 CHAPTER 5: INVISAPC MANAGER TECHNICAL SUPPORT 1.877.877.2269 An InvisaPC Manager (DTX1032-R) managing a network of InvisaPC Receivers and Transmitters can also act as an InvisaPC Receiver. The DTX1032-R can manage 32 transmitters/receivers by default. It can manage up to 250 transmitter/receivers when an upgrade license(s) (DTX1032-LIC100 / DTX1032-LIC250) is added to DTX1032-R. -
Page 18: Modes Of Operation
NEED HELP? LEAVE THE TECH TO US LIVE 24/7 CHAPTER 6: MODES OF OPERATION TECHNICAL SUPPORT 1.877.877.2269 The InvisaPC system has various modes of operation such as Auto-Login, Auto-Connect, Private Connection, and Shared Connection Modes. 6.1 AUTO LOGIN In Auto-Login Mode, turning on the InvisaPC Receiver automatically causes a login as a pre-defined user. The user is presented with the permitted connections that have been predefined. -
Page 19: Application Examples
NEED HELP? LEAVE THE TECH TO US LIVE 24/7 CHAPTER 7: APPLICATION EXAMPLES TECHNICAL SUPPORT 1.877.877.2269 The InvisaPC system is built to be flexible so that it can be deployed in many different types of applications such as basic extension, switching applications (sometimes called matrix), cloud-based desktops, control rooms, digital signage, and kiosk applications and other applications in banking, financial services, broadcast, network operations, industrial, government and enterprise computing sectors. -
Page 20: Video, Audio And Usb Switching
NEED HELP? LEAVE THE TECH TO US LIVE 24/7 CHAPTER 7: APPLICATION EXAMPLES TECHNICAL SUPPORT 1.877.877.2269 7.2 VIDEO, AUDIO AND USB SWITCHING Numerous applications require being able to switch between different target PCs or Virtual Desktops. The user wants to be able to change the source of Video, Audio, or USB extension (or all three together). -
Page 21: Invisapc Family
Not applicable Not applicable TRANSMITTERS NUMBER OF VIDEO HEADS USB PORTS SERIAL AUDIO DVI CPU CABLE USB CPU CABLE DTX1000-T (1) DVI (1) USB 2.0 Type B Not included Not included DTX1002-T (2) DVI (1) USB 2.0 Type B Not included... -
Page 22: Installation
Š External power supply for the InvisaPC Transmitter Š Š Power cord Š Š DVI cable(s) (One DVI-D cable included for single head [DTX1000-T, DTX1000SA-T], two DVI-D cables needed for dual head Š [DTX1002-T]) Š USB A to USB B Device cable Š... -
Page 23: Installation Options
7. Once a Connection has been defined, use the OSD to make connection. NOTE: VGA or analog video monitors can be connected to the InvisaPC Receiver by using a DVI-D to VGA converter (such as Black Box part number AC1038A). 1.877.877.2269... - Page 24 NEED HELP? LEAVE THE TECH TO US LIVE 24/7 CHAPTER 9: INSTALLATION TECHNICAL SUPPORT 1.877.877.2269 NOTE: When using the Receiver in single-head mode on a dual-head Receiver, the LEFT DVI connector is default as per the figure shown next. FIGURE 9-1. INVISAPC RECEIVER (DTX1002-R) CONNECTIONS TABLE 9-1.
-
Page 25: Connect The Invisapc Transmitter
9. Turn on power for remote workstation and Transmitter. NOTE: Use only the power supply provided by Black Box. NOTE: When using a dual head Transmitter in single-head mode, the RIGHT DVI connector is default as per the figure shown next. - Page 26 NEED HELP? LEAVE THE TECH TO US LIVE 24/7 CHAPTER 9: INSTALLATION TECHNICAL SUPPORT 1.877.877.2269 FIGURE 9-2. INVISAPC TRANSMITTER (DTX1002-T) CONNECTIONS TABLE 9-2. INVISAPC TRANSMITTER CONNECTIONS COMPONENTS NUMBER IN FIGURE 9-2 COMPONENT Power LED 5-VDC power inlet USB Type B connector RJ-45 port DVI video input #2 DVI video input #1...
-
Page 27: Connect The Invisapc Manager
NEED HELP? LEAVE THE TECH TO US LIVE 24/7 CHAPTER 9: INSTALLATION TECHNICAL SUPPORT 1.877.877.2269 9.8 CONNECT THE INVISAPC MANAGER (DTX1032-R) The recommended sequence to connect the Manager is: 1. Connect your keyboard, monitor, mouse, and other peripheral cables to the appropriately labeled ports on the InvisaPC Receiver. 2. -
Page 28: Networked Installation
TABLE 10-1. INVISAPC SYSTEM DEFAULT NETWORK SETTINGS COMPONENT IP ADDRESS TYPE DEFAULT GATEWAY SUBNET MASK Static InvisaPC Receiver (DTX1000-R or DTX1002-R) 192.168.1.21 192.168.1.1 255.255.255.0 Static InvisaPC Transmitter (DTX1000-T, DTX1000SA or DTX1002-T) 192.168.1.22 192.168.1.1 255.255.255.0 Static InvisaPC Manager (DTX1032-R) 192.168.1.23 192.168.1.1 255.255.255.0 1.877.877.2269 BLACKBOX.COM... -
Page 29: Operation Of Invisapc System
NEED HELP? LEAVE THE TECH TO US LIVE 24/7 CHAPTER 11: OPERATION OF INVISAPC SYSTEM TECHNICAL SUPPORT 1.877.877.2269 Operating a workstation through the InvisaPC system is no different than working directly connected to a PC desktop. All peripherals operate as if directly connected, even though the workstation is located at a distance. 11.1 LED IDENTIFICATION Front panel There is one LED on the front panel of an InvisaPC unit (integrated into the power-button on the Receiver and Manager) - called the... -
Page 30: Osd Functions
NEED HELP? LEAVE THE TECH TO US LIVE 24/7 CHAPTER 12: OSD FUNCTIONS TECHNICAL SUPPORT 1.877.877.2269 The InvisaPC Receiver and Manager incorporate an On-Screen Display (OSD) that allows you to view information about the configuration of your system and potentially also allows for setting connections and configuration parameters such as the IP address, depending on the type of user. -
Page 31: Default Username And Password
NEED HELP? LEAVE THE TECH TO US LIVE 24/7 CHAPTER 12: OSD FUNCTIONS TECHNICAL SUPPORT 1.877.877.2269 FIGURE 12-2. LOG-ON SCREEN - REBOOT BUTTON Š System Preferences: This button has a drop down menu that allows the user to define system preferences for the InvisaPC Š... -
Page 32: User Views And Capabilities
NEED HELP? LEAVE THE TECH TO US LIVE 24/7 CHAPTER 12: OSD FUNCTIONS TECHNICAL SUPPORT 1.877.877.2269 12.4 USER VIEWS AND CAPABILITIES There are three different types of users in the InvisaPC System. Your user type will determine what exactly you will see on your OSD. -
Page 33: Creating A New Connection
NEED HELP? LEAVE THE TECH TO US LIVE 24/7 CHAPTER 12: OSD FUNCTIONS TECHNICAL SUPPORT 1.877.877.2269 12.5.1 CREATING A NEW CONNECTION To allow an InvisaPC Receiver or Manager to connect to a target InvisaPC Transmitter, an administrator must create a connection. The administrator clicks on the New button on the Connections screen. -
Page 34: Connecting
NEED HELP? LEAVE THE TECH TO US LIVE 24/7 CHAPTER 12: OSD FUNCTIONS TECHNICAL SUPPORT 1.877.877.2269 Š Enable Extended Desktop: not available on the single-video head InvisaPC Receiver. On a dual-video head InvisaPC, this enables both Š video heads to operate if connected to a source that supports dual-head operation (eg. Dual-head InvisaPC Transmitter). Š... -
Page 35: Control Tab
NEED HELP? LEAVE THE TECH TO US LIVE 24/7 CHAPTER 12: OSD FUNCTIONS TECHNICAL SUPPORT 1.877.877.2269 12.6 CONTROL TAB The Control Tab on the OSD enables an administrator to change the configuration of the InvisaPC system. The Control Tab is shown in Figure 12-6. -
Page 36: Preferences
NEED HELP? LEAVE THE TECH TO US LIVE 24/7 CHAPTER 12: OSD FUNCTIONS TECHNICAL SUPPORT 1.877.877.2269 There are five functions that can be accessed on this tab: 1. Preferences – allows users to change preference settings for: i. Power-Mode Settings – allows changing of the power mode configuration. ii. - Page 37 NEED HELP? LEAVE THE TECH TO US LIVE 24/7 CHAPTER 12: OSD FUNCTIONS TECHNICAL SUPPORT 1.877.877.2269 Resolution The Resolution button allows an administrator or power user to set the preferred resolution for the RDP Connection and for the OSD. By default, both the RDP Resolution and the OSD Resolution are set to Auto. The RDP Connection Resolution allows the resolution to be changed for an RDP connection, (i.e.
- Page 38 NEED HELP? LEAVE THE TECH TO US LIVE 24/7 CHAPTER 12: OSD FUNCTIONS TECHNICAL SUPPORT 1.877.877.2269 Hot-Key The Hot-Key button allows the administrator to change the hot-key configuration. The hot-key is used with the “o” key to terminate the current connection and bring up the OSD. The hot-key with “p” key is used to switch to the previous connection without loading the OSD.
- Page 39 NEED HELP? LEAVE THE TECH TO US LIVE 24/7 CHAPTER 12: OSD FUNCTIONS TECHNICAL SUPPORT 1.877.877.2269 2. Connection Inactivity Timer – This sets a limit on how long a user can be connected to a source (virtual machine, Transmitter etc.) without any keyboard or mouse activity.
-
Page 40: Network
NEED HELP? LEAVE THE TECH TO US LIVE 24/7 CHAPTER 12: OSD FUNCTIONS TECHNICAL SUPPORT 1.877.877.2269 12.6.2 NETWORK The network screen shown in Figure 12-12 allows an administrator to change the settings for the InvisaPC Receiver or Manager. The default network setting for the Receiver is a static IP address of 192.168.1.21. It has a Network Mask of 255.255.255.0 and a Gateway 192.168.1.1. -
Page 41: System
NEED HELP? LEAVE THE TECH TO US LIVE 24/7 CHAPTER 12: OSD FUNCTIONS TECHNICAL SUPPORT 1.877.877.2269 12.6.3 SYSTEM The System screen shown in Figure 12-13 allows an administrator to upgrade the firmware in the InvisaPC Receiver or Manager, reset it to factory defaults, import/export the configuration to an external USB drive, and perform a system diagnostic. FIGURE 12-13. - Page 42 NEED HELP? LEAVE THE TECH TO US LIVE 24/7 CHAPTER 12: OSD FUNCTIONS TECHNICAL SUPPORT 1.877.877.2269 Once the administrator has selected the file and clicked Ok, the system checks that the selected file has no errors before upgrading the InvisaPC Receiver or Manager. The configuration of the unit is preserved through the upgrade. Restore Factory Defaults The administrator can click the Restore button to reset the Receiver or Manager back to factory defaults.
- Page 43 NEED HELP? LEAVE THE TECH TO US LIVE 24/7 CHAPTER 12: OSD FUNCTIONS TECHNICAL SUPPORT 1.877.877.2269 NOTE: We currently do not support hostnames in the web address so please use the IP of the Web Access server. You must place the full address to the login page of the RD Web Access server (https://*************.apsx). FIGURE 12-16.
- Page 44 The diagnostics provides information for Black Box to debug customer encountered issues. When this button is clicked the user is asked to save the diagnostics onto a memory stick in the Receiver unit. This file should be sent back to Black Box for analysis. There is a similar diagnostic that can be run on a transmitter (see page 46).
- Page 45 NEED HELP? LEAVE THE TECH TO US LIVE 24/7 CHAPTER 12: OSD FUNCTIONS TECHNICAL SUPPORT 1.877.877.2269 Transmitter Button The Transmitter button on the Control Tab allows administrators to change the configuration of an InvisaPC Transmitter (this button is only visible to administrators). The following options are available when the Transmitter button has been activated: 1.
- Page 46 NEED HELP? LEAVE THE TECH TO US LIVE 24/7 CHAPTER 12: OSD FUNCTIONS TECHNICAL SUPPORT 1.877.877.2269 If the IP address of the Receiver and Transmitter are not on the same subnet, a router is required to allow them to communicate. This is true even when the Receiver “discovers”...
- Page 47 NEED HELP? LEAVE THE TECH TO US LIVE 24/7 CHAPTER 12: OSD FUNCTIONS TECHNICAL SUPPORT 1.877.877.2269 FIGURE 12-20 Transmitter Video Quality Settings 1. Best Quality – lossless compression, pixel-perfect mode of operation. Generally needs dedicated network to ensure no frame loss. 2.
- Page 48 NEED HELP? LEAVE THE TECH TO US LIVE 24/7 CHAPTER 12: OSD FUNCTIONS TECHNICAL SUPPORT 1.877.877.2269 Video Source Optimization The transmitter can be configured to handle different applications by changing the way it handles the video signal if it natively has embedded noise (i.e.
-
Page 49: Managing Users
The Transmitter provides diagnostics information for Black Box to debug customer encountered issues. When this button is clicked the user is asked to save the diagnostics onto a memory stick in the Receiver unit. Send this file back to Black Box for analysis. -
Page 50: Add A User
NEED HELP? LEAVE THE TECH TO US LIVE 24/7 CHAPTER 12: OSD FUNCTIONS TECHNICAL SUPPORT 1.877.877.2269 12.7.1 ADD A USER To add a user, click the add button. This causes the New-User window to be displayed. 12.7.2 AUTO LOG ON When the Log-on button is selected and a user is chosen, this user will be automatically logged on after power is applied to unit or after a reboot. -
Page 51: Edit A User
NEED HELP? LEAVE THE TECH TO US LIVE 24/7 CHAPTER 12: OSD FUNCTIONS TECHNICAL SUPPORT 1.877.877.2269 Š Connect to at login: This tick box defines whether the InvisaPC Receiver or Manager attempts to connect immediately to the selected Š connection after a logon by the user. This automatic connection only occurs after a logon. If a user exits the connection, the connection tab is displayed to the user for selection of a connection. -
Page 52: Remove A User
NEED HELP? LEAVE THE TECH TO US LIVE 24/7 CHAPTER 12: OSD FUNCTIONS TECHNICAL SUPPORT 1.877.877.2269 12.7.4 REMOVE A USER To remove a user, highlight the user’s name and press “Remove.” admin FIGURE 12-25. REMOVE USER When the Remove button is clicked, a pop-up window is displayed to prompt confirmation that this user is to be deleted. Click the Yes button to remove the user. -
Page 53: Central Management
NEED HELP? LEAVE THE TECH TO US LIVE 24/7 CHAPTER 13: CENTRAL MANAGEMENT TECHNICAL SUPPORT 1.877.877.2269 An InvisaPC system can be composed of just Receivers and Transmitters. In these types of systems – called unmanaged – there is no central management. Each device needs to be configured individually and upgraded individually. Often to keep the system in sync, the admin exports the configuration from one receiver and imports it to all other receivers using a USB Flash Drive. -
Page 54: Discovering And Adding Devices
NEED HELP? LEAVE THE TECH TO US LIVE 24/7 CHAPTER 13: CENTRAL MANAGEMENT TECHNICAL SUPPORT 1.877.877.2269 FIGURE 13-2. DEVICE TAB EXPANDED 13.1.1 DISCOVERING AND ADDING DEVICES Using the Discover button is the best way to add devices to your managed devices. When you click the Discover button, the manager will look for unmanaged devices on the network. -
Page 55: Adding A Device On Your Network
NEED HELP? LEAVE THE TECH TO US LIVE 24/7 CHAPTER 13: CENTRAL MANAGEMENT TECHNICAL SUPPORT 1.877.877.2269 13.1.2 ADDING A DEVICE ON YOUR NETWORK If the device you have discovered is on your network, you can simply click the Manage button. You will then be asked to give this device a name and it will be added to your Managed Devices section. -
Page 56: Adding A Device Not On Your Network
NEED HELP? LEAVE THE TECH TO US LIVE 24/7 CHAPTER 13: CENTRAL MANAGEMENT TECHNICAL SUPPORT 1.877.877.2269 13.1.3 ADDING A DEVICE NOT ON YOUR NETWORK If the device is on a different network, it cannot be managed it directly (e.g. on a different subnet with no router between devices). It will need its network settings changed. -
Page 57: Add Device Via Ip Address
NEED HELP? LEAVE THE TECH TO US LIVE 24/7 CHAPTER 13: CENTRAL MANAGEMENT TECHNICAL SUPPORT 1.877.877.2269 13.1.4 ADDING DEVICE VIA IP ADDRESS The Add Device section only applies to devices that are on the same network as the manager. The Add Device pop up window allows the administrator to add a device using the device’s IP address. -
Page 58: Upgrading A Device Remotely
Administrators can see the available Licenses in their system via the License button. They can also Import Licenses via USB Flash Drive. Place the upgrade file received from Black Box in the root directory of the flash drive. Press the License button. This will pop-up a window that shows the Serial Number of the unit and the current License limit. -
Page 59: Appendix A. Invisapc Video Resolutions Supported
NEED HELP? LEAVE THE TECH TO US LIVE 24/7 APPENDIX A. INVISAPC VIDEO RESOLUTIONS SUPPORTED TECHNICAL SUPPORT 1.877.877.2269 The InvisaPC supports the resolutions listed below: Š 640 x 480 @ 60 Hz Š Š 640 x 480 @ 75 Hz Š... -
Page 60: Appendix B. Configuring Windows 7 Virtual Machines For Invisapc
NEED HELP? LEAVE THE TECH TO US LIVE 24/7 APPENDIX B. CONFIGURING WINDOWS 7 VIRTUAL MACHINES TECHNICAL SUPPORT 1.877.877.2269 A few properties must be configured on a target Windows Virtual Machine for InvisaPC to connect with it. On the Windows Virtual Machine click on the Start button and launch a command window. Then launch group policy editor – gpedit. msc. -
Page 61: Appendix C. Invisapc Network Protocols Overview
For management purposes some other ports are used. The Black Box Discovery protocol used UDP Multicast Group 224.0.1.249 (port 39150). This is sent by the Manager to discover InvisaPC devices in the network. The router must allow UDP Multicast forwarding to allow devices on subnet different to where Manager is located to be discovered. -
Page 62: Appendix D. Troubleshooting
Sluggish Mouse: When using the InvisaPC, you may find that the mouse is not being very responsive, or has a noticeable delay. This can typically occur if the video card is using Dithering technology. You can contact Black Box to get a small utility to disable video card dithering on AMD graphics cards. - Page 63 NEED HELP? LEAVE THE TECH TO US LIVE 24/7 APPENDIX D. TROUBLESHOOTING TECHNICAL SUPPORT 1.877.877.2269 21 BRAND_CHECK_FAIL This is not a correct upgrade file for InvisaPC Please check release notes for correct version and compatibility information. 22 CLASS_CHECK_FAIL Can’t upgrade Transmitter with Receiver file or visa versa. Please check release notes for correct version and compatibility information.
-
Page 64: Appendix E. Regulatory Information
NEED HELP? LEAVE THE TECH TO US LIVE 24/7 APPENDIX E. REGULATORY INFORMATION TECHNICAL SUPPORT 1.877.877.2269 E.1 FCC STATEMENT This equipment has been found to comply with the limits for a Class A digital device, pursuant to Part 15 of the FCC Rules. These limits are designed to provide reasonable protection against harmful interference when the equipment is operated in a commercial environment. -
Page 65: Nom Statement
NEED HELP? LEAVE THE TECH TO US LIVE 24/7 APPENDIX E. REGULATORY INFORMATION TECHNICAL SUPPORT 1.877.877.2269 E.2 NOM STATEMENT 1. Todas las instrucciones de seguridad y operación deberán ser leídas antes de que el aparato eléctrico sea operado. 2. Las instrucciones de seguridad y operación deberán ser guardadas para referencia futura. 3. -
Page 66: Appendix F. Disclaimer/Trademarks
F.1 DISCLAIMER Black Box Network Services shall not be liable for damages of any kind, including, but not limited to, punitive, consequential or cost of cover damages, resulting from any errors in the product information or specifications set forth in this document and Black Box Network Services may revise this document at any time without notice. - Page 67 NEED HELP? LEAVE THE TECH TO US LIVE 24/7 NOTES TECHNICAL SUPPORT 1.877.877.2269 __________________________________________________________________________________________________ __________________________________________________________________________________________________ __________________________________________________________________________________________________ __________________________________________________________________________________________________ __________________________________________________________________________________________________ __________________________________________________________________________________________________ __________________________________________________________________________________________________ __________________________________________________________________________________________________ _________________________________________________________________________________________________ __________________________________________________________________________________________________ __________________________________________________________________________________________________\ __________________________________________________________________________________________________ __________________________________________________________________________________________________ __________________________________________________________________________________________________ __________________________________________________________________________________________________ _________________________________________________________________________________________________ __________________________________________________________________________________________________ 1.877.877.2269 BLACKBOX.COM...
- Page 68 NEED HELP? LEAVE THE TECH TO US LIVE 24/7 TECHNICAL SUPPORT 1.877.877.2269 © COPYRIGHT 2017 BLACK BOX CORPORATION. ALL RIGHTS RESERVED.
Need help?
Do you have a question about the DTX1000-T and is the answer not in the manual?
Questions and answers