
Subscribe to Our Youtube Channel
Related Manuals for Kramer VS-611DT


Summary of Contents for Kramer VS-611DT
-
Page 1: User Manual
USER MANUAL MODEL: VS-611DT UHD 6x1:2 Auto Switcher P/N: 2900-300464 Rev 3 www.kramerAV.com... -
Page 5: Table Of Contents
Overview About Fast Switching Defining the VS-611DT UHD 6x1:2 Auto Switcher Connecting the VS-611DT Connecting a Serial Controller to the VS-611DT via RS-232 Operating the VS-611DT Switching – Manual and Auto Performing a Factory Reset Locking the Front Panel Buttons... -
Page 6: Introduction
Room Connectivity; GROUP 10: Accessories and Rack Adapters; GROUP 11: Sierra Video Products; GROUP 12: Digital Signage; GROUP 13: Audio; and GROUP 14: Collaboration. Congratulations on purchasing your Kramer VS-611DT UHD 6x1:2 Auto Switcher, which is ideal for the following typical applications: •... -
Page 7: Getting Started
Avoid interference from neighbouring electrical appliances that may adversely influence signal quality. • Position your VS-611DT away from moisture, excessive sunlight and dust. This equipment is to be used only inside a building. It may only be connected to other equipment that is installed inside a building. -
Page 8: Recycling Kramer Products
Kramer Electronics has made arrangements with the European Advanced Recycling Network (EARN) and will cover any costs of treatment, recycling and recovery of waste Kramer Electronics branded equipment on arrival at the EARN facility. For details of Kramer’s recycling arrangements in your particular country go to our recycling pages at www.kramerav.com/support/recycling/. -
Page 9: Overview
Overview The VS-611DT is a high-performance automatic switcher for HDMI video signals with resolution up to 4K@60 UHD (4:2:0). With six HDMI inputs, the unit can automatically or manually switch to a predefined or last connected input whenever the currently active video signal is interrupted or whenever a higher-priority video signal is introduced. -
Page 10: About Fast Switching
Many newer display devices, however, are now capable of “on-the-fly” switching. Depending on the display device in use, the VS-611DT allows for fast switching (minor reset and the connection kept alive) and extra fast switching (no reset and the connection kept alive). -
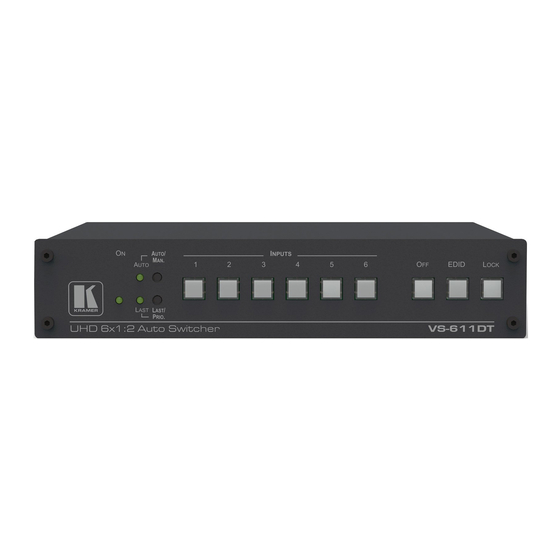
Page 11: Defining The Vs-611Dt Uhd 6X1:2 Auto Switcher
Defining the VS-611DT UHD 6x1:2 Auto Switcher This section defines the VS-611DT. Figure 1: VS-611DT UHD 6x1:2 Auto Switcher Feature Function ON LED Lights when the unit is powered on LAST LED Lights when in Last Connected mode AUTO LED Lights when in Auto Switching mode AUTO/MAN. - Page 12 IR 3.5mm Mini Jack Connects to an HDBT IR transmitter HDBT OUT RJ-45 Connector Connects to an HDBT TP line HDMI OUT Connector Connects to an HDMI acceptor 12V DC Connector Connects to a power supply for the unit VS-611DT – Overview...
-
Page 13: Connecting The Vs-611Dt
You do not have to connect all the inputs and outputs, connect only those that are required. To connect the VS-611DT as illustrated in the example in Figure 1. Connect up to six HDMI sources (for example, KDS-MP4(s), laptop(s), DIP-31(s)) to INPUTs 1-6 using HDMI cables. -
Page 14: Connecting A Serial Controller To The Vs-611Dt Via Rs-232
Figure 2: Connecting the VS-611DT UHD 6x1:2 Auto Switcher Connecting a Serial Controller to the VS-611DT via RS-232 The VS-611DT operates at 9600 baud rate (see all communication parameters in Section 9.1). To connect a serial controller to the VS-611DT: •... -
Page 15: Operating The Vs-611Dt
5.1.2 Auto Switch Mode In Auto switch mode, the VS-611DT automatically switches one of six HDMI inputs to a predefined or the last connected input whenever the currently active video signal is interrupted or whenever a higher-priority video signal is detected. -
Page 16: Performing A Factory Reset
To perform a factory reset: 1. Disconnect device power. 2. Press and hold Input 1 while reconnecting device power. All indicators flash while resetting to the factory default parameters. When all the lights turn off the reset is complete. VS-611DT – Operating the VS-611DT... -
Page 17: Locking The Front Panel Buttons
Both HDMI and HDBaseT outputs turn off. Copying the EDID The EDID is a data structure transmitted by the display that enables the VS-611DT to recognize the display connected to the output. The VS-611DT acquires and stores the EDID to make reconnection to the display effortless. -
Page 18: Setting The 5V Output Time Delay
2. Press and hold the Lock button while reconnecting device power. The Lock LED flashes indicating HDCP setup mode. 3. Press the Input 1-6 button(s) to set HDCP. 4. If the LED is on, HDCP passes to the port. If flashing, HDCP does not. VS-611DT – Operating the VS-611DT... -
Page 19: Setting The Audio Output
When inputting ARC or HDMI multi-channel LPCM audio, the analog outputs the front right and front left components. If the device is in ARC mode and compressed audio is input, speakers connected to the analog output produce noise. VS-611DT - Operating the VS-611DT... -
Page 20: Setting The Switching Speed
The device’s USB port can work as a virtual COM (VCOM) port. Verify that the USB port on the PC that connects to the VS-611DT is configured as a VCOM port. You may need to install a driver to do this. Use a tool such as Hercules or K-Config to use P3K over USB. -
Page 21: Upgrading The Firmware
5.11 Upgrading the Firmware The VS-611DT can be upgraded via USB or RS-232. For instructions on upgrading the firmware, see “K-Upload Software User Guide” (www.kramerav.com/support/download.asp?f=39700). 5.12 Step-In Support The VS-611DT supports programmable step-in functionality when used in conjunction with compatible step-in devices, such as the SID-X3N and DIP-31 (using an HDMI cable that supports HEC, the HDMI Ethernet Channel). -
Page 22: Using The Web Pages
To access the Web page: • Enter the IP address (192.168.1.39) in the browser. The Router window opens. Routing Inputs to Outputs • On the left side, click the Routing tab. The Routing window opens: VS-611DT – Using the Web Pages... - Page 23 To set port priority: 1. Click Set Port Priority. The Set Port Priority window opens. 2. Click the Set dropdown for the desired port. 3. Set a priority from 1 to 6. 4. Click OK to set. VS-611DT - Using the Web Pages...
-
Page 24: Using Edid Settings
2-Channel LPCM only Describes the characteristics of the EDID source device Short Summary Copy To Click the Inputs checkbox to select/de-select all input devices Click each input to which to copy the chosen EDID VS-611DT – Using the Web Pages... - Page 25 10. Click OK. When selecting the EDID file, if the path indicates \fakepath\ as shown in the following illustration, allow the browser to upload the file in the browse Tool/Internet. Safari does not support file upload. VS-611DT - Using the Web Pages...
-
Page 26: Setting Device Id Parameters
To modify serial or Ethernet communication parameters: Adjust the parameters as required, either by entering the parameters directly or by using the drop-down list. Click Set. The changes are saved. Re-power the device. VS-611DT – Using the Web Pages... -
Page 27: Contacting Kramer
Contacting Kramer The About Us screen displays the version of the Web software, Kramer’s address, phone, email and Web site. VS-611DT - Using the Web Pages... -
Page 28: Technical Specifications
35.1cm x 21.2cm x 7.2cm (13.8” x 8.4” x 2.8”) W, D, H SHIPPING WEIGHT: 1.58kg (3.5lbs) INCLUDED ACCESSORIES: Power cord Specifications are subject to change without notice For the most updated resolution list, go to our Web site at www.kramerav.com VS-611DT – Technical Specifications... -
Page 29: Supported Resolutions
720(1440)x288p @50Hz 720(1440)x288p @50Hz 2880x576i @50Hz 2880x576i @50Hz 2880x288p @50Hz 2880x288p @50Hz 1440x576p @50Hz 1440x576p @50Hz 1920x1080p @50Hz 1920x1080p @23.97Hz/24Hz 1920x1080p @25Hz 1920x1080p @29.97Hz/30Hz 2880x480p @59.94Hz/60Hz 2880x480p @59.94Hz/60Hz 2880x576p @50Hz 2880x576p @50Hz 1920x1080i @50Hz 1920x1080i @100Hz VS-611DT - Supported Resolutions... - Page 30 1280x720p @119.88/120Hz 720x480p @119.88/120Hz 720x480p @119.88/120Hz 720(1440)x480i @119.88/120Hz 720(1440)x480i @119.88/120Hz 720x576p @200Hz 720x576p @200Hz 720(1440)x576i @200Hz 720(1440)x576i @200Hz 720x480p @239.76/240Hz 720x480p @239.76/240Hz 720(1440)x480i @239.76/240Hz 720(1440)x480i @239.76/240Hz 1280x720p @23.97Hz/24Hz 1280x720p @25Hz 1280x720p @29.97Hz/30Hz 1920x1080p @119.88/120Hz 1920x1080p @100Hz VS-611DT – Supported Resolutions...
-
Page 31: Default Settings
Default Settings The VS-611DT has the following default settings for communication, first power on and EDID. Default Communication Settings RS-232 Protocol 3000 (Default) Baud Rate 9600 Data Bits Stop Bits Parity None Command Format ASCII First Power On Default Settings... -
Page 32: Default Edid
1280 x 1024p at 60Hz - VESA STD 1400 x 1050p at 60Hz - VESA STD 1680 x 1050p at 60Hz - VESA STD 1600 x 1200p at 60Hz - VESA STD EIA/CEA-861 Information Revision number..3 VS-611DT – Default Settings... - Page 33 IEEE registration number. 0x000C03 CEC physical address..1.0.0.0 Maximum TMDS clock..165MHz Report information Date generated... 03/11/2015 Software revision..2.60.0.972 Data source....Real-time 0x0042 Operating system..6.1.7601.2.Service Pack 1 Raw data 00,FF,FF,FF,FF,FF,FF,00,2D,B2,ED,03,01,00,00,00,0F,18,01,03,82,46,27,78,0A,D5,7C,A3,57,49,9C,25, 11,48,4B,FF,FF,80,81,C0,81,00,95,00,81,40,81,80,90,40,B3,00,A9,40,01,1D,00,72,51,D0,1E,20,6E,28, 55,00,7E,88,42,00,00,1E,02,3A,80,18,71,38,2D,40,58,2C,45,00,C4,8E,21,00,00,1E,00,00,00,FC,00,56, 53,2D,36,31,31,44,54,0A,20,20,20,20,00,00,00,FD,00,32,55,1F,5E,11,00,0A,20,20,20,20,20,20,01,B1, 02,03,1A,41,47,11,13,05,14,84,10,1F,23,09,06,04,83,01,00,00,65,03,0C,00,10,00,8C,0A,D0,8A,20,E0, 2D,10,10,3E,96,00,58,C2,21,00,00,18,01,1D,80,18,71,1C,16,20,58,2C,25,00,C4,8E,21,00,00,9E,01,1D, 80,D0,72,1C,16,20,10,2C,25,80,C4,8E,21,00,00,9E,01,1D,00,72,51,D0,1E,20,6E,28,55,00,C4,8E,21,00, 00,1E,01,1D,00,BC,52,D0,1E,20,B8,28,55,40,C4,8E,21,00,00,1E,00,00,00,00,00,00,00,00,00,00,00,C5 VS-611DT - Default Settings...
-
Page 34: Protocol 3000
Protocol 3000 The VS-611DT can be operated using the Kramer Protocol 3000 serial commands. The command framing varies according to how you interface with the VS-611DT. In the following example, a basic video input switching command that routes a layer 1... -
Page 35: Understanding Protocol 3000
You can enter commands directly using terminal communication software (e.g., Hercules) by connecting a PC to the serial, Ethernet or the USB (VCOM) port on the VS-611DT. To enter CR press the Enter key (LF is also sent but is ignored by the command parser). -
Page 36: Kramer Protocol 3000 Syntax
A separate response is sent for every command in the chain. 10.2 Kramer Protocol 3000 Syntax The Kramer Protocol 3000 syntax uses the following delimiters: CR = Carriage return (ASCII 13 = 0x0D) • • LF = Line feed (ASCII 10 = 0x0A) •... - Page 37 Command_2 Parameter2_1,Parameter2_2,…| Command_3 Parameter3_1,Parameter3_2,…|… • Device Message Format: Start Address (optional) Body Delimiter CR LF Device_id@ Message • Device Long Response – Echoing command: Start Address (optional) Body Delimiter CR LF Command SP [Param1,Param2 …] result Device_id@ VS-611DT - Protocol 3000...
-
Page 38: Protocol 3000 Commands
End User RESET Reset device System – mandatory Administrator SIGNAL Get input signal lock status System End User Get device serial number System – mandatory End User VERSION Get device firmware version System – mandatory End User VS-611DT – Protocol 3000... - Page 39 ~nn@BUILD-DATESPdateSPtimeCR LF Parameters date – Format: YYYY/MM/DD where YYYY = Year, MM = Month, DD = Day time – Format: hh:mm:ss where hh = hours, mm = minutes, ss = seconds Response Triggers Notes K-Config Example “#BUILD-DATE?”,0x0D VS-611DT - Protocol 3000...
- Page 40 1. Multi-line: ~nn@Device available protocol 3000 commands:CR LFcommand,SP command...CR LF 2. Multi-line: ~nn@HELPSPcommand:CR LFdescriptionCR LFUSAGE:usageCR LF Parameters COMMAND_NAME – name of a specific command Response Triggers Notes To get help for a specific command use: HELPSPCOMMAND_NAMECR LF K-Config Example “#HELP”,0x0D VS-611DT – Protocol 3000...
- Page 41 End User Public Description Syntax Set: #INFO-IO?CR Get: Get in/out count Response ~nn@INFO-IO?SPINSPinputs_count,OUTSPoutputs_countCR LF Parameters inputs_count – number of inputs in the unit outputs_count – number of outputs in the unit Response Triggers Notes K-Config Example “#INFO-IO?”,0x0D VS-611DT - Protocol 3000...
- Page 42 – String of up to 19 printable ASCII chars Response Triggers Notes This command identifies equipment connected to Step-in master products and notifies of identity changes to the connected equipment. The Matrix saves this data in memory to answer REMOTE-INFO requests K-Config Example “#MODEL?”,0x0D VS-611DT – Protocol 3000...
- Page 43 Permission Transparency Set: PROT-VER? Get: End User Public Description Syntax Set: #PROT-VER?CR Get: Get device protocol version Response ~nn@PROT-VERSP3000:versionCR LF Parameters Version – XX.XX where X is a decimal digit Response Triggers Notes K-Config Example “#PROT-VER?”,0x0D VS-611DT - Protocol 3000...
- Page 44 After execution, a response is sent to the com port from which the Get was received Response is sent after every change in input signal status ON to OFF, or OFF to ON Notes K-Config Example Get the input signal lock status of Input 3: “#SIGNAL? 3”,0x0D VS-611DT – Protocol 3000...
- Page 45 Transparency Set: VERSION? Get: End User Public Description Syntax Set: #VERSION?CR Get: Get firmware version number Response ~nn@VERSIONSPfirmware_versionCR LF Parameters firmware_version – XX.XX.XXXX where the digit groups are: major.minor.build version Response Triggers Notes K-Config Example “#VERSION?”,0x0D VS-611DT - Protocol 3000...
- Page 46 Response is sent after every change in output HPD status OFF to ON and ALL parameters (new EDID, etc.) are stable and valid Notes K-Config Example Get the output HPD status of HDMI Out: “#DISPLAY? 2”,0x0D VS-611DT – Protocol 3000...
- Page 47 4. Disconnect audio output 1 ~VID ERR003 CRLF 5. Get status of all video links ~AUD 0>1CRLF Command processing begins after entering CR ~VID 2>1, 0>2, A response is sent for each command after processing 1>3, 3>4 CRLF VS-611DT - Protocol 3000...
- Page 48 The get command identifies input switching on Step-in clients The set command is for remote input switching on Step-in clients (essentially via by the Web) Example Set the remote input switching of video to HDMI Out from HDMI Input 2: “#ROUTE 1,1,2”,0x0D VS-611DT – Protocol 3000...
-
Page 49: Communication Commands
– String of 3 letters indicating the port type: TCP, UDP ETHPort – TCP / UDP port number: 0-65565 Response Triggers Notes K-Config Example Set the Ethernet port protocol for TCP to port 12457: “#ETH-PORT TCP,12457”,0x0D VS-611DT - Protocol 3000... - Page 50 A network gateway connects the device via another network and maybe over the Internet. Be careful of security problems. Consult your network administrator for correct settings. K-Config Example Set the gateway IP address to 192.168.0.1: “#NET-GATE 192.168.000.001”,0x0D VS-611DT – Protocol 3000...
- Page 51 Parameters net_mask – Format: xxx.xxx.xxx.xxx Response Triggers The subnet mask limits the Ethernet connection within the local network For proper settings consult your network administrator Notes K-Config Example Set the subnet mask to 255.255.0.0: “#NET-MASK 255.255.000.000”,0x0D VS-611DT - Protocol 3000...
- Page 52 10.3.4 EDID Handling Commands Additional EDID data functions can be performed via the VS-611DT web pages or a compatible EDID management application, such as Kramer EDID Designer (see www.kramerav.com/product/EDID%20Designer). Command Description Type Permission CPEDID Copy EDID data from the output to the...
- Page 53 This limited warranty gives you specific legal rights, and you may have other rights which vary from country to country or state to state. This limited warranty is void if (i) the label bearing the serial number of this product has been removed or defaced, (ii) the product is not distributed by Kramer Electronics or (iii) this product is not purchased from an authorized Kramer Electronics reseller.
-
Page 54: Safety Warning
SAFETY WARNING Disconnect the unit from the power supply before opening and servicing For the latest information on our products and a list of Kramer distributors, visit our Web site to find updates to this user manual. We welcome your questions, comments, and feedback.
Need help?
Do you have a question about the VS-611DT and is the answer not in the manual?
Questions and answers