
Related Manuals for Intellinet 507622


Summary of Contents for Intellinet 507622
-
Page 1: User Manual
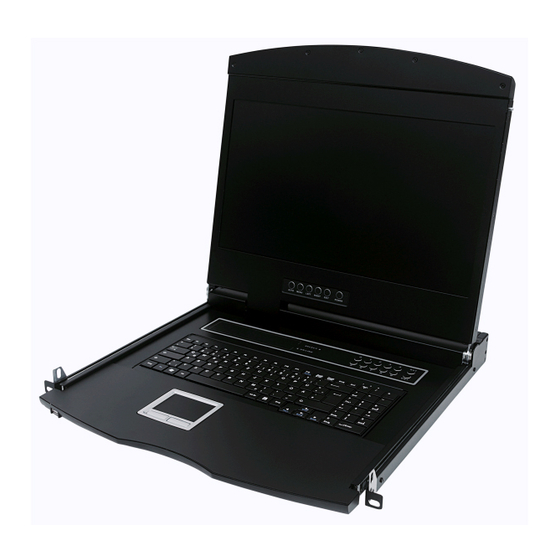
LCD KVM Switch User Manual Models 507622, 507738, 507745, 507769, 507776, 507844, 507882, 507899, 507905, 507912, 507936 Model Shown: 507622 INT-LCD-KVM-SWITCH_UM-0317_REV5.01... -
Page 2: Compliance Statements
LCD KVM Switch User Manual Compliance Statements U.S. Federal Communications Commission (FCC) Interference Statement This product has been tested and found to comply with FCC regulations Class B (Class B) digital device and FCC specifications Details of Section 15. These limits are designed to provide reasonable protection against harmful interference in a residential installation. -
Page 3: Table Of Contents
Table of Contents ..............................2 OMPLIANCE TATEMENTS & D ..........................4 RODUCT ODELS ESCRIPTIONS & M ....................... 4 ACKAGE ONTENTS ANUAL NFORMATION ................................4 OTE TO THE ..............................4 ESCRIPTION OF YMBOLS CHAPTER 1 ‒ INTRODUCTION ............................5 1.1 P .............................. -
Page 4: Product Models & Descriptions
Screw-Install Kit 1 pc. Screw-in mounting bracket Ensure that all parts are present and free from damage. If parts are missing or damaged, contact your Intellinet • dealer or distributor. Make sure to read this manual carefully before installing and operating the Intellinet LCD KVM Switch. Only •... -
Page 5: Chapter 1 - Introduction
Chapter 1 – Introduction 1.1 Products Overview 1.1.1 Hardware Requirements 1.1.1.1 Console Rear two USB-A keyboard and mouse ports • Pre-set USB-A type keyboard and mouse • A set of USB interface mice • A set of USB interface keyboards •... -
Page 6: Supported Operating Systems
LCD KVM switch VGA cable • VGA & USB (Type-A) + PS2 keyboard (purple) + PS2 mouse (green) to VGA LCD KVM switch DVI cable • DVI-I & USB (Type-A) + Audio Cat5 to VGA connection Dongle • VGA + PS2 keyboard (purple) + PS2 mouse (green) to Cat5 port... -
Page 7: Parts
1.2 Parts 1.2.1 Front View The are two different sizes of LCD screens, as shown below. Refer to the chart for a description of the numeric values for each graphic. 17" Model 19" Model Number Part Function Description Upper Handle Pull the handle, slide the LCD module out and push it in Lock Locks the LCD module;... -
Page 8: Modular Switch Rear Views
1.2.2 Modular Switch Rear Views This section shows the available connection types of the Intellinet Removable KVM Switch Modules. Both the VGA and Cat5 switch types can be optionally configured with Remote Control IP as the images describe. LCD KVM 8-port VGA Switch... -
Page 9: Views And Dimensions
1.3 Views and Dimensions 4:3 Screen – 17" 16:9 Screen – 19" Single-Rail LCD KVM Console Single–Rail Multi-Port KVM Console Dimensions LCD VGA/DVI/Cat5 KVM Switch... -
Page 10: Chapter 2 - Hardware Installation
Chapter 2 – Hardware Installation 2.1 Stacking and Installation Notes 1. Before proceeding, refer to the important safety information regarding the placement of the LCD KVM switch, which is listed in the appendix. ✪ 2. Before installation, make sure that all the devices connected to the power supply are turned off. Unplug all power cables from the computer. -
Page 11: Kvm Module Assembly & Disassembly
2.3 KVM Module Assembly & Disassembly The Intellinet series of KVM Switches utilizes an LCD screen, keyboard and mouse with detachable, modular switch components. This design allows the user to change out any the KVM components in the case of damage or if the set-up of the system changes. -
Page 12: Keyboard Disassembly
To quickly and easily upgrade this equipment for remote control of the KVM Switch and its attached devices, use an Intellinet IP-Function Module for KVM Switches (507936). Follow these steps to complete installation. NOTE: make sure that the switch is off and disconnected from a power source before beginning installation. - Page 13 1. On the rear of the KVM module, find the expansion slot and the blank panel for installation. Use a screwdriver to remove the screws and the blanking panel. 2. Push the IP module gently into the cavity. 3. Fix the module in place with the screws. 4.
-
Page 14: Single Device Installation
2.6 Single Device Installation The follow section describes how to correctly establish VGA, Cat5 or DVI connections. Note: Before installation, make sure that the equipment is powered off. To prevent damage to the equipment during installation, make sure that all installed devices are fully grounded. 2.6.1 VGA Port KVM Module Installation To install a single-level KVM, complete the following steps. -
Page 15: Cat5 Port Kvm Module Installation
Refer to the IP module product manual for how to use and debug the IP module. 4. For display problems caused by transmission distance, electromagnetic interference, common ground, etc., Intellinet recommends using Cat6 shielded network cable to connect and try to improve the display effect. LCD VGA/DVI/Cat5 KVM Switch... -
Page 16: Dvi Port Kvm Module Installation
2.6.3 DVI Port KVM Module Installation To install a single-level KVM, complete the following steps. Refer to the diagram below for additional visualization: 1. Plug your USB keyboard and mouse into the USB console port on the back panel of the switch. 2. -
Page 17: Cascade Device Installation
2.7 Cascade Device Installation This product can be cascaded to increase the number of controlled devices. 2.7.1 VGA Port LCD KVM Switch Cascade In the VGA-switch Cascade Mode, the keyboard, mouse and computer connections are the same with the stand- alone connection. -
Page 18: Cat5 Port Lcd Kvm Switch Cascade
Hot Key combinations, or the OSD will not start when cascaded. (Refer to the OSD chapter for details on the OSD Hot Key settings.) For display problems caused by transmission distance, electromagnetic interference, common ground, etc., Intellinet recommends using Cat6 shielded network cable to connect and try to improve the display effect. LCD VGA/DVI/Cat5 KVM Switch... -
Page 19: Chapter 3 - Basic Operations
Chapter 3 – Basic Operations 3.1 Hot-Swap The KVM switch supports hot-swapping, which allows the user to remove components by unplugging the cables that are connected computer's port without having to shut down the switch. To make the hot-swap function work properly, adhere to this information and/or follow these steps: Hot-swap Computer Connection In order for the On-Screen Display (OSD) Menu to correspond to the KVM connection-port changes, you must reset the... -
Page 20: Hot Key Selection
3.2.3 Hot Key Selection This product offers four hotkey switching methods: 【SCRLL】+【SCRLL】+【NUM】/ 【CTRL】+【CTRL】+【NUM】/ 【ALT】+【ALT】+【NUM】/ 【SHIFT】+【SHIFT】+【NUM】 The default hot-key toggle combination is [SCRLL] + [SCRLL] + [NUM], where [NUM] is the keyboard number 1- 16. The KVM switch will switch to the corresponding computer of the port number. To change the key combination of the hotkey, set and change it in the corresponding option of OSD Menu. -
Page 21: Chapter 4 - On-Screen Display (Osd) Operations
Chapter 4 – On-Screen Display (OSD) Operations This chapter reviews how the switch's menu-driven interface handles the computer switching procedure and provides instant access to any computer on the installation. 4.1 OSD Login The OSD function provides a two-level (administrator / user) password mechanism. The factory default setting—i.e., first- time access—does not require login-password authentication. -
Page 22: F1:Goto
4.5.1 F1:GOTO To use the “NAME” method, move the highlight bar to “NAME" and press 【Enter】. Input the name of a port, then press [Enter] to confirm. To use the "PN" method, move highlight bar to “PN” and press 【Enter】. Input the port number, and then press 【Enter】... -
Page 23: F4 Qv
4.5.4 F4 QV The QV function selects a port for Quick View. Move the highlight bar to a port, press [F4] and an icon of an upward facing triangle appears. Press [F4] again and the icon disappears. 4.5.5 F5 EDIT The EDIT function creates or edits the name of a port. - Page 24 4.5.6.1 OSD ACTIVATING HOTKEY This screen provides the user with four hotkey combinations. Use the keyboard's 【↑】 【↓】 buttons to move the cursor to select an item, and then press 【Enter】 to save. The default is to use 【CTRL】【 CTRL】as the OSD menu start hotkey. 4.5.6.2 SWITCH HOTKEY This screen provides the user with four hotkey combinations.
-
Page 25: Set Password
4.5.6.4 CHANNEL DISPLAY DURATION This screen allows the user to adjust the time the tip window will stay on screen. The options are as follows: 3 SECOND—The tip window lasts for 3 seconds; • ALWAYS ON—The tip window is always on the screen. •... - Page 26 4.5.6.9 CLEAR THE NAME LIST This function clears the name of a port in the OSD menu. If you use this function, all the port names will be emptied, so proceed carefully. It is necessary to verify the administrator password. Afterward, input the 【Y】key and press【Enter】...
-
Page 27: Appendix
✪ Appendix A–1 General Safety Instructions This product should only be used indoors. • Read all the instructions for future reference. • Follow all the warnings and instructions on the device. • Do not place this equipment on any unstable surface. If this equipment falls, it will cause serious damage. •... -
Page 28: Specifications
A–3 Specifications A.3.1 VGA Series LCD KVM Switch Function 8 口 16 口 Connectors Direct Cascade(Max) OSD Menu, Front Panel Hot-Key, Hot-key, Remote Control IP Port Selection (Optional) Video 17”\19”\19”Wide LED Screen Keyboard 1 x USB Type A Female Console Mouse 1 x USB Type A Female Connectors... -
Page 29: Cat5 Series Lcd Kvm Switch
A.3.2 Cat5 Series LCD KVM Switch Function 8 口 16 口 Computer Direct Connections Cascade(Max) Port Selection OSD Menu, Buttons, Hot-key, Remote Control IP (Optional) Video 17”\19”\19”wide-screen LCD Monitor Console Keyboard 1 x USB Type A Female Connectors Mouse 1 x USB Type A Female Expansion 1 x USB Type A Female (Prepositive USB port for keyboard, mouse)... -
Page 30: Dvi Series Lcd Kvm Switch
A.3.3 DVI Series LCD KVM Switch Function 8 口 Connectors Direct Port Selection OSD Menu, Buttons, hot keys Monitor 17”\19”\19”Wide-Screen LCD Monitor Keyboard 1 x USB Type A female Mouse 1 x USB Type A female Expansion Console 1 x USB Type A Female (Prepositive port for Keyboard, mouse) Port Port 4 x Mini Stereo... -
Page 31: Lcd Module Specifications
A.3.4 LCD Module Specifications Function 17inchLCD module 19inchLCD module 19inchwide-screen LCD module LCD Screen 17inch4:3 19inch4:3 19inch16:9 Size Ratio LCD Screen SXGA TFT-LCD Wide AHVA TFT-LCD Type 376.32 (H) x 301.056 Viewing Area 337.920(H) × 270.336(V) 408.96(H) x 230.04(V) Resolution 1280*1024@60HZ 1980*1080@60HZ Display... -
Page 32: Warranty
POLSKI: Informacje dotyczące gwarancji znajdują się na stronie intellinetnetwork.com/warranty. ITALIANO: Per informazioni sulla garanzia, accedere a intellinetnetwork.com/warranty. EN MÉXICO: Póliza de Garantia Intellinet — Datos del importador y responsable ante el consumidor—IC Intracom México, S.A.P.I. de C.V. Av. Interceptor Poniente # 73, Col. Parque Industrial La Joya, Cuautitlán Izcalli, Estado de México, C.P. -
Page 33: Notes
NOTES LCD VGA/DVI/Cat5 KVM Switch... - Page 34 All trademarks and trade names are the property of their respective owners. © IC Intracom. All rights reserved. Intellinet is a trademark of IC Intracom, registered in the U.S. and other countries. LCD VGA/DVI/Cat5 KVM Switch...
Need help?
Do you have a question about the 507622 and is the answer not in the manual?
Questions and answers