Table of Contents
Advertisement
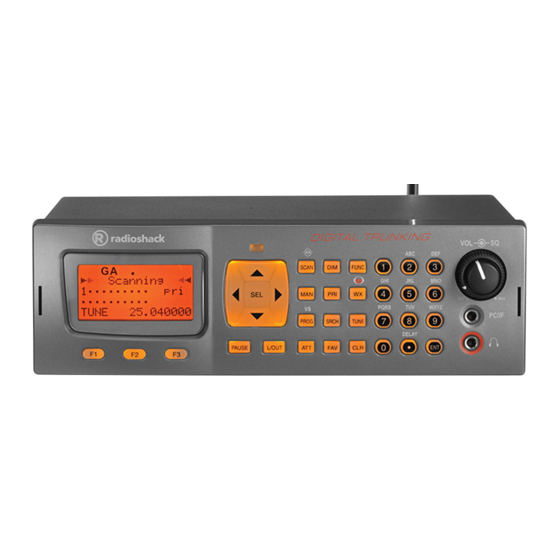
Desktop/Mobile Radio Scanner
Thank you for purchasing your Digital Trunking Desktop/Mobile
Radio Scanner from RadioShack. Please read this user's guide before
installing, setting up, and using your new scanner.
What's Included
Scanner
Antenna
Screw (2)
Mounting bracket
DIN sleeve
Keys (2)
Rubber washer (2)
Lock washer (2)
Digital Trunking
Rubber feet (3)
Knob (2)
AC adapter
DC cable with fuse
User's Guide
Quick Start Guide
V-Scanner Pre-
programmed Data
www.radioshack.com
PRO-652
Advertisement
Table of Contents

Related Manuals for Radio Shack PRO-652


Summary of Contents for Radio Shack PRO-652
- Page 1 PRO-652 Digital Trunking Desktop/Mobile Radio Scanner Thank you for purchasing your Digital Trunking Desktop/Mobile Radio Scanner from RadioShack. Please read this user’s guide before installing, setting up, and using your new scanner. What’s Included Scanner Rubber feet (3) Antenna Knob (2)
-
Page 2: Table Of Contents
ontents Understanding Your Scanner ............6 Understanding the Function Keys ..............6 Understanding the Display ................9 Understanding Object Oriented Scanning ...........10 Scanner Features .....................13 Scanner Setup ................. 16 Installing Your Scanner ..................16 Setting up a Mobile Base ................16 Bracket Mounting ..................16 Dashboard Installation .................17 Connecting the Antenna ................18 Powering Your Scanner ...................19... - Page 3 Contents Essential Parameters ..................30 Trunking System (TSYS) Objects ..............31 Duplicate (DUPE) .....................34 Scanning ..................35 Basic Scanning Operation ................35 Wildcard Scanning ..................35 Manual Mode ....................36 Organizing Objects ................ 38 Object Numbering ..................38 Grouping Objects with Scan Lists ..............39 Changing Scan List Membership ..............40 New Objects .....................40 Existing Objects.
- Page 4 ontents Service Search Object (SRVC) .................53 Essential Parameters ..................53 Signal Stalker II Object (STLK) ................55 Essential Parameters ..................55 Dedicated Searches ................ 57 Dedicated LMIT Search ...................57 Dedicated SRVC Search ..................58 Dedicated Signal Stalker II ................60 Dedicated TUNE Search .................61 Tune LED .......................63 Weather Scanning ................
- Page 5 Contents LTR Home Repeater AutoMove ..............79 Additional Information ..............80 Power-On Configuration Key Sequences ............80 Power-On Password ..................81 Birdie Frequencies ...................82 FCC Notice ......................83 Scanning Legally ....................83 Care ........................84 Service and Repair ...................84 Specifications ....................85 Troubleshooting....................89 Reset Global Parameters to Factory Defaults ..........90 Initializing the Scanner to Factory Defaults ...........92 Appendix A: Search Bands .............
-
Page 6: Understanding Your Scanner
Understanding Your Scanner Understanding the Function Keys Five Way Pushbutton Pad t p q u Navigates while browsing objects and menus. t u Navigates through Scan Lists. Programmable LED SEL (Select) Activates data entry fields and toggles Scan List selection in object menus. FUNC + SEL to activate context sensitive help menus. - Page 7 Understanding your Scanner 1-0 / A-Z Inputs a number or character. Use while scanning to select Scan Lists 1-10 on/off. Press after FUNC to select Scan List 11-20 on/off. • / DELAY Inputs decimal point (frequency input), space (text input) or hyphen (Trunking ID input).
-
Page 9: Understanding The Display
Understanding your Scanner Understanding the Display The LCD provides important information about the status of the radio. The top row of icons provide status information. Beneath this row, there are 4 rows of 16 characters each that provide alphanumeric information such as frequencies and object names. The last row usually contains softkeys for F1, F2, and F3. -
Page 10: Understanding Object Oriented Scanning
Understanding your Scanner Understanding Object Oriented Scanning Your PRO-652 scanner utilizes an entirely new method of programming called Object Oriented Scanning. In Object Oriented Scanning, all “Scannable Objects” are treated the same. Scannable Objects include talkgroups on trunked radio systems, conventional non-trunked frequencies, limit searches, service searches, and Signal Stalker II configurations. - Page 11 Understanding your Scanner with their own attributes. Scannable Objects all exist at the same level or hierarchy within the scanner—no single type of Scannable Object is more important than another, and Scannable Objects do not have dependencies on or links to other Scannable Objects in order for them to function properly.
- Page 12 Understanding your Scanner managed automatically by a special computer, called a controller, or by other specialized hardware. If you want to monitor a talkgroup on a trunked radio system, you must store that talkgroup’s parameters in a TGRP object. TSYS – Trunking System Object A TSYS is a special object type that is used when creating TGRP objects.
-
Page 13: Scanner Features
Understanding your Scanner Scanner Features Object Oriented User Interface is designed for ease of use, yet is powerful enough to satisfy the most sophisticated experts. Common data entry, browsing and control methods are used for non-trunked conventional channels, trunking talkgroups, search configurations and Signal Stalker II setups. - Page 14 P25 NAC Functionality – P25 Network Access Code (NAC) is used to provide selective squelch operation on conventional digital channels. Your PRO-652 will detect the NAC that is being used on a P25 conventional digital channel, and allow you to program NAC codes to block transmissions that do not have a matching NAC, including analog traffic on the same frequency.
- Page 15 High speed scanner programming cables are available at your local RadioShack store or RadioShack.com. Real-time Signal Strength Indicator – Shows relative strength of received signals. IMPORTANT NOTICE: The PRO-652 Digital Scanner will not receive encrypted radio communications, or radio transmissions that utilize ProVoice digital modulation.
-
Page 16: Scanner Setup
Scanner Setup Scanner Setup Installing Your Scanner You can mount your scanner in your vehicle or use it as a base station. Setting up a Mobile Base You can place your scanner on a desk, shelf, or table to use it as a base station. -
Page 17: Dashboard Installation
Scanner Setup 3. Attach the mounting bracket to your vehicle’s surface using the supplied screws and lockwashers. Note: Do not use the rubber feet if you are mounting the bracket with screws. Dashboard Installation If you are unsure how to install your scanner in your vehicle, consult your automobile manufacturer, dealer, or a qualified installer. -
Page 18: Connecting The Antenna
Scanner Setup To remove your scanner from the DIN sleeve, insert the two keys straight into the scanner’s front panel and pull the scanner out. Connecting the Antenna You must install an antenna before you can operate the scanner. The supplied telescopic antenna helps your scanner receive strong local signals. -
Page 19: Powering Your Scanner
Scanner Setup Powering Your Scanner You can power your scanner from a wall outlet, or from your vehicle’s battery. You must use a power source that supplies 12V DC and delivers at least 600 mA. Its center tip must be set to positive and its plug must fit the scanner’s DC 13.8V jack. -
Page 20: Vehicle (Direct)
Scanner Setup Vehicle (Direct) 1. Disconnect the cable from your vehicle battery’s negative (–) terminal. 2. Ground the black wire of the supplied DC power cord to your vehicle’s chassis. The grounding screw must make complete contact with your vehicle’s metal frame. 3. -
Page 21: Transferring Data To Or From Another Scanner Or Pc
Transferring Data To or From another Scanner or PC You can transfer the programmed data to and from another PRO-652 or PRO-651 scanner using a connecting cable which has 1/8-inch (3.5mm) stereo (TRS) phone plugs on both ends (not supplied). See “Cloning”... -
Page 22: Squelch And Attenuator
Scanner Setup Squelch and Attenuator The squelch and attenuator control the scanner sensitivity. If squelch is set too high, the scanner may scan slowly or stop on noise or silence. If this happens, adjust squelch using the steps above, or for conventional channels, set the correct subaudible squelch mode. -
Page 23: Basic Settings
Scanner Setup Basic Settings The Global menu stores all of the radio-wide settings used by the scanner. The Global menu allows you to “tweak” these settings to your liking. The default settings will work fine for most users, but you may want to use the Global menu to personalize the radio to suit your individual tastes. -
Page 24: Delay
Scanner Setup 3. Press p or q to scroll to the desired parameter. Note: Press FUNC p or FUNC q to jump to the top or bottom of the menu. 4. Press t or u to select options for selected field. 5. -
Page 25: Turning The Key Tone On Or Off
Scanner Setup Turning the Key Tone On or Off Each time you press any of the scanner’s keys, the scanner beeps. To turn the scanner’s key tone on or off: 1. Press PROG for Program Mode. 2. Press softkey to access Global menu. GLOB 3. -
Page 26: Creating Scannable Objects
Creating Scannable Objects Creating Scannable Objects Understanding Object Menus When you turn on your scanner for the first time, the scanner is in Program Mode for you to create your first object into memory. If you do not see this screen, press PROG. Press NEW to Create objects EDIT... - Page 27 Creating Scannable Objects 2. For the purpose of this explanation, press F2, the softkey. CONV 3. The Conventional Channel menu opens. Indicates cursor location in menu Menu name CONV Channel Scan Lists: Active menu item Freq: 25.000000 Next menu item (Scroll down for more Save Exit...
-
Page 28: Conventional Channel Objects
Creating Scannable Objects • If you press the q key on the bottom of the 5-way pushbutton pad, you can scroll down and see all of the parameters that can be specified for the object. • Pressing FUNC p or FUNC q will jump to the top or bottom of a menu, respectively. -
Page 29: Creating A Conv Object
Creating Scannable Objects Note: When MODE is set for Auto, the scanner will automatically select the default mode based on the frequency you enter. In most cases it will not be necessary to change MODE. We also recommend labeling your CONV object by giving it a name in the TAG field. -
Page 30: Trunking Talkgroup Objects (Tgrp)
Creating Scannable Objects • When you press a key, the associated letters appear on the screen. Press the corresponding number. For example, when you press ABC, appear on the display. To select press A, B, 1. To select press 2. To select press 3. -
Page 31: Trunking System (Tsys) Objects
Creating Scannable Objects Trunking System (TSYS) Objects The first time you make a TGRP for a particular trunked radio system, you must also create a TSYS object that contains the system parameters associated with that trunked radio system. Once you create a TSYS, you can use it over and over again without having to re-enter all of the system data. - Page 32 Creating Scannable Objects 4. Press p or q to scroll through the talkgroup object parameters until the cursor is at TSYS: 5. Press SEL. > < Trunked System Type: MOT 800/900 Tag: System Save Exit Dflt 6. The cursor should be on TYPE:.
- Page 33 Creating Scannable Objects 15. Press q to scroll to ID:. By default, the trunking talkgroup ID is set to Wildcard To change the ID, press the number keys to enter the specific talkgroup ID. Press ENT or DONE softkey to store the ID. See “Talkgroup Notes”...
-
Page 34: Duplicate (Dupe)
Creating Scannable Objects Basi Wildcard Talkgroup Notes: • Wildcard is a special type of TGRP object that allows you to Befor monitor all talkgroup call traffic on the associated trunked radio scann system. are m • Wildcard TGRP objects allow you to quickly find and store new 1. -
Page 35: Scanning
Scanning Basic Scanning Operation Before the scanner can begin to scan, you must have created scannable objects. Your scanner will scan any scannable objects that are members of enabled Scan Lists and are not locked out. 1. Press SCAN to start scanning. Flashing T indicates scanner is receiving control channel data from a trunked radio system... -
Page 36: Manual Mode
Scanning Manual Mode In Manual Mode, you can browse through the stored objects in your scanner and select an object to monitor. 1. Press MAN during scanning to enter Manual Mode. 2. Press p or q to scroll through the objects assigned to the current Scan List. - Page 37 Scanning The following screen appears when the scanner is stopped on a talkgroup channel while scanning.
-
Page 38: Organizing Objects
Organizing Objects Organizing Objects Object Numbering Your PRO-652 is different from other types of scanners in how it stores your Scannable Objects in memory. Instead of fixed channels and banks, objects are stored in the first available block of free memory and an Object ID is assigned. The Object ID is the “address”... -
Page 39: Grouping Objects With Scan Lists
Organizing Objects Grouping Objects with Scan Lists By default, new objects are automatically assigned to Scan List 01. You can divide these objects into separate Scan Lists so that you can easily enable or disable groups of objects depending on what you want to scan. -
Page 40: Changing Scan List Membership
Organizing Objects By application: You can group objects by their application. For example, you may wish to place law enforcement related objects for your area in one Scan List, fire and rescue objects in another, and business related objects in yet another Scan List. By Favorites: The Favorites (FAV) Scan List is a powerful tool that can be used to quickly narrow (or expand) your scanning profile. -
Page 41: Naming Scan Lists
Organizing Objects 6. Press u to scroll through the Scan Lists. 7. Press SEL to select for the desired scan list item. The asterisk (*) next to the Scan List number indicates that the object is a member of that Scan List. 8. -
Page 42: From Global Settings Menu
Organizing Objects Scan List 11-20 Press FUNC, then press a number key, i.e., press FUNC 3 to toggle the status of Scan List 13. Note: If you enable a Scan List that has no assigned objects, the number for that Scan List will flash in the display while the scanner is scanning. -
Page 43: Favorite List
Organizing Objects 4. Press PROG. 5. Press softkey. EDIT 6. Press softkey to view object menu. CURR 7. Scroll down to Scan Lists: 8. Press u to scroll through the Scan Lists. 9. Press SEL to select the desired scan list item. The asterisk (*) next to the Scan List number indicates that the object is a member of that Scan List. -
Page 44: Setting The Default Scan List
Organizing Objects Setting the Default Scan List By default, your scanner will store all new objects, and objects found during Search, Tune, and Stalker as mapped to Scan List 01. You can easily change the default Scan List to any Scan List you specify, including the special FAV and Skywarn Scan Lists. -
Page 45: Searching For Objects Using Find
Organizing Objects To delete a TSYS using the FIND feature: See “Searching for Objects using FIND” below. 2. Once the TSYS has been located, press the PROG key, then press FUNC CLR. 3. Press the softkey at both warnings to delete the TSYS. WARNING: All TGRPs associated with the deleted TSYS will be lost. - Page 46 Organizing Objects 3. Press softkey. FIND 4. Press softkey. The scanner finds the first locked out L/Out object. 5. Press to toggle lockout status. L/Out 6. Press softkey when finished. EXIT or Press softkey to edit object menu for the selected object. EDIT or Press softkey to find the next locked out object.
-
Page 47: Filtering By Object Type
Organizing Objects or Press MAN to begin monitoring the object in Manual Mode. or Press PROG to exit FIND and execute programming tasks at the selected object position. Note: FIND keeps the last search text you specified stored for subsequent FIND operations. Filtering by Object Type When browsing objects in Program Mode, you can filter the objects that are displayed by their type. -
Page 48: Temporary Lockout
Organizing Objects Temporary Lockout Temporary lockout locks out an object until the scanner is turned off. When the scanner is powered on again, all objects that have been temporarily locked out are restored. To temporarily lockout an object: 1. When the scanner stops on an object, press L/OUT. In Manual Mode or Program Mode, press p, q, t or u to select an object. -
Page 49: Change L/Out Key Function
Organizing Objects To unlock a permanent lockout: In Manual Mode or Program Mode, press p, q, t or u to select an object. 2. Press FUNC, then L/OUT. Change L/OUT Key Function By default, the L/OUT key activates temporary lockout when pressed. -
Page 50: Talkgroup Lockout
Organizing Objects 5. Scroll to an empty spot and enter any frequency you wish to manually add to the list. 6. To clear the entire list, press FUNC, then the softkey. Talkgroup Lockout Talkgroup lockout is similar to search lockout, as it allows you to lockout undesired talkgroups while searching for new talkgroup activity with wildcard TGRP objects. -
Page 51: Object Searches
Object Searches Object Searches A powerful feature of your PRO-652 is the ability to define different types of frequency searches and process them while scanning. Frequency searches are just another type of Scannable Object in the hierarchy of the radio’s memory organization, so they can be manipulated and scanned in the same manner as conventional channels and trunking talkgroups. - Page 52 Object Searches See “Appendix B: Detailed Menu Reference: LMIT Menu” on page 108 for detailed menu information. To create a new LMIT object: 1. Press PROG for Program Mode. 2. Press softkey. 3. Press softkey to view available Search types. SRCH 4.
-
Page 53: Service Search Object (Srvc)
Object Searches 3. Press PAUSE to hold on the active frequency. Press PAUSE again to resume. Note: It can take some time to process all of the frequencies in a LMIT search. You can experiment with different size frequency ranges to find a LMIT search setup that does not interfere excessively with scanning of other object types. - Page 54 Object Searches To create a new SRVC object 1. Press PROG for Program Mode. 2. Press softkey, then press softkey to view the available SRCH Search types. 3. Press the softkey. SRVC 4. Press q to scroll to the field. Srvc: 5.
-
Page 55: Signal Stalker Ii Object (Stlk)
Object Searches Signal Stalker II Object (STLK) A Signal Stalker Object (STLK) stores the parameters necessary for the radio to rapidly sweep a range of frequencies for strong signals from nearby transmitters. A STLK object can be used for standalone operation—the radio just sweeps and stops when activity is detected, or for stalking that is performed while the radio is scanning. - Page 56 Object Searches 2. Press SEL to select . An asterisk (*) indicates the sub band is enabled. 3. Press p or q to select to name your STLK object. Tag: 4. Use the number keys to enter a name. See “Appendix C: Text Entry Appendix C: Text Entry and QuickText”...
-
Page 57: Dedicated Searches
Dedicated Searches Dedicated Searches Your scanner provides fast access to dedicated frequency search modes that allow you to execute searches or run Signal Stalker II without having to go through the process of setting up and saving a search object. T his is handy for those times where you need to run a search quickly. -
Page 58: Dedicated Srvc Search
Dedicated Searches 5. Press the softkey to add a found frequency to the lockout FrL/O list. 6. Press the softkey to create a new CONV object using the STOR found frequency. Dedicated SRVC Search Your scanner’s dedicated SRVC search modes provide you with the ability to instantly access each of the scanner’s service search ranges without creating a new SRVC object. - Page 59 Dedicated Searches • Aircraft - Searches civilian and military air frequencies. Freq. (MHz) Band 108-118 Navigation 118-137 Civilian Voice 138-150 Military Voice (excludes 2m Amateur) 225-400 Military Voice • Ham - Searches amateur radio frequencies. Freq. (MHz) Band 28.0-29.7 10m Band 50-54 6m Band 144-148...
-
Page 60: Dedicated Signal Stalker Ii
Dedicated Searches Dedicated Signal Stalker II Dedicated STLK mode lets you access and run Signal Stalker II easily and quickly. In Manual, Program or Scan mode, press FUNC SCAN to access the Signal Stalker II dedicated mode. Note: When a signal is being received, the softkey (F1) Band changes to... -
Page 61: Dedicated Tune Search
Dedicated Searches Public Safety sub bands: Freq. (MHz) Band 33.4-46.5 VHF Low Band 151-170 VHF High Band 453-467 UHF Band 764-806 700 MHz Band 851-869 800 MHz Band Dedicated TUNE Search Your scanner’s dedicated TUNE mode provides you with the ability to quickly enter any frequency and monitor that frequency for transmissions, or search up or down from that frequency for activity. - Page 62 Dedicated Searches By default, TUNE mode is paused when first activated. The f 2. Press PAUSE to begin searching from the current frequency. Trunk 3. Press p or q to change the search direction. Moto baud or Press softkey to add a found frequency to the lockout list. chan FrL/O or Press the...
-
Page 63: Tune Led
Dedicated Searches The following information is displayed for each trunking mode: Trunked Mode Analysis Display Motorola 3600 qq% SID:ssss Stt baud control qq = decoding quality of the control channel data, SID = System channel ID, and S = Site Number P25 9600 BPS qq% Nnnn W:wwwww Sys:sss Rrr Stt... -
Page 64: Weather Scanning
Weather Scanning Weather Scanning To ac 1. P Note: The weather alert feature is an extremely sensitive, high 2. P quality receiver of weather frequencies. However, the included fi antenna is optimized for general purpose scanning. If you use this 3. -
Page 65: Same Standby Mode
Weather Scanning To activate Weather Priority Mode: 1. Press WX. 2. Press p or q to look for other weather radio transmitters and find the strongest weather radio transmitter for your location. 3. Press PRI. SAME Standby Mode SAME Standby Mode monitors the specified weather frequency silently, waiting to receive a Specific Area Message Encoding (SAME) alert that corresponds with a SAME location code that you have previously entered. - Page 66 Code: 7. Press the number keys to enter a SAME code. Note: The PRO-652 supports entry of Extended SAME codes, which can include numbers and letters. The text entry mode is used to enter both numerical SAME codes and extended SAME codes.
- Page 67 Weather Scanning 11. Scroll to . You can specify different alarm sounds for this Alarm: SAME entry. We recommend that you use the default setting here for general purpose weather alerting. 12. Scroll to . Default is off. Lockout is a special purpose Lockout: parameter that can be used to lock out individual event or area codes.
-
Page 68: Activating Same Standby Mode
Weather Scanning Activating SAME Standby Mode After you have entered your desired SAME codes, you can activate the SAME Standby Mode to begin standby operation. The radio will remain silent until a SAME transmission is received with a code that matches one that you have stored. -
Page 69: Scanner Memory
Scanner Memory V-Scanner Storage Your PRO-652 features two types of memory storage: • Main memory is used to store programming that is used for everyday monitoring and scanning. • Virtual Scanner (V-Scanner) memory is used to store complete copies of your scanner’s main memory for later recall. V- Scanner includes objects, global settings, and dedicated search configurations. -
Page 70: Using V-Scanners
Scanner Memory Using V-Scanners You can save active scanner configurations (called “working” or “main” memory) to a V-Scanner storage folder for later use. Then recall the stored scanner configurations from a V-Scanner storage folder to main memory when you want to use them. When you recall a configuration from a V-Scanner storage folder and use it in main memory, any changes you make while using the configuration will not automatically be transferred to the... -
Page 71: Loading A V-Scanner Folder To Main Memory
Cloning You can transfer the programmed data to and from another PRO-652 (or PRO-651) scanner using a connecting cable which has -inch stereo phone plugs on both ends (not supplied). -
Page 72: Memory Report
Scanner Memory 4. On the SOURCE radio, scroll to then press SEL Clone Send: when you are ready to send data from your SOURCE radio to the TARGET radio. Both working memory and global settings are transferred. Note: The contents of working memory on the TARGET radio will be overwritten immediately when SEL is pressed on the SOURCE radio. -
Page 73: Advanced Settings
Advanced Settings Advanced Settings Priority Scan Priority Scan operation is available for CONV and TGRP objects. When Priority Scan is active, increased priority is given to objects that have their Priority mode set to Turning Object Priority On or Off When the scanner stops on the object while active, press PRI to select Object Priority on or off. -
Page 74: Conv Priority Scan
TGRP calls. Additionally, your PRO-652 decodes the subaudible priority data that is present on analog Motorola talkgroup calls (3600 baud control channel systems only), and will switch to a priority talkgroup when the data for that talkgroup is found in the subaudible priority data. -
Page 75: Audible Alarms And The Alert Led
Global SAVE settings menu. Audible Alarms and the Alert LED Your PRO-652 features an Alert LED with audible alarm capability that allows you to set different visual and audible notifications for the different types of objects you create. - Page 76 You may notice these variations when using the White LED color setting (LED COLOR: 7), or when comparing one PRO-652 to another. You can compensate for these slight variations by fine-tuning the Red/Green/Blue (RGB) LED settings for each color. See the COLOR settings in the GLOB menu in “Appendix B: Detailed Menu Reference: GLOB Menu”...
-
Page 77: Multi-Site Mode On Networked Systems
Advanced Settings • None, Chirp, Hi-Lo, Alert, Ring, 2-Chirp, Fast Hi-Lo, Alarm: DTMF # are used to set audible alarms that play each time activity is found on the object. 2. Press t or u to select the desired option. 3. - Page 78 Advanced Settings To activate Multi-site mode on a Motorola or P25 networked system: 1. Press PROG to enter Program Mode. 2. Press p, q, t or u to navigate to a talkgroup on the networked multi-site system. 3. Press softkey, then softkey.
-
Page 79: Ltr Home Repeater Automove
Advanced Settings You should experiment with the different Multi-site modes and the threshold settings to find a combination that works best for your location. Notes: • Multi-site functionality is not available in EDACS or LTR trunking. • Threshold settings are only available when Multi-Site Roam is selected. -
Page 80: Additional Information
The following table lists the power-on key sequences available in the PRO-652. Unless otherwise specified, each sequence is invoked by pressing and releasing each key in sequence, one at a time. The first key must be pressed while the Welcome/Owner screen is being... -
Page 81: Power-On Password
Additional Information Power-On Password Setting a power-on password can prevent anyone other than you from using this scanner. tion To set the power-on password 1. Press PROG to enter Program Mode. 2. Press softkey. GLOB 3. Scroll to then press SEL key. Set password, 4. -
Page 82: Birdie Frequencies
Additional Information 4. The confirmation menu for the power-on password setting appears. Press softkey. 5. Enter 0000 in the password setting menu and press softkey. Note: In the initial password setting menu characters “0000” are always displayed. Enter 0000 while these characters “0000” are displayed If you forget the password If you forget your password, you must initialize the scanner to be... -
Page 83: Fcc Notice
Additional Information FCC Notice This equipment has been tested and found to comply with the limits for a scanning receiver, pursuant to Part 15 of the FCC Rules. These limits are designed to provide reasonable protection against harmful interference in a residential installation. This equipment generates, uses and can radiate radio frequency energy and, if not installed and used in accordance with the instructions, may cause harmful interference to radio communications. -
Page 84: Care
Additional Information • Pager transmissions • Any scrambled or encrypted transmissions According to the Electronic Communications Privacy Act (ECPA), as amended, you are subject to fines and possible imprisonment for intentionally listening to, using, or divulging the contents of such a transmission unless you have the consent of a party to the communication (unless such activity is otherwise illegal). -
Page 85: Specifications
Additional Information Specifications Frequency Coverage 25.000-26.960 MHz ............(in 10 kHz steps/AM) 26.965-27.405 MHz ............(in 10 kHz steps/AM) 27.410-29.505 MHz .............. (in 5 kHz steps/AM) 29.510-29.700 MHz ............... (in 5 kHz steps/FM) 29.710-49.830 MHz ............. (in 10 kHz steps/FM) 49.835-54.000 MHz ............... - Page 86 Additional Information 940.000-960.000 MHz ............(in 6.25 kHz steps/FM) 1240.000-1300.000 MHz ..........(in 6.25 kHz steps/FM) *Excludes frequencies utilized by the Cellular Mobile Radiotelephone Service: 824-848.9875 MHz and 869-893.9875 MHz Working Memory 1800 programmed objects using flexible “Scannable Object” system. Program and scan conventional channels, trunking talkgroups, limit searches, service searches, and Signal Stalker II configurations as “Scannable Objects”...
- Page 87 Additional Information 3rd IF ......................455 kHz (The 3rd LO uses the low side of the 2nd IF) Frequency Range VHF Low ..............25.00000 - 54.00000 MHz VHF Aircraft ............108.00000 - 136.99166 MHz VHF High ..............137.00000 - 174.00000 MHz ...................
- Page 88 Additional Information Trou Memory backup No backup battery required, utilizes non-volatile EEPROM memory. Power AC Adapter (Class 2; 12V DC; 600 mA; center tip set to positive). Scan powe Specifications are typical; individual units might vary. Specifications and depictions are subject to change and improvement without notice. The k not w Scan...
-
Page 89: Troubleshooting
Additional Information Troubleshooting Problem Cause Solution Scanner won’t The AC adapter or DC Be sure the adapter’s barrel plug is power on. adapter/cable is not fully plugged into the DC 13.8V jack. connected. The keypad does The scanner may need Follow steps in “Initializing the not work. -
Page 90: Reset Global Parameters To Factory Defaults
Additional Information Problem Cause Solution Poor or no Weak signals from Reposition radio for best reception. reception. distant stations. Attenuator in use on Check performance with and weak signals. without attenuator activated, use setting with best reception. Strong signal over- Check performance with and load from nearby without attenuator activated, use... - Page 91 Additional Information 1. Turn off the scanner, then turn it on again. The scanner briefly displays the DSP boot version, and then the Welcome/Owner screen is displayed. 2. Press 0 while the scanner is displaying the Welcome/Owner screen. The scanner displays: System Tests: Select a Test...
-
Page 92: Initializing The Scanner To Factory Defaults
Additional Information Initializing the Scanner to Factory Defaults If initializing the global parameters to factory defaults does not resolve your problem, you may wish to initialize the entire scanner to factory defaults. This operation will result in the clearing of your programmed data and the loss of any custom changes you have made to the radio’s global parameters. - Page 93 Additional Information 4. Press ENT. The scanner displays: File System Initializing the Initialized to File System Defaults. Please Wait..Press any key. 5. Press any key on the keypad to proceed. The scanner displays: GLOB EEPROM area Initialized to defaults. Press any key.
-
Page 94: Appendix A: Search Bands
Search Bands Appendix A: Search Bands Aircr All Sub Bands Searc Group. Freq. (MHz) Band 25-54 VHF Low Grou 108-137 VHF Aircraft 137-174 VHF High 216-300 220 MHz Commercial/ Amateur 300-406 UHF Military Air 406-470 470-512 UHF-T 764-806 700 MHz 806-869 800 MHz Searc... -
Page 95: Aircraft Band
Search Bands Aircraft Band Searches civilian and military air frequencies. Group. Freq. (MHz) Band 108-118 Navigation 118-137 Civilian Voice 138-150 Military Voice (excludes 2m Amateur) 225-400 Military Voice Ham Bands Searches amateur radio frequencies. Group. Freq. (MHz) Band 28.0-29.7 50-54 144-148 222-225 1.25cm... -
Page 96: Appendix B: Detailed Menu Reference
Detailed Menu Reference Appendix B: Detailed Menu Reference • Context sensitive help is available for every menu parameter. Press Cont FUNC SEL to view help for the selected parameter. Press SEL to exit help. • Each menu parameter includes a softkey, which restores Dflt the factory default setting for that parameter. - Page 97 Detailed Menu Reference GLOB Options Description Parameter Contrast Sets LCD contrast. Use keys on 5-way pushbutton pad. Owner Enters sub menu to set Welcome Message text display. Clone Send Press SEL to send data using clone mode. Alert Mode Both, Tone, Controls the Alert LED and Audible Alarm Light, Off...
- Page 98 Detailed Menu Reference GLOB Options Description Parameter Clear Hits Press SEL to clear all hit counters. Hit Counts Yes or No Turns the hit counter feature on or off. Dflt ScanList 0-22 Sets default destination Scan Lists for new objects and CONV Stor from Searches, Signal Stalker II, and Tune.
- Page 99 Detailed Menu Reference GLOB Options Description Parameter LCD BlinkOff 1-250 x 10 mS For alternating text displays, sets the display time for the secondary display element. LCD BlinkOn 1-250 x 10 mS For alternating text displays, sets the dis- play time for the primary display element. LED BlinkOff 1-250 x 10 mS When the Alert LED setting for an object is...
- Page 100 Detailed Menu Reference GLOB Options Description Parameter The C TLO=FUNC L/O On or Off Controls the operation of the L/OUT key. objec When Off, pressing L/OUT performs a Temporary Lockout of the selected object. When On, pressing L/OUT performs a Permanent Lockout of the selected object.
-
Page 101: Conv Menu
Detailed Menu Reference CONV Menu The CONV menu is used when creating new Conventional Channel objects, or editing existing Conventional Channel objects. ect. CONV Options Description Parameter ect. Scan Lists On or Off for Sets membership in Scan Lists. Use keys both Scan Lists 1-22 to scroll through Scan Lists. - Page 102 Supe Backlight On, Off or Flash Controls whether the backlight should be on or flashing while the object is active. “Off” setting is ignored by the PRO-652. Audi Alarm None, Sets the Audible Alarm for the CONV object. When an Audible Alarm is selected,...
- Page 103 Detailed Menu Reference CONV Options Description Parameter Atten On or Off When on, applies 20 dB of attenuation to all transmissions on the CONV channel. Useful in areas where interference from nearby strong signals is present. Delay On or Off Controls whether a Delay is used to wait for reply traffic after a transmission on the CONV channel.
-
Page 104: Tgrp Menu
Detailed Menu Reference TGRP Menu The TGRP menu is used when creating new Trunking Talkgroup Latch objects, or editing existing Trunking Talkgroup objects. TGRP Options Description Parameter Scan Lists On or Off for Sets membership in Scan Lists. Use keys Scan Lists 1-22 to scroll through Scan Lists. - Page 105 Detailed Menu Reference TGRP Options Description Parameter Latch LED On or Off Normally the Alert LED is active only while the object is receiving a transmission. When Latch is on, the Alert LED will remain lit after the transmission is complete, unless overridden by a subsequent object that is also using the Alert LED.
-
Page 106: Tsys Menu
Detailed Menu Reference TSYS Menu The TSYS menu is used when creating new Trunking System objects, Narro or editing existing Trunking System objects. TSYS Options Description Parameter Type Sets the trunking system type. Choose MOT Audi 800/900, 800/900 if the system is a Motorola 800 or 900 MHz analog or digital trunked radio system that Dwel uses the 3600 baud control channel. - Page 107 Detailed Menu Reference TSYS Options Description Parameter ects, Narrow FM Yes or No Use Yes when the system is known to use Narrow FM modulation. Most 900 MHz analog trunked radio systems utilize NFM modulation. This set- ting has no effect on digital trunked radio system performance.
-
Page 108: Lmit Menu
Detailed Menu Reference TSYS Options Description Parameter Threshold Lo 1-99 Available When Multi-Site is set to ROAM. Sets the control channel decode % threshold for a site to be considered out of range, which will begin the process of looking for a new site. T Tables Default, For Motorola and P25 systems only - sets custom... - Page 109 Detailed Menu Reference LMIT Options Description Parameter s the LED Color Sets LED color to 0-7 as defined in the GLOB menu. By default, 0=LED Off, 1=Red, 2=Yellow, 3=Green, 4=Cyan, 5=Blue, 6=Magenta, 7=White. Latch LED On or Off Normally the Alert LED is active only while s SEL the object is receiving a transmission.
-
Page 110: Srvc Menu
Detailed Menu Reference LMIT Options Description Parameter Zeromatic On or Of When on, enhances the scanner’s ability to Grou lock on to the actual center frequency of a search hit instead of an adjacent frequency. Search Dir Up or Down Sets search direction used when LMIT object is active. - Page 111 Detailed Menu Reference SRVC Options Description Parameter ty to Groups Use to scroll, Toggle search groups when Pub Safety, of a SEL to toggle Aircraft and Amateur service searches are ency. on/off used. See Appendix A on page 94 for Search Band Group frequencies.
- Page 112 Detailed Menu Reference STLK SRVC Options Description Parameter The S EXPERT BELOW or ed Modulation Auto, AM, FM, Modulation setting for the SRVC search. In most cases Auto will work fine. Use AM to override and force AM modulation, FM to force FM modulation, NFM to force narrow Scan FM modulation.
-
Page 113: Stlk Menu
Detailed Menu Reference STLK Menu Menu The STLK menu is used when creating new Signal Stalker II objects, or editing existing Signal Stalker II objects. h. In M to STLK Options Description M to Parameters rrow Scan Lists On or Off for Sets membership in Scan Lists. - Page 114 Detailed Menu Reference STLK Options Description Parameters Backlight On, Off or Flash Controls whether the backlight should be on, off or flashing while the object is active. Alarm None, Chirp, Sets the Audible Alarm for the STLK object. When an Audible Alarm is selected, the select- Hi-Lo, Alert, ed alarm will play anytime the scanner stops Ring, 2-Chirp,...
-
Page 115: Appendix C: Text Entry And Quicktext
Text Entry Appendix C: Text Entry and QuickText Your scanner uses a simple text entry method that allows entry of all uppercase and lowercase letters of the alphabet, numbers, and punctuation symbols. Your scanner also features QuickText, which allows you to store up to 10 commonly used text items for instant lect- recall while editing alphanumeric fields. - Page 116 Text Entry • For punctuation, FUNC accesses a second set of punctuation marks. The shift action of FUNC remains active until it is pressed again. • Press t or u to move the cursor to the desired location in edit fields.
-
Page 117: Quicktext
Text Entry QuickText ssed QuickText allows you to store up to 10 commonly used text items for instant recall while editing alphanumeric fields. For example, as you search, store, and name new CONV or TGRP objects, you may find that you type the same words over and over, such as POLICE, FIRE, SHERIFF, STATE, CITY, COUNTY, etc. -
Page 118: Customizing Quicktext
Text Entry Customizing QuickText To edit the QuickText words: 1. Press PROG, then the softkey. GLOB 2. Press p or q to scroll to and find the QuickText storage QTXT location that you wish to change. 3. Press uto edit the QuickText entry. 4. -
Page 119: Index
Index Index Alarms Global Setting.........................97 Object Setting ..............75, 99, 102, 105, 109, 111, 114 Weather Alarm ........................65 Alert LED Global Setting.........................97 Object Setting ..............75, 99, 102, 104, 108, 111, 113 Antenna ........................8, 18 Troubleshooting ......................90 Weather Scanning ......................64 Attenuator Global Settings .......................97 Key .............................6 Setting ..........................22... - Page 120 Index Dashboard ........................17 Dedicated Searches Defined ..........................57 LMIT ..........................57 Signal Stalker II .......................60 SRVC ..........................58 TUNE ..........................61 Tune LED ........................63 Delay Key .............................7 Object Delay .................103, 105, 109, 112, 114 Search Delay ........................99 Setting ..........................24 Deleting Objects ......................44 Dim ..........................
- Page 121 Index Global Attenuator Key .............................6 Help Menu........................23 Key .............................6 Hit Counters ....................... 74 Input Character ...........................7 Decimal Point ........................7 Number ..........................7 Text ..........................29, 115 Installing ........................16 Keylight Setting ..........................25 Key Tone ........................25 LCD Contrast ......................24 Legal Scanning ......................83 Limit Search Creating ..........................51 Dedicated LMIT Search ....................57...
- Page 122 Index Manual Mode ......................36 Memory Object Numbering ......................38 Report ..........................72 Saving Main Memory .....................70 Scan Lists .........................39 V-Scanner ........................69 Motorola Custom Channel Tables ....................108 Display Information ......................63 Dwell Time ........................107 Fleet Map ........................108 Multi-Site .........................77, 107 Priority Talkgroups ......................74 Show CC Info ........................100 Trunking System Type ....................106 Networked Systems ....................
- Page 123 Index Key .............................6 Tune Mode ........................62 Power ........................8, 19 Power-On Configuration .................... 80 Power-On Password ....................81 Priority CONV Setting .......................101 Global Setting......................98, 99 Key .............................7 Priority Scan ........................73 TGRP Setting ........................104 Weather Priority Mode....................64 Programming CONV Objects ........................29 PROG Key .........................6 Storing Memory ......................69 TGRP Objects .........................30...
- Page 124 Index Legally ..........................83 Priority ........................73, 98 Weather ...........................64 Wildcard ..........................35 Searching Dedicated Searches .......................57 Search Mode Key ......................7 For Birdie Frequencies ....................82 For Objects ........................45 Frequency Searches .......................51 Limit Search ........................51 Lockout ..........................50 Search Bands ........................94 Service Search ........................53 Signal Stalker II .......................55 Service and Repair .....................
- Page 125 Index Priority Scan ........................74 Types..........................33, 34 Text Entry ......................... 115 Text Tags .........................29 Transferring Data ....................... 21 Troubleshooting ......................89 Trunking System Object Creating ..........................31 Detailed Menu Reference ....................106 Entering TSYS Menu ....................104 Tune Dedicated Tune Search ....................61 Key .............................7 Tune LED ........................63, 98 V-Scanners About..........................69...
- Page 126 Limited Warranty This product is warranted by RadioShack against manufacturing defects in material and workmanship under normal use for one (1) year from the date of purchase from RadioShack company- owned stores and authorized RadioShack franchisees and dealers. EXCEPT AS PROVIDED HEREIN, RadioShack MAKES NO EXPRESS WARRANTIES AND ANY IMPLIED WARRANTIES, INCLUDING THOSE OF MERCHANTABILITY AND FITNESS FOR A PARTICULAR PURPOSE, ARE LIMITED IN DURATION TO THE DURATION OF...
- Page 127 parts and products may be used in the performance of warranty service. Repaired or replaced parts and products are warranted for the remainder of the original warranty period. You will be charged for repair or replacement of the product made after the expiration of the warranty period.
- Page 128 RadioReference.com Your Complete Reference Source www.radioreference.com RADIOREFERENCE.COM IS THE WORLD’S LARGEST RADIO COMMUNICATIONS WEBSITE, WITH A COMPLETE FREQUENCY AND TRUNKED RADIO SYSTEM DATABASE. WEBSITE, WITH A COMPLETE FREQUENCY AND TRUNKED RADIO SYSTEM DATABASE. COME SEE WHAT FREE SERVICES WE HAVE TO OFFER TO THE COMMUNITY: COME SEE WHAT FREE SERVICES WE HAVE TO OFFER TO THE COMMUNITY: The RadioReference Database The RadioReference Database...
Need help?
Do you have a question about the PRO-652 and is the answer not in the manual?
Questions and answers
how can git rid of heap error on radio shack 652//thanks
To fix the heap error on the RadioShack PRO-652, perform a reset and reprogram the scanner. Follow these steps:
1. Reset the Scanner:
- Turn off the scanner.
- Press and hold the PROG, FUNC, and GLOBAL keys.
- Turn the scanner back on while holding these keys.
- Release the keys when the reset prompt appears.
2. Reprogram the Scanner:
- If the issue persists after resetting, re-enter the frequencies and settings manually or using programming software.
3. Check for Corrupt Data:
- The heap error may be caused by a corrupt frequency or object.
- Clear all stored data and reprogram carefully.
4. Cycle Power:
- If the scanner becomes unresponsive, turn it off and back on to resume normal operation.
Following these steps should resolve the heap error.
This answer is automatically generated