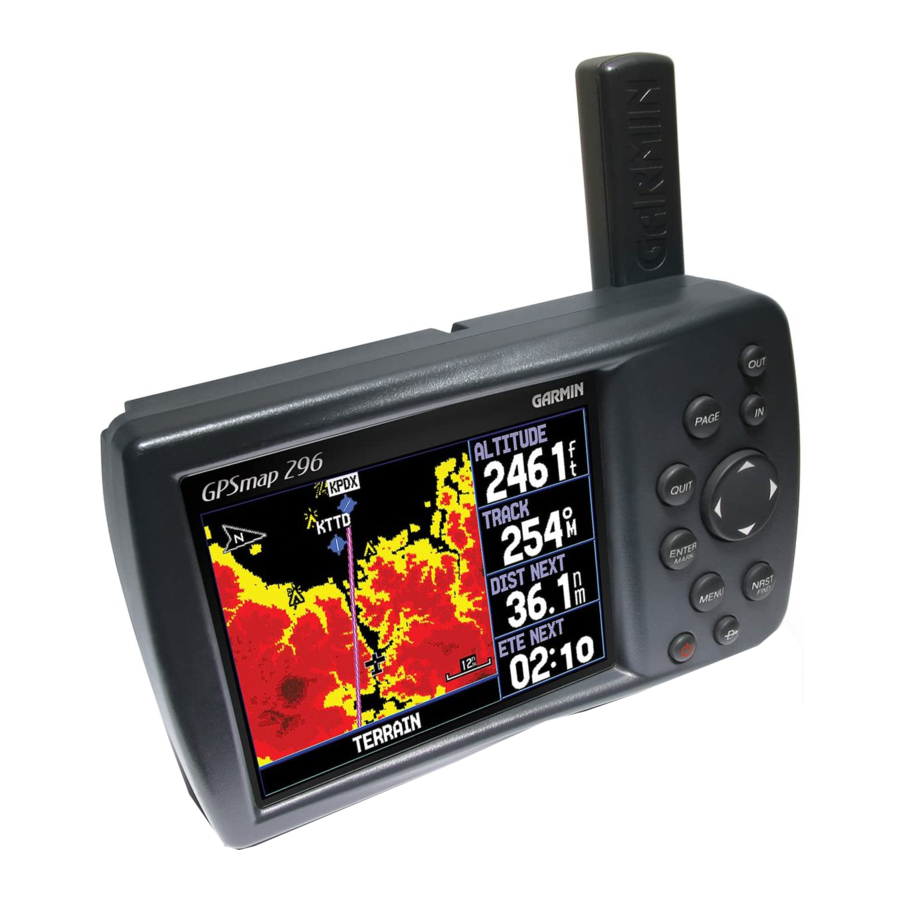
Garmin GPSMAP 296 Pilot's Manual
Portable aviation receiver
Hide thumbs
Also See for GPSMAP 296:
- Pilot's manual (168 pages) ,
- Features (7 pages) ,
- Quick reference manual (2 pages)
Table of Contents
Advertisement
Quick Links
Advertisement
Table of Contents

Related Manuals for Garmin GPSMAP 296


Summary of Contents for Garmin GPSMAP 296
- Page 1 GPSMAP ® portable aviation receiver pilot’s guide...
- Page 2 All rights reserved. Except as expressly provided herein, no part of this manual may be reproduced, copied, transmitted, disseminated, downloaded or stored in any storage medium, for any purpose without the express prior written consent of Garmin. Garmin hereby grants permission to download a single copy of this manual onto a hard drive...
- Page 3 Introduction Preface Thank you for choosing the Garmin GPSMAP 296. The GPSMAP 296 utilizes the proven performance Welcome of Garmin GPS and full-featured mapping to create an unsurpassed portable aviation receiver. Please take a moment now to compare the contents of this package with the packing list on the outside of the box. If any pieces are missing, please contact your Garmin dealer immediately.
-
Page 4: Table Of Contents
Information about the Charge Mode....3 Route Tab Options Menu ........37 Navigating in Marine Mode ........ 21 Turning On the GPSMAP 296 ......4 Active Route Page..........38 Going to a Destination in Marine Mode..... 21 Initializing the GPSMAP 296 ....... 4 Route Review Page .......... -
Page 5: Introduction
Introduction Terrain Page............69 Main Menu ........82 Reviewing and Editing Waypoints ..... 47 Points Tab ............49 Using the Terrain Page........69 Overview ............. 82 ‘User’ tab ............. 49 Terrain Page Options Menu ....... 69 Using the Main Menu........82 ‘Proximity’... - Page 6 Appendix ........119 Cable Connections..........131 ‘Airspace’ Alarms......... 99 Specifi cations ............ 119 ‘Nav’ (Navigation) Alarms......99 Connecting your GPSMAP 296 to a Computer 131 Performance ............ 119 ‘System’ Alarms ......... 100 Information about USB Drivers ....131 Power.............. 119 ‘Sonar’...
-
Page 7: Safety Information
Introduction CAUTION: Use the GPSMAP 296 at your own risk. To reduce the risk of unsafe operation, carefully review and understand all aspects of this Owner’ s Manual – and thoroughly practice operation using Safety Information Simulator Mode prior to actual use. When in actual use, carefully compare indications from the GPSMAP... - Page 8 WARNING: For use in vehicles, it is the sole responsibility of the owner/operator of a vehicle with the GPSMAP 296 installed to place and secure the device so it will not interfere with the vehicle operat- WARNING: This product, its packaging, and its components contain chemicals known to the State of California to cause ing controls and safety devices, obstruct the driver’...
-
Page 9: Getting Started
Getting Started Designed for detailed electronic mapping capability, the Garmin GPSMAP 296 is a powerful navigation device suitable for use in aircraft, motor vehicles, and marine vessels. The unit comes with Unit Overview a built-in Jeppesen database that includes worldwide airports and VORs, plus regional NDBs, intersec- tions, airspace boundaries, runway data, and communication frequencies. -
Page 10: Learning About The Keypad
Press and hold the POWER key for more than one second to turn the unit on and off. Briefl y press and release to adjust the backlighting and external speaker volume. The GPSMAP 296 Keypad Use the ARROW KEYPAD to select (highlight) menu options and to enter data. Also use... -
Page 11: Charging The Gpsmap 296
Information about the Charge Mode Applying external power to the GPSMAP 296 automatically starts the unit for full operation. If the battery is present and needs to be charged, the external power source charges the unit while it is in use. -
Page 12: Turning On The Gpsmap 296
Getting Started Turning On the GPSMAP 296 The fi rst time you power up your new GPSMAP 296, the receiver must collect satellite data and es- Unit Overview tablish its present position. To ensure proper initialization, the GPSMAP 296 is shipped from the factory in AutoLocate mode, which allows the receiver to “... -
Page 13: Adjusting The Backlight And Volume
Backlight/Volume adjustment window. ENTER/MARK QUIT If you are using the optional External Speaker with 12/24-Volt Adapter Cable with the GPSMAP 296, you may want to adjust the volume level of the speaker. To adjust the speaker volume: 1. -
Page 14: Using The Gpsmap 296
Getting Started Understanding the Features The GPSMAP 296 unit’ s advanced keypad system is designed to allow quick, convenient selection of Using the GPSMAP 296 navigation options and data entry. As you progress through this Pilot’s Guide, you will often be directed to press a specifi... -
Page 15: Selecting Options And Entering Data
Getting Started Selecting Options and Entering Data You may select and activate options and enter data to customize your GPSMAP 296 to fi t your Using the GPSMAP 296 personal needs. This requires movement of the cursor, which is identifi ed in this manual as highlighting, selecting, or choosing an item in a list or a fi... -
Page 16: Using Additional Map Data
Temperature, or Location. Using Additional Map Data Optional Garmin Data Cards and MapSource CD-ROMs enhance the versatility of your GPSMAP 296. With optional MapSource City Select data, you can view listings of nearby restaurants, lodging, shopping centers, attractions and entertainment, and even retrieve addresses and phone numbers for any listed location. -
Page 17: Activating The Simulator Mode
From the GPS Options Menu you can enter a ‘New Location’ and ‘New Altitude’ to simulate from. For example, if you are interested in using the GPSMAP 296 in your plane and your hangar is near San When the GPSMAP 296 is in Simulator Mode, the Diego, but you live in Los Angeles, you can select San Diego as your New Location. -
Page 18: Simulating Navigation
To fi nd an aviation destination and simulate navigation in Aviation Mode: 1. Be sure the GPSMAP 296 is set to Simulator Mode and your location is set to San Diego, California (see “Activating the Simulator Mode” on the previous page). - Page 19 Getting Started To fi nd a land destination and simulate navigation in Automotive Mode: 1. Be sure the GPSMAP 296 is set to Simulator Mode and your location is set to San Diego, California Simulated Basic Navigation (see “Activating the Simulator Mode”).
-
Page 20: Basic Operation
Mode appears below. Each of these pages has a specifi c use and each page is discussed later in this manual. The Aviation Mode is the default mode for the GPSMAP 296. This manual fi rst addresses each page, such as the Map Page, as displayed in the Aviation Mode. The manual then describes the page as shown Marine and Automotive Mode, if major differences exist. -
Page 21: Marine Mode
Basic Operation To switch usage modes: 1. Press and hold the button. PAGE Main Pages Overview 2. Use the ARROW KEYPAD to select either ‘Aviation,’ ‘Automotive,’ or ‘Marine’ and press ENTER/MARK Marine Mode Page Sequence Map Page Compass Page Highway Page Active Route Page Position Data Page Automotive Mode Page Sequence... -
Page 22: Navigating In Aviation Mode
-compatible PCs and requires the included PC Interface key to display the Go To Page, which Cable to connect your GPSMAP 296 to the PC’ s serial communications port. The following information is allows you to select an airport or navaid, a... - Page 23 RIGHT to move to the next character fi eld. As you scroll through the characters the GPSMAP 296 displays any database entries with the same characters you have entered to that point. If more than one entry exists in the database for the characters you have entered, a pop-up window appears listing the entries.
-
Page 24: Go To Page Options Menu
Basic Operation Go To Page Options Menu The available options are described below. In the sections following, some options, such as Show Navigating in Details, also have instructions detailing how to use the option. Aviation Mode To access the Go To Page Options Menu: 1. -
Page 25: Show Details
Basic Operation Show Details The ‘Show Details’ options displays detailed information for your destination waypoint or the next Navigating in waypoint in a route. You will fi nd this feature handy for retrieving navaid frequencies or airport information, Aviation Mode such as communication frequencies, runway information, fi... - Page 26 As you view frequencies for various airports you will encounter some with an asterisk (*) immediately preceding the frequency. This denotes a frequency with usage restrictions. You can display the usage restriction information on your GPSMAP 296. To view usage restrictions for a communication frequency: 1.
-
Page 27: Select Approach
NOTE: The approaches provided in the Jeppesen database are for monitoring purposes only. Navigating in The GPSMAP 296 is not an IFR-approved instrument and should not be used as a primary Aviation Mode source of navigation guidance in instrument conditions. -
Page 28: Understanding Vectors
Aviation Mode If you select ‘Yes,’ the GPSMAP 296 creates an extension of the fi nal course, beyond the fi nal approach waypoint in the database (fi nal approach fi x [FAF]). The GPSMAP 296 provides no guidance to the inbound course. -
Page 29: Navigating In Marine Mode
Basic Operation Going to a Destination in Marine Mode Press the DIRECT TO key in on any page to begin navigating to a destination. There are four Navigating in Marine Mode ways to navigate to a destination: Go To Point, Navigate Route, Navigate Track (TracBack), and MOB (Man OverBoard) navigation. -
Page 30: Navigate Route
Basic Operation To activate a ‘ Go To’ from the Find Menu: 1. Press the key. DIRECT TO Navigating in Marine Mode 2. Use the ARROW KEYPAD to highlight ‘Go To Point’ and press ENTER/MARK . The Find Menu opens. 3. -
Page 31: Navigate Track (Tracback Navigation)
Basic Operation Navigate Track ( TracBack Navigation) The TracBack function allows you to retrace your path using the track log automatically stored in the Navigating in Marine Mode receiver’ s memory, which eliminates the need to store waypoints along the way. TracBack routes are cre- ated by reducing your track log into a route with up to 300 turns and activating an inverted route along those points. -
Page 32: Man Overboard (Mob)
Basic Operation Once a TracBack has been activated, the GPSMAP 296 divides the track into segments called ‘ legs.’ Up to 300 temporary ‘turns’ are created to mark the most signifi cant features of the track in order to Navigating in Marine Mode duplicate your exact path as closely as possible. -
Page 33: Navigating In Automotive Mode
Basic Operation Going to a Destination in Automotive Mode Press the DIRECT TO key in on any page to begin navigating to a destination. Automotive Mode Navigating in Automotive provides the basic options as offered while navigating in Marine Mode, as well as several other options Mode that are especially helpful while you are navigating in Marine Mode. -
Page 34: New Route
Basic Operation New Route The ‘New Route’ option works the same as the ‘Go To’ function in Marine Mode. You can select a des- Navigating in Automotive tination point from the Find Menu, and the unit quickly sets an auto-route from your present position. If Mode you have a point highlighted on a list or on the map and press NAV/MOB , ‘Go To <point name>’... -
Page 35: Edit Vias
Basic Operation Edit Vias You can add via points (points through which you would like to travel) to your route using the ‘Edit Navigating in Automotive Vias’ option. Via points are great for adding a stop at the gas station or bank to your route and are really Mode helpful when planning a long trip. -
Page 36: Using The Nearest Pages In Aviation Mode
Basic Operation Nearest Pages Overview The NRST/FIND key provides different information, depending upon the operating mode the unit Using the Nearest Pages in is currently in. In Aviation Mode, the NRST/FIND key operates as a NEAREST key, providing detailed Aviation Mode information on the nearest airports, airport weather sources, VORs, NDBs, intersections, and user waypoints within 200 miles of your present position. - Page 37 Basic Operation To view the Nearest Pages in Aviation Mode: 1. Press the NRST/FIND key. Using the Nearest Pages in 2. To select a different category, use the to select the desired fi le tab along the top of ARROW KEYPAD Aviation Mode the page.
-
Page 38: Setting Airport Criteria
Basic Operation Setting Airport Criteria From the Nearest Airport tab, an options window allows you to fi lter out airports that do not meet a Using the Nearest Pages in defi ned criteria. This allows you to only show airports with a desired surface type and suffi cient runway Aviation Mode length. -
Page 39: Viewing Communication Frequencies
Basic Operation Viewing Communication Frequencies Using the Nearest Pages in The Nearest Pages list up to fi ve nearest fl ight service station (FSS) and air route traffi c control center (ARTCC) points of communication. The closest communication point—along with frequency(s), bearing Aviation Mode and distance—is displayed fi... - Page 40 Basic Operation From the Nearest Pages you can display additional airspace information as well, such as fl oor and ceiling limits or communication frequency(s). Using the Nearest Pages in To view additional airspace information: Aviation Mode 1. Once an airspace alert had been provided, press to display the Nearest Pages and the NRST/FIND airspace information.
-
Page 41: Finding An Item In Marine Or Automotive Mode
Basic Operation Using the Find Menu The Find Menu allows you to easily search the stored waypoints and points of interest. When in Finding an Item in Marine Marine or Automotive Mode, you can access the Find Menu by pressing the NRST/FIND key. After you or Automotive Mode press NRST/FIND , the unit searches for items from your current location or from another location on the map. -
Page 42: Viewing The Information Page
Basic Operation To fi nd an item from another location through the Map Page: From the Map Page, use the to pan to the desired location and press ARROW KEYPAD NRST/FIND Finding an Item in Marine 2. Using the ARROW KEYPAD, highlight the desired category from the list and press ENTER/MARK or Automotive Mode... -
Page 43: Recently Found Items
Basic Operation Recently Found Items The Recently Found page displays a list of the items you have searched for or gone to recently. Press Finding an Item in Marine to display the Options Menu for the ‘Recently Found Items.’ MENU or Automotive Mode Show Find History –... -
Page 44: Using Routes
Basic Operation Creating a Route The Garmin GPSMAP 296 lets you create and store up to 50 reversible routes, with up to 300 Using Routes waypoints each. Routes can be created in two ways. The fi rst way is to select waypoints from the Find Menu, allowing you to see a list of the route points as you create the route. -
Page 45: Route Tab Options Menu
Basic Operation To create a route graphically: 1. Press the key twice to display the Main Menu Page. Use the to highlight MENU ARROW KEYPAD Using Routes ‘Route’ from the vertical list of tabs. 2. Press the key to display the Route Options Menu. Select the ‘New Route’ option and press MENU ENTER/MARK Or Highlight the fi... -
Page 46: Active Route Page
Basic Operation Active Route Page Whenever you have activated a route in the GPSMAP 296, the Active Route Page shows each point Using Routes (waypoint or map item) of the active route. The current destination point, the ‘active’ point, is marked with an arrow icon. -
Page 47: Route Review Options Menu
Basic Operation Route Review Options Menu By pressing MENU on the Route Review Page, the following menu options are available: Using Routes Activate – begins navigation of the route. Edit on Map – allows you to edit the route on the map. Insert Waypoint –... - Page 48 Basic Operation To add points to the route using the Route Review Page and the Find Menu: 1. Press twice to open the Main Menu. Use the to select ‘Route.’ MENU ARROW KEYPAD Using Routes 2. Use the ARROW KEYPAD to select the desired route and press ENTER/MARK 3.
-
Page 49: Following A Route
Active Route and Route Review Pages share many of the same features and options. Current Route Page in Automotive Mode Whenever you have activated a route in the GPSMAP 296 set in Automotive Mode, the Active Route Active Route Page ( Aviation Mode) Page shows each turn of the active route, with the distance to the turn, the street name, and estimated time to arrival and time of arrival. -
Page 50: Using Waypoints
Basic Operation Creating and Using Waypoints The Garmin GPSMAP 296 stores up to 3000 alphanumeric waypoints with a user-defi ned icon, com- Using Waypoints ment, altitude, depth, and temperature available for each waypoint. Waypoints can be created using three basic methods: •... -
Page 51: Creating Waypoints Graphically
When you move the cursor over a map item, you will see a highlighted description of that item. The GPSMAP 296 uses the map item text shown on the cartography as the default name and symbol for the new waypoint. -
Page 52: Additional Options For Creating Waypoints
Basic Operation Additional Options for Creating Waypoints Waypoints may also be created by manually entering position coordinates through the Points Tab of Using Waypoints the Main Menu. This method can be useful for creating a waypoint at a specifi c latitude/longitude posi- tion from a chart. - Page 53 Basic Operation To create a new waypoint by projecting its location: A waypoint may also be created by “ projecting” the distance and bearing from a specifi c location to a Using Waypoints new location. 1. Create a waypoint using your favorite method (discussed in previous sections). The new waypoint is created with the next available waypoint number and the receiver’s last know position as the default name and position.
-
Page 54: Waypoint Menu Options
Basic Operation Waypoint Menu Options As well as ‘ Project Location,’ two additional options are available by pressing MENU on the New Using Waypoints Waypoint and New Map Waypoint Pages: ‘Average Location’ and ‘Append To Route.’ These menu options also appear on the Waypoint Edit and Waypoint Review Pages. Select ‘Average Location’ to have the unit take several sample location measurements for the waypoint and recalculate for a more accurate position reading. -
Page 55: Reviewing And Editing Waypoints
Basic Operation Reviewing and Editing Waypoints Once you have created and stored a waypoint, it may be modifi ed, reviewed, renamed, moved, or Using Waypoints deleted at any time through the Waypoint Review and Waypoint Edit Pages. To access the Waypoint Review Page: 1. - Page 56 Basic Operation To change the other waypoint elements: 1. Highlight the desired fi eld and press ENTER/MARK Using Waypoints 2. Use the ARROW KEYPAD to edit/enter the data. Press ENTER/MARK when done. On the Waypoint Review and Waypoint Edit Pages, you may also delete the selected waypoint, view the waypoint on the map, and move the waypoint on the map.
-
Page 57: Points Tab
Basic Operation Points Tab The Points Tab of the Main Menu features two tabs, ‘User’ and ‘Proximity,’ that let you manage a large Using Waypoints number of waypoints quickly and effi ciently. The tabs also provide a continuously updated proximity waypoint alarm function that can be used to defi... - Page 58 Basic Operation The following options are available by pressing MENU in the ‘User’ tab: Create Waypoint – creates a new waypoint (see the previous pages). Using Waypoints Delete Waypoint – deletes selected waypoint from list and any route in which it was used. Delete By Symbol –...
- Page 59 Basic Operation To delete waypoints by distance: 1. From the ‘User’ tab, highlight the waypoint to be deleted and press MENU Using Waypoints 2. Highlight ‘Delete By Distance’ and press ENTER/MARK 3. Select ‘Less Than’ or ‘More Than’ and enter the desired distance using the ARROW KEYPAD 4.
-
Page 60: Proximity' Tab
Basic Operation ‘Proximity’ tab The ‘Proximity’ tab of the Points Tab lets you defi ne an alarm circle around a stored waypoint. The Using Waypoints alarm circle can be used to help you avoid reefs, rocks, or restricted waters. Up to ten waypoints may be listed with a maximum alarm radius of 99.99 nautical miles, statute miles, or kilometers. - Page 61 Basic Operation The following options are available by pressing MENU on the ‘Proximity’ tab of the Points Tab: Remove Point – removes selected waypoint from the proximity list. Using Waypoints Remove All – removes all waypoints from the proximity list. To clear one or all proximity waypoint(s) from the list: 1.
-
Page 62: Main Pages
Main Pages Using the Map Page The GPSMAP 296 features a real-time moving map that can do much more than just plot your course. Map Page The Map Page displays digital cartography (map information) that includes airspace boundaries, airports, navaids, lakes, rivers, coastlines, cities, and highways. An on-screen cursor lets you pan ahead to other... -
Page 63: Panning The Map With The Cursor
Main Pages Panning the Map with the Cursor The cursor allows you to pan away from your present position and scroll to other map areas around Map Page the world even outside of your current detail coverage. As you pan past the edge of the current map display, the screen actively scrolls to provide continuous map coverage. - Page 64 Main Pages To view additional details about an on-screen waypoint or map item: 1. With the desired waypoint or map item highlighted, press ENTER/MARK Map Page 2. If the item is a waypoint, a Waypoint Review Page appears, showing details such as name, symbol, coordinates, elevation, and depth.
-
Page 65: Airspace Information
Main Pages Airspace Information Cursor mode may also be used to retrieve information on airspaces depicted on the map. Once the Map Page panning pointer is placed on an open area within an airspace, the entire airspace (or airspace sector) is highlighted. -
Page 66: Selecting Map Scales And Additional Maps
The system has a built-in worldwide database to 20 mi, with more detailed coverage available through the use of the optional Jeppesen, BlueChart, or MapSource data. The GPSMAP 296 displays cartography as long as there is chart information available for the range you have selected. -
Page 67: Map Page Options Menu
Main Pages Map Page Options Menu The Options Menu on the Map Page provides access to functions and features of the Map Page, as Map Page well as layout options for the page. The data window, located at the right side of the display, provides a user-selectable layout of various types of useful data. - Page 68 Change Data Fields – allows you to specify the type of data displayed in each data fi eld on the page. Refer to the “Appendix” for a complete list of all data fi elds used in the GPSMAP 296. Data Card Information – shows information about the detailed map data stored on the data card, and allows you to select which maps are displayed or not displayed on the Map Page.
- Page 69 Main Pages To measure the Bearing/Distance between two points: 1. Highlight the ‘Measure Distance’ option and press . An on-screen pointer appears on ENTER/MARK Map Page the map display at your present position with ‘ENT REF’ below it. 2. Move the cursor to the desired reference point (the starting point that you want to measure from) and press .
- Page 70 Main Pages To review/change data card information: 1. Access the Map Page and press MENU Map Page 2. From the Options Menu highlight ‘Data Card Information’ and press ENTER/MARK 3. The fi rst page shows the Map Families that are stored on the data card and whether they are set to be shown on the Map Page.
-
Page 71: Map Page Setup Menu
Main Pages Map Page Setup Menu The Map Page Setup Menu uses a “fi le tab” system, making it easier for you to fi nd the various settings Map Page for confi guring the map display. The following section describes each fi le tab and the settings available in each tab: To change a map setup feature: 1. -
Page 72: General' Tab
Main Pages ‘General’ tab Detail – Most, More, Normal, Less, Least: controls how much map detail is displayed. This setting only Map Page applies to any map feature set to ‘Auto.’ Those features that have a specifi ed scale or that are turned ‘Off’ are unaffected by this setting. -
Page 73: Line' Tab
Main Pages ‘Line’ tab Heading Line – Off, Distance, Time: turns the Heading Line off or confi gures it for distance or time. The Map Page Heading Line projects (using time or distance) from the position marker (triangle vehicle icon) showing your current heading. -
Page 74: Airport' Tab
Main Pages ‘Airport’ tab Large/Medium/Small Airport – Text Off, Small, Medium, and Large: controls the screen size of the Map Page airport identifi er. Zoom Auto, Off, 20 ft.-800 mi: sets the maximum scale at which airports appear on the screen. Large airports are those with a runway longer than 8000.’ Medium airports are those with a runway longer than 5000’... -
Page 75: Marine' Tab
Auto: BlueChart maps are drawn using symbols similar to the NOAA/NIMA standard. Non- BlueChart maps are drawn using traditional Garmin symbols. • Garmin: All maps are drawn using traditional Garmin symbols. Marine Tab of Map Page Setup Menu • NOAA: All maps are drawn using a symbol set similar to NOAA/NIMA. -
Page 76: Road' Tab
Main Pages ‘Road’ tab Freeway, Highway, Local Road, Local Road Name, Railroad – controls the text size and zoom scale Map Page for roads. Text – Off, Small, Medium, and Large: controls the screen size of the name. Zoom – Auto, Off, 20 ft. to 800 nm/mi: sets the maximum scale at which the roads appear on the screen. -
Page 77: Terrain Page
Change Data Fields – allows you to specify the type of data displayed in each data fi eld on the page. Terrain Page Options Menu Refer to the “Appendix” for a complete list of all data fi elds used in the GPSMAP 296. -
Page 78: Panel Page
The Panel Page appears only when the GPSMAP 296 is in Aviation Mode. The graphic HSI depicts the desired course to the destination waypoint (or the next waypoint in a route), current ground track, off course error and a TO/FROM indication. -
Page 79: Panel Page Options Menu
Set OBS and Hold – allows you to manually defi ne the course to your destination waypoint. Once While navigating selected, the GPSMAP 296 uses the OBS course setting for steering guidance with the course deviation needle and desired course pointer. - Page 80 Main Pages Capture VNAV Profi le – centers/re-centers the VNAV indicator on the graphic HSI. To utilize this feature, a Go To or route must be in use and a valid vertical navigation profi le must be entered on the Panel Page vertical navigation setup page.
- Page 81 Main Pages To set a user-defi ned bug heading reference: 1. With the Panel Page displayed, press to display the Panel Page Options Menu. MENU Panel Page 2. Use the ARROW KEYPAD to highlight ‘Set Bug Indicator’ option and press ENTER/MARK. 3.
-
Page 82: Compass Page In Marine And Automotive Modes74
Main Pages Using the Compass Page The Compass Page replaces the Panel Page when the unit is in Marine or Automotive Mode. It is on Compass Page in Marine by default in Marine Mode but off by default in Automotive Mode. During active navigation, the Compass and Automotive Modes Page guides you to your destination with digital data fi... -
Page 83: Compass Page Options Menu
Main Pages Compass Page Options Menu The Options Menu on the Compass Page allows you to customize the Compass Page to your prefer- Compass Page in Marine ences in both Marine and Automotive modes. Like the Map Page, the Compass Page features user- and Automotive Modes selectable data fi... -
Page 84: Highway Page In Marine And Automotive Modes76
Main Pages Highway Page Overview The Highway Page is only available in Marine Mode or Automotive Mode. Highway Page in Marine Whenever a ‘Go To,’ ‘TracBack’ or ‘Route’ has been activated, the Highway Page provides digital and and Automotive Modes graphic steering guidance to the destination. -
Page 85: Highway Page Options Menu
Main Pages To change the highway perspective scale: • Press to zoom in. Highway Page in Marine • Press to zoom out. and Automotive Modes Highway Page Options Menu The Highway Page Options Menu allows you to defi ne the data fi elds and select which waypoints and track are displayed on the screen. -
Page 86: Active Route Page
Main Pages Active Route Page Whenever you have activated a route while in Aviation or Marine Mode, the Active Route Page shows Active Route Page each point (waypoint or map item) of the active route, with the point name, Course, Distance, and sev- eral other fi... -
Page 87: Current Route Page
Main Pages Current Route Page Whenever you have activated a route in the GPSMAP 296 set in Automotive Mode, the Active Route Current Route Page Page shows each turn of the active route, with the distance to the turn, the street name, and estimated time to arrival and time of arrival. -
Page 88: Position Data Page
Main Pages Understanding the Position Data Page The Position Data Page provides a quick reference for the important data you want to display while Position Data Page navigating a route in Aviation Mode and Marine Mode. The default page displays a compass ribbon, your current latitude and longitude, the current date and time, the location you are traveling from, and eight user-selectable data fi... -
Page 89: Trip Computer Page: Automotive Mode
Reset the Trip Computer before beginning a trip. If you make frequent stops, leave the GPSMAP 296 powered on to allow the unit to accurately measure elapsed time during the trip. -
Page 90: Main Menu
Main Menu. GPS – shows satellite status, accuracy, and differential information. Flights – displays a log of the fl ights you have taken using the GPSMAP 296. Main Menu: GPS Tab Route – allows you to create, edit, activate, or delete routes. -
Page 91: Using The Gps Tab
Green signal strength bars: The receiver has collected the necessary data and the satellite(s) are ready for use. As soon as the GPSMAP 296 has collected the necessary data from the best satellites in view to calcu- Current Date Power Source Current Time late a fi... -
Page 92: Receiver Status
Main Menu Receiver Status The Receiver Status fi eld, located at the top fi eld of the page, displays one of the following conditions: GPS Tab • Searching the Sky: The receiver is looking for any satellites. • AutoLocate: The receiver is looking for any satellite whose almanac has been collected. This ‘Receiver process can take up to fi... -
Page 93: Differential Field
Main Menu Differential Field Differential receiver status is indicated in the bottom left fi eld of the page and will show one of the GPS Tab following conditions: • None: No optional beacon receiver is attached or enabled in the ‘Com 1’ or ‘Com 2’ tab (Setup Tab of the Main Menu) or WAAS is turned Off. -
Page 94: Flights Tab
The Flights Tab displays a list of any recorded fl ights, including date, route of fl ight, and fl ight time. Flights Tab The GPSMAP 296 saves up to 50 recorded fl ights. Entries on this list are automatically created for each fl ight (but only in Aviation Mode). Recording begins when your speed exceeds 30 knots and you gain 500’... -
Page 95: Route Tab
As discussed in the “Using Routes” section of this manual, the Route Tab displays the routes you have Route Tab created in your GPSMAP 296 unit. For complete information on routes, refer to the “Using Routes” sec- tion that appears in the “Basic Operation” chapter in this manual. -
Page 96: Points Tab
Main Menu Points Tab Overview The Points Tab of the Main Menu features two tabs, ‘User’ and ‘Proximity,’ that let you manage a Points Tab large number of waypoints quickly and effi ciently. For complete information about creating, editing, and deleting waypoints, refer to the “Using Waypoints”... -
Page 97: Track Tab
GPSMAP 296 uses this information to allow you to navigate using the saved track. The track log starts recording as soon as the GPSMAP 296 gets a location fi x. For the best results, clear the track log before you start traveling because when the track log is full, the new track points overwrite the oldest track points. -
Page 98: Active' Tab
Main Menu ‘Active’ tab The ‘Active’ tab allows you to save and clear the track log as well as set up how the unit records Track Tab tracks. Record Mode – ‘Wrap’ records over the oldest tracks when the track log reaches 100%. ‘Fill’ records a track log until the track log is full (100%). - Page 99 Main Menu To save a portion of the track log: 1. Press the key twice to open the Main Menu. MENU Track Tab 2. Use the ARROW KEYPAD to highlight the Track Tab, then highlight the ‘Active’ tab to the right. 3.
-
Page 100: Saved' Tab
Main Menu To restore the ‘Active’ tab defaults: 1. Press the key twice to open the Main Menu. MENU Track Tab 2. Use the ARROW KEYPAD to highlight the Track Tab, then highlight the ‘Active’ tab to the right. 3. Press MENU 4. -
Page 101: Aircraft Tab
Main Menu Aircraft Tab Overview The Aircraft Tab is divided into two separate tabs: ‘Aircraft Profi le’ and ‘Weight & Balance.’ Aircraft Tab To open the Aircraft Tab of the Main Menu: 1. Press MENU twice to open the Main Menu. 2. -
Page 102: Weight & Balance' Tab
‘Aircraft Profi le’ tab conditions for your aircraft. By entering the weight and arm values on this page, the GPSMAP 296 can calculate the total weight, moment, and center of gravity (CG) fi gures to ensure a safe fl ight every time. -
Page 103: Weight & Balance' Tab Options Menu
Main Menu To open the ‘Weight & Balance’ tab: 1. Press twice to open the Main Menu. MENU Aircraft Tab 2. Highlight ‘Aircraft’ from the vertical list of tabs using the ARROW KEYPAD 3. Press the RIGHT or LEFT to highlight ‘Weight & Balance.’ ARROW KEYPAD To perform weight and balance calculations: 1. -
Page 104: E6B Tab
Main Menu E6B Tab Overview The E6B Tab in the Main Menu calculates Density Altitude, True Airspeed, and Winds Aloft (Head E6B Tab Wind, Tail Wind, Wind From, and Wind Speed), based upon information you enter. To open the E6B Tab of the Main Menu: 1. - Page 105 The calculated fi gures for ‘Head Wind,’ ‘Wind From,’ and ‘Wind Speed’ are displayed. NOTE: If a True North reference is currently selected (as the heading reference) on your GPSMAP 296, you must enter ‘Heading’ using a True North reference to accurately determine winds.
-
Page 106: Alarms Tab
Main Menu Using the Alarms Tab The Alarms Tab of the Main Menu allows you to defi ne alarm settings. Alarms Tab To access the Alarms Tab of the Main Menu: 1. Press MENU twice to open the Main Menu. 2. -
Page 107: Airspace' Alarms
Main Menu To restore alarm defaults: 1. Press twice to open the Main Menu. MENU Alarms Tab 2. Use the ARROW KEYPAD to open the Alarms Tab. 3. Press MENU 4. Select ‘Restore Default’ to restore the defaults of the current tab. Select ‘All Alarm Defaults’ to restore all tabs in the Alarms Tab to the factory defaults. -
Page 108: System' Alarms
Main Menu ‘System’ Alarms Clock – sets an alarm based on the unit’ s clock. Select ‘On’ and then enter a specifi c time that you want Alarms Tab the alarm to sound. The unit must be on for the clock alarm to work. Ext. -
Page 109: Celestial Tab
Main Menu Using the Celestial Tab The Celestial Tab of the Main Menu displays sun and moon information, data for the tide, and hunt- Celestial Tab ing and fi shing information. You may display this data for your current position, a position from the map, or a waypoint location. -
Page 110: Tide' Tab
Main Menu To view Sun & Moon information for a different location: 1. Use the to highlight the ‘From’ fi eld and press ARROW KEYPAD ENTER/MARK. Celestial Tab 2. Highlight ‘Use Find Menu’ and press ENTER/MARK . The Find Menu automatically opens. 3. - Page 111 Main Menu To view a tide chart for a different tide station: 1. From the ‘Tide’ tab, highlight the ‘At’ fi eld and press . The Find Menu automatically ENTER/MARK Celestial Tab opens showing the Tide Stations. 2. Press and select ‘Near Current Location,’ ‘Near Current Route,’ Near Other’ (select another MENU location using the map), or ‘Near Destination’...
-
Page 112: Hunt & Fish' Tab
Main Menu ‘Hunt & Fish’ tab The ‘Hunt & Fish’ tab provides you with predictions of the good and best times to hunt and fi sh in a Celestial Tab selected location on a specifi c date. To display the Hunt & Fish information: 1. -
Page 113: Message Tab
Main Menu Viewing the Message Tab The Message Tab of the Main Menu displays a list of messages generated by your GPSMAP 296. Use Message Tab the ARROW KEYPAD to scroll the entire list of messages on the ‘Log’ tab. You can also use the ‘Log Filter’... -
Page 114: Display Tab
Main Menu Adjusting the Display using the Display Tab The Display Tab of the Main Menu allows you to set several features of the display, such as what pages Display Tab to display in the Main Page Sequence and how long the backlight stays on. Color Mode –... -
Page 115: Sound Tab
Main Menu Adjusting the Unit’s Sound The Sound Tab of the Main Menu allows you to customize the sounds your GPSMAP 296 makes to Sound Tab suit your needs. Beeper – sets the beeper to chime during keypresses and alarms (‘Key and Alarm’) or on ‘Alarms Only.’... -
Page 116: Setup Tab
The Setup Tab has several tabs containing different types of information for you to customize your Setup Tab GPSMAP 296. Use the ARROW KEYPAD to scroll to the RIGHT and LEFT to view all of the tabs. To view the Setup Tab: 1. -
Page 117: Vnav' (Vertical Navigation) Tab
Once the profi le is defi ned, message alerts and additional data keep you informed of your progress. NOTE: The GPSMAP 296 is a VFR navigation tool and should not be used to perform instru- ment approaches. -
Page 118: Road Routing' Tab
Main Menu ‘Road Routing’ tab To open the ‘Road Routing’ tab, press the MENU key twice to open the Main Menu. Select ‘Setup’ Setup Tab from the vertical tab list. Then select ‘Road Routing’ from the row of tabs along the top of the page. Route Preference –... -
Page 119: Guidance' Tab
Main Menu ‘Guidance’ tab To open the ‘Guidance’ tab, press the MENU key twice to open the Main Menu. Select ‘Setup’ from Setup Tab the vertical tab list. Then select ‘Guidance’ from the row of tabs along the top of the page. Off-Route Recalculation –... -
Page 120: Time' Tab
Main Menu ‘Time’ tab The ‘Time’ tab allows you to set the time format and zone. You can also set the unit to conform to Setup Tab Daylight Savings. The current time and date is displayed at the bottom of the page. To open the ‘Time’... -
Page 121: Location' Tab
For more information about using paper maps with your Garmin unit, refer to Using a Garmin GPS with Paper Land Maps, available for download at http: //www.garmin.com/manuals/UsingaGarminGPSwithPaperLandMaps_Manual.pdf. -
Page 122: Welcome' Tab
‘Welcome’ tab The ‘Welcome’ tab allows you to enter information, such as your name and address, and the unit can display that information when it is turned on. This can be very helpful if your GPSMAP 296 is ever misplaced. -
Page 123: Com 1' And 'Com 2' Tabs
Allows Go To or route selection on the panel-mounted GPS receiver to be automatically ‘COM 1’ tab of the Setup Tab displayed on the GPSMAP 296. This eliminates the need to enter the destination on both units. • GARMIN DGPS – used to connect the GPSMAP 296 with a Garmin DGPS beacon receiver. - Page 124 Main Menu If ‘ GARMIN DGPS’ or ‘ RTCM In/NMEA Out’ format is selected, additional fi elds are provided to control a Garmin differential beacon receiver directly from your GPSMAP 296. You may have the unit Setup Tab automatically scan for the DGPS beacon signal or you can enter the beacon frequency and bit rate on the unit and the information will be used to tune the beacon receiver.
- Page 125 For DGPS transmitter problems or to fi nd the most updated list of frequencies and coverage areas, contact your local USCG or see their Web site at http://www.navcen.uscg.mil/. ‘COM 2’ tab of the Setup Tab with GARMIN DGPS selected...
- Page 126 Main Menu Advanced NMEA Output Setup If you are going to interface the GPSMAP 296 with another piece of equipment (such as a radar or Setup Tab autopilot), the unit needs to be set to output NMEA data. The NMEA data can be customized to shorten the update time from the unit.
-
Page 127: Appendix
Appendix Performance Receiver: Differential-ready 12 parallel channel receiver Specifi cations Acquisition Times: Approx. 15 seconds (warm start) Approx. 45 seconds (cold start) Approx. 5 minutes (First Time/AutoLocate™) Physical Specifi cations Update Rate: 1/second, continuous Size: 5.7” W x 3.2” H x 1.9” D GPS Accuracy: *<... -
Page 128: Care Information
MapSource). Immersing the Unit in Water The GPSMAP 296 is waterproof to IEC Standard 60529 IPX7. It can withstand immersion in 1 meter of water for 30 minutes. Prolonged submersion can cause damage to the unit. After submersion, be certain to wipe and air dry the unit before reuse or charging. -
Page 129: Accessories
Cigarette Lighter Adapter Trip & Waypoint Manager CD-ROM GA26C Remote Antenna with Suction Cup Mount Refer to the box your GPSMAP 296 unit came in for a complete list of standard accessories that should be in the box. Optional Accessories In addition to the standard accessories included with your GPSMAP 296, the optional accessories listed on the following page are designed to enhance the operation of the GPSMAP 296. - Page 130 Download street-level map detail, points of interest, business addresses and phone numbers, marine data, topographical information and more from MapSource CD-ROMs to a data card, either directly through your GPSMAP 296 using the PC USB Cable, the optional PC Interface Cable, or with the optional USB Data Card Programmer.
-
Page 131: Wiring And Interfacing
GPGSA, GPGSV, GPGLL, GPBOD, GPRTE, and GPWPL. The following are the Proprietary Sentences for NMEA 0183, version 3.01 output: PGRME, PGRMZ, and PGRMM. The GPSMAP 296 also includes NMEA input with support for the BWC, DBT, DPT, MTW, VHW, VTG, and XTE sentences. -
Page 132: Time Offsets
Appendix The chart below gives an approximate UTC (Universal Time Coordinate) time offset for the various longitudinal zones. Check with local charts for more detailed information. If you are in daylight savings Time Offsets time, add one hour to the offset. Longitudinal Zone Offset Longitudinal Zone... -
Page 133: Map Datums And Location Formats
Lines of latitude and longitude on a map or chart are referenced to a specifi c map datum. Every chart has a map datum reference and the GPSMAP 296 can be set to match most of those commonly used. -
Page 134: Loran Td Setup
Setup TD fi eld, the active waypoint information will refl ect those changes. Since the GPSMAP 296 does not rely on the LORAN signal for navigation, it can reference a different GRI chain and/or secondary stations and still navigate to the location stored in memory. -
Page 135: Loran Td Setup
Because of this, the unit can navigate to a TD coordinate anywhere in the world. You must know your GRI chain number, secondary stations to create a LORAN TD position. For more information please read our LORAN TD Position Format Handbook, available at the Garmin Web site, at www.garmin.com/support/userManual.html. LORAN TD Setup... -
Page 136: Map Datum List
Appendix Chua Astro Chua Astro- Paraguay L.C. 5 Astro Cayman Brac Island Corrego Alegr Corrego Alegre- Brazil Liberia 1964 Liberia 1964- Liberia Map Datum List Croatia Croatia Luzon Mindanao Luzon- Mindanao Island Djakarta Djakarta (Batavia)- Sumatra Island (Indonesia) Luzon Philippine Luzon- Philippines (excluding Mindanao Isl.) Adindan Adindan- Ethiopia, Mali, Senegal, Sudan Dos 1968... - Page 137 Appendix Obsrvtorio ‘66 Observatorio 1966- Corvo and Flores Islands Timbalai 1948 Timbalai 1948- Brunei and E. Malaysia (Sarawak (Azores) and Sabah) Map Datum List Old Egyptian Old Egyptian- Egypt Tokyo Tokyo- Japan, Korea, Okinawa Old Hawaiian Old Hawaiian- Mean Value Tristan Ast ‘68 Tristan Astro 1968- Tristan da Cunha Oman...
-
Page 138: Garmin Data Cards
Appendix Installing and Removing Data Cards The GPSMAP 296 uses an optional Garmin data cards to display digital charts and maps on-screen or Garmin Data Cards save user data. Install the data card in the card slots located on the bottom of the unit. Install or remove the data card at any time, whether the unit is on or off. -
Page 139: Cable Connections
USB cable to the computer. To connect your GPS to your computer: 1. Connect the small end of your cable to the lower connector on the back of the GPSMAP 296, shown in the top image to the right. -
Page 140: Messages
Cant Unlock Maps: No applicable unlock code for one or more maps was found. All MapSource map are not accessible. Database Error: Internal problem with the unit. Contact your dealer or Garmin Customer Service to have the unit repaired. Deep Water: The water is deeper than the amount set in the Deep Water Alarm. - Page 141 Appendix Shallow Water: The water is shallower than the amount set in the Shallow Water Alarm. Track Already Exists: A saved track with the same name already exists. Messages Track Log Full: Indicates the track log is full and track recording has been turned off. In order to record more track points, you will need to clear the track log and turn track recording on.
-
Page 142: Data Field Options
Appendix Accuracy: Estimated position accuracy in feet or meters. Altitude: (Aviation Only) Height above mean sea level (MSL). Data Field Options Battery Timer: The time remaining on the battery before it is fully discharged. Bearing: The direction from your current location to a destination. Course: The direction from your starting location to a destination. - Page 143 Appendix Est. Time to VNAV: (Aviation Only) The estimated time required to reach the initial descent point in a VNAV profi le. Data Field Options Flight Timer: (Aviation Only) The length of time for the current fl ight. Fuel Timer: (Aviation Only) The fuel required to travel from current location to the indicated route waypoint.
- Page 144 Appendix Track: The direction of movement relative to a ground position. Also referred to as ‘ground track.’ Trip Avg Speed (Moving): Average speed of unit when moving since last reset. Data Field Options Trip Avg Speed (Total): Average speed of unit for both moving and stopped speeds since last reset. Trip Odometer: A running tally of distance travelled since last reset.
-
Page 145: What Is Waas
2003 confi rmed an accuracy of 2–3 vertical meters throughout the majority of the continental U.S. and portions of Alaska. For more information, go to http://gps.faa.gov/Programs/WAAS/waas.htm. If you are using the GPSMAP 296 outside of the U.S.A., it is recommended that you NOTE: turn off WAAS for the most accurate location fi... -
Page 146: Compliance, License, And Warranty Information138
Appendix FCC Compliance The GPSMAP 296 complies with Part 15 of the FCC interference limits for Class B digital devices Compliance, License, and FOR HOME OR OFFICE USE. These limits are designed to provide more reasonable protection against Warranty Information harmful interference in a residential installation, and are more stringent than “outdoor”... -
Page 147: Software License Agreement
FOLLOWING SOFTWARE LICENSE AGREEMENT. PLEASE READ THIS AGREEMENT CAREFULLY. Warranty Information Garmin grants you a limited license to use the software embedded in this device (the “Software”) in binary ex- ecutable form in the normal operation of the product. Title, ownership rights, and intellectual property rights in and to the Software remain in Garmin. -
Page 148: Limited Warranty
Garmin retains the exclusive right to repair or replace the unit or software or offer a full refund of the purchase price at its sole discretion. SUCH REMEDY SHALL BE YOUR SOLE AND EXCLUSIVE REMEDY FOR ANY BREACH OF WARRANTY. -
Page 149: Index
Index Symbols Proximity 52 Aviation Navaids 66 Categories 33 Alarms Tab 98, 99, 100 Aviation Points 33 CDI Scale 72 24-hour format 112 Airspace 98, 99 Avoidance Button 110 Celestial Tab 101, 102, 103, 104 2D 83, 84 Sonar Alarms 100 Hunt &... - Page 150 Density Altitude 97 Data Card 130 Track 91 Depth 112 Information 35, 60, 62 Track Log 90 Garmin Data Transfer 115 Detour 25 Port 1 Exits 28, 33 GARMIN DGPS 115, 116 DGPS 137 Data Fields 39, 61, 134, 135, 136...
- Page 151 Index GPS Tab 83, 84, 85 Alarms Tab 98, 99 Marine Tab 67 GRI Chain 127 Celestial Tab 101, 102, 103, 104 Mrn Nav 67 Keypad 2 Guidance Tab 111 Display Tab 106 Point Tab 68 GPS Tab 83, 84, 85 Road Tab 68 Language 107, 108 Message Tab 105...
- Page 152 Index Navigate No Beacon Signal 85 Persistent Alarm 98 Recalculate 25 Route 21, 22, 25 NRST/FIND key 28 Plan Flight 39, 40, 78 Receiver Not Usable 84 To Point 21 Numeric Degrees 112 Plan Route 39, 40, 78 Receiver Status 84 Track 21, 23, 25, 26 Points of Interest 33 Receive Satellite Signals 4...
- Page 153 Index Review 38 Select Approach 16, 19, 39 Show Map 48 Review Options Menu 39 Select Item on Map 55 Signal Strength 83 Temperature 112 RTCM In 115 Sentences 118, 123 Bars 4 Terrain Page RTCM In/NMEA Out 115, 116 Sequencing 71 Simulate 9, 10, 11, 85, 108 Set Up 69...
- Page 154 Index Trip Computer Page 81 Vector to Final 20 Proximity 52 Page Layout 81 Velocity Made Good 136 Symbol 47 Trip Odometer 136 Vertical Speed 112, 136 Transition 87 True Airspeed 97 Vias 25 Waypoint Information Page 29 Tuning Beacon 85 View Details 56 Waypoint Menu Options Turn 136...
- Page 156 For the latest free software updates (excluding map data) throughout the life of your Garmin products, visit the Garmin Web site at www.garmin.com. © Copyright 2004 Garmin Ltd. or its subsidiaries Garmin International, Inc. 1200 East 151 Street, Olathe, Kansas 66062, U.S.A.
Need help?
Do you have a question about the GPSMAP 296 and is the answer not in the manual?
Questions and answers