Table of Contents
Advertisement
Quick Links
Preface
Thank you for purchasing HYT TC-310 Business Two-Way Radio. It adopts ergonomic
design to bring you excellent user experience, and is applicable for a variety of industries
such as hospitality, property management, retail, entertainment and manufacture.
This easy-to-use radio will deliver your secure, instant and reliable communication at peak
efficiency. Please read this manual carefully before use. The information presented herein
can help you to derive optimum performance from your radio.
MODELS COVERED BY THIS MANUAL:
TC-310 UHF Two-Way Radio
Advertisement
Table of Contents

Subscribe to Our Youtube Channel
Related Manuals for Hytera HYT TC-310


Summary of Contents for Hytera HYT TC-310
- Page 1 Preface Thank you for purchasing HYT TC-310 Business Two-Way Radio. It adopts ergonomic design to bring you excellent user experience, and is applicable for a variety of industries such as hospitality, property management, retail, entertainment and manufacture. This easy-to-use radio will deliver your secure, instant and reliable communication at peak efficiency.
- Page 2 Icon Information The following icons are available through this manual: Warning/Caution: represents important safety information, to make users aware of misoperations that may cause malfunction of the radio, personal injury or property damage. Note: indicates important information which helps you make better use of your radio.
-
Page 3: Table Of Contents
Contents Safety Information ......................3 Product Inspection ......................4 Radio Overview......................... 5 Battery Information......................7 Antenna Information......................11 Assembly and Disassembly .................... 12 Attaching/Removing the Battery................12 Attaching/Removing the Antenna................14 Attaching/Removing the Belt Clip................14 Attaching/Removing the External Earpiece/Mini USB Device ........15 Basic Operations...................... - Page 4 SAFETYTRAINING INFORMATION Your HYT radio generates RF electromagnetic energy during transmit mode. This radio is designed for and classified as “Occupational Use Only”, meaning it must be used only during the course of employment by individuals aware of the hazards, and the ways to minimize such hazards.
- Page 5 ALWAYS keep the antenna at least 2.5 cm (1 inch) away from the body when transmitting and only use the HYT belt-clip which is listed in instructions when attaching the radio to your belt, etc., to ensure FCC RF exposure compliance requirements are not exceeded.
-
Page 6: Safety Information
OPERATING NOTES When transmitting with a portable radio, hold the radio in a vertical position with its microphone 5 to 10 cm (2 to 4 inches) away from your mouth. Keep the antenna at least 2.5 cm (1 inch) from your head and body. If you wear a portable two-way radio on your body, ensure that the antenna is at least 2.5 centimeters (1 inch) from your body when transmitting. -
Page 7: Product Inspection
Product Inspection Please unpack the package box carefully and check that all shipped items are received; report any missing or damaged items to your dealer. Accessories supplied with the radio Item Qty. (PCS) Antenna Strap Belt Clip Li-Ion Battery Switching Power Owner’s Manual Antenna Li-Ion Battery... -
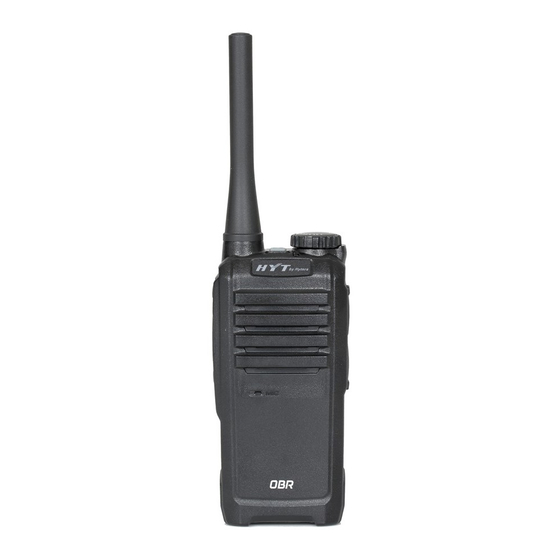
Page 8: Radio Overview
Radio Overview (4) Volume Control (1) Strap Hole (2) Power On/Off Key (3) Antenna Key [+] (5) PTT (Push-to-Talk) (6) Volume Control Key (7) Programmable (8) Microphone Function Key (9) Channel Selector (11) Status (10) Channel Mark (12) HYT Logo Knob Indicator (15) Accessory... - Page 9 Note: Short Press means key press shorter than 1 second, while Long Press means key press longer than 1 second. ﹡LED Indicator Status indications and alert tones are shown in the table below: When the radio is turned on, an alert tone sounds and the Status Indicator flashes orange once.
-
Page 10: Battery Information
from low power to high power. Compandor One beep sounds when the feature is enabled. Two beeps sound when the feature is disabled. Scrambler Channel Lock ﹡Battery Latch Used to secure or remove the battery. ﹡Audio Accessory Jack Used to connect audio accessories. ﹡Mini USB Port Used to connect accessories such as programming cable, cloning cable and switching power. - Page 11 When charging the battery that is attached to a radio, turn the radio off to ensure a full charge. Never charge a wet battery or a wet radio with battery attached. Please dry it with a soft cloth prior to charge. The battery will eventually wear out.
- Page 12 self-discharge. Charging the Battery With a battery-attached radio, when the Status Indicator flashes red, and an alert tone sounds at an interval of ten seconds indicating the battery power runs low, please charge the battery immediately. Only use the charger specified by HYT. The Charge Indicator will indicate the charging progress as follows: Please follow steps below to charge the radio with switching power: 1.
- Page 13 Please follow steps below to charge the radio/battery with a desktop charger: Plug the AC connector of the switching power into an AC outlet socket. Plug the Mini USB connector of the switching power into the Mini USB port on back of the desktop charger.
-
Page 14: Antenna Information
图2:六联排充充电示意图 Figure 1 Schematic Diagram of Six-Unit Charger When multiple desktop chargers are used simultaneously, you may connect the chargers in parallel to create a multi-unit charger. Assembly Method: Slide the latch of a charger into the slot on the bottom of another charger, as shown in Figure 2. -
Page 15: Assembly And Disassembly
days or forest locations may narrow your communication range, so please make full preparations in advance to avoid potential inconvenience. Assembly and Disassembly Attaching/Removing the Battery Attaching the Battery Press the belt clip down (in direction of ①) to make its bottom up. Then push the battery (in direction of ②) into the radio. - Page 16 Figure 2 Removing the Battery Make sure the radio is powered off first. Press the belt clip down (in direction of ①) to make its bottom up. Then lift the battery latch (in direction of ②). See Figure 3. Figure 3 When the battery bottom gets tilted, release the latch and remove the battery (in direction of ③) as shown in Figure 4.
-
Page 17: Attaching/Removing The Antenna
Attaching/Removing the Antenna Attaching the Antenna Align the threaded end of the antenna with the antenna connector located on the radio’s top side. And turn the antenna clockwise to fasten it. See Figure 5. Figure 5 Removing the Antenna Turn the antenna counter-clockwise until you can remove it. Attaching/Removing the Belt Clip Attaching the Belt Clip Unfasten the two screws for belt clip by a screwdriver, then place the belt clip on the radio... -
Page 18: Attaching/Removing The External Earpiece/Mini Usb Device
Figure 6 Removing the Belt Clip Use a screwdriver to loosen the screws and remove the belt clip. Note: Please be careful to avoid missing of screws. Attaching/Removing the External Earpiece/Mini USB Device Attaching the External Earpiece Loosen the strap (①), and tie it to the strap hole (②). Uncover the accessory jack cover (③), and insert the earpiece plug into the jack (④). -
Page 19: Basic Operations
Note: When the earpiece is not in use, make sure the accessory jack is properly covered to prevent intrusion of dusts. Attaching the External Mini USB Device Uncover (not remove) the Accessory Cover (in direction of ①), and insert the Mini USB connector into the Mini USB port (in direction of ②). -
Page 20: Adjusting The Volume
Adjusting the Volume Press [+] to increase or [-] to decrease the volume level. During volume adjustment, the radio will sound alert tones at your selected volume level. Selecting a Channel Rotate the Channel Selector Knob to align the channel numbers. Transmitting Press and hold down the PTT key, and speak into the microphone at your normal voice level. -
Page 21: Advanced Operations
switch even if you rotate the Channel Selector Knob, and this feature always remains valid after PC programming.) Advanced Operations The following functions are programmable by your dealer. CTCSS/CDCSS You may set up talkgroups with unique CDCSS/CTCSS to prevent unwanted conversations at the same frequency. -
Page 22: Battery Strength Indicator
beeping until the PTT key is released. Your dealer can program a pre-alert function to warn you of the TOT expiration in advance. Battery Strength Indicator When you intend to know the battery strength, press the programmed Battery Strength Indication key to illuminate the Status Indicator and learn the battery strength by different colors. -
Page 23: Scan
Operation: Press the Squelch Off key to enter this mode, and press it again to exit. Squelch Off Momentary Purpose: Refer to Squelch Off. Operation: Hold down the Squelch Off Momentary key continuously to enter this mode, and release the key to exit. Monitor Purpose: In this mode, the receiving party can receive incoming calls from the transmitting party regardless of CTCSS/CDCSS condition. - Page 24 Figure 1 Normal Scan Sequence Priority Channel Scan Suppose there is a scan list of 5 channels and Channel 2 is prioritized as Priority 1, the scan operation may proceed in the following sequence, as shown in Figure 2. Figure 2 Priority Scan Sequence Scan On/Off You can enter Scan mode through any of the following two methods: Key-operated Entry...
-
Page 25: Busy Channel Lockout (Bcl)
channel; when the radio is not staying on a scanned channel, it transmits on a preset channel. Unchecked: The radio transmits on the preset channel. Priority Scan This function enables users to scan the most frequently used channel so that messages will not be missed. -
Page 26: Compandor
Plug the earpiece into the accessory jack of the radio. Press the programmed VOX key to activate the VOX feature. Speak through the microphone on the earpiece to transmit your voice. Operation Instructions: Press the PTT key on you radio to disable the VOX during its operation, and release the key to reactivate this function. -
Page 27: Troubleshooting
to perform auto-detection until it operates normally. During the detection process, do not handle the earpiece; otherwise, it may malfunction due to detection errors. If the earpiece functions abnormally, please pull and plug it again as instructed above. You may select VOX levels according to the operating environment. Too much noise and too high VOX level may cause the radio to transmit continuously. -
Page 28: Care And Cleaning
Group members may be too far away from each other. Please make sure that you are within the communication range. The CTCSS/CDCSS settings should be Hear non-group members. changed for all radios in your group by your dealer. Please ensure an adequate volume level is No voice or low voice received from selected. - Page 29 Earbud with In-Line PTT Earset with In-Line MIC & Li-Ion Battery (1700mAh) Six-unit Switching Power ESS09 VOX EHS09 BL1716 PS4001 Rapid-Rate Charger Vehicle Power Adapter Remote Ring PTT Switch Wrist Strap (Nylon) (for Li-Ion Battery) CH06L01 PV1001 POA18 NCN004 Note: Pictures above are for reference only and may vary from actual product. However, featuring functions shall be held.
Need help?
Do you have a question about the HYT TC-310 and is the answer not in the manual?
Questions and answers