Table of Contents

Subscribe to Our Youtube Channel
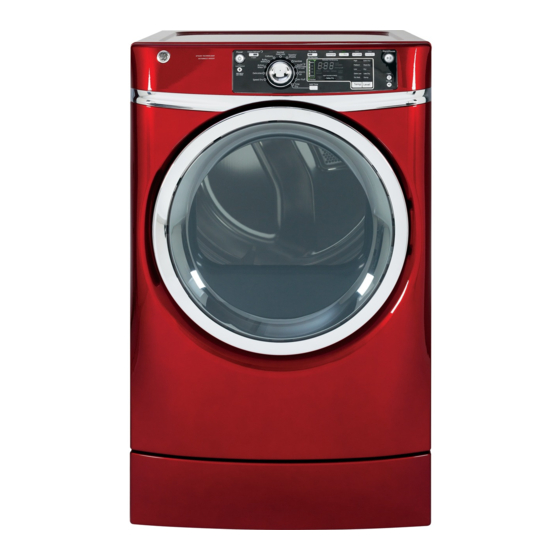
Related Manuals for GE GFDR485GF


Summary of Contents for GE GFDR485GF
- Page 1 GE Appliances Technical Service Guide December 2015 Louisville Built Front Load Dryers GFDR485EF/GF GFDR480EF/GF GFDR275EH/GH GFDR270EH/GH GFDS265EF/GF GFDS260EF/GF GHDS365EF/GF GHDS360EF/GF GE Appliances 31-9249 Louisville, Kentucky 40225...
-
Page 2: Safety Information
Reconnect all Grounding Devices If grounding wires, screws, straps, clips ,nuts, or washers used to complete a path to ground are removed for service, they must be returned to their original position and properly fastened. GE Appliances Technical Service Guide Copyright © 2015 All rights reserved. -
Page 3: Table Of Contents
Table of Contents Safety Information Table of Contents Safety Requirements Nomenclature Introduction Control Features Operating Instructions Diagnostics Service Mode Service Mode Entry Service Mode Exit Service Mode Tests Error Codes Component Locator Views Front View Front View - Front Panel Removed Rear View Rear View Rear Panel Removed Control Panel Components... - Page 4 Side Panel Removal Riser Assembly Riser Removal Door Components Door Assembly Door Removal Door Swing Reversal Door Seal Door Seal Removal Door Frame Door Frame Removal Door Hinge Door Hinge Removal Door Latch Door Latch Removal Door Mask Door Mask Removal Door Cover Door Cover Removal Door Handle...
- Page 5 Inlet Ring Removal Fan Housing Blower Housing Removal Rear Duct Rear Duct Removal Electric Heating System Heater Assembly Heater Removal High Limit Thermostat (Electric) High Limit Thermostat Removal Inlet Thermostat (Electric) Electric Inlet Thermostat Removal Outlet Thermostat (Electric) Electric Outlet Thermostat Removal Inlet Thermistor Inlet Thermistor Removal Outlet Thermistor...
-
Page 6: Safety Requirements
Safety Requirements GE Factory Service Employees are required to use safety glasses with side shields, safety gloves and steel toe shoes for all repairs. Electrically Rated Glove and Dyneema® Cut Resistant Glove Steel Toed Work Boot Dyneema® Cut Resistant Glove... -
Page 7: Nomenclature
Nomenclature Model Number G F D R 2 7 0 E H 0 WW Brand Exterior Color G - GE WW = White Options MC = Metallic Carbon Package RR = Ruby Rd F = Front Load Engineering Digit H = Home Depot... -
Page 8: Introduction
Introduction Louisville built front load dryers incorporate steam features. These units do not utilize a separate steam conjunction with the heat generated by the dryer to de-wrinkle clothing. Located in the Timed Dry Cycles, the steam cycles are: • Steam Refresh: Freshens up to 5 slightly wrinkled dry garments, reducing wrinkles and odors to extend for another wear. -
Page 9: Control Features
Control Features Throughout this manual, features and appearance may vary from your model. Models: GFDR485 GFDR480 GHDS365 GHDS360 13 18 19 Models: GFDR265 GFDR260 13 18 19 Models: GFDR275 GFDR270 13 18 19... -
Page 10: Operating Instructions
Operating Instructions Power Press to “wake up” the display. If the display is active, press to turn the dryer off. NOTE: Pressing Power does not disconnect the appliance from the power supply. Dry Cycles The dry cycle controls the length and tumble speed of the drying process. The chart below will help you match the dry setting with the loads. - Page 11 Sensor Dry Level The sensor continuously monitors the amount of NOTE: Sensor dry Level only works with moisture in the load. When the moisture in your Cottons, Normal, Active Wear, Delicates, clothes reaches your selected dry level, the dryer Speed Dry, Bulky, Towels/Sheets, Sanitize will stop.
-
Page 12: Damp Alert
Extended Tumble The estimated time remaining display will show Minimizes wrinkles by adding approximately 60 “0:00”. minutes of no-heat tumbling after clothes are dry. The beeper will sound every five minutes as a The extended tumble time does not get added to reminder to remove the clothes. - Page 13 Clean Filter Message This message will disappear after the Start/ This message represents only a reminder and Pause button is pressed. Even though you may does not always appear when the filter needs have already cleaned the filter (before or after cleaning.
-
Page 14: Diagnostics
Diagnostics Service Mode Service Mode Entry The control must be in the idle state to enter Service Mode. Press and release My Cycle, then press and release Delay Dry, then press and release My Cycle, then press and release Delay Dry. T1 will be displayed if keys were properly pressed. •... -
Page 15: Error Codes
Error Codes SSD Error Name Error Set Condition Error Clear Conditions Error Response Action No Error No Errors Inlet Thermistor Inlet Thermistor’s Inlet Thermistor’s count Run Heat Control Fallback Short count of low readings of good readings exceeds Algorithm. exceeds 10. Outlet Thermistor Outlet Thermistor’s Outlet Thermistor’s count... -
Page 16: Component Locator Views
Component Locator Views Front View Main Control Board Top Panel (Behind Control Panel) Door Switch Lint Filter (Behind Front Panel) Front Panel Riser Assembly... -
Page 17: Front View - Front Panel Removed
Front View - Front Panel Removed Front Control Assembly Bracket Drum Lamp Front Drum Support Outlet Thermistor (Located Beside Outlet Thermostat) Heater Assembly Outlet Thermostat... -
Page 18: Rear View
Rear View RJ45 Connector Water Valve Rear Cover Terminal Block Cover Vent Duct Screw... -
Page 19: Rear View Rear Panel Removed
Rear View Rear Panel Removed Water Valve Rear Duct Rear Drum Support Inlet Thermistor Outlet Thermistor Outlet Thermostat Motor... -
Page 20: Control Panel Components
Control Panel Components Control Panel Exploded View Cycle Select Knob 5/16" hex Control Board Button Trees Knob Retainer Control Panel Cycle Select Knob Control Panel Front View Front View Rear View Rear View Knob Retainer The control panel is a plastic housing with graphics. The button trees, knob, knob retainer and UI board must be obtained separately. -
Page 21: Button Tree
Button Tree Button Tree (C) Tree (B) Tree (A) Tree (C) Tree (E) Clip Tree (D) Button Tree Removal Clip Clip 1. Remove the control panel. See Control Panel Removal on page 20. 2. Remove the main control board. Clip See Main Control Board Removal on page 23. -
Page 22: Main Control Board
Main Control Board User Interface Mode Type Table (See part instructions if model is not listed in table.) GFMR295EF/GF GFDS260EF/GF GFDS265EF/GF GFDR270EH/GH GFDR275EH/GH GHDS360EF/GF Operating Voltage: 120 VAC GHDS365EF/GF See Main Control Board Location on page 16. GFDR480EF/GF The main control board is two electronic boards GFDR485EF/GF connected together by a wire spline and mounted in a plastic housing. -
Page 23: Rj45 Board
RJ45 Board RJ45 Board Strip Circuit Main RJ45 Control Board Board J4-5 Orange J203-1 +12 VDC +12 VDC J4-6 Yellow J203-2 COMM COMM J4-7 Navy J203-3 DC GND DC GND RJ45 Board Removal 1. Disconnect power from unit. 2. Remove the control panel. See Control Panel Removal on page 20. -
Page 24: Structural Components
Structural Components Top Panel Front Panel See Top Panel Location on page 16. Top Panel Removal 1. Disconnect power from the unit. 2. Remove the control panel. See Control Panel Removal on page 20. 3. Remove the four 1/4 in. hex head top panel screws. -
Page 25: Front Control Assembly Bracket
4. Remove the control panel. The front control assembly bracket is used to attach See Control Panel Removal on page 20. the front panel, top panel and control panel and sup- ports the wire harness. 5. Remove the four 1/4 in. hex head screws located at the top of the front panel. -
Page 26: Rear Panel Removal
11. Disconnect the internal machine wiring from Rear Panel Removal the terminal block and carefully push the wires 1. Disconnect power, water supply and gas (gas through the rear panel. units) from the dryer. Remove Small Wires 2. Remove the control panel. See Control Panel Removal on page 20. -
Page 27: Riser Assembly
See Rear Panel Removal on page 26. 10. Remove any wire harness attachments on the panel being removed. 11. Remove the vent duct. 12. Lay unit on the side opposite of the side panel that's being replaced. 13. Remove the riser mounting bolts and remove the riser. -
Page 28: Door Components
Door Components Door Hinge Door Hinge Door Handle Door Spacer Door Latch Door Cover Protect Door Seal Door Mask Door Cover Door Frame The door is available as a complete assembly, or components may be replaced individually. Door Assembly reinstall the door striker and screws on the opposite side of the door opening. - Page 29 C. Separate the door frame from the chrome door cover. Set the door frame aside on a soft 3. Relocate the door mask. A. Place the chrome door cover on a soft and upwards. B. Remove the two 1/4 in. hex screw that secure door mask in place.
-
Page 30: Door Seal
Door Seal Long Long Long Long Short Short Long Short Short Long Short Short Long Long Long Long Door Seal Removal The door seal is held in place by tabs on the back 4. Grasp the hinge and lift the door frame to re- side of the seal. -
Page 31: Door Hinge Removal
Door Latch Removal 1. Remove the door assembly. See Door Removal on page 28. 2. Remove the door frame. See Door Frame Removal on page 30. 4. Squeeze the latch at the tabs and push through the door frame. Door Hinge Removal 1. -
Page 32: Door Cover
2. Remove the door frame. See Door Frame Removal on page 30. 1/4" hex 1/4" hex 3. Remove the two 1/4 in. hex door handle screws. 1/4" hex 1/4" hex Door Cover 4. Carefully push down the handle out of the door cover. -
Page 33: Drum And Drive Components
Drum and Drive Components Door Switch LED Drum Lamp N.O. N.C. See Drum Lamp Location on page 17. See Door Switch Location on page 16. Operating Voltage: ~ 3 VDC Operating Voltage: 120 VAC Resistance: N/A SPDT Switch LED drum lamps are not present on all mod- Door Closed: Com is connected to N.O. -
Page 34: Incandescent Drum Lamp
Front Drum Support Incandescent Drum Lamp Bulb Socket See Drum Lamp Location on page 17. Incandescent Drum Lamp Strip Circuit To MCB J1-3 (Door Sense) Terminal To Belt Switch Block Door Switch Front Drum Support Removal and Steam Valve 1. Disconnect power from the unit. High Limit 3. -
Page 35: Drive Belt
Drive Belt 3. Remove the front panel. See Front Panel Removal on page 24. 4. Remove the trap duct. See Trap Duct Removal on page 38. 5. Remove the drum lamp. See LED Drum Lamp Removal on page 33. See Incandescent Drum Lamp Removal on page 34. -
Page 36: Drum Roller
See Rear Duct Removal on page 39. wheel. Motor reversal is accomplished by the drum 11. Remove the steam nozzle. reversing relay located on the main control board. See Nozzle Holder Removal on page 49. The relay swaps the location of line and neutral. 12. -
Page 37: Belt Switch
See Trap Duct Removal on page 38. 5. Remove the drum lamp. See LED Drum Lamp Removal on page 33. See Incandescent Drum Lamp Removal on page 34. 6. Remove the front drum support. See Front Drum Support Removal on page 34. 7. -
Page 38: Grill Assembly
inside the drum that hold the grill assembly in place. 6. Pull assembly out of the front drum support. Rear Duct Trap Duct Grill Assembly Trap Duct Trap Duct Removal Heater Assy 1. Disconnect power from the unit. 2. Remove the control panel. Exhaust Duct Fan Housing See Control Panel Removal on page 20. -
Page 39: Inlet Ring
Inlet Ring 14 mm Back-up Nut Rear Duct Inlet Ring Removal 1. Disconnect power from the unit. 2. Remove the control panel. See Control Panel Removal on page 20. 3. Remove the front panel. See Front Panel Removal on page 24. 4. - Page 40 #2 Philips #2 Philips 6. Remove the two 1/4 in. hex screw located on the back side of the rear drum support. 1/4" hex 1/4" hex Remove the rear duct by disengaging the rear duct tab from the heater.
-
Page 41: Electric Heating System
Electric Heating System High Limit Thermostat Inlet Thermostat Heat Shield Heater Assembly Heater Bracket Heater Assembly Main Control Intlet Backup Outlet Backup Board Thermostat Thermostat High Limit Thermostat Location Bottom Coil Motor Centrifugal Switch Top Coil Inlet Thermostat Location See Heater Assembly Location on page 17. Heater Removal 1. -
Page 42: High Limit Thermostat (Electric)
High Limit Thermostat (Electric) Operating Voltage: 240 VAC Opens at 190° + - 5°F Closes at 175° + - 5°F Label Color: Red Electric Inlet Thermostat Removal 1. Disconnect power from the unit. 2. Remove the drum. See Drum Removal on page 35. 3. -
Page 43: Inlet Thermistor
Inlet Thermistor Outlet Thermistor See Inlet Thermistor Location on page 19. Inlet Thermistor Chart Temperature Resistance 50.0°F See Outlet Thermistor Location on page 17. 70.7°F Outlet Thermistor Chart 75.2°F Temperature Resistance 80.6°F 50.0°F 85.1°F 69.8°F 90.5°F 75.2°F 95.9°F 80.6°F 100.4°F 86.0°F 105.8°F 89.6°F... -
Page 44: Gas Heating System
Gas Heating System Flame Detector Burner Inlet Thermostat High Limit Thermostat Gas Valve Igniter Gas Supply Pipe Gas Flow assembly. The gas valve assembly consists of a The regulator regulates gas pressure by moving an regulator, safety valve, main valve and solenoids to actuator up and down as needed. -
Page 45: Gas Conversion
with gas, as shown below. IGNITOR (NOT GLOWING) DETECTOR MAIN BOOSTER SAFETY Safety Valve Open Flame Detector Open below. Should a momentary power failure occur, the valve Gas Conversion To convert the dryer from natural gas to LP gas, refer to the conversion kit (Part #: WE25X10032). To convert the dryer from LP gas to natural gas, refer to the conversion kit (Part #: WE25X10033). -
Page 46: Igniter
Flame Detector 3. Disconnect the gas line and remove the 1/4 in. hex screw from the rear. 4. Remove the drum. See Drum Removal on page 35. 5. Disconnect the wiring to the igniter and gas valves. 6. Remove the two 1/4 in. hex burner bracket mounting screws and slide the entire burner as- sembly toward the front of the dryer to remove from the unit. -
Page 47: High Limit Thermostat (Gas)
High Limit Thermostat (Gas) Operating Voltage: 240 VAC Opens at 260° + - 6°F Closes at 221° + - 10°F Label Color: Orange Gas Inlet Thermostat Removal 1. Disconnect power from the unit. 2. Remove the drum. See Drum Removal on page 35. 3. -
Page 48: Inlet Thermistor
Inlet Thermistor Outlet Thermistor See Inlet Thermistor Location on page 19. Inlet Thermistor Chart Temperature Resistance 50.0°F See Outlet Thermistor Location on page 17. 70.7°F Outlet Thermistor Chart 75.2°F Temperature Resistance 80.6°F 50.0°F 85.1°F 69.8°F 90.5°F 75.2°F 95.9°F 80.6°F 100.4°F 86.0°F 105.8°F 89.6°F... -
Page 49: Steam Components
Steam Components 5. Remove the 1/4 in. hex screw that holds the wa- ter valve in place. Steam Tube Nozzle Holder 1/4" hex Water Valve Retainer Steam Elbow Mist Nozzle 6. Slide the water valve slightly left to remove. Mist Nozzle The mist nozzle is located inside the dryer on the left side of the rear bulkhead. - Page 50 Schematic 12-Black 18-Black 20-Aqua 16-White 22-Yellow 22-Navy 18-Pink/Black...
- Page 51 Motor Direction 1 Highlight 12-Black 18-Black 20-Aqua 16-White 22-Yellow 22-Navy 18-Pink/Black...
- Page 52 Motor Direction 2 Highlight 12-Black 18-Black 20-Aqua 16-White 22-Yellow 22-Navy 18-Pink/Black...
-
Page 53: Warranty
This warranty is extended to the original purchaser and any succeeding owner for products purchased for home use within the USA. If the product is located in an area where service by a GE Authorized Servicer is not available, you may be responsible for a trip change or you may be required to bring the product to an Authorized GE Service location for service. -
Page 54: Index
INDEX Front Control Assembly Bracket – 25 Belt Switch – 37 Front Control Assembly Bracket Removal – 25 Belt Switch Removal – 37 Front Drum Support – 34 Blower Housing Removal – 39 Front Drum Support Removal – 34 Button Tree – 21 Front Panel –... - Page 55 Nozzle Holder Removal – 49 Operating Instructions – 10 Outlet Thermistor – 43 Outlet Thermistor – 48 Outlet Thermistor Removal – 43 Outlet Thermistor Removal – 48 Outlet Thermostat (Electric) – 42 Outlet Thermostat (Gas) – 47 Rear Drum Support – 35 Rear Drum Support Removal –...
Need help?
Do you have a question about the GFDR485GF and is the answer not in the manual?
Questions and answers