Table of Contents
Advertisement
Quick Links
Advertisement
Table of Contents

Related Manuals for montpellier MITL100


Summary of Contents for montpellier MITL100
- Page 1 BUILT IN LARDER User manual MITL100...
-
Page 3: Table Of Contents
Index BEFORE USING THE APPLIANCE ......... 4 General warnings..............4 Safety warnings ................ 6 Installing and operating your fridge........... 7 Electrical connection (For UK type plug) ........8 Before using your fridge............8 THE PARTS OF THE APPLIANCE AND THE COMPARTMENTS ............ -
Page 4: Before Using The Appliance
BEFORE USING THE APPLIANCE General warnings WARNING: Keep ventilation openings, in the appliance enclosure or in the built-in structure, clear of obstruction. WARNING: Do not use mechanical devices or other means to accelerate the defrosting process, other than those recommended by the manufacturer. WARNING: Do not use electrical appliances inside the food storage compartments of the appliance, unless they are of the type recommended by the manufacturer. - Page 5 BEFORE USING THE APPLIANCE - farm houses and by clients in hotels, motels and oth- er residential type environments. - bed and breakfast type environments; - catering and similar non-retail applications. • If the socket does not match the refrigerator plug, it must be replaced by the manufacturer, a service agent or similarly qualified persons in order to avoid a hazard.
-
Page 6: Safety Warnings
BEFORE USING THE APPLIANCE Old and out-of-order fridges or freezers • If your old fridge has a lock, break or remove the lock before discarding it, because children may get trapped inside it and may cause an accident. • •Old fridges and freezers may contain isolation material and refrigerant with CFC or HFC. -
Page 7: Installing And Operating Your Fridge
BEFORE USING THE APPLIANCE • Do not place explosive or flammable material in your fridge for your safety. Place drinks with higher alcohol amount vertically and by closing their necks tightly in the fridge. • Do not cover the body or top of fridge with lace. This affects the performance of your fridge. -
Page 8: Electrical Connection (For Uk Type Plug)
BEFORE USING THE APPLIANCE Electrical connection (For UK type plug) For your safety please read the following information Warning: This appliance must be earthed. This appliance operates from 220-240 volts and should be protected by a 13 amp fuse in the plug. The appliance is supplied with a standard 13 amp 3-pin mains plug fitted with a 13-amp fuse. -
Page 9: The Parts Of The Appliance And The Compartments
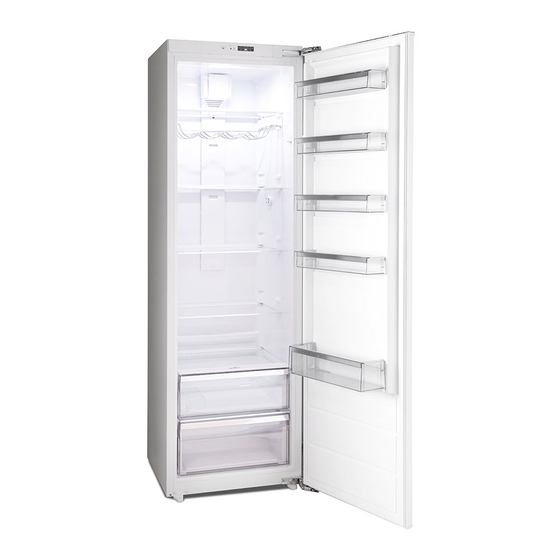
THE PARTS OF THE APPLIANCE AND THE COMPARTMENTS This presentation is only for information about the parts of the appliance. Parts may vary according to the appliance model. 1. Control panel 8. Bottom crisper 2. Turbo fan 9. Bottle shelf 3. -
Page 10: Usage Information
USAGE INFORMATION Control panel Fridge temperature Symbol of Fridge adjusted set button Super Cooling Mode temperature indicator alarm indicator led Fridge partition temperature setting button This button allows setting temperature of the fridge. In order to set values for fridge partition, press this button. Use this button also to activate Super Cooling mode. -
Page 11: Fridge Temperature Settings
USAGE INFORMATION Fridge temperature settings • The initial temperature of the Setting Display is 5°C. • Press fridge setting button once. • Every time you press the button, the setting temperature will increase. (2°C, 4°C, 5°C, 6°C, 8°C, super cooling) •... -
Page 12: Accessories
USAGE INFORMATION Accessories Fresh dial When the humidity controler in the closed position, it allows fresh fruit and vegetables to be stored longer. In case of the crisper is totally full, the fresh dial is located in front of crisper, should be opened. -
Page 13: Arranging Food In The Appliance
ARRANGING FOOD IN THE APPLIANCE • To reduce humidity and consequent increase of frost never place liquids in unsealed containers in the refrigerator. Frost tends to concentrate in the coldest parts of the evaporator and in time will require more frequent defrosting. -
Page 14: Cleaning And Maintenance
CLEANING AND MAINTENANCE • Disconnect the unit from the power supply before cleaning. • Do not clean the appliance by pouring water. • Make sure that no water enters the lamp housing and other electrical components. • The refrigerator should be cleaned periodically using a solution of bicarbonate of soda and lukewarm water. -
Page 15: Defrosting The Refrigerator Compartment
CLEANING AND MAINTENANCE Defrosting the refrigerator compartment • Defrosting occurs automatically in the refrigerator compartment during operation; the water is collected by the evaporation tray and evaporates automatically. • The evaporation tray and the water drain hole should be cleaned periodically with the defrost drain plug to prevent the water from collecting at the bottom of the refrigerator instead of flowing out. -
Page 16: Shipment And Repositioning
SHIPMENT AND REPOSITIONING Transportation and Changing of Installation Position • The original packages and foamed polystyrene (PS) can be retained if required. • During transportation, the appliance should be secured with a wide string or a strong rope. The instructions written on the corrugated box must be followed while transporting. -
Page 17: Before Calling Your After Sales Service
BEFORE CALLING YOUR AFTER SALES SERVICE Alarm ERROR indicator led WHAT TO DO TYPE is turning on Check the door is open There is/are some or not. If the door is not "Failure part(s) Out of order open, call service for Warning"... -
Page 18: Tips For Saving Energy
BEFORE CALLING YOUR AFTER SALES SERVICE Air Blow Noise: Normal fan noise. This noise can be heard in fridges during normal operation of the system due to the circulation of air. If the edges of fridge cabinet that the door joint contact are warm; Especially in summer (hot weather), the surfaces that the joint contact may get warmer during the operation of the compressor, this is normal. -
Page 19: Installation Instructions And Door Reversibility
INSTALLATION INSTRUCTIONS AND DOOR REVERSIBILITY Installation instructions ! It is recommended that this installation be performed by authorized technical stuff. ! Before installation, read the instructions carefully. ! Fit the refrigerator/freezer in stable kitchen units only. ! If necessary, reverse the door according to instructions. 1. - Page 20 INSTALLATION INSTRUCTIONS AND DOOR REVERSIBILITY 19. Lay down the unit door on the floor and screw the door hang to the unit (15) by screws . (fig.M) door (15) 20. To overcome some of the furniture mistakes, there are plastic spacers sticked on the door hang .
- Page 21 INSTALLATION INSTRUCTIONS AND DOOR REVERSIBILITY Figure. B Figure. A 1770 1770 - 1790 Figure. C Figure. D Figure. E Figure. F Figure. G...
- Page 22 INSTALLATION INSTRUCTIONS AND DOOR REVERSIBILITY Figure. H Figure. J Figure. L Figure. K Figure. M Figure. N Figure. O...
- Page 23 INSTALLATION INSTRUCTIONS AND DOOR REVERSIBILITY Figure. P Fig. Q1 Fig. Q2 Figure. Q...
-
Page 24: Door Reversing
INSTALLATION INSTRUCTIONS AND DOOR REVERSIBILITY Figure. R Figure. S Door reversing ! Be careful about not to pinch your fingers in the hinges (door upper hinge and door (20-a) lower hinge (20-b) 1. Unscrew the screws on the front surface of the appliance door . - Page 28 Repairtech Service Helpline: 01527-888133 DOMESTIC APPLIANCE DISTRIBUTORS; HENRY JOHN HOUSE NORTHWAY LANE ASHCHURCH TEWKESBURY GLOUCESTERSHIRE 52206311 GL20 8JH...
Need help?
Do you have a question about the MITL100 and is the answer not in the manual?
Questions and answers