Intermec CN51 User Manual
Hide thumbs
Also See for CN51:
- User manual (170 pages) ,
- Frequently asked questions manual (7 pages) ,
- Instructions (4 pages)
Table of Contents
Advertisement
Quick Links
Advertisement
Table of Contents

Related Manuals for Intermec CN51


Summary of Contents for Intermec CN51
-
Page 1: Mobile Computer
CN 51 Mobile Computer For Windows Embedded Handheld 6.5 User Manual... - Page 2 Intermec by Honeywell. Information and specifications contained in this document are subject to change without prior notice and do not represent a commitment on the part of Intermec by Honeywell. © 2014 by Intermec by Honeywell. All rights reserved.
- Page 3 Description of Change 4/2014 Revised to support software release v2.10. Includes new procedures for configuring the keypad backlight and related power management settings, and for selecting between 2 and 3 charging states for the Battery LED. CN51 Mobile Computer User Manual...
- Page 4 CN51 Mobile Computer User Manual...
-
Page 5: Table Of Contents
About the CN51 Mobile Computer ........ - Page 6 Intermec Applications on the Computer ........
- Page 7 About the Structure of Intermec Settings ........
- Page 8 How to Launch Applications Automatically .......109 viii CN51 Mobile Computer User Manual...
- Page 9 About the Intermec Dashboard ........
- Page 10 Location Services Settings ............159 CN51 Mobile Computer User Manual...
-
Page 11: Before You Begin
Global Services and Support Warranty Information To understand the warranty for your Intermec product, visit the Intermec website at www.intermec.com and click Support > Returns and Repairs > Warranty. -
Page 12: Web Support
This document provides you with information about the features of the CN51, and how to install, configure, operate, maintain, and troubleshoot it. Before you work with the CN51, you should be familiar with your network and general networking terms, such as IP address. Related Documents The Intermec website at www.intermec.com... -
Page 13: Patent Information
Before You Begin 3 Using the Products menu, navigate to your product page. For example, to find the CN51 computer product page, click Computers > Handheld Computers > CN51. 4 Click the Manuals tab. If your product does not have its own product page, click Support >... - Page 14 Before You Begin CN51 Mobile Computer User Manual...
-
Page 15: About The Computer Features
About the Computer Features This chapter introduces the CN51 Mobile Computer with Windows® Embedded Handheld 6.5 operating system. Use this chapter to learn about basic computer features and functions, as well as the available accessories for it. -
Page 16: About The Cn51 Mobile Computer
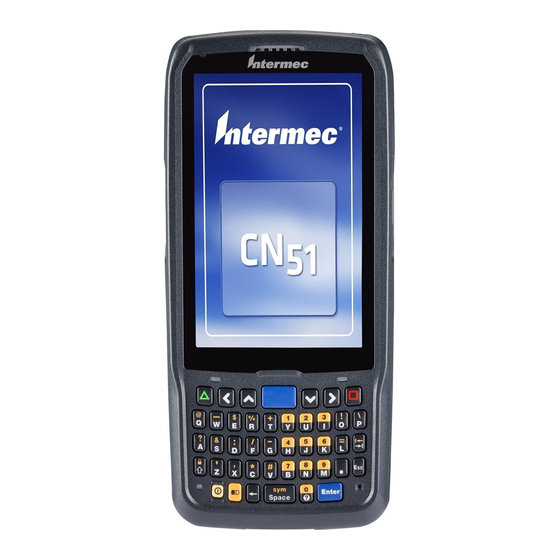
Chapter 1 — About the Computer Features About the CN51 Mobile Computer The Intermec CN51 Mobile Computer is the class-leading mid-range rugged mobile computer that empowers mobile workers with the resources to satisfy and delight customers efficiently today and earn new business tomorrow. - Page 17 Chapter 1 — About the Computer Features CN51 Front View CN51 Back View CN51 Mobile Computer User Manual...
-
Page 18: About Language Provisioning
Charge the Battery Make sure you fully charge the battery (Model 1015AB01) before you use your CN51. You can charge the battery before or after you install it in the CN51. A fully discharged battery charges in approximately 6 hours. -
Page 19: Change The Battery
AC Power Adapter (Model AE37) • Change the Battery When the battery in the CN51 has a low charge, replace it with a charged battery. Note: When you remove a battery from the computer, Intermec recommends that you install a charged battery within one minute to maintain your network connections. -
Page 20: About Battery Status
4 Push forward on the battery release tab until the battery releases, and then lift the battery away from the computer. 5 Insert the bottom of a fully charged battery into the CN51, and press down on the top until it clicks into place. - Page 21 60% charged (when Battery LED is set to 3 charging states). Blinking red The battery is very low. The computer will soon go into Suspend mode. Charge or replace the battery. CN51 Mobile Computer User Manual...
-
Page 22: Set The Battery Status Led Activity
0 °C to 45 °C (32 °F to 113 °F). No battery is installed. The CN51 does not turn on if no battery is installed.The battery is not critically low, and the CN51 is not connected to an external power source. -
Page 23: About Battery Life And Conservation
4 Tap OK. About Battery Life and Conservation Batteries that are stored outside the computer for long periods of time slowly discharge. Intermec recommends storing the battery in a charger to maintain battery performance. Battery Conservation Tips When You Want to: Do this to Save Battery Power: •... -
Page 24: About The Status Leds
Color Description Notification Orange Windows Mobile 6.5 notification. Good Read Green Good read of a bar code. Blinking Bad read of a bar code. Blinking The data collection engine is green processing or starting up. CN51 Mobile Computer User Manual... - Page 25 0 °C to 45 °C (32 °F to 113 °F). The computer is not on external power and the battery is operating normally. CN51 Mobile Computer User Manual...
- Page 26 You can type characters or access functions printed in orange on the keypad. When the LED is green, the Green shift plane is enabled. You can type characters or access functions printed in green on the keypad. CN51 Mobile Computer User Manual...
-
Page 27: About The Keypad
Chapter 1 — About the Computer Features About the Keypad The CN51 comes with either a numeric keypad or a QWERTY keypad: • The numeric keypad is for applications that require mainly numeric data. This keypad also lets you enter special characters, including the alphabet, by pressing color-coded key sequences. -
Page 28: Configure The Keypad Backlight
Brightness (Battery power) or the Brightness (External power) list. The default value is +2. 4 Tap OK. About the Color-Coded Keys Note: The CN51 with QWERTY keypad does not have a green key. Use the orange key and the green key to access additional characters, symbols, and functions printed on the keypad overlay. -
Page 29: How To Capitalize Characters On The Qwerty Keypad
The LED turns off. How to Capitalize Characters on the QWERTY Keypad If your CN51 has the QWERTY keypad, you can capitalize characters individually, or you can type all capital letters by enabling Caps Lock: • To capitalize a single character, press the Shift key, and then the character. -
Page 30: How To Capitalize Characters On The Numeric Keypad
Chapter 1 — About the Computer Features How to Capitalize Characters on the Numeric Keypad If your CN51 has the numeric keypad, you can capitalize characters individually, or you can type all capital letters by enabling Caps Lock: • To capitalize a single character, press the key, and then the 1 key. - Page 31 Tap the screen to turn it back on. Shutdown Very high power saving mode. The computer turns off everything. You must press Power or apply external power to restart the computer. CN51 Mobile Computer User Manual...
-
Page 32: About The Screen Backlight
Clock (RTC) will persist through all of the power options as long as it receives power from the Real Time Clock battery. The Intermec Power Options screen is customizable. You can use Intermec Settings to determine which options are available to end users, the timeout until the default choice is selected, the default action if no option is selected, or to disable the Power Options Screen. -
Page 33: About The Audio Features
1 Point the scanner window at the bar code and hold the computer steady a few inches from the bar code. 2 Press the Scan button or pull the scan handle trigger. The illumination beam, laser pointer, or frame appear. CN51 Mobile Computer User Manual... - Page 34 When the scanner successfully reads a bar code label, you hear a high beep, and the Good Read LED turns on briefly. 3 Release the Scan button or trigger. CN51 Mobile Computer User Manual...
-
Page 35: Connect A Bluetooth Scanner
Chapter 1 — About the Computer Features Connect a Bluetooth Scanner You can connect the computer to an Intermec Bluetooth scanner, such as the SF51 or SR61. Make sure that the Bluetooth radio in the computer is turned on before you try to connect to a scanner. - Page 36 2 Slide the SIM card holder to the left to unlatch it, and lift the holder to open it and access the microSD card holder. 3 Slide the microSD card holder towards the top of the CN51 to unlatch it, and lift the holder to open it.
-
Page 37: How To Transfer Files
Microsoft website at www.microsoft.com/downloads. Use one of these accessories to connect your mobile computer to your • USB cable (P/N 236-297-001) • CN51 USB Snap-On Adapter • CN51 Desktop USB Adapter • AD27 Single Dock CN51 Mobile Computer User Manual... -
Page 38: Set Up The Computer As A Mass Storage Device
File Store and tap OK. 6 Copy files to and from your desktop PC to the mobile computer. CN51 Accessories The CN51 ships with a battery. All other accessories are sold and ordered separately. For help, contact your local sales representative. CN51 Accessory Descriptions... - Page 39 CN51 RS-232 Adapter This accessory snaps on to the CN51 and provides serial connectivity. CN51 Single Dock Use the single dock to hold a CN51 with (Model AD27) its battery installed, charge a spare battery pack, charge the main battery pack, and provide power to the mobile computer.
- Page 40 Chapter 1 — About the Computer Features CN51 Accessory Descriptions (Continued) Accessory Description CN51 Vehicle Power Adapter Use the vehicle power adapter to charge (Model AE36) the battery installed in the CN51 from your vehicle. CN51 Mobile Computer User Manual...
-
Page 41: About The User Interface And Intermec Applications
Use this chapter to learn about the Windows Embedded Handheld user interface and how to interact with the screen. You can also use this chapter to learn about the Intermec applications on your computer, as well as additional applications you can download. -
Page 42: About The User Interface
Chapter 2 — About the User Interface and Intermec Applications About the User Interface The Windows Embedded Handheld 6.5 operating system provides a touch-friendly and easy to navigate user interface. About the Home Screen When you turn on your mobile computer, the Home screen is the first screen that appears after language provisioning is complete. - Page 43 Chapter 2 — About the User Interface and Intermec Applications Home Screen Navigation Bars (Continued) Callout Navigation Bar Description Horizontal scroll bar A horizontal scroll bar appears when you tap the Title bar. The horizontal scroll bar makes it easy to access the applications associated with the Tile bar icons.
-
Page 44: About Screen Gestures
Chapter 2 — About the User Interface and Intermec Applications About Screen Gestures The Windows Embedded Handheld 6.5 interface supports the use of gestures with the finger or stylus to move around the screen. Screen Gestures Gesture Description Represents the left click of a mouse. - Page 45 Chapter 2 — About the User Interface and Intermec Applications Title Bar Status Icons (Continued) Icon Description Bluetooth headset is detected. ActiveSync connection is established. ActiveSync synchronization is in progress. There is a problem with the ActiveSync synchronization. Connected to a Wi-Fi network.
-
Page 46: Configure The Screen Brightness
Chapter 2 — About the User Interface and Intermec Applications Title Bar Status Icons (Continued) Icon Description The battery has a very low charge. The computer is attached to external power and the battery is charging. No battery is installed in the computer. -
Page 47: About Intermec Applications
You can also download additional applications from the Intermec website to help you use all of the features of your computer. Intermec Applications on the Computer Intermec applications help you configure, troubleshoot, and connect your computer to other devices and networks. -
Page 48: Downloadable Intermec Applications For The Computer
Bluetooth scanner. Downloadable Intermec Applications for the Computer You can download Intermec applications to extend the capabilities of the computer. You may need to purchase an Intermec license to run some applications. To find an application, go to www.intermec.com >... -
Page 49: About Intermec Html5 Browser
Chapter 2 — About the User Interface and Intermec Applications You can download and use Intermec Browser for free for a 60-day evaluation period. After the evaluation period expires, you need to purchase a license. For more information on Intermec Browser, see the Intermec Browser User Manual. -
Page 50: About Smartsystems
Chapter 2 — About the User Interface and Intermec Applications You can download and use ITE for free for a 60-day demo period. During the demo period, a demo mode message box appears each time you launch ITE. Press Enter to close the message box. When the demo period expires, you need to purchase a license. -
Page 51: Use The Phone
Use the Phone You can use the phone feature to make and receive telephone calls, as well as transmit data through cellular wide-area networks (WANs). -
Page 52: About The Phone
Activating the UMTS phone on your CN51 is done the same way whether your computer has the Flexible Network Radio or the UMTS/HSPA+WAN radio. You use a SIM card to activate the UMTS phone on the CN51. You can purchase the SIM card from your network provider. 1 Press to turn off the CN51. - Page 53 3 Push forward on the battery release tab until the battery releases, and then lift the battery away from the computer. 4 Open the card access door and slide the SIM card holder to the left to open it. CN51 Mobile Computer User Manual...
- Page 54 6 Close the SIM card holder and slide it to the right to secure it, and then close the card access door. 7 Insert the battery and press down until it clicks in place. 8 Reconnect the handstrap. CN51 Mobile Computer User Manual...
- Page 55 Chapter 3 — Use the Phone 9 Press to turn on the CN51. This screen (or similar) appears: 10 If your computer has the UMTS-only WAN radio, tap Yes. The computer attempts to connect to your UMTS network. When the connection is successful, a confirming message appears.
-
Page 56: About Worldwide Umts
WAN radio after activation. CDMA settings persist through a cold boot. The activation process is slightly different for each CDMA carrier. Your carrier sales contact and an Intermec representative can guide you through the process. In general, you activate the CDMA phone as follows: 1 Contact your wireless provider and give the provider the MEID for the computer. -
Page 57: Make A Phone Call
3 (Optional) If you plan to use the network for data connections (such as browsing the web), you should enable automatic configuration of carrier settings in Intermec Settings. Note: Data connections are to the public domain on your network. Make a Phone Call After you activate your UMTS or CDMA phone, you are ready to start making phone calls. -
Page 58: Configure Phone Sounds
Select a Ring tone from the list. To hear the selected ring tone, tap the Play button. • Select a Keypad sound from the list. • Enter the name of the sound you want to use for voicemail notifications in the Voicemail field. 3 Tap OK. CN51 Mobile Computer User Manual... -
Page 59: How To Add And Switch Between Network Carriers
Use Intermec Settings to quickly change your WAN radio network carrier. Note: Your computer must have the software-defined radio to switch carriers using this method. 1 Tap Start > Settings > System > Intermec Settings > Communications > WWAN > Carrier Choice. CN51 Mobile Computer User Manual... - Page 60 2 Select a Carrier and tap OK. If the update is successful, your new carrier appears in the WWAN settings list. If the update is unsuccessful, the carrier does not change. 3 Tap Ok to exit Intermec Settings. CN51 Mobile Computer User Manual...
-
Page 61: Use The Camera
Use the Camera Learn to use the color camera to take pictures and record videos, read bar codes, perform document capture, or perform signature capture. -
Page 62: About The Color Camera
• configure camera settings for taking pictures and videos. Note: You must use Intermec Settings to configure camera settings for reading bar codes, document imaging, or signature capture. You can send pictures and videos to others or save an image as the background on the Home screen. -
Page 63: Take A Picture
6 When you are done, tap Stop or press Enter to stop recording and save the video. If you choose to save your videos to main memory, the videos are saved to permanent storage on the computer. CN51 Mobile Computer User Manual... -
Page 64: Save Pictures And Videos To A Microsd Card
If you are creating a new scene, type the name in the Scene box. 4 Tap Save. 5 When you are prompted to save the settings, tap Yes. The changes you made are saved. 6 Tap ok to close the message box. CN51 Mobile Computer User Manual... -
Page 65: Scene Settings
Macro: Uses a depth of field of 10 to 50 cm. • Auto: Focuses once within a depth of field range of 50 cm to infinity. • Continuous: Focuses when movement is detected in the scene. • Manual: You must enter a focus distance. CN51 Mobile Computer User Manual... - Page 66 If set to Auto, the camera system automatically determines when to turn the LED on and off when streaming preview frames. Flash The state of the camera flash when you take a picture: automatic, on, or off. CN51 Mobile Computer User Manual...
- Page 67 Black Board • White Board • Aqua • Posterize • Black White Sets the equivalent ISO film speed: Auto, 100, 200, 400, or 800. Noise Reduction Controls the amount of noise or graininess in the image. CN51 Mobile Computer User Manual...
-
Page 68: Configure Camera Settings For Pictures And Videos
Configure Camera Settings for Pictures and Videos Use the Pictures & Videos application to configure the camera. Note: You must use Intermec Settings to configure camera settings for reading bar codes, document imaging, or signature capture. 1 Tap Start > Pictures & Videos. -
Page 69: Camera Settings For Pictures And Videos
Certain settings are only available when taking either Video or Still pictures, but not for both. Note: You must use Intermec Settings to configure camera settings for reading bar codes, document imaging, or signature capture. Camera Settings (Still) - Page 70 +100 • • • Manual • Contrast +100 • • • • -100 • Manual • Sharpness +100 • • • • -100 • Manual • Saturation +100 • • • • -100 • Manual CN51 Mobile Computer User Manual...
- Page 71 Cloudy • Shade • Tungsten • Fluorescent • Incandescent • Horizon • Twilight • Warm Fluorescent • Sunset Exposure From +2.5 to -2.5 in .5 increments. Compensation • ISO Speed Auto • • • • CN51 Mobile Computer User Manual...
- Page 72 Lower 1/2 Average • Upper 1/2 Average • Torch Sets whether or not to use the lighting LED. • • Auto • Flash Sets when to use the flash. • • Auto • FillIn • RedEye CN51 Mobile Computer User Manual...
- Page 73 Flicker To limit possible problems with light/dark exposures when recording video, select the value matching the fluorescent light flicker in the environment: • 50 Hz (typical in Europe) • 60 Hz (typical in North America) CN51 Mobile Computer User Manual...
- Page 74 Variable frame rate Enable variable frame rate to allow the camera to automatically adjust the frame rate for better exposure. This may result in slower preview start. CN51 Mobile Computer User Manual...
- Page 75 Scenes are sets of preset values for • Manual the camera, optimized for • Van Interior different environments. • Office Store • Warehouse • Daylight • Night • Cloudy • Check • DocCap • Settings Brightness: +100 • • • Manual CN51 Mobile Computer User Manual...
- Page 76 -100 • Manual • Color Effects None • Negative • Solarize • Sepia • Gray • Natural • Vivid • Color Swap • Black Board • White Board • Aqua • Posterize • Black White CN51 Mobile Computer User Manual...
- Page 77 • Auto • Night • Spot Light • Sport • Snow • Beach • Aperture • Small Aperture Exposure - Manual Exposure Manual Exposure: • 1/200 • 1/100 • 1/50 • 1/33 • 1/20 • CN51 Mobile Computer User Manual...
- Page 78 480 x 800 (WVGA) • 480 x 640 (VGA) • 288 x 352 (CIF) • 240 x 320 (QVGA) • Video encoder H263 • H264 (default) • MPEG4 • • Video file format *.3gp • *mp4 CN51 Mobile Computer User Manual...
-
Page 79: How To Read Bar Codes With The Camera
Bluetooth scanner, and bar code data is sent to an application as if it came from a scanner or imager. Note: To read bar codes using the camera, you must use Intermec Settings to configure bar code symbology decode settings. -
Page 80: Enable Or Disable Reading Bar Codes With The Camera
Scan button and try again. You may need to move the computer closer to or further away from the bar code for best results. You may also need to select a different focus mode depending on your environment. CN51 Mobile Computer User Manual... -
Page 81: Camera Settings For Reading Bar Codes
Chapter 4 — Use the Camera Camera Settings for Reading Bar Codes To use the camera for reading bar codes, you must use the Intermec Settings application to configure the camera. From the main screen of Intermec Settings, select Data Collection > Camera > Camera Settings. -
Page 82: How To Perform Document Capture With The Camera
Document Capture Image with No Perspective Correction Document Capture Image with Perspective Correction CN51 Mobile Computer User Manual... -
Page 83: Enable Or Disable Document Capture With The Camera
(and other postprocessing features if specified). • You can configure individual parameters in Intermec Settings to enable document capture. Note: To perform document capture using the camera, you must use Intermec Settings to configure all document capture settings. -
Page 84: Camera Settings For Document Imaging
MyDocuments\MDI and tap the image file to view it. Camera Settings for Document Imaging To use the camera for document imaging, you must use the Intermec Settings application to configure the camera. From the main screen of Intermec Settings, select Data Collection > Camera > Camera Settings >... - Page 85 Image rotation Rotates the image None (default) counterclockwise by a • 90 degrees set amount. • 180 degrees • 270 degrees Image lighting Default is disabled. correction Document file Name for the Default is doc_$(num). name document image file. CN51 Mobile Computer User Manual...
- Page 86 Chapter 4 — Use the Camera CN51 Mobile Computer User Manual...
-
Page 87: Use Gps
Use GPS The computer comes equipped with an integrated Global Positioning System (GPS) receiver if your computer has phone capability (WWAN radio). The GPS receiver can deliver standards-based National Marine Electronics Association (NMEA) data strings to GPS applications. -
Page 88: About The Integrated Gps On Your Computer
Note: To use GPS, you must enable the WWAN radio on the computer. Intermec recommends that you use the GPS Intermediate Driver (GPSID) instead of directly accessing the GPS hardware. The GPSID is a Microsoft hardware component that interacts between applications and the GPS hardware. -
Page 89: About The Gps Module Operating Modes
The integrated GPS module has three operating modes: • Standalone MS Assisted (Mobile Station Assisted) • • gpsOneXTRA™ (UMTS computers only) In Standalone mode, the GPS module relies solely on GPS satellites to determine position. Note: The CN51 also supports GLONASS. CN51 Mobile Computer User Manual... -
Page 90: Improve Gps Performance On The Computer
3 Tap the Fix Type tab and select one of these options: Standalone (1), MS assisted (2), or Enable gpsOneXTRA (check box). Note: GLONASS reception is enabled by default. Intermec recommends that you keep GLONASS enabled for better accuracy. To disable GLONASS, make sure that Enable Glonass is not selected. -
Page 91: Configure The Computer
Configure the Computer Use this chapter to learn about the available methods for configuring your computer and how to use Intermec Settings. You can also use this chapter to learn how to configure network communications and wireless security. -
Page 92: How To Configure The Computer
There are several ways to configure the computer: • Directly on the computer. You can use Intermec Settings directly on the computer to change only the settings on that computer. •... -
Page 93: Start Intermec Settings
Intermec Settings is located on the System screen. • Tap Start > Settings > System > Intermec Settings. The Intermec Settings Main Menu appears. About the Structure of Intermec Settings Use the following tables to help find the parameters in Intermec Settings that you want to configure. - Page 94 • Imager settings • Decode security • Camera Enable camera port • Symbologies • Symbology Options • Scanner Settings • Camera Settings • Decode Security • Magstripe Reader Enable Magstripe Reader • Magstripe Reader Settings CN51 Mobile Computer User Manual...
- Page 95 IDL Runtime Versions (Read-only) IDL runtime file versions (ITC50, ITCScan) • Keypad Button Remapping • Green/Orange keys lock option • Keypad backlight • Power Management Power Button • Battery Power • External Power • Device Off Sensor CN51 Mobile Computer User Manual...
- Page 96 The settings that appear in the menu are dependent on the printer that is paired with the device. The printer needs to be using the Wireless Printing application. GPS Menu GPS Options Parameters You Can Configure Bread Crumbing Enable or disable bread crumbing. CN51 Mobile Computer User Manual...
- Page 97 • Enable Blue Light (LED) • Set Rule File Location • Set Data Refresh Periods • Device Health Screen Captures Directory • Screen Captures Allowed Disabled Executables Read-only • Device Wipe Enable Wipe • Interval CN51 Mobile Computer User Manual...
-
Page 98: How To Navigate In Intermec Settings
Virtual GPS Virtual GPS Settings How to Navigate in Intermec Settings You can easily navigate through the screens in Intermec Settings to find the parameters you need to configure: • Tap inside a text field to be able to enter text into it. -
Page 99: Enable Intermec Settings Password
• To exit Intermec Settings, tap Menu > Exit or OK. Enable Intermec Settings Password You can protect Intermec Settings from other users by enabling a password. 1 Start Intermec Settings. 2 Tap Menu > Enter Password. 3 Select the Enable password checkbox. -
Page 100: Configure The Computer Remotely With Smartsystems
• USB and serial communications. Configure 802.11 Radio Communications The CN51 has an 802.11b/g/n or 802.11a/b/g/n radio to transfer data using wireless communications. Before you configure radio communications, you need to have your wireless network set up including your access points. -
Page 101: About Bluetooth Communications
802.11a/b/g/n radio, from the Intermec Settings 802.11 Radio menu, tap Radio Bands and select a/b/g (2.4 and 5.0 GHz). 4 Use Intermec Settings to configure the parameters you need to use for communications with your network. 5 Configure 802.11 security. -
Page 102: Turn On The Bluetooth Radio
1 Tap Start > Settings > Bluetooth > Mode tab. 2 Tap Turn on Bluetooth. 3 (Optional) If you want this computer to be visible to other Bluetooth devices, tap Make this device visible to other devices. 4 Tap OK. CN51 Mobile Computer User Manual... -
Page 103: Connect A Bluetooth Scanner
Chapter 6 — Configure the Computer Connect a Bluetooth Scanner You can connect the computer to an Intermec Bluetooth scanner, such as the SF51 or SR61. Make sure that the Bluetooth radio in the computer is turned on before you try to connect to a scanner. -
Page 104: Create A Configuration Bar Code With Easyset
Make sure that the Bluetooth radio in the computer is turned on before you try to connect to an Intermec Bluetooth printer, such as the PB21, PB50, or PR3. To configure your computer for printing wirelessly using Bluetooth, you need to: •... - Page 105 2 Tap Search to find a printer, or tap Manual to enter a device address. Follow the onscreen instructions to select the current Bluetooth printer. 3 (Optional) Tap Print Test Page. The printer prints out a test page. CN51 Mobile Computer User Manual...
-
Page 106: Connect A Bluetooth Audio Device
2 Follow the onscreen instructions to discover and connect to a Bluetooth audio device. Note: If a wired audio device such as a headset is already connected to the computer, Bluetooth audio receives priority when a Bluetooth audio device is connected. CN51 Mobile Computer User Manual... -
Page 107: About Serial And Usb Communications
LEAP (Funk security only) • You use either Funk or Microsoft security to implement your wireless security solution.Intermec recommends WPA2 security with PSK (Personal) or 802.1x (Enterprise) key management. Before you set security, you need to enable the radio, set the date, and set the SSID on your computer. -
Page 108: Load A Certificate
Tap the Import PFX tab. b Next to the Select pfx to import field, tap <<<. c Find and select the root certificate. d If necessary, enter the Password of pfx. e Tap Import Certificate. CN51 Mobile Computer User Manual... -
Page 109: How To Make Your Security Choice
4 (Optional) In the Profile Label text box, enter a meaningful name for your profile. 5 Configure your security settings. For help, see the next sections. 6 Repeat Steps 3 through 5 for each profile you want to define. CN51 Mobile Computer User Manual... -
Page 110: Configure Wpa Or Wpa2 Enterprise (802.1X) Security
For Prompt for Credentials, select Enter credentials now. b Enter a User Name and User Password. 8 If you selected TLS, enter a User Name and Subject Name. 9 For Validate Server Certificate, select Yes. 10 Tap OK. CN51 Mobile Computer User Manual... -
Page 111: Configure Wpa Or Wpa2 Personal (Psk) Security
Before you set 802.1x-WEP security with Funk security, you need to enable the radio on your computer and set the date. To use TLS protocol, you also need to load a user and root certificate. Intermec recommends that you use WPA2-802.1x instead of 802.1x-WEP if possible. -
Page 112: Configure Leap Security With Funk Security
Configure Static WEP Security with Funk Security Before you set static WEP security with Funk security, you need to enable the radio on your computer and set the date. Intermec recommends that you use WPA2-PSK instead of WEP if possible. -
Page 113: Use Open (No Security) Associations With Funk Security
1 Start Intermec Settings. 2 Select Communications > 802.11 Radio > Funk Security. 3 Select the active Funk security profile. 4 Enter the SSID. 5 For Association, select Open. 6 For Encryption, select WEP. 7 Tap OK. CN51 Mobile Computer User Manual... -
Page 114: Select Microsoft As Your Security Choice
8 Tap OK. The User Logon dialog box appears. 9 If you selected PEAP: a Enter a User Name, Password, and Domain. b If you want to save the password for future authentication sessions, select Save Password. CN51 Mobile Computer User Manual... -
Page 115: Configure Wpa Or Wpa2 Personal (Psk) Security
Before you set 802.1x-WEP security with Microsoft security, you need to enable the radio on your computer and set the date. To use TLS protocol, you also need to load a user and root certificate. Intermec recommends that you use WPA2-802.1x instead of 802.1x-WEP if possible. -
Page 116: Configure Static Wep Security With Microsoft Security
Configure Static WEP Security with Microsoft Security Before you set static WEP security with Microsoft security, you need to enable the radio on your computer and set the date. Intermec recommends that you use WPA2-PSK instead of WEP if possible. -
Page 117: Use Open (No Security) Associations With Microsoft Security
1 Start Intermec Settings. 2 Select Communications > 802.11 Radio > Microsoft Security. 3 Enter the Network name (SSID). 4 For Network Authentication, select Open. 5 For Data Encryption, select Disabled. 6 Tap OK. CN51 Mobile Computer User Manual... - Page 118 Chapter 6 — Configure the Computer CN51 Mobile Computer User Manual...
-
Page 119: Manage The Computer
Manage the Computer Use this chapter to learn how to remotely update, configure, and monitor your Intermec computers. You will also find information on installing and developing software applications as well as how to upgrade the system software. -
Page 120: How To Manage The Computer In Your Network
How to Manage the Computer with CloneNGo Intermec CloneNGo is a software application that allows you to copy the settings and parameters from a master computer onto one or more client computers. Cloning reduces redundancy and error by providing... -
Page 121: How To Develop And Install Applications
How to Develop and Install Applications Use the Intermec Resource Kits to develop applications to run on the mobile computer. The Resource Kits are a library of C++, .NET, Java, and web components grouped by functionality that you can use to create applications for the computer. -
Page 122: Install Applications With Smartsystems
You can use the SmartSystems console to drag-and-drop Intermec applications onto your mobile computer. The console is part of SmartSystems. 1 Download your application file from the Intermec website and unzip it on your desktop PC. 2 Double-click the application file to install it. The application file should appear in the Software Vault. -
Page 123: Install Applications With A Microsd Card
You can use these methods to update your mobile computer: • You can update individual computers, or multiple computers at the same time, using the SmartSystems console. For help, see the next section. You can update individual computers using an SD card. • CN51 Mobile Computer User Manual... -
Page 124: Update The Computer With Smartsystems
• the SmartSystems bundles you want to install. Bundles that include the system software are available from www.intermec.com. Go to Support > Downloads > OS/Firmware/Drivers list. After you locate these items, you can use SmartSystems to update the mobile computer. -
Page 125: Update The Computer With A Microsd Card
• the AutoFlash.img file that contains the update you want to install. If you need this file, visit the Intermec website at www.intermec.com. Click the Products tab, navigate to the computer product page, click the Downloads tab, and then locate the download under OS/Firmware/Drivers. - Page 126 Chapter 7 — Manage the Computer CN51 Mobile Computer User Manual...
-
Page 127: Troubleshoot And Maintain The Computer
Troubleshoot and Maintain the Computer Use this chapter to find answers to any problems you may encounter while using the computer. You will also find information on routine maintenance. -
Page 128: About The Intermec Dashboard
About the Intermec Dashboard The Intermec Dashboard provides proactive monitoring of your computer to prevent downtime. Using Intermec Dashboard, you can easily see the health of the computer and help pinpoint the source of a problem to determine if it is hardware or software related. It is highly integrated with SmartSystems. -
Page 129: About Troubleshooting The Computer
Note: If you send the computer in for service, it is your responsibility to save the computer data and its configuration. Intermec is only responsible for ensuring that the hardware matches the original configuration when repairing or replacing the computer. -
Page 130: Check Wi-Fi Network Status
Follow the next procedure to verify available access points and networks, check signal strength, and view other diagnostics. If you need to contact Intermec Product Support, this information can be helpful in troubleshooting wireless network connection issues. 1 Tap Start > iSpyWiFi. The ISpyWiFi application launches: The ISpyWiFi tab shows: •... - Page 131 Tap Log file. The Save As screen appears. d (Optional) Change the name of the saved log file, the folder to which the file to be saved, the content type (log or text), and the location. e Tap OK. CN51 Mobile Computer User Manual...
-
Page 132: 802.1X Security Problems
You are setting up multiple When you change the SSID, the WEP key values access points in a network are not saved. Configure the WEP key values with different SSIDs, and and save your changes. the connection fails. CN51 Mobile Computer User Manual... -
Page 133: Troubleshoot The Scanner With Scan Diagnostics
2 Select the scanner or imager you want to troubleshoot and tap Diagnose. The application checks to make sure the scanner or imager is enabled and checks the settings to make sure they are optimized. CN51 Mobile Computer User Manual... -
Page 134: Problems Reading Bar Codes
You can troubleshoot problems that prevent you from reading bar codes, such as the appropriate symbology not being enabled. Before you call Intermec Product Support, look for your problem in the next table, and try the possible solutions. Problems Reading Bar Codes... - Page 135 • Make sure the bar code symbology is enabled and configured correctly. Start Intermec Settings and go to Data Collection > Symbologies for the scanning device (scanner, virtual wedge) to check and enable symbologies.
-
Page 136: Problems Using The Computer
• visit the Intermec technical knowledge base, Knowledge Central at intermec.custhelp.com. If you still need help, you can call Intermec Product Support at: 1-800-755-5505 Before you call Product Support, have this information ready: CN51 Mobile Computer User Manual... -
Page 137: Locate Your Configuration Number
Or, programming language of your custom application and tools used to create it. Most information is available in Intermec Settings. Locate Your Configuration Number Before you call Intermec Product Support, you need to know the configuration number of your computer. 1 Open the Device Health Dashboard: •... -
Page 138: How To Restart The Computer
Note: The computer may also cold boot if you change the battery while the CN51 is in Suspend mode, or if you do not change the battery quickly enough when the CN51 is in Hibernate mode. -
Page 139: Clean Boot The Computer
6 Press the Enter key. The message Confirm first key in 6 seconds appears. 7 Press the Space key. The message Confirm second key in 6 seconds appears. 8 Press the Enter key. The message Cleanboot Confirmed appears, and the computer continues the clean boot process. CN51 Mobile Computer User Manual... -
Page 140: Clean The Computer
Opening the computer will void the warranty and may cause damage to the internal components. Note: Intermec recommends that you leave the battery installed when you clean the computer as described. Leaving the battery installed helps prevent fluids from entering the computer through the SIM card and microSD card connectors. -
Page 141: Specifications
Specifications... -
Page 142: Physical And Environmental Specifications
0 °C to 45 °C (32 °F to 113 °F). 20 °C to 25 °C (68 °F to 77 °F) will provide extended battery life. Relative humidity (operating): 5% to 95% non-condensing Environmental rating: IP54, Category 1 CN51 Mobile Computer User Manual... - Page 143 Dutch Post* Postnet* • • EAN/UPC QR Code* • • GS1 Composite* Standard 2 of 5 • • GS1 DataBar Expanded SwedenPost • • GS1 DataBar Limited Telepen • • GS1 DataBar Omni-Directional TLC 39 CN51 Mobile Computer User Manual...
-
Page 144: Ea31 Extended Reading Range
4.50 cm/1.77 in 22.50 cm/8.86 in 0.50 mm/20 mils 6.00 cm/2.36 in 64.00 cm/25.20 in 1 mm/40 mils 12.50 cm/4.92 in 97.50 cm/38.39 in EAN/UPC 100% 0.33 mm/13 mils 4.50 cm/1.77 in 41 cm/16.14 in CN51 Mobile Computer User Manual... -
Page 145: Ea31 Minimum Reading Distances
3.8 cm/1.5 in 24.5 cm/9.65 in 0.50 mm/20 mils 7 cm/2.76 in 45 cm/17.72 in 13.5 cm/5.31 in 71.5 cm/28.15 in 1 mm/40 mils EAN/UPC 100% 0.33 mm/13 mils 5 cm/1.97 in 29.5 cm/11.61 in CN51 Mobile Computer User Manual... -
Page 146: Ea31 Typical Reading Distances
0.25 mm/10 mils 4 cm/1.57 in 26.5 cm/10.43 in 0.38 mm/15 mils 4.9 cm/1.93 in 37 cm/14.57 in EA31 Typical Reading Distances Minimum reading distances are measured in the dark (0 lux). EA31 Typical Reading Distances CN51 Mobile Computer User Manual... - Page 147 0.38 mm/15 mils 4.7 cm/1.85 in 31 cm/12.20 in PDF417 0.17 mm/6.6 mils 5 cm/1.97 in 18.2 cm/7.17 in 0.25 mm/10 mils 3.7 cm/1.46 in 27.5 cm/10.83 in 0.38 mm/15 mils 4.5 cm/1.77 in 40 cm/15.75 in CN51 Mobile Computer User Manual...
-
Page 148: Ea30 Extended Reading Range
64.50 cm/2.56 in 24.50 cm/9.65 in 0.50 mm/20 mils 7.00 cm/2.76 in 62.50 cm/24.61 in 1 mm/40 mils 14.50 cm/5.71 in 97.50 cm/38.39 in EAN/UPC 100% 0.33 mm/13 mils 6 cm/2.36 in 40 cm/15.75 in CN51 Mobile Computer User Manual... -
Page 149: Ea30 Minimum Reading Distances
EAN/UPC 100% 0.33 mm/13 mils 6 cm/2.36 in 31.5 cm/12.4 in DataMatrix 0.18 mm/7 mils 8 cm/3.15 in 15.5 cm/6.1 in 0.25 mm/10 mils 6.5 cm/2.56 in 21.5 cm/8.46 in 0.38 mm/15 mils 5.5 cm/2.17 in 31.5 cm/12.4 in CN51 Mobile Computer User Manual... -
Page 150: Ea30 Typical Reading Distances
0.25 mm/10 mils 5.5 cm/2.17 in 25 cm/9.84 in 0.38 mm/15 mils 7 cm/2.76 in 34 cm/13.39 in EA30 Typical Reading Distances Minimum reading distances are measured in the dark (0 lux). EA30 Typical Reading Distances CN51 Mobile Computer User Manual... - Page 151 0.25 mm/10 mils 6 cm/2.36 in 23 cm/9.06 in 0.38 mm/15 mils 5.5 cm/2.17 in 34.5 cm/13.58 in PDF417 0.25 mm/10 mils 5.5 cm/2.17 in 26 cm/10.24 in 0.38 mm/15 mils 6.5 cm/2.56 in 37 cm/14.57 in CN51 Mobile Computer User Manual...
- Page 152 Appendix A — Specifications CN51 Mobile Computer User Manual...
-
Page 153: Default Settings
Default Settings... -
Page 154: Data Collection Settings
Disable Code 128/GS1-128 Enable DataMatrix Enable DutchPost Disable EAN/UPC Enable UPC A, UPC E, EAN 8, EAN 13 GS1 Composite Disable GS1 DataBar Expanded Disable GS1 DataBar Limited Disable GS1 DataBar Omni-Directional Disable HanXin Disable CN51 Mobile Computer User Manual... - Page 155 Symbology Option Settings Default Value Preamble None (Disabled) Postamble None (Disabled) Symbology Identifier Disable Multicode Disable Scanner Settings Scanner Setting Default Value Trigger Predefined Modes Level Trigger Mode Level Aimer Mode Typical aimer Hardware Trigger Enable CN51 Mobile Computer User Manual...
- Page 156 Imager Settings - File Properties File Property Default Value Image file location \My Documents\MDI Folder memory limit (MBytes) Enable tagging location data Disable Imager Settings - Viewfinder Properties Viewfinder Property Default Value Enable viewfinder Disable CN51 Mobile Computer User Manual...
- Page 157 Horizontal and vertical Horizontal offset Vertical offset Area width Area height Bar code width Bar code height Imager Settings - Document Imaging Properties Document Imaging Property Default Value Enable document imaging Disable Focus check Disable CN51 Mobile Computer User Manual...
- Page 158 Noise Reduction Subsampling None Image Rotation None Image lighting correction Disable Decode Security Settings Decode Security Setting Default Value Consecutive data validation Identical consecutive timeout 1000 Diff consecutive timeout Center Decoding Disable Center decoding tolerance Disable CN51 Mobile Computer User Manual...
-
Page 159: Bluetooth Scanner Settings
Camera Setting Default Enable camera port Symbology Settings Symbologies Default Value Australian Post Disable Aztec Disable Disable CanadaPost Disable Codabar Disable Codablock A Disable Codablock F Disable Code 11 Disable Code 39 Enable Code 93 Disable CN51 Mobile Computer User Manual... - Page 160 Disable Matrix 2 of 5 Disable Maxicode Disable Micro PDF417 Disable Disable PDF417 Enable Planet Disable Plessey Disable Postnet Disable QR Code Disable Standard 2 of 5 Disable SwedenPost Disable Telepen Disable TLC 39 Disable CN51 Mobile Computer User Manual...
- Page 161 Lighting goal Illumination level Initial 1D search area Center Damaged 1D codes Disable Camera Settings - File Properties File Property Default Value Image file location \My Documents\MDI Folder memory limit (MBytes) Enable tagging location data Disable CN51 Mobile Computer User Manual...
- Page 162 Disable Brightness Color conversion None Conversion threshold Very dark Output compression JPEG Output compression quality Projective mapping resolution Disable Bar code length Bar code mask Null (none specified) Automatic correction Horizontal and vertical Horizontal offset CN51 Mobile Computer User Manual...
- Page 163 Noise reduction Image rotation None Image lighting correction Disable Document file name doc_$(num) Camera Settings - Image Capture Properties Image Capture Property Default Value Output Compression Bitmap Output compression quality Edge Enhancement None Noise Reduction CN51 Mobile Computer User Manual...
-
Page 164: Magstripe Reader Settings
Center Decoding Disable Center decoding tolerance Disable Magstripe Reader Settings Use these settings to configure the optional magnetic stripe reader accessory. Magstripe Reader Settings Magstripe Reader Settings Default Enable Magstripe Reader Enable USB MSR auto-detect Enable CN51 Mobile Computer User Manual... -
Page 165: Communications Settings
Profile Settings Default Hide password text Enable Profile Label Profile_1 Network Type Infrastructure Channel SSID INTERMEC Power Mode Enabled (Fast PSP) 8021x None Association Open Encryption None Pre-Shared Key None Transmit Key Key1 Key 1 None CN51 Mobile Computer User Manual... - Page 166 Provisioning PAC Prompt Reprovisioning PAC Prompt Authenticate PAC provisioning Optional server (by certificate) Logging IP Settings IP Settings Default Current Device IP Address 0.0.0.0 DHCP Enable DHCP Client Identifier None IP Address 192.168.1.106 Subnet Mask 255.255.255.0 CN51 Mobile Computer User Manual...
-
Page 167: Ethernet Adapter Settings
IP Settings Default Current Device IP Address 0.0.0.0 DHCP Enable DHCP Client Identifier None IP Address None Subnet Mask 255.255.255.0 Default Router None Primary DNS None Secondary DNS None Primary WINS None Secondary WINS None CN51 Mobile Computer User Manual... -
Page 168: Bluetooth Settings
Backlight Settings Default Display brightness Dim backlight after (on power) Never Keypad backlight Always off Brightness (Battery power) Brightness (External power) Features Disabled by Policy State Setting Default Features Disabled by Policy No systems disabled CN51 Mobile Computer User Manual... - Page 169 Screen turns off after: Disabled • Device turns off after: 5 minutes • External Power Screen turns off after: Disabled • Device turns off after: Disabled Device Off Sensor Sleep face down Battery LED 2 charging states CN51 Mobile Computer User Manual...
- Page 170 Enable Enable USB external drive Enable Enable all image capture Enable Sound Settings Sound Settings Default Beeper and voice Medium Headset beeper Very low Good read vibrate intensity 1 strong pulse Screen taps Key clicks CN51 Mobile Computer User Manual...
-
Page 171: Gps Bread Crumbing State
This section lists default settings for the Core Messaging Service. Core Messaging Service Settings Core Messaging Service Settings Default Server IP None Associated Server IP None Broadcast Name INTERMEC Port 62241 Keep Alive Ping Interval 30 seconds CN51 Mobile Computer User Manual... -
Page 172: Smartsystems Information Settings
System Device Health (seconds): 90 • Network Device Health (seconds): 45 • Printer Device Health (seconds): 300 Device Monitor Settings Device Monitor Settings Default • Device Health Screen Captures Directory: \SmartSystems\ScreenCapture • Screen Captures Allowed: 3 Disabled Executables None CN51 Mobile Computer User Manual... -
Page 173: Virtual Wedge Settings
Default • Server Port: 9569 (Unavailable unless the server is enabled) • Enable Server: Disable • Virtual GPS (unavailable unless Output: Disable the server is enabled) • COM Port: 8 (unavailable unless output is enabled) CN51 Mobile Computer User Manual... - Page 174 Honeywell 6001 36th Avenue West Everett, Washington 98203 U.S.A. tel 425.348.2600 fax 425.355.9551 www.intermec.com © 2014 Intermec by Honeywell All rights reserved. CN51 Mobile Computer User Manual *935-077-002* P/N 935-077-002...
Need help?
Do you have a question about the CN51 and is the answer not in the manual?
Questions and answers