Table of Contents

Related Manuals for Firepower MIG Spool Gun


Summary of Contents for Firepower MIG Spool Gun
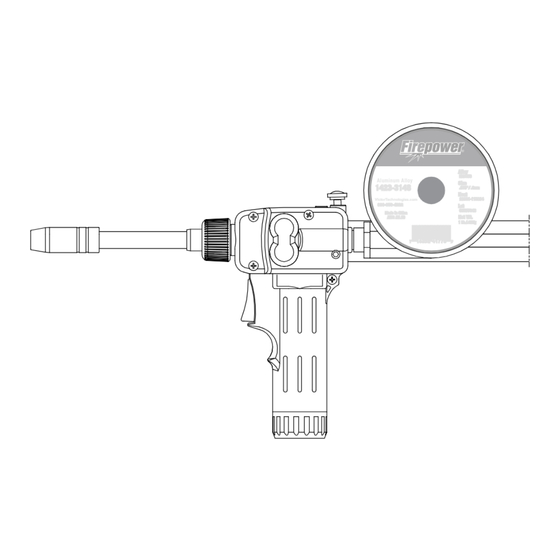
- Page 1 MAX OUTPUT MATERIALS FLEXIBLE GASES INERT ALUMINUM AMPS ARGON Firepower MIG Spool Gun Aluminum Alloy VictorTechnologies.com Safety and Operating Instructions Revision: AA Issue Date: August 2, 2014 Manual No.: 0-5362 www.firepower.com...
- Page 2 YOU ARE IN GOOD COMPANY! Firepower is a Global Brand of Arc Welding Products for Victor Technologies Inc. We distinguish ourselves from our competition through market-leading innovation and truly dependable products that will stand the test of time.
- Page 3 While the information contained in this Manual represents the Manufacturer’s judgment, the Manufacturer assumes no liability for its use. Firepower Spool Gun: 1444-0894 Set-up and Safe Operating Procedures Instruction Guide Number 0-5362 Published by: Victor Technologies, Inc.
-
Page 4: Table Of Contents
Changing the wire conduit ........4-12 4.03 Changing the drive rolls ........4-13 SECTION 5: TROUBLESHOOTING CHECK LIST ..........5-15 SECTION 6: REPLACEMENT PARTS LIST .............6-16 FIREPOWER - LIMITED WARRANTY TERMS ..........6-18 WARRANTY SCHEDULE ................6-19 GLOBAL CUSTOMER SERVICE CONTACT INFORMATION Rear Cover... -
Page 5: Section 1: Safety Precautions
SET-UP AND SAFE OPERATING PROCEDURES SECTION 1: SAFETY PRECAUTIONS WARNING SERIOUS INJURY OR DEATH may result if welding and cutting equipment is not properly installed, used, and maintained. Misuse of this equipment and other unsafe practices can be hazardous. The operator, supervisor, and helper must read and understand the following safety warnings and instructions before installing or using any welding or cutting equipment, and be aware of the dangers of the welding or cutting process. - Page 6 SET-UP AND SAFE OPERATING PROCEDURES ARC RAYS, HOT SLAG, AND SPARKS CAN INJURE EYES AND BURN SKIN Welding and cutting processes produce extreme localized heat and strong ultraviolet rays. Never attempt to weld/cut without a federally compliant welding helmet with the proper lens. A number 12 to 14 shade filter lens provides the best protection against arc radiation.
- Page 7 SET-UP AND SAFE OPERATING PROCEDURES SAFETY AND OPERATING REFERENCES 1. Code of Federal Regulations (OSHA) Section 29, Part 1910.95, 132, 133, 134, 139, 251, 252, 253, 254 and 1000. U.S. Government Printing Office, Washington, DC 20402. 2. ANSI Z49.1 “Safety in Welding and Cutting”. 3.
- Page 8 SET-UP AND SAFE OPERATING PROCEDURES This Page Intentionally Blank 89200016...
-
Page 9: Section 2: Model Specifications
SET-UP AND SAFE OPERATING PROCEDURES SECTION 2: MODEL SPECIFICATIONS Description Rating Rated Welding Current C0 160A Duty Cycle Wire Diameter (Normal) 0.023-0.035 (Normal) Wire Diameter (Stainless Steel) 0.023-0.030 (Stainless Steel) Maximum Wire Feed Speed 630 in./min. (16 m/min.) Diameter: 4” (100 mm) Maximum Wire Spool Size Width: 1.75”... - Page 10 SET-UP AND SAFE OPERATING PROCEDURES This Page Intentionally Blank 89200016...
-
Page 11: Section 3: Installation And Operation
SET-UP AND SAFE OPERATING PROCEDURES SECTION 3: INSTALLATION AND OPERATION 3.01 CONNECTING THE SPOOL GUN 1. Make sure the welding power source is turned OFF before connecting the welding gun. 2. Insert the gun connection into the feeder receptacle, aligning the conduit plug first, then the gas plug. -
Page 12: Adjusting Wire Feed Pressure And Speed
SET-UP AND SAFE OPERATING PROCEDURES 3.02 ADJUSTING WIRE FEED PRESSURE AND SPEED 1. Use a screwdriver to adjust the wire feed pressure. Turn the adjusting screw clockwise to decrease, or counterclockwise to increase pressure on the wire feed drive rolls. 2. - Page 13 SET-UP AND SAFE OPERATING PROCEDURES 3. Press the red button on top of the gun to release pressure from the drive rolls. 4. Push the wire through the guide and into the wire feed drive rolls. 5. Make sure the welding power source is turned ON before proceeding to step 6.
- Page 14 SET-UP AND SAFE OPERATING PROCEDURES 7. Adjust the friction nut on the spool shaft to apply the correct wire tension. Spool should stop when trigger is released. 8. Replace the wire spool cover and hand tighten the cover screw. Installation and Operation 3-10 89200016...
-
Page 15: Section 4: Care And Maintenance
SET-UP AND SAFE OPERATING PROCEDURES SECTION 4: CARE AND MAINTENANCE 4.01 CHANGING THE CONTACT TIP NOTE Replace contact tip if hole is enlarged or deformed. 1. Select the correct contact tip according to the wire used. 2. Remove the nozzle from the gun to reveal the contact tip. -
Page 16: Changing The Wire Conduit
SET-UP AND SAFE OPERATING PROCEDURES 4.02 CHANGING THE WIRE CONDUIT NOTE Replace liner if hole is obstructed. Make sure the end of the liner is smooth. 1. Turn the power source OFF and disconnect the gun. 2. Unscrew the nozzle and remove it from the conductor tube. -
Page 17: Changing The Drive Rolls
SET-UP AND SAFE OPERATING PROCEDURES 4. Remove the conductor tube by unscrewing the nut at the base. 5. Pull the liner out and replace. Repeat steps 1-4 in reverse order to reassemble the gun. 4.03 CHANGING THE DRIVE ROLLS NOTE Turn power supply OFF before replacing drive rolls. - Page 18 SET-UP AND SAFE OPERATING PROCEDURES 3. Remove one screw holding each drive roll in place. Press the red button on top of the gun to relieve pressure on the rolls if necessary. Remove the drive rolls, and install the new drive rolls in reverse order. 4.
-
Page 19: Section 5: Troubleshooting Check List
SET-UP AND SAFE OPERATING PROCEDURES SECTION 5: TROUBLESHOOTING CHECK LIST Problem Possible Cause Corrective Action Be sure the wire diameter being used is Incorrect drive rolls stamped on the drive rolls. Replace drive rolls if necessary. Check and correct drive roll pressure. Turn pressure adjusting screw clockwise until Incorrect drive roll the wire feeds properly or doesn’t slip. -
Page 20: Section 6: Replacement Parts List
SET-UP AND SAFE OPERATING PROCEDURES SECTION 6: REPLACEMENT PARTS LIST Stock Image Number Part Number Description 1110-1100 11-23 Contact Tip .023 (0.6 mm) 1110-1101 11-30 Contact Tip .030 (10.8 mm) 1110-1102 11-35 Contact Tip .035 (10.9 mm) 1210-1300 21T-37 Nozzle 3/8" (9.5 mm) 1210-1100 21-37 Nozzle 3/8"... - Page 21 SET-UP AND SAFE OPERATING PROCEDURES Stock Image Number Part Number Description 2031-2225 WSP62180 Conductor Tube 2031-2228 WSPDR023 .023 Drive Roll Assembly 2031-2234 WSPGR023 .023 Guide Roll Assembly 2031-2229 WSPDR035045 .035 Drive Roll Assembly 2031-2235 WSPGR035045 .035 Guide Roll Assembly .023 Drive Roll Assembly - 2031-2250 WSPDRU023 U-Shaped Smooth...
-
Page 22: Firepower - Limited Warranty Terms
The warranty is effective for the time stated below beginning on the date that the authorized distributor delivers the products to the Purchaser. Notwithstanding the foregoing, in no event shall the warranty period extend more than the time stated plus one year from the date Firepower delivered the product to the authorized distributor. -
Page 23: Warranty Schedule
* 2 years on Power Supply Components 2 Years Parts / No Labor Auto-Darkening Welding Helmet (electronic Lens), ** 1 Month Harness Assy Firepower Regulator for Firepower MST 220i (No labor) 90 days parts / No Labor Remote Controls MIG and TIG Torches (Supplied with power sources) - Page 24 THE AMERICAS Denton, TX USA U.S. Customer Care Ph: 1-800-426-1888 (tollfree) Fax: 1-800-535-0557 (tollfree) International Customer Care Ph: 1-940-381-1212 Fax: 1-940-483-8178 Miami, FL USA Sales Office, Latin America Ph: 1-954-727-8371 Fax: 1-954-727-8376 Oakville, Ontario, Canada Canada Customer Care Ph: 1-905-827-4515 Fax: 1-800-588-1714 (tollfree) EUROPE Chorley, United Kingdom...
Need help?
Do you have a question about the MIG Spool Gun and is the answer not in the manual?
Questions and answers