Table of Contents
Advertisement
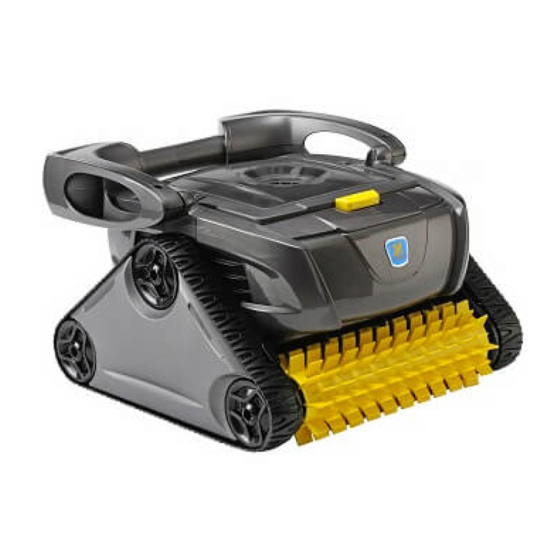
TYPE EM14--
TYPE EM15--
Robotic Pool Cleaner
Owner's Manual
WARNING
FOR YOUR SAFETY - For anything other than the routine cleaning and maintenance described in this
manual, this product must be serviced by a pool technician who is licensed and qualified in pool equipment
by the jurisdiction in which the product will be installed where such state or local requirements exist.
In the event no such state or local requirement exists, the pool technician must be a professional with
sufficient experience in pool equipment installation and maintenance so that all of the instructions in this
manual can be followed exactly. Improper installation and/or operation will void the warranty.
Advertisement
Table of Contents
Troubleshooting

Related Manuals for Zodiac CX35


Summary of Contents for Zodiac CX35
- Page 1 TYPE EM14-- TYPE EM15-- Robotic Pool Cleaner Owner's Manual WARNING FOR YOUR SAFETY - For anything other than the routine cleaning and maintenance described in this manual, this product must be serviced by a pool technician who is licensed and qualified in pool equipment by the jurisdiction in which the product will be installed where such state or local requirements exist.
-
Page 2: Table Of Contents
If the original dealer does not perform warranty service, please visit www.zodiac.com.au to locate an independent service company near you. If you are unable to locate a service company, please call our Customer Service Team at 1300 763 021. -
Page 3: Section 1. Important Safety Instructions
• Do not bury cord. Locate cord so as to prevent it from being damaged by lawn mowers, hedge trimmers and other equipment. • To reduce the risk of electrical shock, do not use the robotic cleaner or control box if the cord is worn or damaged. Contact Zodiac Customer Care Service 1300 763 021 immediately for proper servicing and replacement of the damaged cord. -
Page 4: Section 2. Getting Started
You can operate the filter pump during a cleaning • If there are missing parts or damage, contact cycle; any particles in suspension will be filtered Zodiac Technical Support: 1300 763 021 out. However, it is advised to start cleaning with the filter pump off. •... -
Page 5: Assembling The Transport Caddy
Assembling the Transport Caddy Unscrew the handnut from the base unit (Figure 2). Figure 4. Twist Handnut to Secure Frame Snap two (2) support blocks into place (Figure 5). Slide axle and hubcap piece through center of Figure 2. Remove Handnut from Base Unit Insert the metal handle frame tubing into the wheel and attach to base unit. -
Page 6: Connecting The Control Unit To The Caddy
Connecting the Control Unit to the Caddy Align the bottom of the control unit with the notch at bottom of the control unit hook on the caddy (Figure 8). Figure 6. Attach Caddy Handle Figure 8. Align Control Unit on Caddy Hook Press control unit onto the caddy hook until it snaps and locks into position (Figure 9). -
Page 7: Connecting To A Power Source
Connecting to a Power Source WARNING Failure to comply with the following warnings can result in permanent injury, electrocution or drowning. PREVENT ELECTRICAL SHOCK • Keep the Control box at least 3.5 m from the edge of the pool. • The cleaner is to be installed in accordance with the relevant requirements of the Australian wiring rules AS/NZS 3000. -
Page 8: Section 3. Operation
• The cleaning cycle can be customized at any time, CAUTION before the cleaner starts or while it is operating. The Zodiac robotic cleaner includes a safety feature ® To prevent damage to the cleaner, be sure to adhere... -
Page 9: Starting The Cleaner
control unit Recommended cleaner cleaner Recommended entry point control unit Floating Cable Length Figure 13. Spread Floating Cable Across Farthest Distance of the Pool Starting the Cleaner The first time you use the cleaner, the cleaning surface Figure 12. Submerge and Remove Trapped Air default setting is Floor and Wall After the first time, the default is the last setting used. -
Page 10: Wall Climbing (Surface Control System)
Wall Climbing (Surface Control System) The cleaner has the ability to clean the pool walls up to the waterline. How much the cleaner needs to grip to the wall depends upon the pool surface. Grip Intensity Indicator: Surface Control System (SCS) settings are as follows Stopping the Cleaner for different pool surface types: and Removing from the Pool... -
Page 11: Rinsing The Cleaner
Figure 15. Lift Cleaner From Pool with Handle CAUTION Use care and correct lifting technique when lifting heavy objects. Incorrect removal of the cleaner from the pool can cause muscle strain or back injury. Rinsing the Cleaner Rinse the cleaner after every cleaning cycle. Use slightly soapy clean water, then rinse generously with clean water. -
Page 12: Storing The Cleaner
Press two latches (1) and remove the filter Storing the Cleaner canister lid (2). See Figure 18. The cleaner must be cleaned regularly using slightly soapy clean water. Do not use solvents such as acetone or its equivalent. Rinse the cleaner generously using clean water. -
Page 13: Section 4. Maintenance
control unit Recommended cleaner cleaner Recommended entry point control unit Floating Cable Length Figure 22. Spread Floating Cable Across Farthest Distance of the Pool IMPORTANT Figure 21. Cleaner Stored Correctly on Caddy The floating cable may become tangled if correct procedure is not followed. -
Page 14: Check For Brush Wear
After every cleaning cycle: Check for Brush Wear The cleaner is fitted with PVC brushes in front and Unplug power to the cleaner at the control rear. There are raised grooves that are ''wear'' indicators unit. on the brushes located next to the tab connectors (see Figure 24). -
Page 15: Replacing The Brushes
(even if the bristle wear is not even). Zodiac Group Australia Pty Ltd recommends that you replace the brushes every two (2) years. -
Page 16: Replacing The Track
Replacing the Track Stretch the track around the second wheel, then pull over the last wheel (see Figure 34). Stand the cleaner on its side (Figure 31). Push and position the rib of the track so that the track is seated properly in the groove of the wheel. -
Page 17: Section 5. Troubleshooting
Floating cable may not be plugged Unplug the floating cable from the LED flashes once into the Control box correctly. Control box and reconnect. If the problem persists, contact Zodiac Customer Service at 1300 763 021 2 Flashes Cleaner wheels may be jammed Turn cleaner wheels to ensure LED flashes twice or brushes may be blocked with they are not jammed. -
Page 18: General Troubleshooting
Remove cleaner from the pool. Press power button begin a new cycle. OFF, then begin a new cycle. Propeller may be jammed and not Remove cleaner from the pool. Contact Zodiac turning correctly. Customer Service at 1300 763 021. Wheels may be jammed and not turn- Remove cleaner from the pool. -
Page 19: Section 6. Conformity
Although the robotic pool cleaners have been tested in a large variety of swimming pools, Zodiac cannot guarantee that this robotic pool cleaner will be compatible with all pools. Some pool features may affect performance. For further advice, please contact your Zodiac dealer. - Page 20 Wetherill Park NSW 2164, Australia 1300 763 021 | www.zodiac.com.au ZODIAC ® is a registered trademark of Zodiac International, S.A.S.U, used under license. All other trademarks used herein are the property of their respective owners. ©2016 Zodiac Pool Systems, Inc. H0574000 RevA...
Need help?
Do you have a question about the CX35 and is the answer not in the manual?
Questions and answers
do the tracks become stretched and prevent the unit from working effectively