Table of Contents

Related Manuals for Carrier KSACN0401AAA


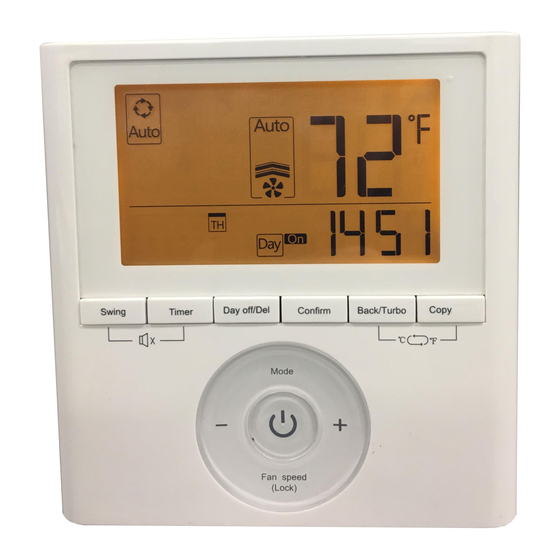
Summary of Contents for Carrier KSACN0401AAA
-
Page 1: Installation Instructions
Wired Remote Controller 7 Day Programmable Ductless Systems KSACN0401AAA (High Wall/Floor Console Models) KSACN0501AAA (Ducted/Cassette Models) INSTALLATION INSTRUCTIONS NOTE: Read the entire instruction manual before installing the unit. -
Page 2: Table Of Contents
TABLE OF CONTENTS PAGE SAFETY CONSIDERATIONS ..........COMPATIBILITY TABLES . - Page 3 CAUTION EQUIPMENT DAMAGE HAZARD Failure to follow this caution may result in equipment damage or improper operation. Excessive torque can break the flare nut depending on installation conditions. CAUTION EQUIPMENT DAMAGE HAZARD Failure to follow this warning could result in personal injury or death. Before beginning any modification or installation of this kit, ensure the main electrical disconnect is in the OFF position.
- Page 4 NOTE: Save this manual for future reference. This manual provides a detailed description of the precautions that the user should be mindful of during operation. To ensure correct service of the wired controller, read this manual carefully before using the unit. Keep this manual, after reading it, for future reference.
-
Page 5: Compatibility Tables
COMPATIBILITY TABLES Table 1—Wired Controller: KSACN0401AAA HIGH WALL* FLOOR CONSOLE** 40MAQB09B--1 619PAQ009BBMA 40MHHQ09---1 40MHHC09---1 40MBFQ09---3 40MAQB12B--1 619PAQ012BBMA 40MHHQ12---1 40MHHC12---1 40MBFQ12---3 40MAQB09B--3 619PEQ009BBMA 40MHHQ09---3 40MHHC09---3 40MAQB12B--3 619PEQ012BBMA 40MHHQ12---3 40MHHC12---3 40MAQB18B--3 619PEQ018BBMA 40MHHQ18---3 40MHHC18---3 40MAQB24B--3 619PEQ024BBMA 40MHHQ24---3 40MHHC24---3 40MAQB30B--3 619PEQ030BBMA 40MAQB36B--3 619PEQ036BBMA NOTE: *Compatible with indoor units 40MAQ/619P*B starting with Serial Number 0216V10001. -
Page 6: Installation Accessory
INSTALLATION ACCESSORY PREPARATION BEFORE INSTALLATION 1. Confirm the following required parts have been supplied (see Table 3). Table 3—Parts NAME QTY. REMARKS Wired controller Installation and owner's manual M4X20 (for mounting on the wall) Screws Wall plugs For mounting on the wall M4X25 (for mounting on the switch box) Screws For fixing on the switch box... - Page 7 WIRED CONTROLLER INSTALLATION PRECAUTION 1. This manual provides the wired controller installation method. Refer to the wiring diagram in this installation manual to wire the wired controller with the indoor unit. 2. The wired controller works in a low voltage loop circuit. Do not connect directly to 208/230V and 460V.
-
Page 8: Installation
4-core shielding wire KSACN0401AAA Fig. 3 - Installation of KSACN0401AAA for High Wall Indoor Models 1. Install the Adapter Board and the Display Board on the High Wall (See the Appendix for instructions). 2. Connect the female joint of the wires group from the adapter board with the male joint of the connective wires group. - Page 9 WIRED CONTROLLER UPPER PART REMOVAL 1. Insert a flat screwdriver into the slots in the lower part of the wire controller (2 places). 2. Remove the upper part of the wire controller (see Fig. 5). Slots Fig. 5 - Slots NOTE: The PCB is mounted in the upper part of the wired controller.
- Page 10 FASTEN THE WIRED CONTROLLER BACK PLATE 1. For surface mounting, fasten the back plate on the wall with the 3 screws (M4x20) and plugs (see Fig. 6). Back plate Screws (M4×20) Fig. 6 - Fasten Back Plate 2. For switch box mounting, fasten the back plate on the switch box with 2 screws (M4x25) and fasten it on the wall with 1 screw (M4x20) (see Fig.
-
Page 11: Wire The Indoor Unit
BATTERY INSTALLATION Fig. 8 - Battery Installation 1. Place the battery in the unit and ensure the positive side of the battery is in accordance with the polarity markings (see Fig. 8). 2. Set the correct time before operating. Batteries in the wired controller can maintain the correct time during a power failure. - Page 12 2. From the bottom Fig. 10 - From the bottom 3. From the top Fig. 11 - From the top 4. Notch the part for the wiring to pass through with a nipper tool. NOTE: DO NOT allow water to enter the remote control. Use the trap and putty to seal the wires.
- Page 13 Putty Trap Putty Putty Trap Trap Fig. 12 - Seal the wires REATTACH THE WIRED CONTROLLER’S UPPER PART 1. While adjusting and mounting the upper case, avoid clamping the wiring during installation (see Fig 13). Fig. 13 - Buckle the upper case IMPORTANT: All the pictures in this manual are for illustration purposes only.
-
Page 14: Appendix
APPENDIX INSTALL THE WIRE CONTROLLER KIT 1. Open the front panel. Fig. 14 - Front Panel 2. Disconnect the wire from the main controller board. Fig. 15 - Main Controller Board... - Page 15 3. Identify the components. Fig. 16 shows, from left to right, the wired controller, adapter board and the display board. Fig. 16 - Wired Controller, Adapter Board, and Display Board 4. Identify connections on the Display Board. CN201 is the display board connection to the main board wire (on the display board). Fig.
- Page 16 CN101 is the display board connection to the Adapter board wire (on the display board). Fig. 18 - CN101 Connection to the Adapter Board 5. Uninstall the display board from the front panel. Keep the display board holder. Fig. 19 - Display Board Holder...
- Page 17 6. Carefully bend and break off the rectangular section (upper left section with two diagonal holes) from the display board. Fig. 20 - Display Board NOTE: Break off the upper left hand rectangle (section with the two holes marked with a red rectangle).
- Page 18 8. Before assembling mounting back on the Front Panel, remove the display board’s screen cover. Fig. 22 - Display Board Screen Cover 9. Connect the Wires to the Adaptor Board. a. Connect the wire coming from the Display board to the Adapter Board (this connection consists of 5 wires).
- Page 19 b. Connect the wire coming from the Wired Remote Controller to the Adapter Board (this connection consists of 4 wires). Fig. 24 - Wired controller port 10. Once the ports are connected, install the cover. Fig. 25 - Transformer Board...
- Page 20 11. Mount the new display board and Adapter board to the Front Panel. 12. Connect the wired remote controller to the display board and the Adapter board. Fig. 26 - Front Panel with New Display Board and Adapter Board 13. Connect the wire from the main controller board (see Fig. 2).
-
Page 21: Specification
RH40%~RH90% Ambient humidity Table 6—Wiring Specifications WIRING TYPE SIZE MAXIMUM LENGTH 0.029 in-0.74mm KSACN0401AAA: 66 ft (20m) Sheathed vinyl cord or cable (0.75-1.25mm KSACN0501AAA: 164 ft (50m) TECHNICAL INDICATIONS AND REQUIREMENT EMC and EMI comply with the CE certification requirements. - Page 22 Copyright 2017 CAC/BDP . S 7310 W. Morris St. S Indianapolis, IN 46231 Edition Date: 07/17 Catalog No:IM-KSACN04(5)01-02 Replaces:IM-KSACN04(5)01-01 Manufacturer reserves the right to change, at any time, specifications and designs without notice and without obligations...
Need help?
Do you have a question about the KSACN0401AAA and is the answer not in the manual?
Questions and answers