
Subscribe to Our Youtube Channel
Related Manuals for ForaCare FORA D40


Summary of Contents for ForaCare FORA D40
-
Page 1: Monitoring System
FORA D40 Blood Glucose plus Blood Pressure Monitoring System Owner’s Manual 09/2009 Version 1.0 A1-1... - Page 2 Therefore, with the compact size and easy operation of this FORA D40 Blood Glucose plus Blood Pressure Monitoring System, you can easily monitor your blood glucose levels and blood pressure by yourself.
-
Page 3: Important Safety Instructions
IMPORTANT SAFETY INSTRUCTIONS READ THIS BEFORE USE The following basic safety precautions should always be taken. 1. Use the device only for the intended use described in this manual. 2. Do not use accessories which are not supplied by the manufacturer. 3. -
Page 4: Table Of Contents
Table of Contents BEFORE YOU START Warnings and Precautions Health Information Blood Glucose Blood Pressure ABOUT ALTERNATIVE SITE TESTING (AST) ABOUT THIS SYSTEM Intended Use Principle of Measurement Major Features Content of the System Appearance and Key Functions of the Monitor LCD Screen Speaking Function Test Strip Description... - Page 5 BLOOD PRESSURE MEASUREMENT Suggestions before Measuring Applying the Pressure Cuff Proper Measurement Position Take a Reading Measurement Average Mode MONITOR MEMORY Viewing Results on the Monitor Reading the Average of Blood Glucose Results Viewing Results on a Personal Computer Data Transmission via Bluetooth Data Transmission via GPRS TAKING CARE OF YOUR MONITOR &...
-
Page 6: Before You Start
BEFORE YOU START Warnings and Precautions The FORA D40 system is designed for use on individuals age 16 and above. It shall NOT be used under any circumstances on newborns, infants or persons who cannot communicate. This device does NOT serve as a cure for any symptoms or diseases. -
Page 7: Health Information
60%* The results you acquire with the FORA D40 system can help you and your healthcare professionals monitor and adjust your treatment plan to gain better control of your diabetes. -
Page 8: Blood Pressure
Blood Pressure Clinical studies show that the adult diabetes is often accompanied by elevated blood pressure. People with diabetes can reduce their heart risk by managing their blood pressure along with diabetes treatment* Knowing your routine blood pressure trend tells whether your body is in good condition or not. -
Page 9: About Alternative Site Testing (Ast)
ABOUT ALTERNATIVE SITE TESTING (AST) Important: There are limitations for doing AST. Please consult your healthcare professional before you do AST. What is AST? Alternative site testing (AST) means that people use parts of the body other than fingertips to check their blood glucose levels. This system provides you to test on the palm, the forearm, the upper arm, the calf, or the thigh with equivalent results to fingertip testing. - Page 10 Do NOT use AST if: You think your blood glucose is low. You are unaware of hypoglycemia. Your AST results do not match the way you feel. You are testing for hyperglycemia. Your routine glucose results are often fluctuating. How to increase the accuracy? Stimulating blood perfusion by rubbing the puncture site prior to blood extraction has a significant influence on the glucose value obtained.
-
Page 11: About This System
ABOUT THIS SYSTEM Intended Use The FORA D40 system is a 2 in 1 system designed to measure blood glucose and to measure blood pressure non-invasively (in vitro diagnostic use.) It is intended for use at home and at clinical settings. It shall not be used for the diagnosis of diabetes or hypertension, or for the testing of newborns. - Page 12 There are three subtypes of FORA D40 system available. Each one of them offers a different way to transmit allowing users to choose their own desired ways to manage their test results. The data transmissions are listed below: Model Data Transmission Function Test results can be viewed on the PC through the cable connection.
-
Page 13: Content Of The System
5 Sporty bag Batteries These products have been designed, tested, and proven to work together as a system to produce accurate blood glucose test results. Use only FORA D40 test strips and control solution with your FORA D40 monitor. NOTE One 3.7V rechargeable Li-ion battery is included in the kit of FORA D40g... -
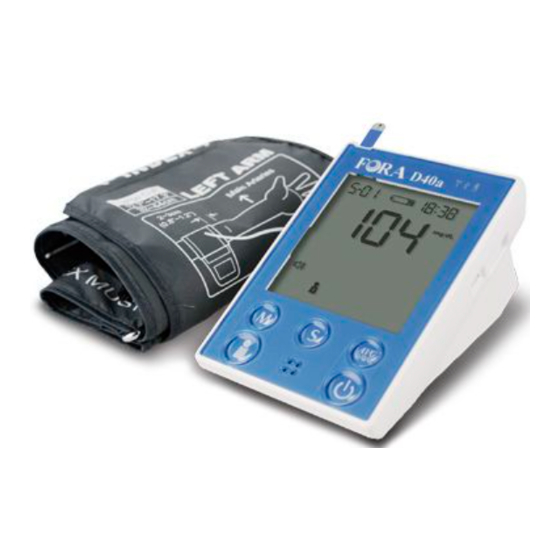
Page 14: Appearance And Key Functions Of The Monitor
Appearance and Key Functions of the Monitor 1. TEST SLOT- is where you insert the test strip. 2. LCD SCREEN- guides you through the test using symbols and simple messages. 3. RF BUTTON- assists you with wireless data transmission. AVERAGE BUTTON- assists you with blood pressure average mode. 4. -
Page 15: Lcd Screen
LCD Screen 1. Date 2. Systolic Pressure Symbol 3. PC Mode 4. & 6. Test Result Area 5. Diastolic Pressure Symbol 7. Voice Volume 8. Ketone Warning 9. Time 10. Code Number 11. Unit of Measurement in Blood Glucose 12. Unit of Measurement in Blood Pressure 13. -
Page 16: Speaking Function
Speaking Function The monitor “speaks” aloud step-by-step instructions on how to test your blood glucose and blood pressure. The following table tells you when and what the monitor“speaks”. WHEN WHAT does the monitor speak? does the monitor speak? Thank you for using this product. The user’s number is one, please When the monitor is turned on. - Page 17 WHEN WHAT does the monitor speak? does the monitor speak? Thank you for using this product. Test strip is inserted. Today’s day is (number), the time is (number), the room temperature is (number), the user’s number is one, please apply When the test strip is inserted into the blood onto the test strip.
- Page 18 WHEN WHAT does the monitor speak? does the monitor speak? Thank you for using this product. Today’s date is (number), the time is (number), you are now in memory mode, the user’s number is one, please select the user’s number. Memory record for (Time), your blood glucose is (number) milligram per When the monitor is in memory mode.
-
Page 19: Test Strip Description
Test Strip Description Your system measures the amount of sugar (glucose) in whole blood. Blood is applied to the absorbent hole of the test strip and is automatically drawn into the reaction cell where the reaction takes place. The test strip contains the following parts: See section “Testing Your Blood Glucose”... -
Page 20: Preparations Before Use
PREPARATIONS BEFORE USE Battery and DC adapter The monitor is powered by batteries or a DC adapter. Low Power Signal When the power is low, the monitor will remind you by displaying two messages: When the flashing “ ” symbol is displayed on the main screen, this indicates that batteries are dead and it is time to change the batteries. -
Page 21: Battery Installation And Replacement
Battery Installation and Replacement Make sure the monitor is off when replacing the batteries. STEP 1- Press the edge of the battery cover and pull up. Lift the battery cover and remove the batteries inside. STEP 2 - Insert four 1.5V AA size alkaline batteries or one 3.7V rechargeable Li-ion battery. -
Page 22: Use Of The Dc Adaptor
2. Disconnect the AC adapter plug from the AC adapter jack of the monitor. NOTE FORA D40 with the Li-ion battery must be recharged by connecting the AC adapter to an electrical outlet. Only this 3.7V rechargeable Li-ion battery (battery pack no. -
Page 23: Setting The Monitor
Setting the Monitor Time, date, units of measurement, memory deletion, volume and language can be set in the monitor. Two keys are involved: S button and M button. Step Press the S Step Year will flash first. button to start setting. Step Press M button Step... - Page 24 NOTE While setting speaking volume, number 0 indicates that the speaking function is off. “ ” will not display. Numbers 1 to 7 indicate speaking volume from low to high. They will be displayed together with “ .” The time, date, speaking volume and memory deletion can ONLY be changed in the setting mode.
-
Page 25: User Number Selection
User Number Selection This FORA D40 system provides up to four users for both measuring functions, and each user has his/her own individual memory storage. STEP 1 Press the user selection button to select the desired user number. You can change the user number by pressing the user selection button. -
Page 26: Blood Glucose Measurement
BLOOD GLUCOSE MEASUREMENT Important Information 1. Severe dehydration and excessive water loss may cause inaccurate results. If you believe you are suffering from severe dehydration, consult a healthcare professional immediately. 2. If your blood glucose results are lower or higher than usual, and you do not have symptoms of illness, first repeat the test. -
Page 27: Quality Control With Fora Control Solutions
Quality Control with FORA Control Solutions FORA control solutions contain a known amount of glucose that reacts with test strips. By comparing your control solution test results with the expected range printed on the test strip vial label, it is able to check that the monitor and the test strips are working together as a system and that you are performing the test correctly. -
Page 28: Important Control Solution Information
Important Control Solution Information Use only FORA control solutions. Check the expiration date on the control solution vial. Do not use if expired. It is recommended to use the control solutions between the temperatures of 20℃ and 25℃ (68℉ and 77℉.) Shake the vial, discard the first drop of control solution, and wipe off the dispenser tip to ensure a good sample and an accurate result. -
Page 29: Performing A Control Solution Test
Performing a Control Solution Test STEP 1. Insert a test strip with contact bars end first and facing up, into the test slot. The monitor turns on automatically and displays the followings in sequence: “ ” and the ambient temperature ”... - Page 30 STEP 3. Press M button and select the symbol "QC." When you do this, this reading will be stored as a control solution data. STEP 4. Obtain Control Solution Shake the control solution vial well. Remove the cap from the control solution bottle.
-
Page 31: Testing Your Blood Glucose
STEP 6. The monitor will begin countdown. After 5 seconds, the control solution test result will appear. The result should fall within the range printed on the test strip vial. Out-of-range results If test results fall outside the printed range, check the “Operating Problem” section in the troubleshooting guide and repeat the test. - Page 32 Testing Your Blood Glucose Be sure to read carefully this section and the test strip package insert found in the test strip box before testing. Make sure you have all items needed to test: the monitor, test strips, lancing device, and sterile lancet. WASH AND DRY YOUR HANDS FIRST BEFORE STARTING.
- Page 33 The adjustable tip offers 5 levels of skin penetration. Twist the adjustable tip in either direction until the number lines up with the arrow: 1-2 for soft or thin skin, 3 for average skin, 4-5 for thick or calloused skin. Slide the ejection/cocking control back until it clicks.
- Page 34 STEP 2. Insert the Test Strip Insert a test strip with contact bars end first and facing up, into the test slot. The monitor turns on automatically and displays the followings in sequence: “ ” and the ambient temperature ” ”...
- Page 35 STEP 4. Select AC/PC Press M button to select AC/PC mode, or just perform a general test. Select “AC” if performing a blood glucose test before meal, or “PC” for performing a test after meal. STEP 5. Apply Blood into the Test Strip When the “...
- Page 36 STEP 6. Obtain an Accurate Result in 5 Seconds Read the test result after 5 seconds. The test result will be automatically stored in the monitor memory. Turn the monitor off by removing the test strip. STEP 7. Discard the Used Lancet Remove the lancing device cap and the lancet.
-
Page 37: Special Message
Special Message MESSAGE WHAT IT MEANS ACTION This indicates hypoglycemia (low blood glucose.) Appears when your result is below measurement You should immediately treat limit, which is less than 20 hypoglycemia as mg/dL. recommended by your healthcare professional. This indicates severe hyperglycemia (high blood Appears when your result is above measurement... -
Page 38: Comparing Monitor And Laboratory Results
Comparing Monitor and Laboratory Results The monitor provides you with whole blood equivalent results. The result you obtain from your monitor may differ somewhat from your laboratory result due to normal variation. Monitor results can be affected by factors and conditions that do not affect laboratory results in the same way (see test strip package insert for typical accuracy and precision data, and for important information on limitations). -
Page 39: Blood Pressure Measurement
BLOOD PRESSURE MEASUREMENT Suggestions before Measuring Avoid caffeine, tea, alcohol, and cigarette at least 30 minutes before measurement. Wait 30 minutes after exercising or bathing before measurement. Sit or lie down for at least 10 minutes before measuring. Do not measure when feeling anxious or tense. Take a 5-10 minute break between measurements. -
Page 40: Applying The Pressure Cuff
Applying the Pressure Cuff STEP 1 Connect the air plug of the tubing to the air jack at the side of the monitor. STEP 2 Assemble the cuff as the left figure. The smooth surface is on the inside of the cuff loop and the metal D-ring should not touch your skin. -
Page 41: Proper Measurement Position
Proper Measurement Position STEP 1 Sit down for at least 10 minutes before measuring. STEP 2 Place your elbow on a table or other object. Relax your hand with the palm facing up. STEP 3 Relax and make sure the cuff is at the same height as your heart. -
Page 42: Take A Reading
Take a Reading Read "Suggestions before Measuring" and "Applying the Pressure Cuff" before you take a reading. Always apply the pressure cuff before turning on the monitor. STEP 1. Press the On/Off button. All the LCD symbols will appear. Press the user selection button to select user (numbers from1 to 4) whose test reading will be stored in its memory. - Page 43 NOTE This monitor can record up to 4 users’ measurements. If you press the On/Off button during the measurement, the monitor will turn off. If the pulse rate symbol showed as “ ” instead of “ ”, this suggests that the monitor has detected an irregular pulse rate. A1-43...
-
Page 44: Measurement Average Mode
Measurement Average Mode Always apply the pressure cuff before turning on the monitor. STEP 1. Press and hold the On/Off button for three (3) seconds. The monitor will turn on and enter the average mode. Then the cuff will begin to inflate automatically. -
Page 45: Monitor Memory
MONITOR MEMORY Your monitor stores 864 the most recent results, and also provides the average of blood glucose test results. Please follow the steps below to review those results. Viewing Results on the Monitor: STEP 1. When the monitor is off, press and release the M button. The monitor will enter the memory mode. - Page 46 STEP 4. Press the user selection button to select another user’s number and to view the test results stored in the monitor memory (i.e. user number 2). NOTE If you’d like to exit from the memory, press the On/Off button to turn off the monitor or leave it idle for 3 minutes for auto-shut down.
-
Page 47: Reading The Average Of Blood Glucose Results
Reading the Day Average of Blood Glucose Results STEP 1 When the monitor is off, keep pressing the M button for 3 seconds to enter the memory mode. STEP 2 Select the user’s number by pressing the user selection button. After the display, press the S button to switch and review blood glucose or blood pressure test results. - Page 48 When using the monitor for the first time, “---” appears, showing that there are no test result in memory. A1-48...
-
Page 49: Viewing Results On A Personal Computer
USB cable or wireless connection. An interface cable and the pairing software system will be needed for the data transmission. Please visit our website at http://www.foracare.ch/products.html and install the Health Care System Software first. If you have any question about this function, please ask the local customer service for assistance. -
Page 50: Data Transmission Via Bluetooth
Data transmission via Bluetooth (For FORA D40b only) STEP 1 With the monitor turned off, press the RF button to initiate the data transmission of the monitor. “PCL” will appear on the display and the RF indicator will light up in blue. When the RF indicator is blinking fast, indicating the monitor is still searching for pairing. -
Page 51: Data Transmission Via Gprs
Data transmission via GPRS (For FORA D40g only) STEP 1 With the monitor turned off, press the RF button to initiate the data transmission from the monitor. “PCL” will appear on the display and the RF indicator will light up in blue. Then test results which have not been uploaded will display on the screen and initiate the transmission in sequence of the user’s number by GPRS service. -
Page 52: Taking Care Of Your Monitor & Strip
TAKING CARE OF YOUR MONITOR & STRIP To protect the monitor and test strips from dirt, dust and other contaminants, please wash and dry your hands thoroughly before use. Cleaning 1. To clean the monitor exterior, wipe with a cloth moistened with tap water or a mild cleaning agent, then dry it with a soft, dry cloth. - Page 53 2. Strip Storage Storage conditions: 4 C to 40 C (39.2℉ to 104℉), below 85% relative humidity. Do not freeze. Store your test strips in their original vial only. Do not transfer to other container. Store test strip packages in a cool, dry place. Keep away from direct sunlight and heat.
-
Page 54: Storage
3. Control Solution Storage Storage conditions: Store the control solution tightly closed at temperatures 2℃ to 30℃ (4℉ to 86℉). Do not freeze. Record the first opening date on the control solution vial. Discard it after 3 months. A1-54... -
Page 55: Troubleshooting
TROUBLESHOOTING If you follow the recommended action but the problem persists, or error messages other than the ones below appear, please call your local customer service. Do not attempt to repair by yourself. MESSAGE CAUSE WHAT TO DO Inflation or pressure error Please contact local customer service for help. - Page 56 Operating Problem 1. Blood Glucose Measurement What happened? The monitor does not display a message after inserting a test strip. POSSIBLE CAUSE WHAT TO DO Batteries exhausted. Replace the batteries. Batteries incorrectly installed or Check to see if the batteries are absent.
- Page 57 What happened? The control solution test result is out of range. POSSIBLE CAUSE WHAT TO DO Error in performing the test. Read the instructions thoroughly and repeat the test. Control solution vial shaken poorly. Shake the control solution vigorously and repeat the test. Expired or contaminated control Check the expiration and discard solution.
- Page 58 2. Blood Pressure Measurement What happened? No display after pushing the On/Off button. POSSIBLE CAUSE WHAT TO DO Batteries exhausted. Replace the batteries. Batteries incorrectly installed or Check that the batteries are correctly absent. installed. What happened? Heart rate is higher/lower than user’s average. POSSIBLE CAUSE WHAT TO DO Moving during measurement.
-
Page 59: Specifications
SPECIFICATIONS System performance Power source: Four 1.5V AA alkaline batteries Size of monitor w/o cuff: 147 (L) x 105 mm (W) x 80 mm (H), 500g with batteries. Memory: Total 864 memory records Power saving: Automatic power off if system idle for 3 minutes (normal mode) or 5 minutes (RF mode). -
Page 60: Fcc Statement
Federal Communications Commission (FCC) Statement 15.21 You are cautioned that changes or modifications not expressly approved by the part responsible for compliance could void the user’s authority to operate the equipment. 15.105(b) Federal Communications Commission (FCC) Statement This equipment has been tested and found to comply with the limits for a Class B digital device, pursuant to part 15 of the FCC rules. - Page 61 CAUTION RISK OF EXPLOSION IF BATTERY IS REPLACED BY AN INCORRECT TYPE. DISPOSE OF USED BATTERIES ACCORDING TO THE INSTRUCTIONS. A1-61...
Need help?
Do you have a question about the FORA D40 and is the answer not in the manual?
Questions and answers