
Related Manuals for ForaCare FORA 6 Connect


Summary of Contents for ForaCare FORA 6 Connect
- Page 1 Multi-Functional Monitoring System Sistema de Monitoreo Multifuncional Owner’s Manual Manual del Propietario...
- Page 3 β-ketone levels can help you and your doctor gain better control of your diabetes. Due to its compact size and easy operation, you can use the FORA 6 Connect Multi-Functional Monitoring System to easily monitor your blood glucose and β-ketone levels anywhere, any time.
-
Page 4: Important Safety Precautions
IMPORTANT SAFETY PRECAUTIONS READ BEFORE USE The meter and lancing device are for single patient use only. Do not share them with anyone including your family members! Do not use on multiple patients! All parts of the kit are considered biohazardous and can potentially ... - Page 5 6. Before using this device to test blood glucose β-ketone, read all instructions thoroughly and practice the test. Carry out all the quality control checks as directed. 7. Keep the device and testing equipment away from young children. Small items such as the battery cover, batteries, test strips, lancets and vial caps are choking hazards.
-
Page 7: Table Of Contents
TABLE OF CONTENTS BEFORE YOU BEGIN Important Information Intended Use Test Principle Contents of System Meter Overview Meter Display Test Strip Setting the Meter MEASURING MODES Three Measuring Modes for Blood Glucose Testing One Measuring Mode for Blood Ketone Testing BEFORE TESTING Calibration for Ketone Testing How to Code Your Meter (β-Ketone test) - Page 8 METER MEMORY Reviewing Test Results Reviewing Day Average Results DOWNLOADING THE RESULTS Data Transmission via Bluetooth MAINTENANCE Battery Caring for Your Meter Disinfecting Procedures Caring for Your Test Strips Important Control Solution Information SYSTEM TROUBLESHOOTING Result Readings Error Messages Troubleshooting DETAILED INFORMATION Reference Values Comparing Meter and Laboratory Results...
-
Page 9: Before You Begin
BEFORE YOU BEGIN Important Information Severe dehydration and excessive water loss may cause readings which are lower than actual values. If you believe you are suffering from severe dehydration, consult a healthcare professional immediately. If your blood glucose or β-ketone results are lower or higher than ... - Page 10 – All parts of the kit are considered biohazardous and can potentially transmit infectious diseases, even after you have performed cleaning and disinfection. – Please read your FORA 6 Connect Multi-Functional Monitoring System Owner’s Manual before you use the test strip. Use only FORA 6 Connect...
-
Page 11: Intended Use
Intended Use The FORA 6 Connect Multi-Functional Monitoring System is intended for use in the quantitative measurement of glucose and β-ketone (beta-hydroxybutyrate) in fresh capillary whole blood from the finger. It is intended for in vitro diagnostic use by people with diabetes mellitus at home as an aid in monitoring the effectiveness of diabetes control program. -
Page 12: Contents Of System
Contents of System The FORA 6 Connect system kit includes: Daily Log Book ○ Meter ○ 1 x 1.5V AAA Battery ○ Owner’s Manual ○ Protective Wallet ○ Quick Start User Guide / ○ Warranty Card Test strips, control solution, sterile lancets and lancing device may be purchased separately. -
Page 13: Meter Overview
Meter Overview Test strip Slot DOWN Button ○ ○ Insert test strip here to turn the MAIN Button ○ meter on for testing. Enter the meter memory and Strip Indication Light silence a reminder alarm. ○ Bluetooth Indicator UP Button ○... -
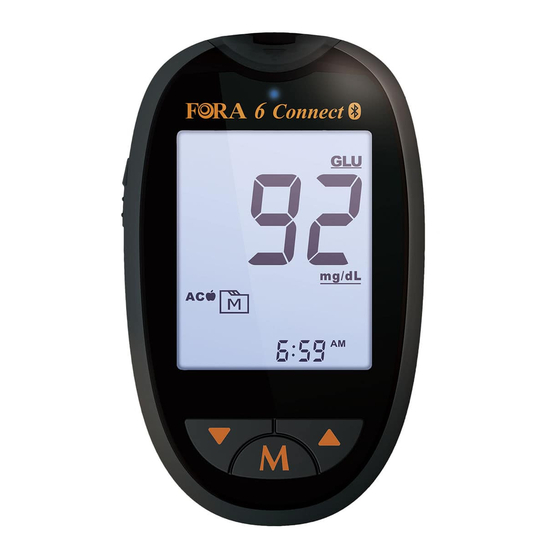
Page 14: Meter Display
Meter Display Code Error Message ○ ○ Blood Drop Symbol Memory Symbol ○ ○ Test Strip Symbol Date / Time ○ ○ Low Battery Symbol Measurement Unit ○ ○ Ketone Testing Glucose Testing ○ ○ Test Result ○ Measuring Mode ○... -
Page 15: Test Strip
The front side of test strip should face up when inserting test strip. Test results might be wrong if the contact bar is not fully inserted into the test slot. NOTE: FORA 6 Connect The Multi-Functional Monitoring System should only be FORA 6 Connect used with Test Strips. -
Page 16: Setting The Meter
Setting the Meter Before using your meter for the first time or if you change the meter battery, you should check and update these settings. Make sure you complete the steps below and have your desired settings saved. Entering the Setting Mode Start with the meter off (no test strip inserted). - Page 17 3. Setting the beep With the speaker symbol displayed, press UP/DOWN to select “On” or “OFF”. Press MAIN. 4. Deleting the memory With “dEL” and “ ” on the display, press UP button and select “no” to keep the results in memory then press MAIN to skip.
-
Page 18: Measuring Modes
MEASURING MODES Three Measuring Modes for Blood Glucose Testing The meter provides you with three modes for blood glucose testing: General, AC, and PC. MODES USE WHEN General tests any time of day without regard to time since last (GEN) meal no food intake for at least 8 hours 2 hours after a meal... -
Page 19: One Measuring Mode For Blood Ketone Testing
One Measuring Mode for Blood Ketone Testing The meter provides you with one mode for blood ketone testing: General. MODE USE WHEN General any time of day without regard to time since last (GEN) meal You can enter general mode by: Start with the meter switched off. -
Page 20: Before Testing
BEFORE TESTING Calibration for Ketone Testing You must calibrate the meter every time you begin to use a new vial of β-Ketone test strips by setting the meter with the correct code. Test results may be inaccurate if the code number displayed on the monitor does not match the number printed on the strip vial. -
Page 21: Checking The Code Number (Β-Ketone Test)
Checking the Code Number (β-Ketone test) You need to make sure that the code number displayed on the meter matches the number on the test strip vial before you proceed. If it matches, you can proceed with your test. If the codes do not match, please stop testing and contact Customer Service for help. -
Page 22: Control Solution Testing
Control Solution Testing Our control solutions contain a known amount of glucose that reacts with test strips and that are used to ensure your meter and test strips are working together correctly. Test strips, control solutions, or sterile lancets may not be included in the kit (please check the contents on your product box). -
Page 23: Performing A Control Solution Test
Performing a Control Solution Test 1. Insert the test strip to turn on the meter Insert a test strip into the meter. Wait for the meter to display a flashing “ ”. 2. Apply control solution Shake the control solution vial thoroughly before use. Squeeze out a drop and wipe it off, and then squeeze out another drop and place it on the tip of the vial cap. - Page 24 With “QC” displayed, the meter will store your test result in memory under “QC”. Out-of-range results If you continue to have test results fall outside the range printed on the test strip vial, the meter and strips may not be working properly. Do NOT test your blood, and call customer service for help.
-
Page 25: Testing With A Blood Sample
TESTING WITH A BLOOD SAMPLE WARNING: To reduce the chance of infection: Never share a lancet or the lancing device. Always use a new, sterile lancet. Lancets are for single use only. Avoid getting hand lotion, oils, dirt, or debris in or on the lancets and the lancing device. -
Page 26: Performing A Blood Glucose Or Β-Ketone Test
► Fingertip testing Hold the lancing device firmly against the lower side of your fingertip. Press the release button to puncture your finger; you will hear a click indicating that the puncture is complete. NOTE: Choose a different spot each time you test. Repeated punctures at the same spot may cause soreness and calluses. - Page 27 3. Obtaining a blood sample Use the pre-set lancing device to puncture the desired site. Wipe off the first appeared drop of blood with a clean cotton swab. The size of the drop should be at least 0.5 microliter (μL) for a blood glucose test or 0.8 microliter (μL) for a blood ketone test.
- Page 28 If you have trouble filling the confirmation window, please contact your health care professional or local customer service for assistance. 5. Read your result The result of your test will appear after the meter counts down to 0. The result will be stored in the memory automatically.
-
Page 29: Meter Memory
METER MEMORY Your meter stores the 1,000 most recent test results with date and time in its memory. To enter the meter memory, start with the meter switched off. Reviewing Test Results 1. Press and release the MAIN button “ ” will appear on the display. The first reading you see is the last testing result along with date, time and the measurement mode. -
Page 30: Reviewing Day Average Results
Reviewing Day Average Results 1. Press and release the DOWN button Your 7 day average result measured in general mode will appear on the display. 2. Press the UP/DOWN button to review 14, 21, 28, 60 and 90 day average results stored in each measuring mode. -
Page 31: Downloading The Results
DOWNLOADING THE RESULTS Data Transmission via Bluetooth You can transmit your measurement data from the meter to an App on your mobile device via Bluetooth signal. Please note that you must first pair your meter to your mobile device before attempting to transmit any data. - Page 32 NOTE: While the meter is in transmission mode, it will be unable to perform a test. Make sure that your Bluetooth enabled device has turned on the Bluetooth signal prior to transmitting the data, and that the meter is within range. ...
-
Page 33: Maintenance
MAINTENANCE Battery Your meter comes with one 1.5V AAA size alkaline battery. Low Battery Signal The meter will display the message below to alert you when the meter power is getting low. The “ ” appears with E-b and low: The power is not enough to do a test. -
Page 34: Caring For Your Meter
We recommend for meter cleaning and disinfection you should use the disinfecting wipe/towelette from below. The following product has been shown to be safe for use with the FORA 6 Connect Multi-Functional Monitoring System. ► Micro-Kill+™ (Micro-Kill Plus™) by Medline (EPA Reg. -
Page 35: Disinfecting Procedures
Disinfecting Procedures 1. Take out one disinfecting wipe from the package and squeeze out any excess liquid in order to prevent damage to the meter. 2. Wipe all meter’s exterior surface display and buttons. Hold the meter with the test strip slot pointing down and wipe the area around the test slot but be careful not to allow excess liquid to get inside. - Page 36 Stop using the meter if you see any signs of deterioration. For example: ● Meter cannot be turned on ● LCD display cracks or becomes cloudy ● Buttons no longer function ● Meter outer casing cracks ● Data cannot be transmitted ●...
-
Page 37: Caring For Your Test Strips
Caring for Your Test Strips Storage conditions: 35.6°F to 86.0°F (2°C to 30°C), 10% - 90% R.H. for blood glucose test trips; 35.6°F to 86.0°F (2°C to 30°C), 10% - 85% R.H. for blood β-Ketone test trips. Do NOT freeze. ... -
Page 38: Important Control Solution Information
Important Control Solution Information Use only FORA control solutions with your meter. Do not use the control solution beyond the expiration date or 3 months after first opening. Write the opening date on the control solution vial and discard the remaining solution after 3 months. ... -
Page 39: System Troubleshooting
SYSTEM TROUBLESHOOTING If you follow the recommended action but the problem persists, or error messages other than the ones below appear, please call your local customer service. Do not attempt to repair yourself and never try to disassemble the meter under any circumstances. Result Readings Glucose Test MESSAGE... -
Page 40: Error Messages
Error Messages MESSAGE WHAT IT MEANS WHAT TO DO Appears when the batteries Replace the batteries cannot provide enough immediately. power for a test. Expired code strip. Repeat the test with a new lot of test strip. Appears when a used test Repeat with a new test strip. -
Page 41: Troubleshooting
Troubleshooting 1. If the meter does not display a message after inserting a test strip: POSSIBLE CAUSE WHAT TO DO Battery exhausted. Replace the battery. Test strip inserted upside down or Insert the test strip with contact bars incompletely. end first and facing up. Defective meter or test strips. -
Page 42: Detailed Information
DETAILED INFORMATION Reference Values Blood glucose plus β-ketone monitoring plays an important role in diabetes control. A long-term study showed that maintaining blood glucose levels close to normal can reduce the risk of diabetes complications by up to 60%* . The results provided by this system can help you and your healthcare professional monitor and adjust your treatment plan to gain better control of your diabetes. -
Page 43: Comparing Meter And Laboratory Results
Please work with your doctor to determine a target range that works best for you. Comparing Meter and Laboratory Results The meter provides you with whole blood equivalent results. The result you obtain from your meter may differ somewhat from your laboratory result due to normal variation. - Page 44 Therefore, it is best to fast for eight hours before doing comparison tests. Factors such as the amount of red blood cells in the blood (a high or low hematocrit) or the loss of body fluid (dehydration) may also cause a meter result to be different from a laboratory result.
-
Page 45: Specifications
SPECIFICATIONS Model No.: FORA 6 Connect Dimension: 89.8 (L) x 54.9 (W) x 18 (H) mm Weight: 46.1 g (without battery) Power Source: one 1.5V AAA alkaline battery Display: LCD Memory: 1,000 measurement results with date and time External Output: Bluetooth... -
Page 46: Federal Communications Commission (Fcc) Statement
FEDERAL COMMUNICATIONS COMMISSION (FCC) STATEMENT 15.21 You are cautioned that changes or modifications not expressly approved by the part responsible for compliance could void the user’s authority to operate the equipment. 15.105(b) Federal Communications Commission (FCC) Statement This equipment has been tested and found to comply with the limits for a Class B digital device, pursuant to part 15 of the FCC rules. - Page 47 FCC RF Radiation Exposure Statement: 1) This transmitter must not be co-located or operating in conjunction with any other antenna or transmitter. 2) This equipment complies with FCC RF radiation exposure limits set forth for an uncontrolled environment. This equipment should be installed and operated with a minimum distance of 20 centimeters between the radiator and your body.
- Page 49 For Self-Testing. Read instructions before use. Para automonitoreo. Lea las instrucciones antes de utilizarse. Distributed by ForaCare, Inc. / Distribuido por ForaCare, Inc. 893 Patriot Drive Suite Drive, Moorpark, CA 93021 USA Products made in Taiwan / Productos hechos en Taiwán Toll Free / Número de Teléfono Gratuito : 1-888-307-8188...
Need help?
Do you have a question about the FORA 6 Connect and is the answer not in the manual?
Questions and answers
I put in the new “control” test strip and now my keystone reader does not give exact reading. Only a messages saying “Lo”. How do i correct this?
The "Lo" message on your ForaCare FORA 6 Connect reader may indicate an issue with the control solution test. To fix this:
1. Ensure you are using the correct control solution (ForaCare control solution).
2. Check that the control solution is not expired (discard if opened for more than 90 days).
3. Verify that the meter is in the correct user mode (CTL or QC Mode).
4. Make sure the test strip and meter are at a stable temperature by placing them in the same environment for 30–60 minutes before testing.
5. If the issue persists, replace the control solution and test again.
These steps should help resolve the "Lo" message.
This answer is automatically generated