Advertisement
Advertisement
Table of Contents

Related Manuals for Teac HDR2250T


Summary of Contents for Teac HDR2250T
- Page 1 HDR2250T Twin Tuner PVR...
- Page 2 Keep your purchase receipt to enable you to proceed quickly in the event of a Warranty Service. If you require Warranty Service, please contact the TEAC Warranty Service Hotline at 1300 553 315 for assistance. Please ensure that you have the model number, serial number and purchase receipt ready when you call.
- Page 3 The serial number of the product is missing or has been tampered with. No one is authorised to assume any liability on behalf of TEAC or impose any obligation on it, in connection with the sale of any equipment other than as stated in this warranty and outlined above.
-
Page 4: Table Of Contents
TABLE OF CONTENTS CHAPTER PAGE Safety Instructions __________________ Introduction __________________ Unit & Remote Control Overview __________________ Initial Set Up __________________ Watching TV __________________ Recording Programs (PVR) __________________ USB Media Playback __________________ System Settings __________________ Troubleshooting __________________ Technical Specifications __________________... -
Page 5: Safety Instructions
SAFETY INSTRUCTIONS Always read the safety instructions carefully and keep this User's Manual for future reference. Keep this equipment away from humidity and liquids. Lay this equipment on a stable, flat surface before setting it up. Do not stand it on soft furniture. If any of the following situation arises, get the equipment checked by a service technician: •... -
Page 6: Introduction
Scheduled recording via EPG • 500GB internal hard disk • Record 2 channels while watching a 3 • Series recording What’s In The Box • HDR2250T unit • User manual • AV cable • HDMI cable • DC12V power adaptor •... -
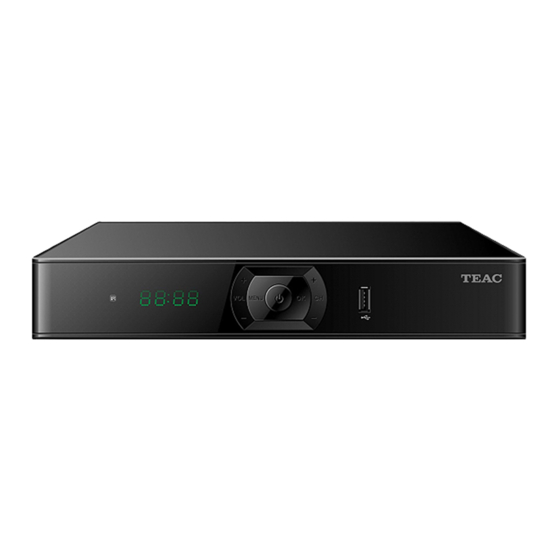
Page 7: Unit & Remote Control Overview
UNIT & REMOTE CONTROL OVERVIEW Front and Rear Panel 1. LOOP OUT: Connect this to the antenna input jack of another device (like your TV) 2. ANT IN: Connect to the antenna socket on your wall 3. SPDIF: Connect to the TV for digital audio output (optional) 4. - Page 8 Remote Control Unit Function Turn on unit/switch to Standby Mode Media Enter Media Browser 0 ~ 9 Number keys for setting up functions or channel switching Video output mode Aspect ratio Sleep timer Subtitles CH.FAV View Favourite Channel lists Switch back to the previous channel Increase/decrease volume Switch channels sequentially Mute sound.
-
Page 9: Initial Set Up
INITIAL SET UP After completing the connection from this unit to the TV, turn the power on from your wall power outlet. Turn on your TV and switch to the corresponding input mode to receive the picture from the unit. When the unit is turned on for the first time, it enters the Initial Setup menu. -
Page 10: Watching Tv
WATCHING TV Program info For details about the current program playing on the TV, press the INFO button. View the full description for the program by pressing the INFO button a second time. Changing channels You can change channels with the CH+/- buttons. To see the complete list of channels, press the OK button. - Page 11 Horizontal EPG Vertical EPG Follow the on-screen button hints at the bottom of the screen for navigation and setting up recordings/reminders.
- Page 12 Channel Management The Channel Edit menu lets you make personal changes to the program listings. To access this menu: 1. Press the MENU button, press the RIGHT button to select "Channel", and press OK. 2. Channel Edit is password protected. Key in the correct password. (Default password: 0000) 3.
- Page 13 PLAY: Press the OK button to play the highlighted channel. Exit the menu to watch in full screen. FAVOURITE: You can save a list of favourite channels. Select the channel you want and press the CH.FAV/Number 1 button. The Favourites List menu will pop up – highlight the desired list(s) and press the GREEN button so that a check mark appears beside the list name.
- Page 14 Channel Scanning If you have deleted some or all the channels, you can scan for channels once more without having to do a full factory reset: 1. Press MENU and go to the Installation menu with the LEFT/RIGHT buttons. 2. Choose DTV Auto or Manual Search and press OK to proceed. Auto Search Manual Search...
- Page 15 Channel Backup & Recovery Using a USB flash drive, you can back up your customised Channel settings and load it again later. 1. Connect a compatible USB flash drive. If the USB drive cannot be detected, you may need to format it first (PVR Menu > Storage > press the RED button). 2.
-
Page 16: Recording Programs (Pvr)
WARNING: Ensure that no valuable information is currently stored in the connected data storage unit, as the formatting process means that ALL DATA will be ERASED. TEAC does not take responsibility for lost data. While recording functions are running, DO NOT disconnect the data storage unit, to avoid damage or data loss. - Page 17 Instant recording Record on demand whenever you need it. 1. To start recording, press the RECORD ( ) button on the remote control. While recording, "REC" is shown on the unit's display. 2. To stop recording, press the STOP button. RECORDING WHILE ON STANDBY You can also put the unit on Standby Mode while still recording: 1.
- Page 18 SCHEDULE MANUALLY Use this method if you wish to manually set a start time and recording length for a scheduled recording. 1. Press the SCHED. button, then the RED button. (Alternatively, press the EPG button, then the RECORD ( ) button.) 2.
- Page 19 Recorded programs list Quickly access your recorded TV programs with this list. 1. Press the PVR LIST button to view the Recorded File Browser. 2. Use the UP/DOWN buttons to highlight a desired file. 3. To start playback of that file, press the OK button. 4.
- Page 20 Time Shift (Pause live TV) "Time Shift" is a handy feature to "pause" live TV programs via a temporary recording function, which you may find helpful if you are interrupted for a few minutes during your show. It ensures that you don't miss a single second of the show because you can return to the TV later and continue watching from where you stopped.
-
Page 21: Usb Media Playback
USB MEDIA PLAYBACK Switching to Media Browser The Media Browser will list compatible movie and music files that you can play on this unit. 1. Press the MENU button, then in the PVR Menu, choose "Media Browser". 2. Press the UP/DOWN buttons to highlight the desired data storage drive. 3. -
Page 22: System Settings
The Settings menu allows customisation of technical input/output settings, date/time, language, and parental control/password settings. You can also upgrade the firmware (downloadable from www.teac.com.au) or reset the unit to its initial condition. 1. Press the MENU button, the press LEFT/RIGHT to go to the Settings menu. - Page 23 OSD Setting • OSD transparency: adjust menu transparency. • OSD timeout: adjust the timer for the OSD to hide automatically. • Language setting: adjust the language presented in the OSD. • Auto standby mode: turn on/off for automatic standby. Time Setting •...
- Page 24 Parental Control • Parental rating: choose a program rating threshold for locking programs automatically. • Setting menu: turn the lock on/off for the Setting menu. • PVR menu: turn the lock on/off for the PVR menu. • New password: key in a new password twice to change it. PVR Setting •...
- Page 25 You need to key in the password to access this function. 1. Format the USB drive to the FAT32 file system before you start the process. 2. Download and save the firmware (HDR2250T … .mupg) to the root directory of the USB drive.
-
Page 26: Troubleshooting
TROUBLESHOOTING Issue Possible Causes What To Do LED on the front panel fails to Power supply is not plugged Check if the power cable is light up in or is turned off plugged securely and ensure the power is turned on No picture or sound The cable signal is weak or is Ensure that the audio/video... -
Page 27: Technical Specifications
TECHNICAL SPECIFICATIONS...
Need help?
Do you have a question about the HDR2250T and is the answer not in the manual?
Questions and answers