Table of Contents
Advertisement
AMS
VOL
SEL
VOL
SCN
MODE
M1
M2
USER MANUAL AND INSTALLATION INSTRUCTIONS
S X
R 19
CD/MP3/WMA/SD/USB/AUX CAR RADIO
RDS (Radio Data System) Function
40 W X 4 High Power Output
SRX 190
RPT
SHF
-10
+10
M3
M4
M5
M6
TA
FM Stereo Radio
Anti-Shock Mechanism
Telephone Mute Function
DISP
SCAN
LOUD
ENTER
BAND
REG
EQ
AF
PTY
AUX IN
0
Advertisement
Table of Contents

Related Manuals for Scott SRX190


Summary of Contents for Scott SRX190
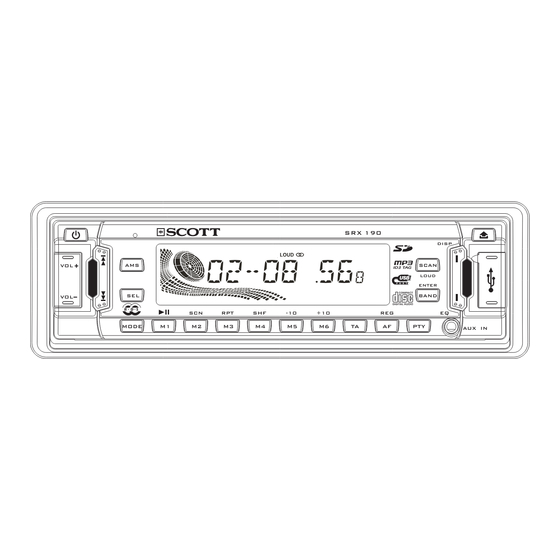
- Page 1 R 19 CD/MP3/WMA/SD/USB/AUX CAR RADIO FM Stereo Radio RDS (Radio Data System) Function Anti-Shock Mechanism Telephone Mute Function 40 W X 4 High Power Output SRX 190 DISP SCAN LOUD ENTER BAND MODE AUX IN USER MANUAL AND INSTALLATION INSTRUCTIONS...
-
Page 2: Table Of Contents
CONTENTS CONTENTS...............................GB-1 ACCESSORIES............................GB-2 PRECAUTION............................GB-3 INSTALLATION............................GB-4 USING THE DETACHABLE FRONT PANEL ....................GB-7 WIRING DIAGRAM..........................……... GB-8 OPERATIONS............................GB-9 LOCATION AND FUNCTION OF KEYS ......................GB-9 GENERAL OPERATIONS .......................... GB-10 RADIO OPERATIONS ..........................GB-14 RDS (RADIO DATA SYSTEM) OPERATIONS ...................……..GB-15 CD/MP3/WMA DISC OPERATIONS..................……....GB-17 SD/MMC MEMORY CARD OPERATIONS.................... -
Page 3: Accessories
ACCESSORIES Spring Washer Mounting Bracket Removable Trim Ring Small metal Strip Plain Washer (Half Sleeve) equipped on the unit Tapping Screw Mounting Bolt Release Key USB Adaptor Cable Screw Hex Nut SRX 190 CD/MP3/WMA/SD/USB/AUX CAR RADIO DISP FM Stereo Radio RDS (Radio Data System) Function Anti-Shock Mechanism Telephone Mute Function... -
Page 4: Precaution
PRECAUTION This unit is designed and manufactured with the users safety in mind, however any improper use or operation may result in certain dangers. It is therefore highly recommended to read this manual thoroughly and adhere to the following precautions. SAFETY PRECAUTIONS To prevent an electrical shock, do not open the housing of the unit. -
Page 5: Installation
Installation Notes: - Choose the mounting location where the unit will not interfere with the normal driving function of the driver. - Before finally installing the unit, connect the wiring and make sure that the unit works properly. - Consult with your nearest dealer if installation requires the drilling of holes or other modifications of the vehicle. - Install the unit where it does not get in the driver's way and cannot injure the passenger if there is a sudden stop, like an emergency stop. -
Page 6: Using The Detachable Front Panel
Installing the unit Be sure you test all connections first, and then follow these steps to install the unit. 1. Make sure the ignition is turned off, and then disconnect the cable from the vehicle battery's negative (-) terminal. 2. Disconnect the wire harness and the antenna. 3. - Page 7 This metal strap also helps ensure proper electrical grounding of the unit. Ensure that you install the short part of the mounting bolt to the back of the unit and the other long part to the dashboard. 10. Reconnect the cable to the vehicle battery's negative (-) terminal. Then replace the outer trim ring and install the unit's front panel (see the steps of ' TO ATTACH THE FRONT PANEL Dismantling the unit...
- Page 8 USING THE DETACHABLE FRONT PANEL REMOVING AND PROTECTING DETACHABLE FRONT PANEL The front panel of the unit may be removed as a theft deterrent. After removing the front panel, use the case provided to keep the front panel from getting damaged. 1 Press the OPEN button (6) to flip down the front panel.
-
Page 9: Wiring Diagram
Wiring Diagram FUSE ISO connector: Part A: No Connect No Connect ISO CONNECTOR No Connect Battery B+ (Yellow) Antenna (Blue) Orange Telephone Mute No Connect Connection Cable Accessory (Red) Ground B- (Black) Part B: Rear Right + (Violet) Rear Right - (Violet/Black) Front Right + ( Grey) Front Right - (Grey/Black) Front Left + (White) -
Page 10: Operations
Operations Descriptions of Function Controls Location and Function of Keys Power ( )/ Mute Button Front panel : LCD display VOL + Button VOL - Button SEL (MENU/ENTER) Button Open ( ) Button SRX 190 Disc slot DISP Eject ( ) key SD/MMC Memory Card Slot SCAN... -
Page 11: General Operations
General Operations Reset the unit Operating the unit for the first time, after replacing the car battery or changing the connections, you must reset the unit. 1.Turn off the unit power. 2.Press the OPEN ) button and remove the front panel, then press the RESET button with a ballpoint or similar object to restore the unit to the original factory settings. - Page 12 “ INITIAL VOL” (initial volume) : “INVOL 17” will be visible on the LCD display. Ppress the VOL+ VOL- button to adjust the initial volume of theis unit. CLOCK “ADJUST” (adjust the clock time): “ADJ 00.00” will be visible on the LCD display. Press the VOL + to adjust the hour, and press the VOL -...
- Page 13 To select playback mode In power on mode, press MODE button repeatedly to select the different modes in the following sequence: RADIO, CD (with a disc inside the disc slot) , USB(with USB device inserted), SD/MMC(with SD/MMC card inserted), AUX mode. Last position memory feature - During disc, USB, SD/MMC card playback, if you turn off the unit and then switch on it, the unit will resume playing from the point that it was interrupted.
- Page 14 ESP Function This unit has the electronic shockproof function. This enables the unit to be shockproof for several seconds: CD: 40 seconds. MP3/WMA: 100 seconds. Anti-theft LED Indicator Designed as a theft deterrent, the red LED will flash when the unit is turned off and the front panel is removed. GB-13...
-
Page 15: Radio Operations
Radio Operations Press the MODE button to select the radio mode. To select a radio band In radio mode, Press the BAND button repeatedly to select one of the three radio broadcasting bands: ->FM 1-> FM 2 -> FM 3 ->. Auto/ Manual tuning( FM 50KHz/step) - Automatic search mode: Press the... -
Page 16: Rds (Radio Data System) Operations
- Auto store: Press the button for more than 2 seconds to start auto store. The radio will scan from the lowest frequency, and automatically store the 6 strongest stations into the preset memories. When auto store is complete, the radio will start preset scan to the stored 6 station Scan function Press the... - Page 17 NEWS -> AFFAIRS -> INFO -> SPORT-> EDUCATE -> DRAMA -> CULTURE -> SCIENCE -> VARIED -> POP M -> ROCK M -> EASY M -> LIGHT M -> CLASSICS -> OTHER M -> WEATHER -> FINANCE-> CHILDREN -> SOCIAL -> RELIGION ->...
-
Page 18: Cd/Mp3/Wma Disc Operations
CD/MP3/WMA Disc Operations Press the MODE button to select the disc mode. Loading/Removing a Disc 1. Press the OPEN ) button on the front panel to flip down the front panel and then insert a disc into the disc slot with the printed side facing upward;... - Page 19 Select the tracks for playback in MP3 or WMA mode You can access 3 different types of track search modes for MP3/WMA files: Track search File name search Folder search Exit Track search mode: a) Press the button once to access the track number search mode which allow you to quickly find a specific MP3/WMA *----- title by its file number, and “00 ”...
-
Page 20: Sd/Mmc Memory Card Operations
SD/MMC Memory Card Operations Using the SD/MMC card: When you insert a SD/MMC card into the memory card slot, the player will read the SD/MMC card automatically. If you insert a disc into the disc slot while reading the SD/MMC card, the unit will play the disc. You can press MODE button to select SD/MMC mode. -
Page 21: Usb Operations
USB Operations Using the USB stick: When you insert a USB stick through the port, the unit will search for the MP3/WMA files and start to play them automatically. If you insert a disc into the disc slot while reading the USB stick, the unit will play the disc. You can press MODE button to select USB mode. -
Page 22: Disc Notes
DISC NOTES A. Notes on discs: 1. Attempting to use non-standard shape discs (e.g. square, start, and heart) may damage the unit. Be sure to use round shape CD discs only for this unit. 2. Do not stick paper or tape, etc, onto the label side or the recording side of any discs, as it may cause a malfunction. Dirt, dust, scratches and warping discs will cause disoperation. - Page 23 3. Near car heaters. 4. On the seats or dashboard. Disc Cleaning Use a dry soft cloth to wipe the surface. If the disc is quite dirty, Use a soft cloth slightly moistures with isopropyl (rubbing) alcohol. Never use solvents such as benzene, thinner or conventional record cleaners as they may mar the surface of the disc. Note: A disc may become somewhat scratched (although not enough to make it unusable) depending on the way it is handled and conditions in the usage environment.
-
Page 24: Specifications
Specification 1. GENERAL Power Supply Requirements......DC 12 Volts, Negative Ground Unit Dimensions...........178(W)x160(D)x 50(H) mm Tone Controls............- Bass (at 100 Hz) ±10 dB - Treble (at 10 KHz) ±10 dB Maximum Output Power..............4x40 watts Current Drain..............15 Ampere (max.) 2. CD PLAYER Signal to Noise Ratio.................>... -
Page 25: Troubleshooting
Trouble Shooting Symptom Cause Solution The car ignition switch is not on. Turn the ignition key to “ACCESSORY” in order to switch the unit on. No power The connections are not correct. Check the connections. A fuse has blown in the vehicle Check the vehicle fuses. - Page 26 If at any time in the futrue you should need to dispose of this product, please note that waste electrical product should not be disposed of with household waste. Please recycle where facilities exist. Check with Your Local Authority or retailer for recycling advice. (Waste Electrical and Electronic Equipment Directive)
Need help?
Do you have a question about the SRX190 and is the answer not in the manual?
Questions and answers