
Related Manuals for Scott DRX 2002


Summary of Contents for Scott DRX 2002
- Page 1 DRX 2002 RDS CAR RADIO WITH DVD/MPEG4/VCD/CD/MP3/USB/SD PLAYER AM/FM STEREO RDS FUNCTION (AF/TP/TA/PTY) 30 STATION MEMORY MOTORIZED 7” TOUCH PANEL TFT LCD MUSIC POWER 160 WATTS USER MANUAL AND INSTALLATION INSTRUCTIONS...
-
Page 2: Table Of Contents
Contents ACCessoRIes ACCESSORIES ..................1 SAFETY PRECAUTIONS ..............2 INSTALLATION ..................3-5 MAINTENANCE ..................6 PANEL CONTROL ................7 Mounting sleeve Mounting bolt Outer trim frame REMOTE CONTROL ................8 (already mounted BASIC OPERATION ................9 on the unit) TUNER ....................10 DVD/VCD PLAYBACK ................ -
Page 3: Safety Precautions
sAfety PReCAUtIons 1. Be sure to connect the color-coded leads according to the diagram. Incorrect connections may cause the unit to malfunction or damage the vehicle’s electrical system. 2. Be sure to observe the correct polarity when connecting the speaker leads to the speaker terminals. Never connect the left and right speaker cables to each other or to a metal part of the vehicle. -
Page 4: Installation
InstALLAtIon Wiring Diagram AUDIO IN-R (Red) Antenna AUDIO IN-L (White) REAR AUDIO OUT-L (White) Fuse 15A REAR AUDIO OUT-R (Red) WIRE TO ACTIVATE REVERSING ISO Connector CAMERA (Pink) + PARKING BRAKE WIRE(Green) - VIDEO OUT 1 (Yellow) VIDEO OUT 2 (Yellow) CAMERA IN (Yellow) VIDEO IN (Yellow) USB SLOT... - Page 5 InstALLAtIon Connections Many vehicles are already fitted with ISO connectors behind the dashboard, including all the electrical cabling for installing a car radio. In such cases, the connections fitted to the vehicle can be directly plugged into the car radio connectors. If your car is not already fitted with these connectors, we strongly advise you to obtain an ISO connector from a specialist shop or from your car dealership. Once you have obtained the connector, you will only need to connect your loudspeakers and the power supply to the ISO cable following the connection instructions below. Function Location Connector A...
-
Page 6: Installation
InstALLAtIon Installation procedure 1. If relevant, remove any other audio system from the car. 2. After unscrewing the four car radio attachment screws, insert the mounting sleeve into the dashboard. Fix it firmly in place by folding down the metal tabs. 3. If this has not already been done, attach the brackets (2x) to the car radio. In order to do this, use the supplied flat head screws (M5x6mm). -
Page 7: Maintenance
MAIntenAnCe Replacing fuses Make sure the amperage matches the specified value when replacing the fuses. If the fuse is blown, check the power connection and replace with a new one. If the same problem occurs, there must be a malfunction. In such cases, please consult your retailer. Warning: Never use a fuse with a rated amperage over the one specified, otherwise you risk damaging the unit. Replacing the battery When the operation range of the remote control becomes shorter or if it no longer works, replace the lithium battery with a new button cell (CR2025). -
Page 8: Panel Control
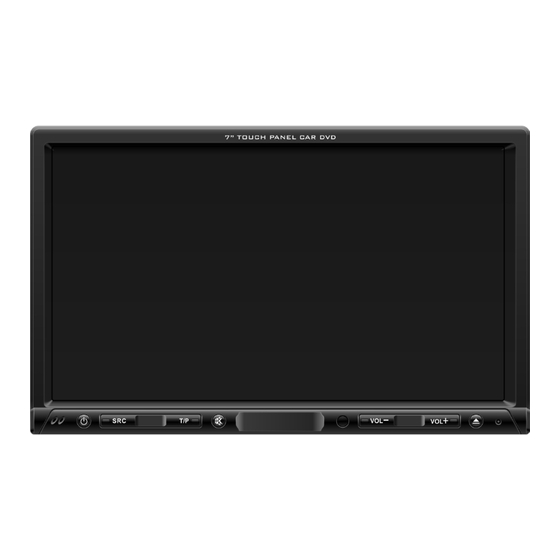
PAneL ContRoL Front Panel 1. Touch panel TFT LCD display button: Turn the unit on/off 3. SRC (SOURCE) button: Select the following sources: - Radio (“BAND”) - “DISC” (when a disc is inserted) - “USB” (when a USB device is connected) - SD/MMC card (“SD”) (when an SD/MMC card is inserted) - Aux in (“AUX”) 4. T /P (TA/PTY) button - Press briefly to turn the RDS TA (traffic announcement) on/off. -
Page 9: Remote Control
ReMote ContRoL 1. SRC (SOURCE): Select one of the following 16. MODE: Enter source selection menu. sources: : Turn the unit on/off. 18. ANGLE (DVD mode). - Radio (“Band”) - “DISC” (when a disc is inserted) 19. SUBTITLE: select a subtitle language (DVD - “USB”... -
Page 10: Basic Operation
BAsIC oPeRAtIon Source Select Loading a disc or an SD/MMC card To open the panel first, press the button on the panel. Insert a disc Press the button to turn on with label side facing up or an SD/MMC card into the corresponding slot. the unit. Then press the MODE When a disc is inserted, the panel will close automatically. -
Page 11: Tuner
tUneR RADIO Buttons on the car radio: On the source menu, touch the “BAND” button to enter radio mode. Press the T/P button briefly to turn AF (alternative frequencies) on/off. Hold the T/P button more than 2 seconds to turn the PTY function (selection of program type) on/off. Touch the icon to access the following functions: 1. -
Page 12: Dvd/Vcd Playback
DVD/VCD PLAyBACK DVD Playback For playback operations, touch the center of the screen to display the control icons. In the source menu, touch the “DISC” button to enter the DISC mode when a DVD disc is inserted. VCD Playback In the source menu, touch the “DISC” button to enter the disc mode when a VCD is inserted. -
Page 13: Cd Playback
MP3/MPeG4/JPeG fILes on A DIsC, CD PLAyBACK UsB DeVICe oR sD/MMC CARD CD Playback MP3/MPEG4/JPEG Menu In the source menu, touch the “DISC” button to enter the disc mode This menu is displayed in “DISC”, “SD” and “USB” mode when the when a CD is inserted. - Page 14 MP3/MPeG4/JPeG fILes on A DIsC, UsB DeVICe oR sD/MMC CARD MPEG4 playback PHOTO playback (JPEG files) During MPEG4 file playback, touch the center of the screen to display During JPEG file playback, touch the center of the screen to display the the control icons. control icons. 1. SRC: Display the source selection menu. 1. SRC: Display the source selection menu. : Stop playback. : Rotate the picture clockwise/counterclockwise.
-
Page 15: Advanced Playback Functions
ADVAnCeD PLAyBACK fUnCtIons AUX (AV In) fUnCtIon GOTO 1. Connect an external A/V device to the AUDIO IN-R, AUDIO IN-L and VIDEO IN jacks (connected from extension cables) on the unit. You can use the search feature to select a title/chapter/track number or 2. -
Page 16: System Setup
systeM setUP SELECT Menu SETUP Menu SEL: Display the select menu to adjust the sound effects and picture quality. Sound effects EQ: “Rock”, ”Pop”,“Classic”, “Flat”, “OFF” BAS: Bass In the source menu, touch the “SET” button to enter the setup menu. TRE: Treble 1. - Page 17 systeM setUP CAMERA ON/OFF: Turn reversing camera on/off. Safety Notes: MIRROR ON/OFF: Turn mirror mode on/off. If this mode is on, the The DVD video display of the unit will not operate while the vehicle is camera image is a mirror image. moving.
-
Page 18: Dvd Setup
DVD setUP SYSTEM SETUP “TV TYPE” (display format) PASSWORD Select the display format to watch widescreen The default password is “0000”. To change movies. the password, enter the old password, and TV SYSTEM 4:3 PS (Pan Scan): For 4:3 screens, the left then enter the new one. - Page 19 DVD setUP SYSTEM SETUP AUDIO LANGUAGE MENU LANGUAGE Select the default audio language (if several Select the default menu language (if several languages are available on the DVD). languages are available on the DVD). DEFAULT Restore the factory default settings. AUDIO SETUP LANGUAGE SETUP Use the...
-
Page 20: Dvd Setup
DVD setUP VIDEO SETUP SATURATION This option allows the user to adjust the Adjust the saturation of the display. dynamic compression in order to limit BRIGHTNESS variations in volume. Adjust the brightness of the display. “LINE OUT”: Compress the signal. The variation in volume is small. -
Page 21: Information On Disc Compatibility
InfoRMAtIon on DIsC CoMPAtIBILIty Disc formats supported by this DVD player: Chapter: This is a smaller segment of picture or music within a DVD title. A title is DISC TYPE CONTENT SIZE MAXIMUM TIME comprised of one or more chapters, each numbered for easy searching. Some discs may not have chapters. -
Page 22: Troubleshooting Guide
tRoUBLesHootInG GUIDe The following checklist can help you solve the problems which you may encounter when using the unit. Before consulting it, check the connections and follow the instructions in the user manual. Problem Possible cause Solution General Car ignition is not on. Turn your car key in the ignition. -
Page 23: Technical Specifications
sPeCIfICAtIons General Power supply 12V DC (11V-16V allowable) Discs and files supported DVD, DVD+R/RW, DVD-R/RW, CD- Music power output 40W x 4 DA, CD-R/RW, MP3, JPEG, SVCD, RMS power output 25W x 4 VCD2.0, MPEG4, Xvid Speaker impedance required 4 – 8 Ohm Video system PAL, AUTO, NTSC Pre-amp output voltage...
Need help?
Do you have a question about the DRX 2002 and is the answer not in the manual?
Questions and answers