
Subscribe to Our Youtube Channel
Related Manuals for Reely Shadow 2.0


Summary of Contents for Reely Shadow 2.0
- Page 1 Operating Instructions Quadrocopter „Shadow 2.0“ RTF Item no. 1400004 Version 10/16...
-
Page 2: Table Of Contents
Table of Contents Page Introduction ................................4 Explanation of Symbols ............................4 Intended Use ...............................5 Scope of Delivery ..............................5 Product Description .............................6 Safety Information ..............................7 a) General Information ............................7 b) Mains Unit ..............................8 c) Before Commissioning ..........................8 d) During Operation ............................8 Notes on Batteries and Rechargeable Batteries ....................10 Preparation of the Quadrocopter ........................ - Page 3 Page 12. Overview of the Flight Modes ..........................33 a) „Manual Mode“ ............................33 b) „GPS Mode“ ..............................33 c) „IOC“ Function (Smart Flight Orientation) ....................33 d) „CL Mode“ ..............................34 e) „HL Mode“ ..............................35 f) „POI Mode“ ..............................35 13. Activating the Flight Modes ..........................36 14.
-
Page 4: Introduction
Introduction Dear Customer, thank you for purchasing this product. This product complies with the statutory national and European requirements. To maintain this status and to ensure safe operation, you as the user must observe these operating instructions! These operating instructions are part of this product. They contain important notes on commissioning and handling. -
Page 5: Intended Use
Intended Use This product is an electrically powered helicopter-like model with wireless radio control via the remote control system included in the delivery. The quadrocopter is solely designed for private use in the field of model construction and the operating times associated with it. The model is designed for operation outdoors but may also be used in sufficiently sized rooms (e.g. -
Page 6: Product Description
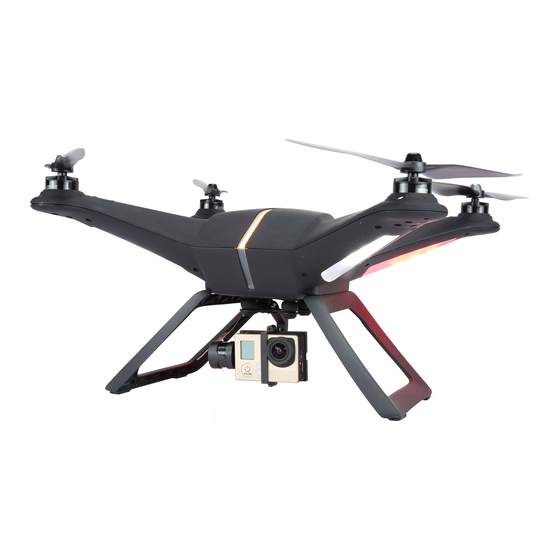
Product Description The ready-to-fly quadrocopter has 4 separate motors that drive one propeller each. Concurrent acceleration of all propellers permits the quadrocopter to lift off of the ground and hover stably in the air at the corresponding propeller speeds. The enclosed remote control permits controlling the quadrocopter specifically to the desired flight altitude and direc- tion. -
Page 7: Safety Information
Safety Information In case of damage caused by non-compliance with these operating instructions, the warranty/gua- rantee will expire. We do not assume any liability for consequential damage! We do not assume any liability for property damage and personal injury caused by improper use or non-compliance with the safety instructions! In such cases the warranty/guarantee is voided. -
Page 8: B) Mains Unit
b) Mains Unit • The mains unit is constructed pursuant to protection class II. • Use only a proper mains socket of the public mains for voltage/power supply of the mains unit. Use the enclosed mains cable for connection. • The socket to which the mains unit‘s connection cable is connected must be easily accessible. •... - Page 9 • Never switch off the remote control (transmitter) while the model is in use. After landing, always switch off the flight battery before the remote control. Then remove the flight battery from the quadrocopter. • Never switch off the remote control while the quadrocopter is still in operation. •...
-
Page 10: Notes On Batteries And Rechargeable Batteries
Notes on Batteries and Rechargeable Batteries Although use of batteries and rechargeable batteries in everyday life is a matter of course today, there are many dangers and problems. Ensure that you observe the following general information and safety information when handling batteries and rechargeable batteries. -
Page 11: Preparation Of The Quadrocopter
Preparation of the Quadrocopter In the further course of these instructions, figures in the text always refer to the adjacent figure or the figures within the section. References to other figures are indicated with the corresponding figure number. a) Assemblies, Displays and Attachments Illustration A in figure 1 shows the quadrocopter from the front. -
Page 12: B) Mounting The Propellers
b) Assembly of the Propellers The quadrocopter comes with 1 pair of left-turning propellers (1) and 1 pair of right-turning propellers (2) each. Important: Observe the rotating direction of the propellers at in- stallation. The propellers at the front left and the rear right turn clockwise when viewed from above;... -
Page 13: C) Stabilised Camera Holder (2 D-Gimbal)
c) Stabilised Camera Holder (2 D-Gimbal) The quadrocopter has a camera holder stabilised around two axes (gimbal) installed already. Once the flight battery at the quadrocopter is switched on, the holder will automatically align and compensate any nod and roll movements of the quadro- copter in flight. -
Page 14: D) Charging The Flight Battery
d) Charging the Flight Battery The 3-cell flight battery is charged using the enclosed mains unit (1) supplied. For this, open the cover of the charge adapter (2), so that the two large charging contacts (3) are visible. Connect the flight battery (4) to the charge adapter according to the two middle illustrations in figure 5. -
Page 15: E) Testing The Rechargeable Battery Charge Condition
e) Testing the Rechargeable Battery Charge Condition The current charge condition of the flight battery can be tested easily at any time. For this, briefly push the on/off button (1) at the flight battery. For approx. two seconds, the four LEDs show the current charge condition. -
Page 16: Transmitter Controls
Transmitter Controls Figure 7... - Page 17 Front (figure 7): 1 Transmitter aerial 2 Carry handle with integrated second transmitter aerial 3 Rotary encoder „VRB“ 4 Toggle switch „GPS“ 5 Trim button for nod function 6 Control stick for nod and roll functions 7 Trim button for roll function 8 „OK“...
-
Page 18: Setting Up The Transmitter
Setting up the Transmitter a) Inserting the Batteries For the power supply of the transmitter you will need 4 alkaline batteries (e.g. Conrad item no. 652507, pack of 4, order 1) of the size AA/mignon. Proceed as follows to insert the batteries: The battery compartment lid (1) is located on the back of the transmitter. - Page 19 The operating display consists of the following elements: 1 Model name 2 Model type figure 3 Battery symbol for transmitter voltage supply 4 Battery symbol for receiver voltage supply 5 Nod trimming display 6 Roll trimming display 7 Information area for status messages 8 Yaw trimming display 9 Distance display in „Following-Mode“...
- Page 20 The operating display shown in figure 10 will only appear com- pletely if the receiver system or quadrocopter is in operation as well. Pushing the button „UP“ or „DOWN“ calls two more display win- dows alternatingly. The first window shows the following information: •...
-
Page 21: C) Setting The Control Stick Length
c) Setting the Control Stick Length You can adjust the length of the control sticks, depending on your steering habits. To do so simply hold the bottom part of the grip (1) and turn the upper part (2) up anti-clockwise. You can now set the length of the control stick by turning the bottom part of the grip. -
Page 22: Commissioning Of The Quadrocopter
Commissioning of the Quadrocopter Before you start the quadrocopter for the first time, read this section with care. Only if you are absolutely certain that you have made all settings correctly must you start the motors and let the quadrocopter lift off. Otherwise, contact an experienced model pilot who can support you in initial commissioning. -
Page 23: B) Inserting The Flight Battery Into The Quadrocopter
b) Inserting the Flight Battery into the Quadrocopter To ensure a sufficiently good satellite reception, the quadrocopter should be set up on a free field, where no high- voltage lines, power masts, metal constructions or other obstacles may impair GPS reception. Stay away from broadcasting systems and other facilities that may negatively influence the electromagnetic conditions in your environment. -
Page 24: C) Calibration Of The Compass
c) Calibration of the Compass The quadrocopter has a compass with the help of which it can control the flight direction and flight altitude. Before the quadrocopter can be started, the compass must be calibrated. We recommend calibration before each flight. After a site change to another starting position, the compass must be calibrated. -
Page 25: D) Basic Information Relevant For Controlling Of Quadrocopters
d) Basic Information Relevant to the Control of Quadrocopters Before you let your model lift off for the first time, you should first familiarise yourself with the control possibilities open to you and thereby be able to fly safely. The quadrocopter is controlled via the two control sticks at the remote control transmitter. Ex works, the control func- tions of the two sticks are programmed to „mode 2“. - Page 26 Yaw Function The two right-ward turning and the two left-ward turning propellers balance out the torques acting on the model. The quadrocopter hovers stably. If the control stick for the yaw function (also see figure 7, item 16) is moved to the left, he electronics in the model will increase the speed of the propeller turning to the right (clockwise) and at the same time rescue there speed of the propellers turning to the left (counter-clockwise).
- Page 27 Roll function The roll function allows you to move your quadrocopter sideways to the right and to the left (see figure 20). Use the right control stick for control (also see figure 7, item 6). If the stick is slightly moved to the left, the electronics in the quadrocopter change the propeller speeds so that the model will turn to the left slightly and thus also fly to the left.
- Page 28 Nod Function The nod function allows you to move your quadrocopter forward and backward (see figure 21). This is also controlled with the right control stick (also see figure 7, item 6). If the stick is slightly pushed to the front, the electronics in the quadrocopter change the propeller speeds so that the model will turn to the front slightly and thus also fly forward.
-
Page 29: E) Setting The Toggle Switches
e) Setting the Toggle Switch Before letting your model lift off for the first time, check the switch positions of the three toggle switches „IOC“ (also see figure 7, item 18), „GO-HOME“ (see figure 7, item 19) and „GPS“ (also see figure 7, item 4). -
Page 30: F) Starting The Quadrocopter
f) Starting the Quadrocopter • Stand behind the quadrocopter. • The quadrocopter should point at you with the voltage display of the flight battery (four LEDs). • Check the voltage display of the flight battery and the remote control transmitter, as well as the position of the toggle switches (position front/top). -
Page 31: G) Trimming The Quadrocopter
g) Trimming the Quadrocopter When operating the quadrocopter indoors (e.g. in a hall) or in manual mode („GPS“ off), the quadrocopter may fly into a spe- cific direction in spite of both control sticks being in the middle positions. If the quadrocopter drifts to the right when hovering, push the trim button for the roll function (also see figure 7, item 7) to the left until the quadrocopter stops trying to drift to the right. -
Page 32: H) Overview Of The Flashing Displays Of The Status Leds
h) Overview of the Flashing Displays of the Status LEDs After switching on the transmitter and the flight battery in the quadrocopter, the quadrocopter will perform a self-test in which it checks, among others, binding with the transmitter. During this time, the status LEDs will light up yellow*. Do not move the quadrocopter during this period. -
Page 33: Overview Of The Flight Modes
Overview of the Flight Modes The quadrocopter has different flight modes that can be activated by toggle switch. a) „Manual-Mode“ „Manual-Mode“ is suitable for indoor shows where it is not possible to receive a GPS signal for constructional reasons. The quadrocopter can be controlled in all directions but there are no automatic corrections of the light position, since the quadrocopter has no GPS information. -
Page 34: D) „Cl Mode
When the „IOC“ function has been activated, the movement directions of the quadrocopter no longer refer to its build. The movement direction of the quadrocopter changes depending on which mode is called within the „IOC“ function. Important! The „IOC“ function requires concurrent reception of more than 6 GPS satellites and the quadrocopter must be more than 5 m away from the starting point. -
Page 35: E) „Hl Mode
e) „HL-Mode“ In „HL-Mode“ (= „Home Point-Lock“), the movement direction of the quadrocopter always refers to the line from the starting point (HP) in the direct proximity of which the pilot is placed as well, and the quadrocopter. Independently of the direction in which the front of the quadrocopter is aligned, it will always fly in the direction in which the pilot steers at the transmitter from the pilot‘s point of view. -
Page 36: Activating The Flight Modes
Activating the Flight Modes The „IOC“ function is activated and deactivated with the „IOC“ switch, which also switches the respective flight modes. The switch can be assigned with 3 combination options on demand. Ex works, the switch „IOC“ is occupied according to the combination C in the following table. -
Page 37: Go-Home" Function
„POI-Mode“ The mode is only available if the switch „IOC“ has been programmed to the combination B or C. The „point of interest“ can only be saved manually. The prerequisite for this is reception of more than 6 satellites for a period of at least 10 seconds. - Page 38 When it is above the saved starting point, it will quickly reduce the flight altitude to 5 mm and hover for 3 - 5 seconds before finally slowly reducing the remaining flight altitude until touching down. Figure 30 Attention! The „Go-Home“ function is tripped automatically when the quadrocopter no longer receives any valid remote control signal.
-
Page 39: Following" Function
„Following“ Function For the quadrocopter to be able to follow the remote control, the transmitter also must be equipped with a GPS receiver (see figu- re 31, item 1). The installation of the GPS receiver on the remote control can be taken from the above illustration in figure 31. The connection plug (see figure 31, item 2) of the GPS receiver is connected to the rear of the remote control. -
Page 40: Undervoltage Warning
Undervoltage Warning The quadrocopter checks the voltage of the flight battery continually in flight. The current voltage can be read in the remote control‘s display if required (see upper illustration in figure 12). However, the voltage values are displayed with a delay due to the data transmission. -
Page 41: Flight Space Limitation And Flight Prohibition Zones
Flight Space Limitation and Flight Prohibition Zones The quadrocopter has a distance and altitude limitation that can be set individually with the assistant software. Ex works, a maximum flight altitude of 120 m and a max. distance of 300 m are set. If the distance limit is exceeded by more than 10 m, the quadrocopter will automatically return to the starting point. -
Page 42: Gimbal Control
Gimbal Control The camera holder that is stabilised around two axes (gimbal) compensates for the nod and roll movements of the quadrocopter and thus ensures a calm camera image. Additionally, the camera can be swivelled from the horizontal position vertically up by 45° and down by 135°. The swivel movement is controlled with the rotary controller VRB (1). -
Page 43: Binding Function
Binding Function Transmitter and receiver in the quadrocopter are already aligned with each other (bound) in the factory and can be used at once. Renewal of binding is only required after replacing the receiver in the model, when replacing the transmitter or to remove a malfunction, e.g. -
Page 44: Programming The Remote Control
• Check the function of the system. The receiver now must react to the control signals of the transmitter. If this is not the case, repeat binding or check the digital encoding of transmitter and receiver. Programming the Remote Control Your remote control offers a system setting menu „System setup“... -
Page 45: The System Setting Menu „System Setup
The System Setting Menu „System Setup“ The basic settings of the remote control transmitter are made in the system setup menu first. To get to the system settings menu, push the button „OK“ with the transmitter switched on. The operating display in the display switches to the menu display. - Page 46 Setting the Control stick Assignment • Switch on the transmitter and call the system setting menu. • The top menu item „Sticks mode“ is marked by the cursor ar- row. • Briefly push the button „OK“ to activate the menu item. The display shows the currently used control stick assign- ment.
-
Page 47: B) Display Brightness „Lcd Brightness
b) Display Brightness „LCD brightness“ To have a perfectly legible display signals at all times, you can set the brightness value individually. Setting the brightness value • Switch on the transmitter and call the system setting menu. • Move the cursor arrow to the menu item „LCD brightness“ with the two buttons „UP“... -
Page 48: C) Transmitter Software Version „Firmware Ver
c) Transmitter Software Version „Firmware ver.“ On demand, you can have the version number and the date of the transmitter software displayed. This way, you can recognise at once whether there is a newer software for the transmitter that can be installed (see following menu item). -
Page 49: D) Transmitter Software Update „Firmware Update
d) Transmitter Software Update „Firmware update“ To transfer a never version of the transmitter software to the remote control, the transmitter must be connected to a PC or notebook with an USB interface cable. For the data to be transmitted to the remote control, the transmitter must be put in the update mode. -
Page 50: E) Reset To Factory Settings „Factory Reset
e) Reset to Factory Settings „Factory reset“ With this function you have the option of deleting all the data of all remote control to their factory settings with a single command. Attention! When you call this function, all previously entered settings are deleted! The remote control is returned to the delivery condition and all individual data must be entered again. -
Page 51: The Function Setting Menu „Functions Setup
The Function Setting Menu „Functions setup“ In the function setup menu, you can check the switching and control functions and set the basic trim. To get to the function settings menu, push the button „OK“ and hold it with the transmitter switched on. The operating display in the display switches to the menu display. -
Page 52: A) Control Encoder Test „Display
a) Control Encoder Test „Display“ In this menu, you can have the control signals of all 10 channels displayed graphically. When actuating the control sticks, switches or dial switches, you can check the changes of the control value at the same time in the bar chart. This shows you immediately if, e.g., a switch or potentiometer at the remote control is defective. -
Page 53: B) Basic Trim „Subtrim
b) Basic Trim „Subtrim“ As already mentioned when trimming in the quadrocopter, it may happen in manual mode („GPS“ off) that the quad- rocopter will fly in a specific direction even though both control sticks are in the middle positions. The four trim buttons (see figure 7, items 5, 7, 15 and 17) can be used to trim the quadrocopter so that it has a stable hover flight again when the control sticks are not deflected. -
Page 54: Maintenance And Care
Maintenance and Care Clean the exterior of the model and the remote control only with a soft, dry cloth or brush. Never use abrasive cleaning agents or chemical solutions as these could damage the surfaces of the casings. The propellers have to be easily movable and there should not be a clearance in the bearing. Propellers that are torn or where small parts have broken off must be replaced with original propellers without delay in any case. -
Page 55: Troubleshooting
Troubleshooting Even though the model and the remote control system were built to the state of the art, there may still be malfunctions or faults. For this reason, we would like to give you some information on how to deal with possible problems. Problem Remedy Transmitter doesn’t respond. -
Page 56: Declaration Of Conformity (Doc)
The quadrocopter cannot be switched to • Check the functions of the switches „IOC“ and „GPS“ in the remote „IOC mode“. control menu „Display“. • The quadrocopter is not operated in „GPS mode“. • The quadrocopter does not receive at least 7 (or more) GPS satel- lites. - Page 57 Quadrocopter: Power supply ........3-cell LiPo battery back (rated voltage 11.1 V) Dimensions ...........350 x 350 x 220 mm (L x W x H) Rotor shaft distance ......425 mm (diagonal) Propeller size ........254 x 97 mm (10“ x 3.8“) Take-off weight ........1500 g (incl. rechargeable battery) Max.
- Page 60 Legal Notice This is a publication by Conrad Electronic SE, Klaus-Conrad-Str. 1, D-92240 Hirschau (www.conrad.com). All rights including translation reserved. Reproduction by any method, e.g. photocopy, microfilming, or the capture in electronic data processing systems require the prior written approval by the editor. Reprinting, also in part, is prohibited. This publication represent the technical status at the time of printing.
Need help?
Do you have a question about the Shadow 2.0 and is the answer not in the manual?
Questions and answers