
Related Manuals for Reely Folding Drone GPS 1668261


Summary of Contents for Reely Folding Drone GPS 1668261
- Page 1 Operating Instructions Electrical quadrocopter “Folding Drone GPS” RtF Item No. 1668261...
-
Page 2: Table Of Contents
Table of contents Page Introduction ................................4 Explanation of symbols ............................4 Intended use ................................5 Delivery content ..............................5 Product description ..............................6 Safety information ..............................7 a) General information ............................7 b) Before first use ..............................8 c) During use ..............................8 Battery information .............................10 a) General information .............................10 b) Additional information about lithium rechargeable batteries ................ - Page 3 Page 13. FPV mode ................................25 a) General information .............................25 b) Downloading the app ...........................26 c) Preparing the vehicle for use ........................26 d) Basic app functions .............................27 e) Flight with remote control in FPV operation ....................30 f) Recording/viewing images or videos ......................30 g) "Follow me"...
-
Page 4: Introduction
1. Introduction Dear customer, Thank you for purchasing this product. This product complies with statutory national and European regulations. To ensure that the product remains in this state and to guarantee safe operation, always follow the instructions in this manual. These operating instructions are part of this product. -
Page 5: Intended Use
3. Intended use The "Folding Drone GPS RtF" electric quadcopter is an electrically driven helicopter-like model that is controlled using the wireless remote control included. The quadcopter is designed solely for private use within the domain of model construction with the associated operating times. It is not suitable for other purposes. -
Page 6: Product Description
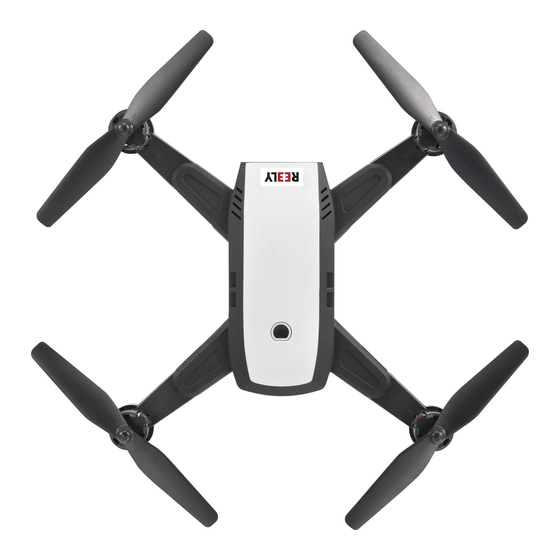
5. Product description The "Folding Drone GPS RtF" electric quadcopter is a pre-assembled helicopter-like model aircraft with four rotors and a built-in camera. Quadcopters are already used professionally to complete a wide range of tasks. The flight attitude and altitude of the quadcopter are stabilised by state-of-the-art microprocessor-controlled electron- ics with position control and acceleration sensors, as well as a GPS function. High-quality DC motors in conjunction with a specially developed actuator result in a powerful flight operation. The novel controls and electronic self-stabili- sation result in excellent flight characteristics. -
Page 7: Safety Information
6. Safety information Damage caused due to failure to observe these instructions will void the warranty. We shall not be liable for any consequential damage. We shall not be liable for damage to property or personal injury caused by incorrect handling or failure to observe the safety information! Such cases will void the warranty/guarantee. -
Page 8: B) Before First Use
b) Before first use • The operation and handling of remote controlled quadcopters must be learned! If you have never oper- ated a model of this kind, start with particular care and get used to the reactions of the model to the remote control commands first. Be patient! • Ensure that there are no other models operating on the same frequency (2.4 GHz) within range of the remote control. Always check whether there are any other 2.4 GHz remote control systems that may... - Page 9 • In the event of a crash, switch off the rotor motors immediately. Rotating rotors may be damaged if they come into contact with obstacles or in the event of an impact. Check the rotors for any signs of cracks or damage before flying the model again! • To avoid damaging the model due to a crash caused by an undervoltage/total discharging of the re- chargeable battery, monitor the undervoltage indicators during the flight.
-
Page 10: Battery Information
7. Battery information Batteries present numerous safety hazards. Compared with conventional NiMH rechargeable bat- teries, LiPo/Li-ion rechargeable batteries have a high energy content. For this reason, it is essential to comply with safety regulations to prevent the risk of a fire or explosion. Always observe the following safety information when handling batteries. -
Page 11: B) Additional Information About Lithium Rechargeable Batteries
• When charging, place the charger and rechargeable flight battery on a non-flammable, heat-resistant surface (such as a stone tile). Keep the charger and battery away from flammable objects. Leave enough space between the charger and the rechargeable flight battery. • Do not charge batteries when they are still hot (e.g. due to a high discharge current in the model). Allow the rechargeable flight battery to cool down to room temperature before charging it. • Ensure that there is sufficient ventilation, as the battery and charger may heat up during the charging process. Never cover the charger or the quadcopter battery! • Never leave batteries unattended when they are charging. Check the rechargeable flight battery for overheating or bloating at regular intervals. This indicates an imminent risk of a fire or explosion. If the rechargeable flight battery overheats or starts to expand, disconnect it from the charger immediately and take it to a location where it will not cause any additional damage if it explodes or catches fire (e.g. - Page 12 • Always use a compatible charger to charge lithium batteries and ensure that the charging specifications are correct. Do not use NiCd, NiMH or lead-acid battery chargers, as these may cause a fire or explo- sion! Always select the correct charging specifications for your rechargeable battery. • When charging a rechargeable lithium battery with more than one cell, be sure to use a so-called "balancer" (integrated in the included charger). • The charge rate for LiPo/Li-on batteries must not exceed 1C (or the value stated in the battery instruc- tions).
-
Page 13: Preparations For Flying
8. Preparations for flying a) Inserting batteries into the remote control Remove the battery compartment cover on the back of the remote control. To do this, you must first remove the cover screw and then push the lever in the direction of the arrow. Only then can the battery compartment lid can be lifted off. Insert four AA/mignon batteries, observing the correct polarity. Observe the polarity markings in the battery compart- ment. -
Page 14: B) Charging The Quadcopter Rechargeable Battery
b) Charging the quadcopter rechargeable battery To power the included USB charger, use a suitable USB power adapter or USB cigarette lighter adapter (not included) with an output current of at least 1000 mA. It is not recommended to use a USB port on a computer or USB hub with its own power supply, as the charger's power requirements of approx. -
Page 15: C) Final Assembly
c) Final assembly The model is pre-assembled and ready for use. It comes with retractable rotor blades as a special feature. The pack- aged size is very small as a result, thus facilitating transport. For flight operation, the rotors must be unfolded one after the other until you can hear and feel them engage. The rotors can be folded back into their initial position for transport or storage. For the first test flights, we recommend that you also attach a rotor guard to each unfolded wing, as shown in the right figure. To do this, push the rotor guard bracket onto the motors from above. -
Page 16: Remote Control Buttons
9. Remote control buttons Figure 4 1 Smartphone holder 8 "Calibrate gyro" button 2 Antennas 9 "Pan camera down" button 3 On/off switch with LED indicator 10 "Calibrate compass" button 4 "Return and landing at the starting point" button 11 "Auto start/landing" button 5 "Flight mode"... -
Page 17: Safety Features
10. Safety features The "Folding Drone GPS RtF" electric quadcopter is equipped with a number of transmitter and model safety features designed to protect the model aircraft from damage and to minimise possible damage. The protection mechanisms are recognisable by a LED indicator (model aircraft) or an optical and acoustic warning signal (transmitter). -
Page 18: Before First Use
11. Before first use To make the explanation of the controls simpler and more consistent, the classic terms are used here. These come from aviation language and are widely used. Directions are given from the perspective of a "virtual" pilot. The two green LEDs on the body of the model serve as direction indicators and mean "forward". -
Page 19: B) Yaw Function
b) Yaw function "Yaw" denotes the rotation of the quadcopter around the vertical axis. This movement either occurs unintentionally due to the torque of the rotors or intentionally as a flight direction change. The movement occurs in the quadcopter by speed differences from one individual rotor to another. If you move the control lever (Figure 4, no. 6) to the left, the quadcopter will turn to the left. If you move the control lever to the right, the quadcopter will turn right. -
Page 20: D) Roll Function
d) Roll function "Roll" denotes the movement around the longitudinal axis, similar to rolling a ball sideways (or the sideways move- ment a crab). As a result, lifting one side the quadcopter moves it to the side, regardless of the forward direction. If you move the right joystick (Figure 4, no. -
Page 21: First Take-Off
12. First take-off a) Starting the quadcopter The operation and handling of remote controlled model aircraft must be learned! If you have never before operated a model of this kind, take extra care at the start and get used to the reactions of the model to the remote control commands first. Be patient! Refer to the instructions in section 11. - Page 22 • Lift the model horizontally off the ground and turn it counter-clockwise three times around its own axis (see Figure 9, no. A). Immediately afterwards, hold the quadcopter upright (see Figure 9, no. B; with the camera facing upwards) and turn the model counter-clockwise three times around its own axis. Then place the quadcopter on a flat surface again. Figure 9 • If the LEDs on the model flash at a slow rate in a few more seconds, the calibration has been successful. • Now wait until the quadcopter LEDs glow steadily. This can take from 30 to 40 seconds. If the LEDs glow steadily, the model has successfully received a GPS signal.
- Page 23 • Another option is to use the "Return and landing at the starting point" function. If you use the button (Figure 4, no. 4) provided on the transmitter, the model will automatically return to the starting point and land there. There may be very small deviations of 1 –...
-
Page 24: B) Calibrating The Quadcopter
b) Calibrating the quadcopter If the model can no longer hover on the spot (e.g. after a crash), the sensors must be recalibrated. Place the quad- copter on a level surface. Now press and hold down the "Calibrate" button on the transmitter (Figure 4, no. 8) for approx. three seconds. The LEDs on the model will flash very quickly. The LEDs will stay solid when calibration is complete. -
Page 25: Fpv Mode
13. FPV mode a) General information The quadcopter is standardly equipped with a camera that wirelessly transmits a live video signal to a suitable smart- phone (not included). Pictures and videos are taken using an app installed on your smartphone. Pictures or videos can be stored and edited on your smartphone. -
Page 26: B) Downloading The App
b) Downloading the app A smartphone app is required to use FPV mode. The only costs incurred will be the normal costs incurred through downloading. The app itself is free. Scan one of the QR codes shown below depending on the operating system of your smartphone. After scanning the QR code, you will be automatically re-directed to the download page for the current version of the app. -
Page 27: D) Basic App Functions
d) Basic app functions The home page of the app is shown in Figure 15. The "Start" button opens the user interface shown in Figure 16. Figure 15 Figure 16... - Page 28 The icons shown in the upper row (see Figure 16) have the following functions: 1 Exit screen 2 Indicators of altitude, distance, speed, position and controls 3 Indicator of the remaining capacity of the quadcopter rechargeable battery (only displayed when the smartphone is paired with the model) 4 Indicator of the video signal received from the quadcopter 5 Display of the current location via Google Maps...
- Page 29 If the cogwheel (Figure 16, no. 6) is enabled, the following icons will also be displayed (see Figure 17): Figure 17 7 "Joystick" (various parameter settings for flight operation) 8 "Param" (display of factory settings that have no effect on this model) 9 "Map" (displays and maps for GPS operation) 10 "Other"...
-
Page 30: E) Flight With Remote Control In Fpv Operation
e) Flight with remote control in FPV operation Start and operate the model, as described in detail in chapters 11 and 12. You can now view the flight route on the screen of your smartphone. For the first test flights, it is advisable that the flight area is free of obstacles and that the flight operation is monitored by a co-pilot. In FPV operation, the co-pilot can keep you updated on the current flight situation and assist you with orientation. You must also keep in mind that in different countries FPV operation is only allowed with a co-pilot. f) Recording/viewing images or videos Important notice! Pay attention to the legal principles of your country regarding the creation of photos and video recordings of persons, objects and facilities as well as the publication of such photos and videos. -
Page 31: G) "Follow Me" Mode
g) "Follow me" mode When operating the model with the hand-held transmitter in FPV operation, you can also use the "Follow me" mode. If you enable this function, the model will follow the pilot at a defined distance. Adjust the desired distance and flight altitude at which the model should follow the pilot. Now select the correspond- ing symbol on the screen of your smartphone (Figure 16, no. 11, function type selection) to enable the "Follow me" mode. -
Page 32: Controlling The Quadcopter With Your Smartphone
14. Controlling the quadcopter with your smartphone The quadcopter can also be operated solely with a smartphone as well as the transmitter included. There are two options for this shown below. To ensure an interference-free transmission of control and video signals, there should not be other trans- mitters in the model’s 2.4 GHz transmission range. The smartphone's "Bluetooth "... - Page 33 To control the quadcopter with your smartphone and in-app controls, follow the steps below: • Switch the quadcopter on. The LEDs flash The model now emits a WiFi transmission signal. • Switch on your smartphone. Under "Settings/WiFi", connect the "WIFI-720-GPS-xxxxx" signal to your smartphone. • Start the app for the quadcopter on your smartphone. • In the app, select the "START"...
-
Page 34: Other Functions Of The App
15. Other functions of the app a) Core Functions Indicators of altitude, distance, speed, position with GPS coordinates and values of the controls are shown in Figure 16, no. 2. In Figure 16, no. 3, you can see the remaining capacity of the quadcopter rechargeable battery as a percentage. A fully charged rechargeable battery is displayed with 100%. This value decreases during flight operation. For safety reasons, the model automatically initiates a landing process below a certain percentage value. -
Page 35: B) Cogwheel Icon Functions
b) Cogwheel icon functions In Figure 16, no. 6, you will see a cogwheel icon. Selecting this icon opens a sub-menu with "Joystick, Param, Map and Other" functions (see Figure 17). Under "Joystick" (Figure 17, no. 7), you can make the following settings for flight operation: Figure 20a "Joystick mode": Selection of Mode 1 and Mode 2 (factory setting). In Mode 2, the altitude and yaw control functions are performed with the left-hand control;... -
Page 36: C) Functions Under "Param
If you continue to scroll up the display, other setting options will be displayed: Figure 20b "Speed": Here you can set the control compliance of the model. Analogous to the information in chapter 11. e), here you can choose between the beginner and advanced mode by tapping. "Calibrate accelerometer": This function is used to calibrate the sensors (gyros). -
Page 37: D) Features Under "Map
d) Features under "Map" Figure 22 "Aircraft display map center": Specify here if the model icon (dot) should be always in the middle of the map ("YES") or moving on the map ("NO"). "Map coordinates auto calibrate (china)": This function is not available in this model. The factory setting should not be changed. "Map type": Here you can select displays and maps for GPS operation. -
Page 38: E) Features Under "Other
e) Features under "Other" Figure 23 "Real-time preview": For flight operation, you can choose between a low video resolution (480p = standard) and a high video resolution (720p). "Camera inverse": Enable this option to rotate the video image by 180°. f) Controlling with the position sensors of a smartphone Modern smartphones are equipped with built-in position sensors that always rotate the display according to the loca- tion of the device so that you can read or recognise the content. -
Page 39: Maintenance, Servicing And Repairs
16. Maintenance, servicing and repairs a) Regular cleaning The quadcopter is a very simply constructed aircraft . There are no mechanical parts that require lubrication or other maintenance. Nevertheless, you should clean any dirt (woollen threads, hair, dust, etc.) off the quadcopter after each flight. -
Page 40: Disposal
17. Disposal a) Product Electronic devices are recyclable waste and must not be disposed of in the household waste. At the end of its service life, dispose of the product according to the relevant statutory regulations. Remove any inserted (rechargeable) batteries and dispose of them separately from the product. b) (Rechargeable) batteries You as the end user are required by law (Battery Ordinance) to return all used batteries/rechargeable batteries. -
Page 41: Technical Data
19. Technical data a) Transmitter Transmission frequency........2449 - 2481 MHz Transmission power..........3 dBm Transmitter range ..........max. 70 - 80 m (open area) Operating voltage ..........6 V/DC (4 AA/mignon batteries) Dimensions (L x W x H) ........145 x 142 x 40 mm Weight (without batteries) .........approx. 161 g b) Quadcopter Flight time ............approx. -
Page 42: E) Quadcopter Rechargeable Battery
e) Quadcopter rechargeable battery Construction type ..........LiPo, 2 cells Nominal voltage ..........7.4 V Capacity ............850 mAh Discharge rate ..........max. 25C f) USB charger Operating voltage ..........5 V/DC (via USB) Required input current ........min. 1000 mA Suitable rechargeable battery type ....LiPo, 2 cells (rated voltage 7.4 V) Charging time ...........approx. - Page 44 This is a publication by Conrad Electronic SE, Klaus-Conrad-Str. 1, D-92240 Hirschau (www.conrad.com). All rights including translation reserved. Reproduction by any method, e.g. photocopy, microfilming, or the capture in electronic data processing systems require the prior written approval by the editor. Reprinting, also in part, is prohibited. This publication represent the technical status at the time of printing.
Need help?
Do you have a question about the Folding Drone GPS 1668261 and is the answer not in the manual?
Questions and answers