Table of Contents
Advertisement
INTRODUCTION:
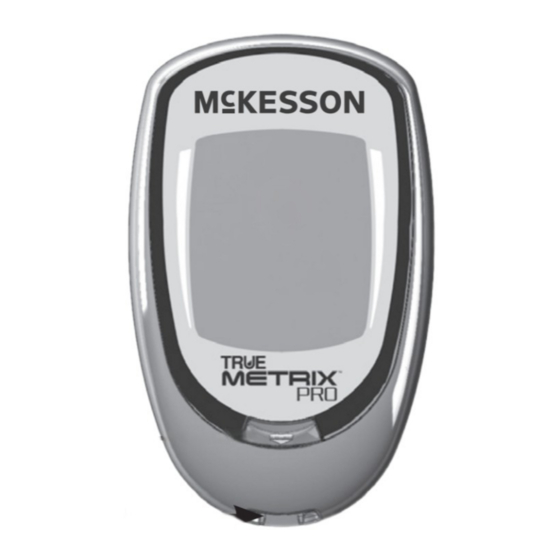
McKesson TRUE METRIX® PRO
Professional Monitoring Blood Glucose Meter
McKesson TRUE METRIX® PRO is a simple, accurate way to
test whole blood glucose (sugar) level, anytime, anywhere. Our
goal is to provide quality healthcare products and dedicated
customer service. For questions about McKesson TRUE
METRIX® PRO products, call 1-800-777-4908.
McKesson recognizes the importance of practicing safe
and reliable testing using the McKesson TRUE METRIX®
PRO Professional Monitoring Blood Glucose Meter. Each
patient should have specific blood glucose target ranges
that are determined by their Doctor or Diabetes Healthcare
Professional. Having most blood glucose results within the
patient's target range shows how well a treatment plan is
working to control glucose levels. Keeping results within the
patient's target range helps slow or stop complications from
diabetes.
The McKesson TRUE METRIX® PRO Professional Monitoring
Blood Glucose Test Strips are for use with the McKesson
TRUE METRIX® PRO Professional Monitoring Blood Glucose
Meter to quantitatively measure glucose (sugar) in fresh
capillary whole blood samples drawn from the fingertip or
forearm, or venous whole blood collected only in sodium
heparin vacutainer tubes. The McKesson TRUE METRIX®
PRO Professional Monitoring Blood Glucose Meter measures
current glucose results. It also detects, analyzes and corrects for
hematocrit and temperature, and calculates the glucose result.
1
Advertisement
Table of Contents
Troubleshooting

Related Manuals for McKesson TRUE METRIX PRO


Summary of Contents for McKesson TRUE METRIX PRO
-
Page 1: Introduction And Important Information
INTRODUCTION: McKesson TRUE METRIX® PRO Professional Monitoring Blood Glucose Meter McKesson TRUE METRIX® PRO is a simple, accurate way to test whole blood glucose (sugar) level, anytime, anywhere. Our goal is to provide quality healthcare products and dedicated customer service. For questions about McKesson TRUE METRIX®... -
Page 2: Important Safety Information
METRIX® PRO: • Read all product instructions for use before testing. • Use of McKesson TRUE METRIX® PRO in a manner not specified in this Owner's Manual is not recommended and may affect ability to determine true blood glucose levels. - Page 3 • Perform Control Tests before performing a blood glucose test for the first time. • Perform Control Tests with more than one level of control solution. Three levels of McKesson TRUE METRIX® Control Solution are available for Control Tests. Call 1-800-803-6025 for assistance in obtaining...
- Page 4 WARNING! Healthcare Professionals should adhere to standard precautions and disinfection procedures when handling or using this device for testing. ALL parts of the McKesson TRUE METRIX® PRO Professional Monitoring Blood Glucose Meter are considered potentially infectious, and capable of transmitting blood-borne pathogens between patients and healthcare professionals.
- Page 5 IMPORTANT INFORMATION (cont.): • If the patient is showing symptoms of low or high blood glucose, check their blood glucose. If any result seems higher or lower than expected, repeat the test with a new test strip. Contact the Doctor or Diabetes Healthcare Professional with any unusual results.
-
Page 6: Table Of Contents
Phone Number and Expected Results ........... Cover Introduction and Important Information ..........1 Description of System Meter ......................7 Test Strips ....................10 Control Solution ..................12 Quality Control Testing Automatic Self-Test ..................13 Control Test ....................14 How to Test Control ...................15 Blood Glucose Testing Obtaining a Blood Sample .................19 How to Test Blood ..................22 TRUE METRIX®... -
Page 7: Description Of System Meter
Description of System Meter Top of Meter ① “ ▶ ” Button Increase numbers in Meter Set Up; add ALT Symbol; move forward by date/time when viewing results and Averages in Memory; scroll through Event Tags to mark results (if feature on). ②... - Page 8 Front of Meter Back of Meter ① Display Screen Shows results, messages, user prompts, information. ② Test Port Insert Test Strip here, contact blocks facing up. ③ Strip Release Button Releases test strip after testing for disposal. ④ Battery Door Use one non-rechargeable 3V lithium battery (#CR2032), positive (“+”) side up (see Changing Battery).
- Page 9 Full Display Screen 10 11 12 1. Result is from Memory 2. Time, Date 3. Time is AM/PM 4. Event Tag Symbols 5. Result is from 7-, 14-, or 30-day Average 6. Test Result 7. Control Symbol 8. Battery Symbol 9.
-
Page 10: Test Strips
Test Strip Top of Test Strip ① Contact End - Insert into Test Port with contact blocks facing up. ② Sample Tip - Touch Tip to top of drop of sample (blood or control solution) after Drop Symbol appears in the Display. Note: Insert test strip into meter before touching Sample Tip to blood or control solution drop. - Page 11 Test Strip Vial Label May 30, 2015 ① Lot Number (LOT) - Used for identification when calling for assistance. ② Expiration Dates (EXP) - Write date first opened on vial label. Discard vial and unused test strips either 4 months after first opening or date printed next to EXP on vial label has passed, whichever comes first.
-
Page 12: Control Solution
Control Solution (Control) Control Bottle Label LEVEL 1 Control Solution • For use only with McKesson TRUE METRIX ® TRUE METRIX PRO Blood Glucose Test Strips ® • Not intended for human consumption • For in vitro diagnostic use only Store at temperature range of 36-86°F (2-30°C). -
Page 13: Quality Control Testing
Quality Control Testing To assure accurate and reliable results, McKesson TRUE METRIX® PRO offers two kinds of Quality Control Tests. These tests ensure that McKesson TRUE METRIX® PRO is working properly and testing technique is good. Automatic Self-Test Contact Blocks... -
Page 14: Control Test
Note: It is important to perform Control Tests with more than one level of control solution. Three levels of McKesson TRUE METRIX® Control Solution are available for Control Tests. Call 1-800-803-6025 for assistance in obtaining different levels of control solution. -
Page 15: How To Test Control
How to Test Control Solution Use ONLY McKesson TRUE METRIX® Control Solution with the McKesson TRUE METRIX® PRO Professional Monitoring Blood Glucose Meter and Test Strips. 1. Check dates on control solution label and test strip vial label. Do not use control solution or test strips if Expiration Dates have passed. - Page 16 5. Insert test strip into Test Port. Meter turns on. Note: If test strip has been out of the vial too long before testing, an error message appears upon insertion of the test strip into the meter. Contact Blocks Face Up Release and discard old test strip.
- Page 17 Troubleshooting. 11. Compare meter result to Control LEVEL 2 Control Solution Test range printed on test strip • For use only with McKesson TRUE METRIX ® TRUE METRIX PRO Blood Glucose Test Strips ® vial label for level of control •...
- Page 18 CAUTION! If Control Test result is outside range, test again. If result is still outside range, system should not be used for testing blood. Call for assistance (see manual cover for phone number). 12. After result is shown, Strip Release Button flashes. Hold meter with test strip pointing down.
-
Page 19: Blood Glucose Testing
DO NOT use sodium fluoride (grey top) vacutainer tubes. This may cause false low glucose results. Caution! • ALL parts of the McKesson TRUE METRIX® PRO Professional Monitoring Blood Glucose Meter could carry blood- borne pathogens after use, even after cleaning and disinfecting. - Page 20 Tips for Fingertip Sampling 1. Select fingertip. Clean area with soap and warm water, rinse or use an approved disinfectant to clean the area. Dry thoroughly. 2. Lance finger. 3. To help blood drop form, lower the hand to a level below the heart and gently massage the finger from palm to fingertip.
- Page 21 Tips for Forearm Sampling Important Notes Regarding Forearm Testing • Check with the patient's Doctor or Diabetes Healthcare Professional to see if forearm testing is appropriate for the patient. • Results from the forearm are not always the same as results from the finger.
-
Page 22: How To Test Blood
How to Test Blood 1. Check dates on test strip vial being used. Do not use either 4 months after first opening or after date printed next to EXP on label has passed, whichever comes first. 2. Clean the area to be lanced with an approved disinfectant. - Page 23 6. Obtain the blood sample. Allow drop to form (see Obtaining a Blood Sample). 7. With test strip still in meter, touch Tip of test strip to top of blood drop and allow blood to be drawn into test strip. Remove Sample Tip from blood drop immediately after the meter beeps and dashes appear across the meter Display.
- Page 24 10. Hold meter with test strip pointing down. Press Strip Release Button to discard test strip in the appropriate container. Meter turns off. Result is stored in Memory with date and time. 11. Discard all biohazard materials into appropriate container. Wash hands after taking off gloves. Note: Removing test strip before result displays cancels the test.
-
Page 25: True Metrix® Pro Meter And Laboratory Testing
When comparing results between McKesson TRUE METRIX® PRO and a laboratory system, McKesson TRUE METRIX® PRO blood tests should be performed within 30 minutes of laboratory test. If a patient has recently eaten, fingerstick results from the McKesson... -
Page 26: System Out Of Range Warning Messages
System Out of Range Warning Messages WARNING! Meter reads glucose levels from 20-600 mg/dL. If blood test result is less than 20 mg/dL, “Lo” appears in Display. If blood test result is greater than 600 mg/dL, “Hi” appears in Display. ALWAYS repeat test to confirm Low (“Lo”) and High (“Hi”) results. -
Page 27: Meter Set Up
Meter Set Up Note: Setting up the time, date, Event Tags, Ketone Test Alert and Test Reminders may not be suitable for a multiple patient use of the system. Check with the facility procedures and policies before performing Set Up. Note: If the meter turns off at any time during Set Up, go back to Step #1 under Meter Set Up and begin again. - Page 28 4. The month (number) flashes. To change, press “ ▶ ” or “ ◀ ” Button to select the month. Press “ • ” Button to set. 5. The day (number) flashes. To change, press “ ▶ ” or “ ◀ ” Button to select the day.
-
Page 29: Set Event Tags, Ketone Test Alert And Test Reminders
Set Event Tags, Ketone Alert and Test Reminders Meter comes with Event Tags, Ketone Test Alert and all Test Reminders off. Note: If the meter turns off at any time during Set Up, go back to Step #1 under Meter Set Up and begin again. Event Tags Event Tags are used to mark a test result that was taken during a specific event. - Page 30 Ketone Test Alert When a blood glucose result is over 240 mg/dL, the Ketone Test Alert is a reminder to check the patient's ketones per the treatment plan prescribed by the doctor or diabetes healthcare professional. Ketone Test Alert 2. Press “ ▶ ” or “ ◀ ” Button to turn Alert on or off.
- Page 31 Test Reminder Up to four Test Reminders per day may be set. Reminder sounds at set time for 10 seconds. Meter comes with all Test Reminders off. To set the Test Reminders: 1. After pressing “ • ” Button to set Ketone Test Alert, Display shows first Reminder setting (A-1).
- Page 32 4. Turn Reminders on and repeat setting the time for next 3 Reminders (if needed). Exit Set-Up Press and hold “ • ” Button until meter turns off. Meter also turns off after 2 minutes of non use. Set-up choices are saved.
-
Page 33: Meter Memory
Meter Memory Note: The use of the Memory features (Averages, test results) may not be suitable for a multiple patient use of the system. Check with the facility procedures/ policy before use. View Averages (7-, 14-, and 30-Day) The Averages feature allows the viewing of the average of all blood glucose results 7-Day performed on the meter within a 7-, 14-, or... -
Page 34: View Memory
View Memory Meter Memory stores 500 results. Once Memory is full, the oldest result is replaced with the newest result. 1. Press and release “ • ” Button. Meter Memory Symbol displays 7-, 14-, and 30-day Averages. Press and release “ • ” Button again to view most recent Control Test result in Memory. -
Page 35: Care, Cleaning/Disinfecting And Troubleshooting
Wash hands after taking off gloves as contact with blood presents a risk of infection. We recommend using only one meter per patient. Caring for McKesson TRUE METRIX® PRO • Store system (meter, control solution, test strips) in carrying case to protect from liquids, dust and dirt. - Page 36 To Clean and Disinfect the Meter: 1. Wash hands thoroughly with soap and water. Wear a clean pair of gloves. 2. To Clean: Make sure meter is off and a test strip is not inserted. With ONLY PDI Super Sani Cloth Wipes (or any disinfectant product with the EPA* reg.
- Page 37 • Buttons are hard to push on the meter or do not work, • Unable to insert test strip into Test Port, • Automatic Self-Test gives an error message. For general questions about McKesson TRUE METRIX® PRO products, call 1-800-777-4908. For additional assistance, call 1-800-803-6025.
- Page 38 McKesson TRUE METRIX® Control Solution Care • Write date opened on control solution label. Discard either 3 months after first opening or after date printed next to EXP on label has passed, whichever comes first. • After use, wipe bottle tip clean and recap tightly.
-
Page 39: Changing Battery
Changing Battery A low battery displays Battery Symbol while continuing to function. A dead battery displays Battery Symbol, beeps, and then turns off. To replace battery: 1. Lift tab on Battery Door. 2. Turn meter over. While holding meter in one hand with Battery Door facing down, tap meter Battery Door... -
Page 40: Troubleshooting
Troubleshooting 1. After inserting test strip, meter does not turn on. Reason Action Test strip inserted upside Remove test strip. down or backwards Re-insert correctly. Test strip not fully Remove test strip. Re-insert inserted test strip fully into meter. Test strip error Repeat with new test strip. -
Page 41: Display Messages
10 minutes for System Too Cold/ to reach room temperature Too Hot before testing. Retest with new Sample Not McKesson TRUE METRIX® Detected or PRO Professional Using Wrong Monitoring Blood Glucose Test Strip Test Strip and larger sample. Used Test Strip,... -
Page 42: Removing Test Strip
Display Reason Action Retest with new test strip. If error persists, call for Test Strip assistance. If symptoms Error or very such as fatigue, excess high blood urination, thirst, or blurry glucose result vision are found, follow (higher than healthcare professional's 600mg/dL) advice for high blood glucose. - Page 43 Display Reason Action Do not use meter for testing. For general questions, Broken call 1-800-777-4908. For Display additional assistance, call 1-800-803-6025. WARNING!! WARNING!! Retest with new test Out of Range strip. If result is still - High Results “Hi” (High) >...
-
Page 44: System Specifications/Chemical Composition
Altitude: Up to and including 10,200 feet. Note: Use within specified environmental conditions only. Chemical Composition McKesson TRUE METRIX® PRO Professional Monitoring Blood Glucose Test Strips: Glucose dehydrogenase-FAD (Aspergillus species), mediators, buffers and stabilizers. McKesson TRUE METRIX® Control Solution: Water, d-glucose, buffers, viscosity enhancing agent, salts, dye and preservatives. -
Page 45: Warranty
McKesson TRUE METRIX® PRO Limited Lifetime Warranty Nipro Diagnostics, Inc. provides the following Warranty to the original purchaser of the McKesson TRUE METRIX® PRO Professional Monitoring Blood Glucose Meter: Nipro Diagnostics Inc. warrants this meter to be free of defects in materials and workmanship at the time of purchase. -
Page 46: References
References 1. American Diabetes Association. Diagnosis and Classification of Diabetes Mellitus. Diabetes Care, Volume 37, Supplement 1, January 2014. 2. FDA Public Health Notification: Use of Fingerstick Devices on More than One Person Poses Risk for Transmitting Blood Borne Pathogens: Initial Communication (2010) http://www.fda.gov/MedicalDevices/Safety/ AlertsandNotices/ucm224025.htm. -
Page 47: Notes
Notes:... - Page 48 Notes: RE4SUNP03 Rev 1...
Need help?
Do you have a question about the TRUE METRIX PRO and is the answer not in the manual?
Questions and answers
what is a e-3 code
An E-3 code for McKesson TRUE METRIX PRO indicates that the meter has detected the test strips are compromised.
This answer is automatically generated
how long after opening vial must control solution be discarded
The control solution for the McKesson TRUE METRIX® PRO can be used for up to 3 months after first opening or until the expiration date printed on the label has passed, whichever comes first.
This answer is automatically generated
I **** interested in your recommendation of cleaning products and disinfecting types. Currently we are using a wipe with 70% alcohol the a cavi wipe afterwards. We have had trouble with our glucometer shutting down, possibly from too much moisture. Also we start an IV and I would like to take the dot of blood from the IV angio- would this be acceptable with this glucometer? Thank you
The recommended cleaning and disinfecting method for the McKesson PRO glucometer involves using wipes that have been tested for up to 10,950 cleaning and disinfecting cycles, equal to 10 cleanings per day over 3 years. This ensures the meter's proper function without moisture issues when done according to guidelines. Healthcare professionals must wear gloves while cleaning and disinfecting.
It is not acceptable to take a blood sample from an IV angio with this glucometer. The meter is validated for fresh capillary whole blood from the finger and forearm, and venous blood drawn in sodium heparin tubes—not from IV lines.
This answer is automatically generated