Table of Contents
Advertisement
Advertisement
Table of Contents

Summary of Contents for Neptune Apex WAV
- Page 1 Apex WAV QuickStart Guide...
-
Page 2: Table Of Contents
PROGRAMMING (CLASSIC WEB INTERFACE) ..............6 WAV PROFILE TYPE ......................6 WAV Types/Modes of Operation ..................7 WAV MONITORING AND ALERTS ..................8 FLO ..........................11 MAINTENANCE ......................13 NEPTUNE SYSTEMS LIMITED WARRANTY ..............13 CE DECLARATION OF CONFORMITY ................14... -
Page 3: Package Contents
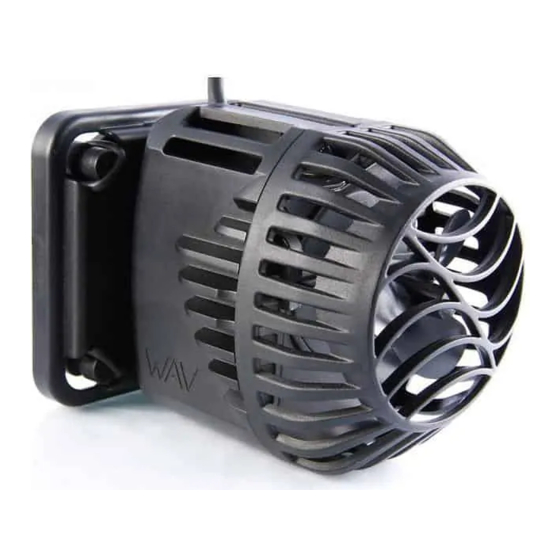
4. 24VDC power supply 5. 6’ Aquabus cable 6. Packet of (4) screws for mounting the 1LINK modules (use of mounting screws is optional) If any of these items are missing, please contact Neptune Systems Support (see last page for contact information). FIRMWARE IMPORTANT: Your Apex Base Unit must be running firmware version 4.40 or higher to... - Page 4 Assembling the WAV pump 1. Unpack a WAV pump and magnetic mount set. 2. Carefully separate the two halves of the magnetic mount. Retain the packing material used as a spacer between the magnets for future use. 3. Set aside the outer magnet. 4.
-
Page 5: Installation
d. Center the mount on the pump initially; you can change the angle of the pump as desired later. 5. Repeat for the second pump and mount set. 6. Keep the two outer magnets well separated; do not allow them to snap together. INSTALLATION 1. -
Page 6: Initial Connection - Wav
1LINK. These outlets correspond to the 24VDC ACC ports on the 1LINK; they are for use with Neptune Systems accessory products; they will not be used for your WAV installation. There will also be a single outlet created for each connected WAV, named WAV_#_1; each WAV will have a unique AquaBus address. -
Page 7: Programming (Apex Fusion Interface)
PROGRAMMING (APEX FUSION INTERFACE) There is no programming of the 1LINK necessary in APEX Fusion for WAV operation. You will program only the WAV outlets. To program a WAV using APEX Fusion, click the cog icon on the WAV tile from the Fusion dashboard, then using the Fusion graphical scheduler interface, create your desired WAV schedule. -
Page 8: Programming (Classic Web Interface)
PROGRAMMING (CLASSIC WEB INTERFACE) There is no programming of the 1LINK necessary in the Classic Dashboard for WAV operation. You will program only the WAV outlets. Refer to the Apex Setup and Programming Guide or the Comprehensive Reference Manual for detailed instructions on how to configure and program profiles and outlets. This QuickStart Guide assumes a basic level of understanding of profiles, outlets, and the use of the Classic Dashboard Interface. -
Page 9: Wav Types/Modes Of Operation
WAV TYPES/MODES OF OPERATION There are 7 primary modes or control types available in the APEX Fusion WAV scheduler and in profiles. Constant– a simple mode which gives an unchanging intensity. Mavericks – A high-energy flow mode with random small and large changes in intensity such as is typical of a reef. -
Page 10: Wav Monitoring And Alerts
WAV MONITORING AND ALERTS The WAV has the capability to report various abnormal conditions; there are 4 types of WAV alarms: Position Error Alarm – The WAV can sense if its position has been changed, such as might happen if the pump gets solidly bumped during maintenance, or if someone has removed the outer magnet mount and the pump has fallen to the bottom of the tank. - Page 11 Optionally, the WAV Alarms may also be configured and the Home Position of each WAV set using the display menu. Before setting the Home Position of each of your WAVs, the WAV outlet(s) must be turned OFF. To set the WAV Home Position using the Apex web pages, navigate to Configuration -> Module Setup. Then click the Set Home Position button.
- Page 12 If none of the 4 WAV Alarms are present, the WAV tile in APEX Fusion will show an OK status; if any enabled WAV Alarm is active, it will be displayed on the Fusion tile. On the WAV tile, a TEMP value equating to the current internal temperature of the WAV is displayed. The normal range of TEMP will be 40-60%.
-
Page 13: Flo
Since the WAV constantly communicates with APEX Fusion, it knows exactly how much flow it is producing and logs a new measurement simply called FLO. FLO is shown on a tile in APEX Fusion. Data from all of the WAVs in your aquarium are aggregated. The size of your tank is factored in, and calculations are done to determine the number of tank volume turnovers per hour, which is then scaled to a FLO number from 0 to 10;... - Page 14 You can use the FLO number and FLO graph to assess the overall level of flow in your tank. Suggested flow ranges for varying types of marine aquariums: FLO Value Best For Fish-only Common LPS coral Common SPS coral High-flow SPS coral 7-10 Extreme flow for SPS coral You can use this number to compare to others who use the WAV in their aquarium or simply compare to your...
-
Page 15: Maintenance
NEPTUNE SYSTEMS LIMITED WARRANTY Neptune Systems warrants this product to be free from defects in material and workmanship for a period of 1 year from the date of purchase. Probes carry a 90-day warranty. If repair or adjustment is necessary and has not been the result of abuse, misuse, or accidental damage, within the 1-year period, please return the product with proof of purchase, and correction of the defect will be made without charge. -
Page 16: Ce Declaration Of Conformity
Manufacturer: Neptune Systems, 15750 Vineyard Blvd, Suite 150, Morgan Hill, CA 95037; 408-779-4090 Product: WAV Model No. WAV200-002 The undersigned hereby declares, on behalf of the Neptune Systems, LLC. of Morgan Hill, California that the above- referenced product, to which this declaration relates, is in conformity with the provisions of: ...


Need help?
Do you have a question about the Apex WAV and is the answer not in the manual?
Questions and answers