Table of Contents
Advertisement
Quick Links
Advertisement
Chapters
Table of Contents

Subscribe to Our Youtube Channel
Related Manuals for German pool HTB-716


Summary of Contents for German pool HTB-716
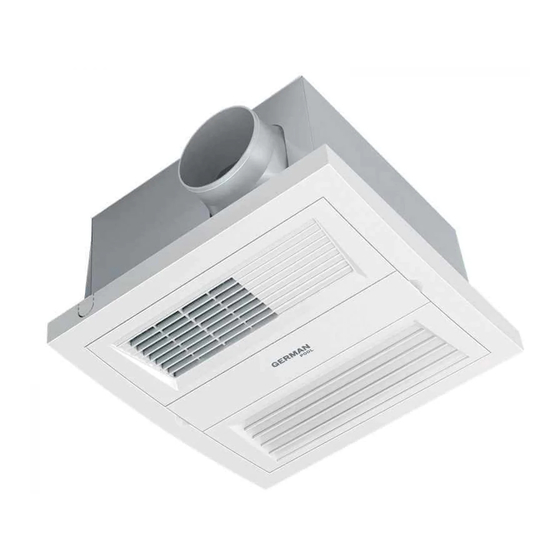
- Page 1 HTB-716 多 功 能 浴 室 乾 衣 暖 風 機 Multi-Purpose Bathroom Heater 在 使 用 之 前 請 詳 細 閱 讀 「 使 用 說 明 書 」及「 保 用 條 款 」 , 並 妥 為 保 存 。...
-
Page 2: Table Of Contents
目錄 注意事項 產品結構 安裝說明 操作說明 清潔與保養 技術規格 保用條款... -
Page 3: 注意事項
注意事項 重要說明 為安全起見,使用產品前請先細閱本說明書,並保存說明書,以便作參考之用。 本產品只供家居使用。請必須依照說明書內的指示操作。 安裝和操作之前請認真閱讀本說明,未能遵守本說明可能導致人身傷害或財產損失。 為降低火災,觸電或受傷等風險,遵守以下指示: 1.在製造商的指示下使用該產品,如果你有任何問題,請聯繫製造商或被授權經銷商。 2.安裝工作和電氣接線必須由符合當地法律法規、擁有相關資格的人員進行操作。 3.切割或者鑽入牆壁或天花板的時候,請注意不要損壞電線和其他隱藏的工具。 4.在維修或清潔產品之前,請務必關閉產品的所有功能,並切斷電源,以防止開關意外接通 電源。 5.使用本產品時,請確認產品所標明的使用電壓,是否與接地插座電壓一致,並切勿與其它 電器共用電源插頭。 6.切勿於操作本產品時將手指或外物伸入進出風柵,以免燙傷或造成危險。 7.切勿對進出風柵澆水,以免引起短路或觸電。 8.手濕時切勿接觸進出風柵或操作面板,以免觸電。 9.清潔或更換本產品前,必須先切斷電源。 10.切勿使用任何稀釋劑或任何腐蝕性物質清潔本產品,以免損壞本產品。 11.切勿頻繁開啟或關掉功能鍵,以免影響正常操作,長時間不使用本產品請切斷電源。 12. 本產品不適宜讓兒童、身體或心智殘障、缺乏經驗或知識的人士操作,除非該人士得到負 責保護其安全的人士之監督或指引。 13. 兒童必須被監督,切勿讓兒童使用、觸摸或把玩本產品。 14. 切勿使用受損壞的電線或電源插頭,以防觸電、引起短路或火災。 15. 如電源線損壞或發生其他故障,切勿自行拆卸、修理或改裝,必須由本公司或符合資格的專 業技術人員更換或維修。... -
Page 4: 產品結構
產品結構 機身 機體 防水箱 面罩卡塊 面罩 PTC 陶瓷發熱 出風口 裝箱明細及配件 風管 互聯軟線 開關 電源線 附件 說明書 主機 防水箱 風格柵 抱箍 (1.5m) (四芯) (三聯) (1.5m) 安裝說明 安裝本體前,可能要進行電源的連接工程。當提供的電源線不夠長時,請先將機體從防水箱中取 出,完成電源連接作業。 天花式安裝 1.天花板開孔 在浴室天花板上開口,基本安裝的 開口尺寸:300x300mm。(見圖1) (圖1) 產品規格及設計如有變更,恕不另行通知,最新版本請瀏覽www.germanpool.com。 Specifications are subject to change without prior notice. Refer to www.germanpool.com for the most up-to-date version. - Page 5 安裝說明 2. 拆除防水箱(見圖2) (1)打開面罩上的面罩卡塊,卸下固定面罩的2顆自攻螺釘,然後卸下面罩。 (2)卸下固定整個機體的4顆自攻螺釘,將機體小心地從防水箱中拉出。 (圖2) 3. 安裝防水箱 將防水箱用四根螺絲杆穩固吊掛於天花板成水平狀態。(見圖3) (圖3)
- Page 6 安裝說明 4.安裝出風口 固定好防水箱之後,將出風口用兩顆螺絲固定在防水箱開孔處。 5.連接風管 將出風口與風管的一端用抱箍或者捆紮帶固定,風管另一端伸展至戶外。如有需要,另一端可 用抱箍或者捆紮帶連接在風格柵上。 6.安裝機體 將機體對準出風口插入防水箱之中,然後用自攻螺釘再將機體固定在防水箱上。 7.安裝面罩 用螺釘將面罩固定在機體上,最後卡入面罩卡塊。 8.固定開關 接通電源之後,按下開關板上的各個功能鍵,確認產品的各項功能正常,然後將開關固定在牆 壁上,固定位置應能有效防止水濺。 掛牆安裝方式 根據不同的安裝空間,合理佈置主機、防水箱以及開關的安裝位置。 1.拆除防水箱(見圖2) (1)打開面罩上的面罩卡塊,卸下固定面罩的2顆自攻螺釘,然後卸下面罩。 (2)卸下固定整個機體的4顆自攻螺釘,將機體小心地從防水箱中拉出。 2.防水箱鑽孔 在防水箱底部用電鑽打出4個的φ5安裝孔,四個角上各一個。(見圖4) 3.固定防水箱 將防水箱放置於牆上適當高度,出風口向下,根據防水箱上已經鑽出的孔與牆體進行配打,在 牆體上鑽出φ8的孔,將φ4塑膠膨脹敲入牆體上的孔洞之中,再將防水箱固定於牆體之上。 (圖4) (圖5)
- Page 7 安裝說明 4.安裝出風口 固定好防水箱之後,將出風口用兩顆螺絲固定在防水箱開孔處。(見圖5) 5.安裝機體 將機體對準出風口插入防水箱之中,然後用自攻螺釘再將機體固定在防水箱上。 6.安裝面罩 用螺釘將面罩固定在機體上,最後卡入面罩卡塊。 7.固定風管 將風管插入防水箱的出風口處,用抱箍或捆紮帶固定,風管末端延展至戶外。如有需要,另一 端可用抱箍或者捆紮帶連接在風格柵上。 8.固定開關 接通電源之後,按下開關板上的各個功能鍵,確認產品的各項功能正常,然後將開關固定在牆 壁上,固定位置應能有效防止水濺。 注意:在避免水濺的前提下,盡量將主機安裝在較低位置,便於暖氣流通。 窗式安裝方式 開孔尺寸 35cm 玻璃開孔尺寸為 鋁窗連玻璃 2.5cm 30cm 30cm x 30cm 不少於35cm 2.5cm 2.5cm 機身深度為 鋁窗框每邊 18.5cm 預留最少2.5cm 底視圖 35cm 30cm 10.9cm 18.5cm 16cm 10.9cm 18.5cm 出風口 2.5cm 2.5cm 1.5cm...
- Page 8 安裝說明 根據不同的安裝空間,合理佈置主機、開關的安裝位置。 1.玻璃開孔尺寸:約300mm x 300mm,可按實際情況進行適當調整。 2.將防水箱連同機體一同推入鋁框開孔處,用螺絲將防水箱固定在鋁框上,然後用玻璃膠填充周邊 進行防水處理。(見圖6) 注意:出風口孔洞方向朝下。 (圖6) 3.固定開關 接通電源之後,按下開關板上的各個功能鍵,確認產品的各項功能正常,然後將開關固定在 牆壁上,固定位置應能有效防止水濺。 注意:在避免水濺的前提下,盡量將主機安裝在較低位置,便於暖氣流通。...
- Page 9 安裝說明 接線圖 如需要重新接線,請嚴格遵守接線圖進行連接。 黃綠 藍 220V 50Hz “電源雙極開關” 棕 規格應不低於 250V~15A 電源 黑 黃 θ 暖風 吹風 白 換氣 開關(反面) θ: 熱保護器 K:斷路器 F1: 吹風 F2:換氣 P: PTC發熱器 警 告 - 本產品安裝應盡量遠離窗簾和其他可燃材料,以避免火災等危險; - 本產品安裝應避免在浴缸或淋浴區可觸及到開關; - 通風管應避免與燃氣熱水器排氣管接入同一煙道,以防危險氣體的滲入; - 接線應由專業電工完成; - 安裝時電源線必須保持在斷電狀態; - 請務必使用本產品所配互連軟線及開關等配件安裝;...
-
Page 10: 操作說明
操作說明 本產品為家用浴室取暖器,兼有吹風、換氣功能。 原始備用狀態 開關 POWER 「開關」向上按,隱藏橙色指示,所有功能關閉。 吹風 FAN 暖風 HEAT 換氣 VENT 暖風功能 吹出暖風 開關 POWER 1.「開關」鍵向下按,橙色指示朝上。 2.「吹風」及「暖風」鍵同時向下按,兩個橙色指示均同時朝上。 吹風 FAN 暖風 HEAT 注意:必須開啟「吹風」功能方有暖風。 換氣 VENT 吹風功能 室溫吹風 開關 POWER 1.「開關」鍵向下按,橙色指示朝上。 2.「吹風」鍵向下按,橙色指示朝上。 吹風 FAN 暖風 HEAT 注意:必須關掉暖風功能。請把「暖風」鍵向上按以隱藏「暖風」功能的橙色指示。 換氣 VENT 換氣功能 沒有暖風效果 開關... -
Page 11: 清潔與保養
清潔與保養 1.清潔前必須斷開電源; 2.清潔時應用浸潤中性清潔劑的軟布輕輕擦拭面罩表面; 3.所有電氣元件不能與水接觸。 注意:不可用汽油或有腐蝕的化學試劑清洗機器的零部件,不能用高於60℃的熱水浸洗塑膠件。 技術規格 HTB-716 型號 220 V 電壓(V) 50 Hz 頻率(Hz) 1,630 W 功率(W) (H) 185mm (W) 270mm (D) 270mm 主機尺寸 (H) 165mm (W) 300mm (D) 300mm 開孔尺寸 3.8 kg 淨重 6.2 kg 連防水箱淨重 - 本產品規格及設計如有變更,恕不另行通知。 - 中英文版本如有出入,一概以中文版為準。... - Page 12 Content Warning Product Structure Installation Instructions Operating Instructions Care & Maintenance Technical Specifications Warranty Terms & Conditions P.12...
-
Page 13: Warning
Warning Important For safety purposes, read the instructions carefully before using the appliance. Retain the User Manual for future reference. The appliance is designed for domestic use only, and may only be installed and operated in accordance with this User Manual. Please read these instructions carefully before attempting to install or operate this product. -
Page 14: Product Structure
Product Structure Main Unit Housing Waterproof Shell Fixture Block Fascia PTC Ceramic Heating Outlet Product Content & Accessories Waterproof Duct Interconnecting Power Accessories User Main Unit Grill Switch Duct Hoop Shell (1.5m) Cord Cord(1.5m) Pouch Manual Installation Instructions Power connection might be needed before installing the product. When the power cord provided is not long enough, please remove the machine from the waterproof shell to redo power supply connection. - Page 15 Installation Instructions 2. Remove waterproof shell (Fig. 2) (1) Remove the fixture block from the fascia carefully. Unfix the two screws on the fascia, and remove the fascia from the housing. (2) Unfix the four screws of the waterproof shell, and remove it from the main unit. (Fig.2) 3.
- Page 16 Installation Instructions 4. Install outlet Install the outlet with 2 screws on the waterproof shell. 5. Connect duct Insert the ventilation duct into the outlet duct; fix them with a hoop or cable tie. If necessary, the other end could be connected to the air grille and also fix with the hoop or a cable tie. 6.
- Page 17 Installation Instructions (Fig.4) (Fig.5) 4. Mount the outlet Fix the outlet with 2 screws into the holes of the waterproof shell. (Fig. 5) 5. Mount the housing Put the unit into the waterproof shell, make sure the slot is on the right place and could install on the outlet.
- Page 18 Installation Instructions Window Mounting Window Opening Cut-Out Dimensions 35cm Minimum width Window opening: 2.5cm 30cmx30cm (incl. window opening & frame) 30cm not less than 35cm 2.5cm 2.5cm Reserve 2.5cm on Depth of machine: each side of the frame 18.5cm Bottom View 35cm 30cm 10.9cm...
- Page 19 Installation Instructions 1. The opening of the window should be around 300mm x 300mm. Adjust this reserved size according to the actual situation as necessary. 2. Push the waterproof shell together with the machine into the reserved hole. Fix the waterproof shell with screws on the aluminum frame.
- Page 20 Installation Instructions Wiring If the rewiring is needed, please make sure you connect the wires exactly the same as the wiring diagram below. Yellow Green Blue 220V 50Hz Brown Double-pole Switch specification should not be lower Power than 250V~15A Black Yellow θ...
-
Page 21: Operating Instructions
Operating Instructions This unit combines the functions of fan heating, fan and ventilation. Power Off Mode 開關 POWER Push “Power” switch upwards. Orange indicator is hidden. All functions are turned off. 吹風 FAN 暖風 HEAT 換氣 VENT Heat Mode Fan heating 開關... -
Page 22: Care & Maintenance
3. All electrical components should be away from water. Note: Do not use any petroleum based cleaners or corrosive materials to clean any machine parts. Do not clean using hot liquids over 60 ℃ Technical Specifications Model HTB-716 Voltage (V) 220 V Frequency (Hz) 50 Hz Power (W) -
Page 23: 保用條款
HTB-716 Warranty Terms & Conditions 保用條款 Under normal operations, the product will receive a 1-year 此保用提供德國寶產品之機件在正常使用下壹年 full warranty provided by German Pool (effective starting 保用(自購買日起計算)。 from the date of purchase). 任何塑膠附件及輔助裝置。 Plastic parts and accessories Customer Service & Repair Centre 客戶服務及維修中心... - Page 24 傳真 Fax:+853 2875 2661 HONG KONG TOP BRAND TEN YEAR ACHIEVEMENT AWARD © 版權所有。未獲德國寶授權,不得翻印、複製或使用本說明書作任何商業用途,違者必究。 © All rights reserved. Copying, reproducing or using the contents of this manual is not allowed without prior authorization from German Pool, violators will be prosecuted. HTB-716_M_14(5)
Need help?
Do you have a question about the HTB-716 and is the answer not in the manual?
Questions and answers