Table of Contents
Advertisement
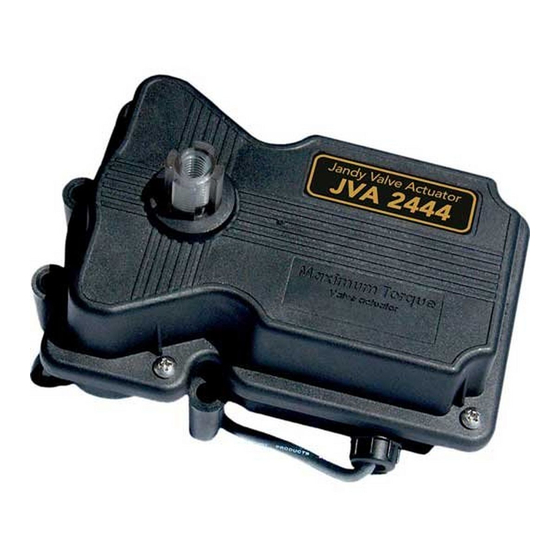
Jandy
Pro Series
®
Valve Actuator
Model JVA 2444
FOR YOUR SAFETY - This product must be installed and serviced by a contractor who is licensed and
qualified in pool equipment by the jurisdiction in which the product will be installed where such state
or local requirements exist. The maintainer must be a professional with sufficient experience in pool
equipment installation and maintenance so that all of the instructions in this manual can be followed
exactly. Before installing this product, read and follow all warning notices and instructions that accompany
this product. Failure to follow warning notices and instructions may result in property damage, personal
injury, or death. Improper installation and/or operation will void the warranty.
Improper installation and/or operation can create unwanted electrical hazard which can
cause serious injury, property damage, or death.
ATTENTION INSTALLER - This manual contains important information about the
installation, operation and safe use of this product. This information should be given to
the owner/operator of this equipment.
INSTALLATION AND
OPERATION MANUAL
WARNING
Advertisement
Table of Contents

Related Manuals for Jandy JVA 2444 Pro Series


Summary of Contents for Jandy JVA 2444 Pro Series
- Page 1 INSTALLATION AND OPERATION MANUAL Jandy Pro Series ® Valve Actuator Model JVA 2444 WARNING FOR YOUR SAFETY - This product must be installed and serviced by a contractor who is licensed and qualified in pool equipment by the jurisdiction in which the product will be installed where such state or local requirements exist.
- Page 2 Page 2 ENGLISH Jandy Pro Series Valve Actuator Installation and Operation Manual ® EQUIPMENT INFORMATION RECORD DATE OF INSTALLATION INSTALLER INFORMATION INITIAL PRESSURE GAUGE READING (WITH CLEAN FILTER) PUMP MODEL HORSEPOWER FILTER MODEL SERIAL NUMBER CONTROL PANEL MODEL SERIAL NUMBER...
-
Page 3: Table Of Contents
ENGLISH Page 3 Jandy Pro Series Valve Actuator Installation and Operation Manual ® Table of Contents Section 7. Wiring Diagrams ......11 Section 1. Safety Information ......4 JVA Wiring Schematic 2444 ......11 Section 2. General Information ....... 5 JVA's with Toggle Switch ........11 JVA's with Time Clock ........11... -
Page 4: Section 1. Safety Information
Page 4 ENGLISH Jandy Pro Series Valve Actuator Installation and Operation Manual ® Section 1. Safety Information IMPORTANT SAFETY INSTRUCTIONS PERTAINING TO A RISK OF FIRE, ELECTRIC SHOCK, OR INJURY TO PERSONS READ AND FOLLOW ALL INSTRUCTIONS When installing and using this electrical equipment, basic safety precautions should always be followed, including the... -
Page 5: Section 2. General Information
Introduction This manual contains information for the proper Standard JVA Position Pro Series Valve installation and operation of Jandy ® Standard Plumbing position is with the middle port Actuators (JVA). Procedures in this manual must be (B) as the incoming or common port to the valve (see followed exactly. -
Page 6: Actuator Mounting
Turn the actuator over so you can see into the clear actuator shaft. There are four (4) "teeth" JVA’s mount directly on all full-size Jandy Pro on the inside of the shaft. Locate the smallest Series Valves (8 screws on lid). Zodiac recommends "tooth"... -
Page 7: Section 4. Synchronization
ENGLISH Page 7 Jandy Pro Series Valve Actuator Installation and Operation Manual ® Section 4. Synchronization ON 1 On/Off Switch is Synchronization Methods located on the bottom of the JVA Standard Plumbing If the valve is plumbed in the ON 2... - Page 8 Page 8 ENGLISH Jandy Pro Series Valve Actuator Installation and Operation Manual ® Important - Rotate the actuator shaft so the NOTE The cam is marked with the arrow at "0", a long hash mark at the 180° position, and 2 short hash marks at arrow mark on the top cam aligns with the the 90°...
-
Page 9: Section 5. Manual Operation
ENGLISH Page 9 Jandy Pro Series Valve Actuator Installation and Operation Manual ® Manual Override, Power Off Move toggle switch located on the bottom of Rotate Cams actuator to the OFF (center) position. Unscrew (counterclockwise) the locking knob above the handle four (4) full turns. -
Page 10: Section 6. Maintenance
Pro Series Valve Actuator Installation and Operation Manual ® Section 6. Maintenance Valve NOTE This section does not apply to Jandy Pro Series Actuator Never Lube Valves and non-positive seal valves. ® Never Lube Valves and non-positive seal valves can The JVA has three (3) seals which should be lubricated be identified by the absence of a grease cap. -
Page 11: Section 7. Wiring Diagrams
ENGLISH Page 11 Jandy Pro Series Valve Actuator Installation and Operation Manual ® Section 7. Wiring Diagrams Left Right JVA Wiring Schematic 2444 Micro switch Micro switch Common Common WARNING Disconnect power to the system at the main circuit breaker before servicing to avoid risk of electric shock which can result in property damage, severe injury or death. -
Page 12: Section 8. Troubleshooting
Page 12 ENGLISH Jandy Pro Series Valve Actuator Installation and Operation Manual ® Section 8. Troubleshooting Troubleshooting All major components, including the power cord, are replaceable without replacing the entire actuator. Each item may be replaced as a separate piece allowing easy infield repair. See Section 8, Exploded Views and Replacement Kits, for actuator replacement part numbers. -
Page 13: Section 9. Jva Exploded View And Spare Parts
ENGLISH Page 13 Jandy Pro Series Valve Actuator Installation and Operation Manual ® Section 9. JVA Exploded View and Spare Parts Dwg. Kit # Description Qty. R0409600 JVA Gasket and Screw Kit Gasket O-ring, Screw, #14 x 2" 1, 2 Screw, #8 x 5/8"... - Page 14 Page 14 ENGLISH Jandy Pro Series Valve Actuator Installation and Operation Manual ® NOTES...
- Page 15 ENGLISH Page 15 Jandy Pro Series Valve Actuator Installation and Operation Manual ® NOTES...
- Page 16 Zodiac Group Australia. 219 Woodpark Road Smithfield, NSW AU 2164 1.800.688.552 | www.Zodiac.com.au ETL LISTED CONFORMS TO UL-STD 1563 Zodiac Pool Systems, Inc. CERTIFIED TO CAN/CSA C22.2 NO.218.1 2620 Commerce Way, Vista, CA 92081 1.800.822.7933 | www.ZodiacPoolSystems.com ©2016 Zodiac Pool Systems, Inc. ZODIAC is a registered trademark of Zodiac International, ®...
Need help?
Do you have a question about the JVA 2444 Pro Series and is the answer not in the manual?
Questions and answers