
Related Manuals for Proximus Maestro 3016 IP


Summary of Contents for Proximus Maestro 3016 IP
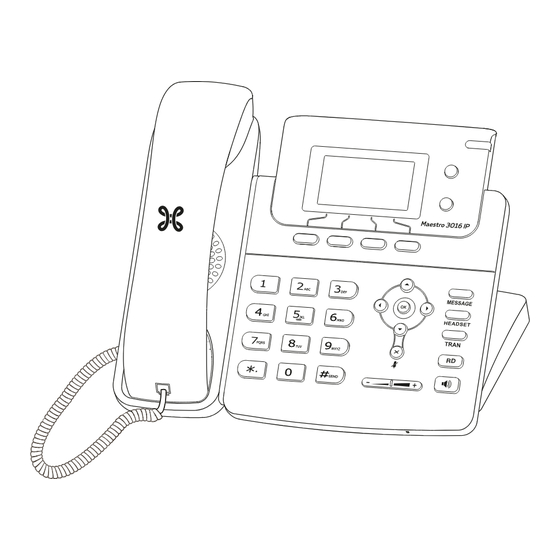
- Page 1 Maestro 3016 IP Phone Quick Start Guide Ç...
- Page 2 Table of Contents English ...........1 Nederlands ........6 ........11 Deutsch Français ........16...
- Page 3 The following items are included in your package. If you nd anything missing, contact your system administrator. Ethernet Cable Stand Handset Cord Handset Quick Start Guide Power Adapter Maestro 3016 IP Assembling the Phone Assembling the Phone 1. Attach the stand,as shown below: Desk Mount Method 180 。 Wall Mount Method...
- Page 4 AC Power Note: The Maestro 3016 IP should be used with original power adapter (5V/600mA) only. The use of the third-party power adapter may cause the damage to the phone.The Ethernet cable must be connected to a yellow connectors on the b-box 3V+.
- Page 5 Basic Call Features Placing a Call Using the handset: 1. Pick up the handset. 2. Enter the number, and then press the Send soft key. Using the speakerphone: 1. With the handset on-hook, press 2. Enter the number, and then press the Send soft key. Using the headset: 1.
- Page 6 Call Transfer You can transfer a call in the following ways: Blind Transfer 1. Press or the Tran soft key during a call. The call is placed on hold. 2. Enter the number you want to transfer to. 3. Press or the Tran soft key.
- Page 7 Contact Directory To add a contact: 1. Press the Dir soft key when the phone is idle, and then select All Contacts. 2. Press the Add soft key to add a contact. 3. Enter a unique contact name in the Name field, and enter the phone number in the proper field. 4.
- Page 8 De volgende onderdelen zijn ingesloten in de verpakking. Indien een onderdeel niet aanwezig is, neem dan contact op met uw leverancier. Ethernet kabel Standaard Krulsnoer Maestro 3016 IP Hoorn Voedingsadapter Quick Start Handleiding De IP telefoon aansluiten Assembling the Phone 1.Klik de standaard vast aan het telefoontoestel zoals hieronder staat afgebeeld:...
- Page 9 Via voedingsadapter Note: Gebruik voor de Maestro 3016 IP alleen de originele voedingsadapter (5V/600mA) voor het IP toestel. Het gebruiken van een niet originele voedingsadapter kan resulteren tot schade aan het toestel.De Ethernet-kabel moet worden aangesloten op een gele connector op de b-box 3V+.
- Page 10 Basis gebruik Oproep Via de hoorn: 1. Neem de hoorn van het toestel. 2. Geef het nummer in en druk op de toets Send. Via de handenvrij spreken toets: 1. Laat hoorn op de haak liggen en druk op 2. Geef het nummer in en druk op de toets Send . Via de headset: 1.
- Page 11 Doorverbinden U kunt een gesprek op de volgende manieren doorverbinden: Onaangekondigd doorverbinden: 1. Druk op de toets of de toets Tran tijdens het gesprek. Het gesprek wordt in de wachtstand geplaatst. 2. Geef het nummer in aan wie u het gesprek wilt doorverbinden. 3.
- Page 12 Telefoonboek Een contact toevoegen: 1. Druk op de toets Dir als het toestel in de rust stand staat en selecteer de gewenste groep. 2. Druk op de toets Add om een contact toe te voegen. 3. Geef een unieke naam op in het veld Name en de telefoonnummers in de juiste velden. 4.
-
Page 13: Installation Des Telefons
Folgende Teile sind im Lieferumfang Ihres Telefons enthalten. Falls etwas fehlen sollte, wenden Sie sich bitte an Ihren Systemadministrator. Hörerkabel Ethernet-Kabel Erste Schritte Maestro 3016 IP Hörer Standfuß Netzgerät Installation des Telefons 1. Befestigen Sie den Standfuß wie nachfolgend dargestellt: Tischinstallation 180 。... - Page 14 Stromversorgung Hinweis: Das Maestro 3016 IP sollte ausschließlich mit einem original Netzteil (5V/600mA) benutzt werden. Die Verwendung eines Netzteiles eines Drittanbieters kann zu einer Beschädigung des Telefons führen. Das Ethernet-Kabel muss an einen angeschlossen werden gelb-Anschlüsse auf der b-box 3V+.
-
Page 15: Anruf Tätigen
Grundlegende Anruffunktionen Anruf tätigen Mit dem Hörer: 1. Nehmen Sie den Hörer ab. 2. Geben Sie die Nummer ein und drücken Sie dann im Bildschirm auf Send. Mit Freisprecheinrichtung: 1. Drücken Sie bei aufgelegtem Hörer auf die Taste 2. Geben Sie die Nummer ein und drücken Sie dann im Bildschirm auf Send. Mit Headset: 1. - Page 16 Rufweiterleitung Sie können Anrufe wie folgt weiterleiten: Direkte Weiterleitung oder die Bildschirmtaste Tran. Der Anruf wird in 1. Drücken Sie während eines Anrufs Wartestellung versetzt. 2. Geben Sie die Nummer ein, an die der Anruf weitergeleitet werden soll. 3. Drücken Sie oder die Bildschirmtaste Tran.
-
Page 17: Lautstärke Einstellen
Drücken Sie die Bildschirmtaste Option, um eine der nachfolgenden Funktionen auszuführen: • Wählen Sie die Option Detail, um detaillierte Informationen des Eintrags anzuzeigen. • Wählen Sie die Option Add to Contacts, um einen Eintrag zum lokalen Verzeichnis hinzuzufügen. • Wählen Sie die Option Add to Blacklist, um den Eintrag auf die schwarze Liste zu setzen. •... -
Page 18: Contenu De La Boîte
Contenu de la boîte Cordon du Câble Ethernet Guide de combiné démarrage rapide Maestro 3016 IP Combiné Pied Adaptateur secteur Installation du Téléphone Fixez le pied comme montré ci-dessous Solution de montage sur une table 180 。 Solution de montage au mur... - Page 19 Alimentation secteur Remarque : Le Maestro 3016 IP doit seulement être utilisé avec l’adapateur secteur fourni (5V/600mA). L’utilisation de tout autre alimentation pourra causer des dommages dans le téléphone. Le câble Ethernet doit être raccordé à un des connecteurs jaunes de la b-box 3V+.
-
Page 20: Terminer Un Appel
Fonctions d'appel de base Passer un appel Utiliser le combiné : 1. Décrochez le combiné. 2. Saisissez le numéro. Utiliser le haut-parleur : Le combiné étant raccroché, appuyez sur 2. Saisissez le numéro. Utiliser le casque : 1. Le casque étant branché, appuyez sur pour activer le mode casque. -
Page 21: Transfert D'appel
• S'il y a plusieurs appels en attente, appuyez sur pour sélectionner l'appel souhaité, puis appuyez sur la touche de fonction Resume. Transfert d'appel Vous pouvez transférer un appel d'une des façons suivantes Transfert sans préavis ou sur la touche de fonction Tran pendant un appel. L'appel est mis en 1. -
Page 22: Personnaliser Votre Téléphone
Personnaliser votre téléphone Historique des appels 1. Appuyez sur la touche de fonction History lorsque le téléphone est inactif, appuyez sur pour parcourir la liste. 2. Sélectionnez une entrée dans la liste, vous pouvez faire c e: qui suit: • Appuyez sur la touche de fonction Send pour passer un appel. -
Page 23: Declaration Of Conformity
Declaration of Conformity Date of Issue: 2016 - 8 - 12 Proximus PLC under Belgian Public Law Boulevard du Roi Albert II 27 Koning Albert II-laan, B-1030 Brussels, BELGIUM VAT BE 0202.239.951, Brussels Register of Legal Entities. Declare that the product:... -
Page 24: Conditions De La Garantie
Proximus Center ou chez un de nos agents agréés, muni du ticket de caisse ainsi que de l’appareil complet dans son emballage d’origine ou dans un autre garantissant une sécurité... - Page 25 Garantievoorwaarden Het toestel dat u net hebt aangekocht, werd door Proximus zorgvuldig uitgezocht en wordt gedurende twee jaar gedekt door een waarborg op onderdelen en arbeidsloon tegen materiële gebreken en fabrieksfouten, behoudens anders luidende contractuele bepalingen. De waarborg begint te lopen op de datum van de afhaling of de levering van het toestel.
-
Page 26: Guarantee Terms
The warranty shall be valid from the date on which the equipment is collected or delivered. If you have any problems with the equipment, you should take it to a Proximus Center or to one of our authorized agents, in its entirety and in its original packaging, or in packaging providing the same degree of protection, together with the original receipt. - Page 27 Anspruch nimmt, die nicht durch Proximus beauftragt wurden; • wenn er die Fabrikationsnummern und/oder die Warenzeichen des Geräts entfernt oder verfälscht. Proximus haftet nicht für indirekte oder immaterielle Schäden, die der Kunde aufgrund des schlechten Funktionierens des Geräts erleidet, insbesondere durch Produktionsausfall, Verdienstausfall oder entgangene Verträge.
Need help?
Do you have a question about the Maestro 3016 IP and is the answer not in the manual?
Questions and answers